LDK Experiment 3: Buttons and Switches
This Tutorial is Retired!
This tutorial has been retired. For the most recent information, please refer to the updated tutorial.
View the updated tutorial: LilyPad Buttons and Switches
 Dia
Dia 
Introduction
Welcome to the third experiment of the LilyPad Design Kit, where we’ll talk about the buttons and switches available in the LilyPad line. Chances are you experience plenty of buttons and switches in your day-to-day life, but knowing which is appropriate to your e-textile project can be a little bit tricky. In this tutorial, we'll show you the ins and outs of simple switches and buttons, as well as help you decide which are best for your projects.
Suggested Reading
Here are a couple of related tutorials that might interest you:
Gather Materials
Here are the components you’ll need for this circuit. If you’re using the LilyPad Design Kit, you’ve already got these!
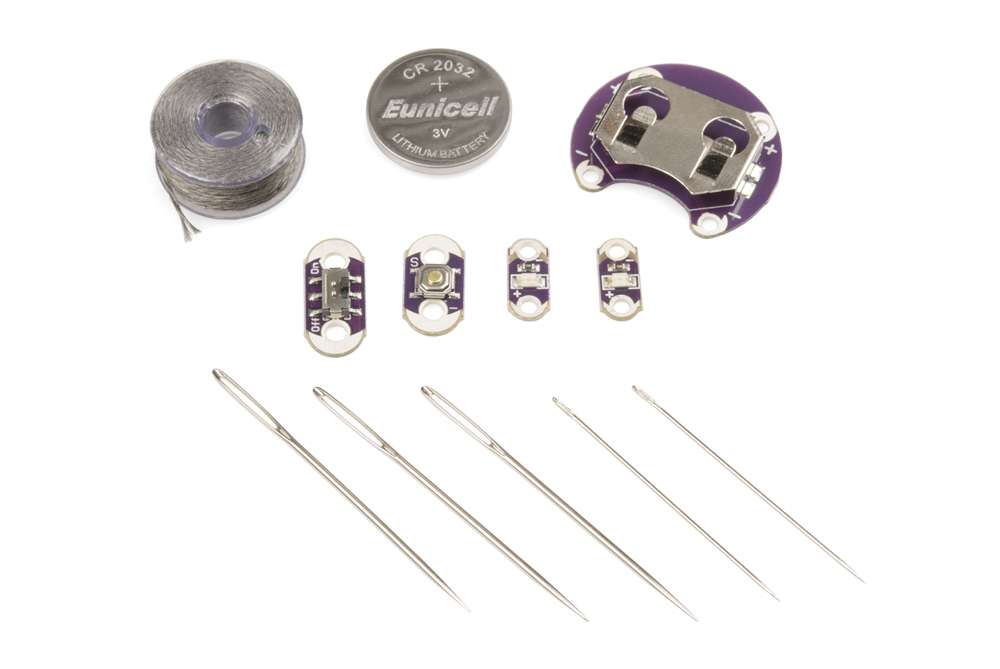
You’ll also want to have scissors, fabric, an embroidery hoop, and possibly a needle threader.
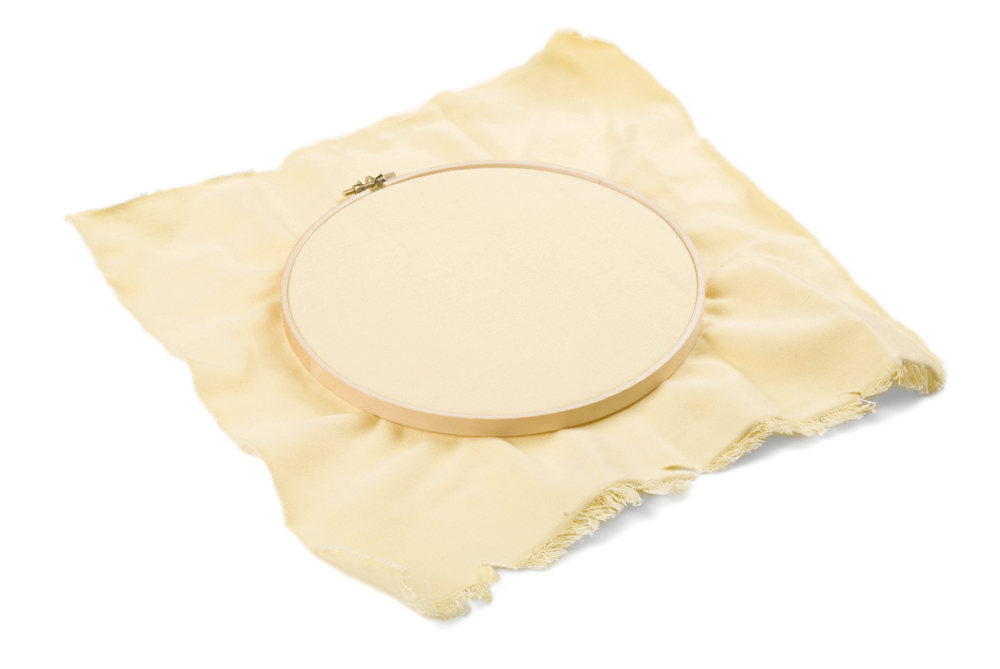
Go ahead and get the fabric set up in the embroidery hoop, and start with a threaded, knotted needle.
Positive Trace
This is another parallel circuit, like the one you made in LDK experiment 2. This time, we’ll be adding a switch and a button, so that you can see how to orient them correctly. With buttons and switches, you’ll no longer have to take the battery out of your circuit to turn it off!
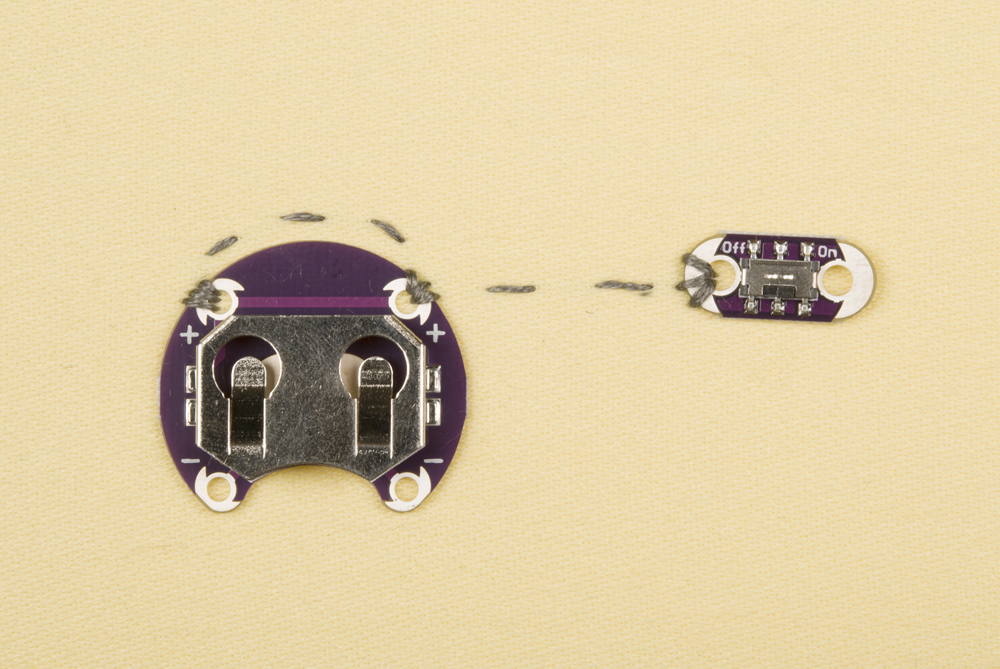
Like usual, we’re going to start with the positive trace. Place your battery holder where you’d like it, and sew the two positive pins down and to each other. Then sew a few stitches to where you’d like your switch to go. Sew down one side of your switch (it doesn’t matter which, switches aren’t polarized), then knot and cut your thread.
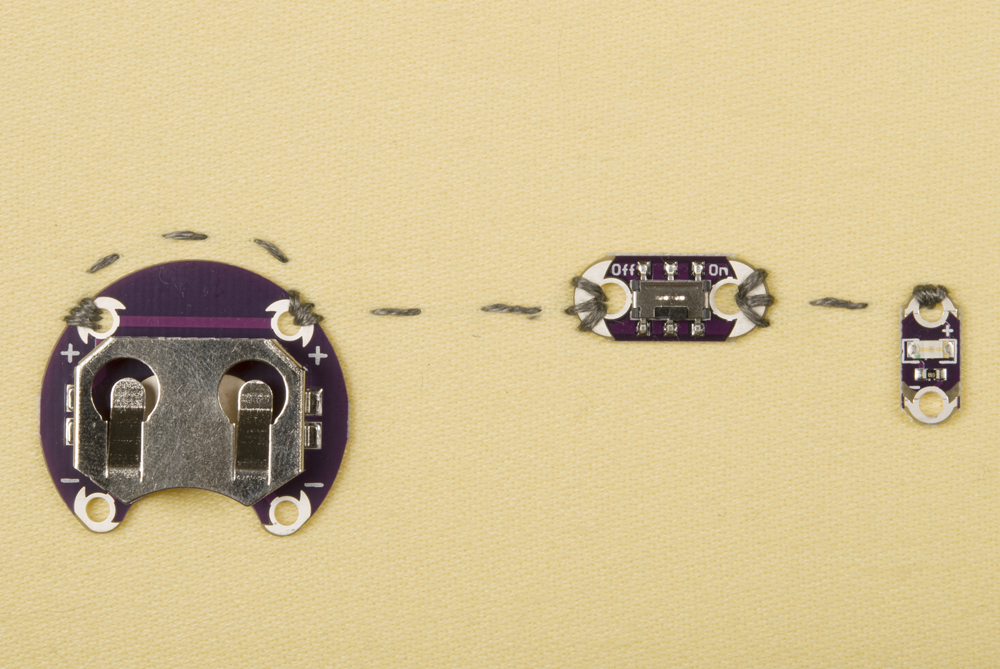
Starting again with a new thread, sew down the other side of the switch, and, from there, sew to where you want the positive side of your first LED to go. It is very important that this be a second trace, and that the thread ends be trimmed short enough to avoid accidentally coming into contact with each other. It is a common mistake to sew both sides of the switch (or button) with one trace. When this happens, current will bypass the switch entirely, traveling through the thread instead, and your switch will do nothing.
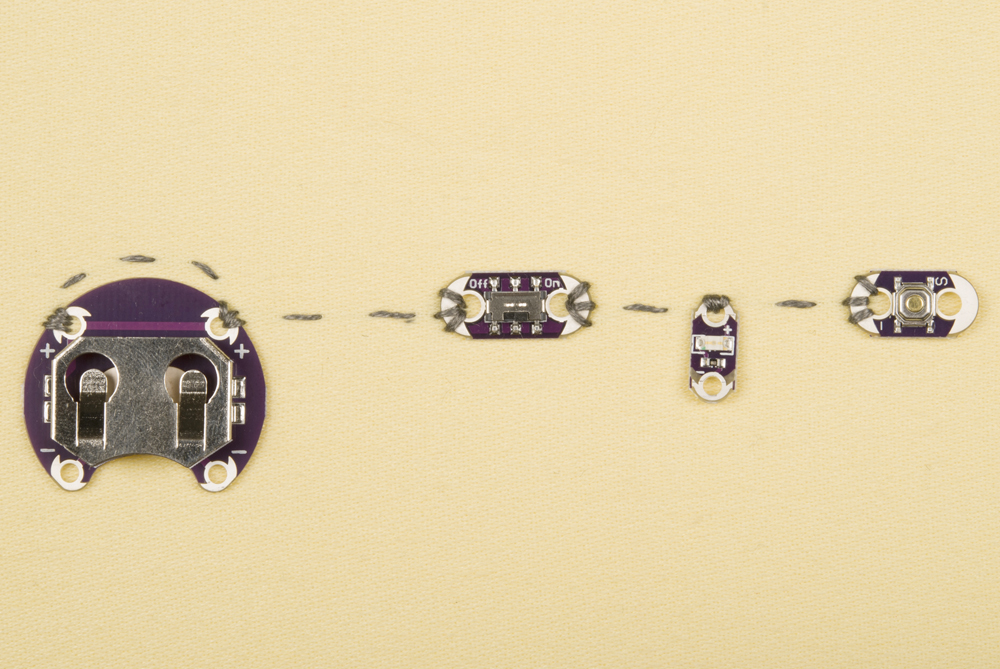
With the same trace, sew from the positive side of the first LED to one side of the button. Sew this down, then knot and cut your thread. Like the switch, the button must be sewn down on each side with a different trace.

Beginning a new trace, sew from the second side of the button to the positive pin of the second LED, then knot and cut your thread.
Negative Trace
Time to sew down the negative trace, which will be much faster, since there are no buttons or switches to fuss with!
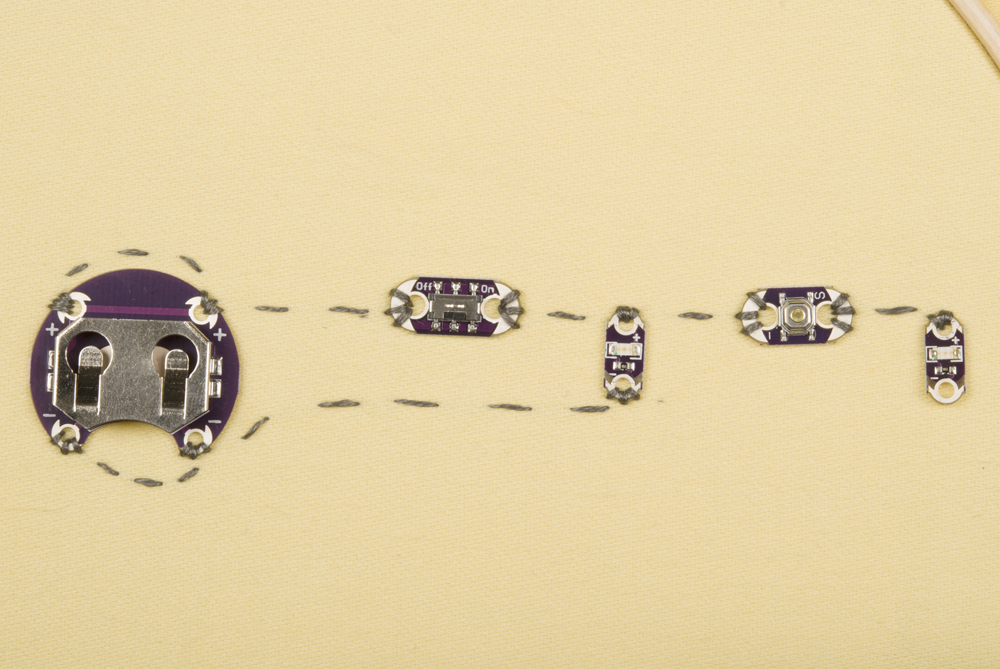
Starting with a newly threaded needle, stitch the negative pins of the battery down to the fabric, to each other, and to the negative pin of the first LED, which you should also stitch down.
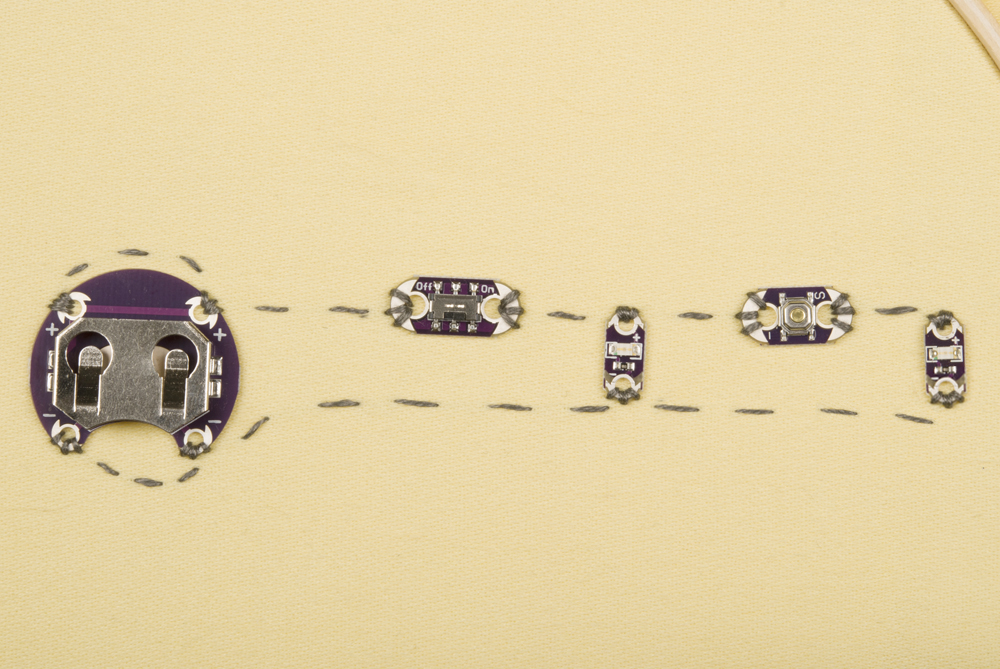
Sew from here to the negative pin of the second LED, and sew it down. Cut and knot your thread.
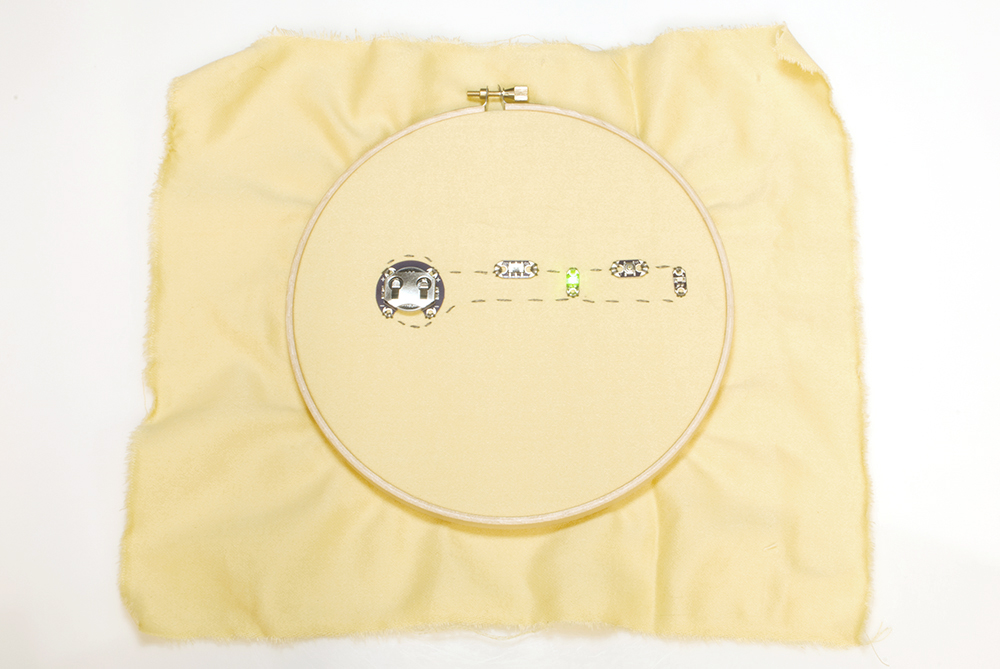
Turn off your switch, then slide your battery into the holder, smooth side up. Nothing should light up; if it does, double check that there isn’t any thread touching under your switch. When you turn your switch on, the first LED should come on.
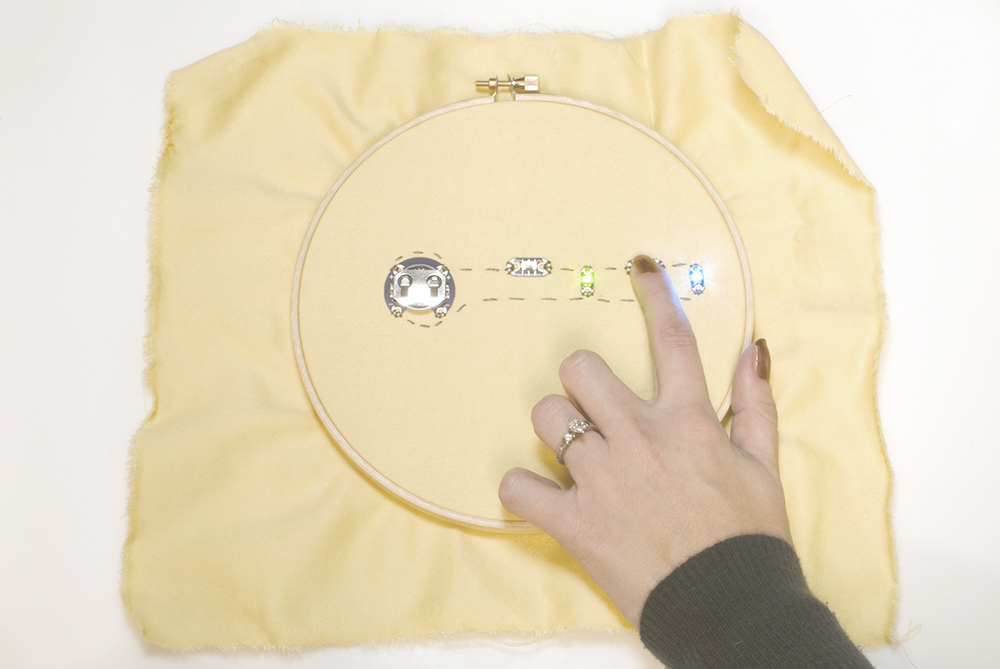
Press the button while the switch is still on, and both LEDs should light up.
How it Works
The switch works like a light switch, regulating all current going through the circuit. When it is turned to ‘on’, current will flow through the same as it would if there were no switch at all. When it is turned ‘off’, it will interrupt the circuit by disconnecting the conductive materials inside (an open circuit), and nothing will light up regardless of whether the button is pressed.
The button interrupts by default, and only creates an electrical connection when it is pressed.
Both of these components affect current flow only to those components that come after them in a parallel circuit. If you put an LED into the circuit before the switch, it would not turn off when the switch was turned off. Similarly, the LED placed after the button is off unless the button is pushed, but the LED that comes before the button isn’t subject to it.
Resources and Going Further
Want more? Check out LDK Experiment 4 for more e-textile fun.
Want to try more circuits with buttons and switches?