How to Use a Breadboard
 M-Short,
  Joel_E_B
Providing Power to a Breadboard
When it comes to providing power to you breadboard, there are numerous options.
Borrowing from Other Power Sources
If you are working with a development board such as an Arduino, then you can simply pull power from the Arduino’s female headers. The Arduino has multiple power and ground pins that you can connect to the power rails or other rows on a breadboard.
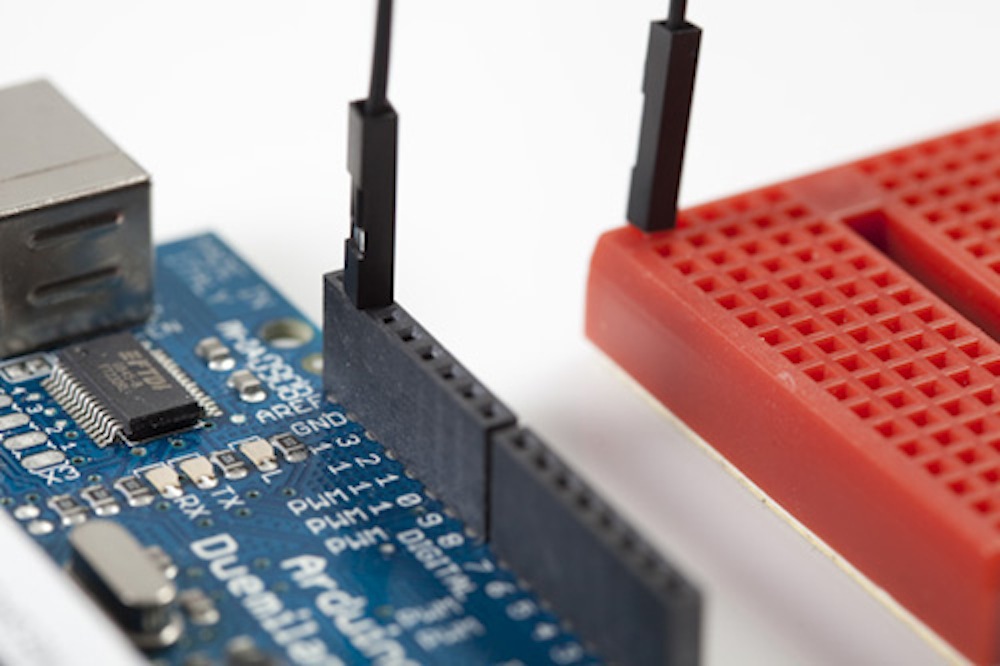
The Arduino usually gets its power from the USB port on a computer or an external power supply such as a battery pack or a wall wart.
Binding Posts
As mentioned in the previous section, some breadboards have binding posts that allow you to connect external power sources.
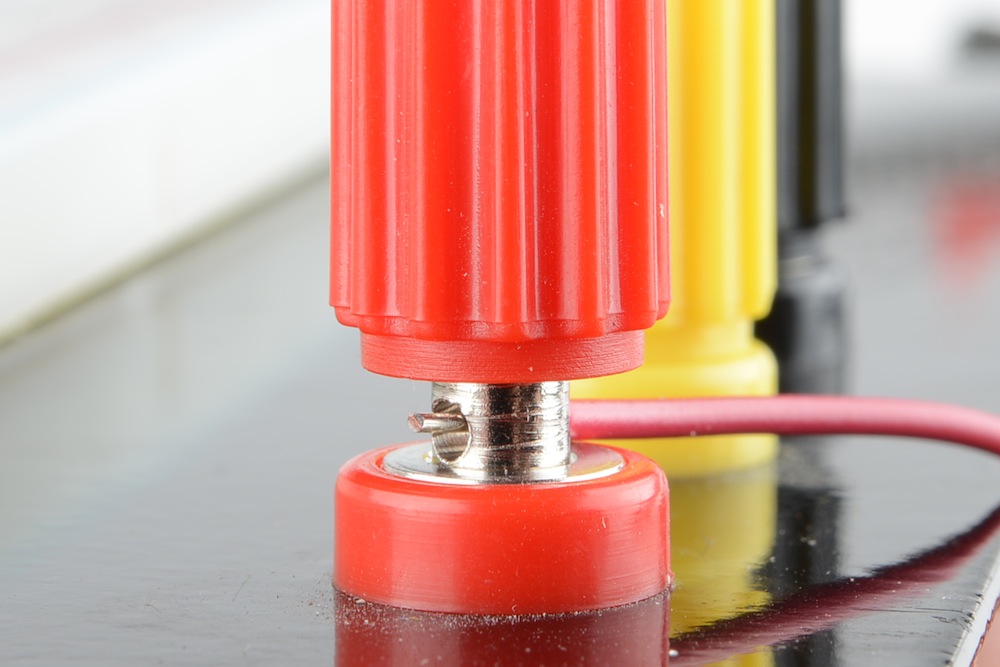
The first step to using the binding posts is to connect them to the breadboard using some jumper wires. Although it would seem that the posts are connected to the breadboard, they are not. If they were, you would be limited to where you could and couldn’t provide power. As we’ve seen, breadboards are meant to be totally customizable, so it would make sense that the binding posts are no different.
With that, we have to connect wires to the posts in order to connect them to the breadboard. To do that, unscrew the post until the hole going through it is exposed. Slide the stripped end of your jumper wire through the hole, and screw the post back down until the wire is firmly connected.
Typically, you only need to connect a power and ground wire from the posts to the breadboard. If you need an alternate power source, you can use the third post.
Now your posts are connected to the the breadboard, but there is still no power. You can use many different methods to connect power to the posts, and, thus, to the breadboard.
Benchtop Power Supplies
Many electronics labs have benchtop power supplies that allow you to provide a wide range of voltage and current to your circuit. Using a banana connector you can provide power from the supply to the binding posts.
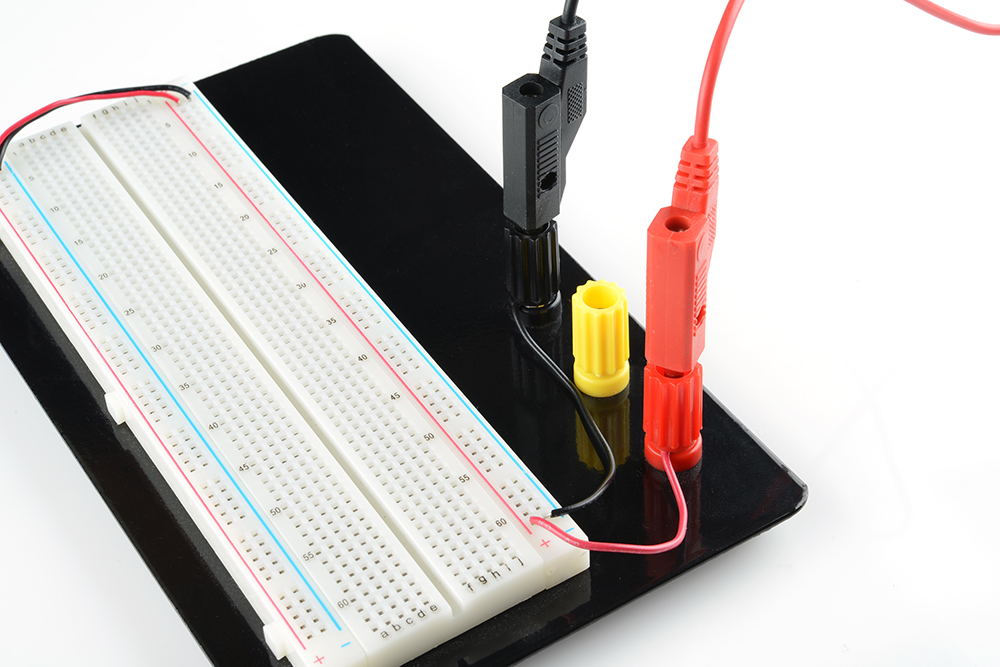
Alternatively, you could use alligator clips, IC hooks, or any other cables with a banana connection to hook your breadboard up to a number of different supplies.
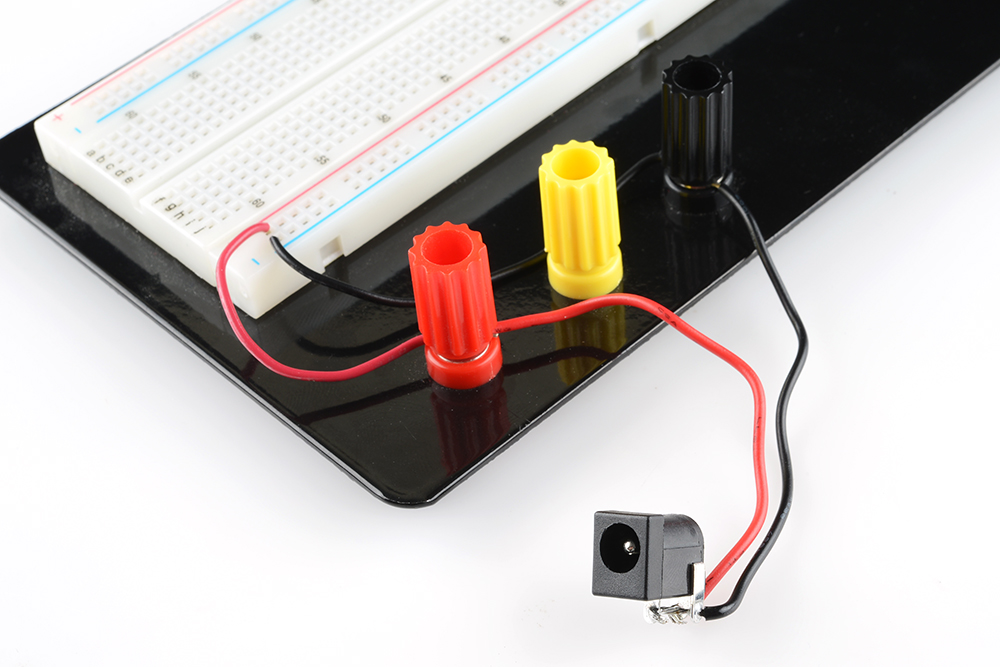
Another method of using the binding posts is to solder a barrel jack to some wires, and then connect them to the binding posts. This is a more advanced technique, and it requires some intermediate soldering skills.
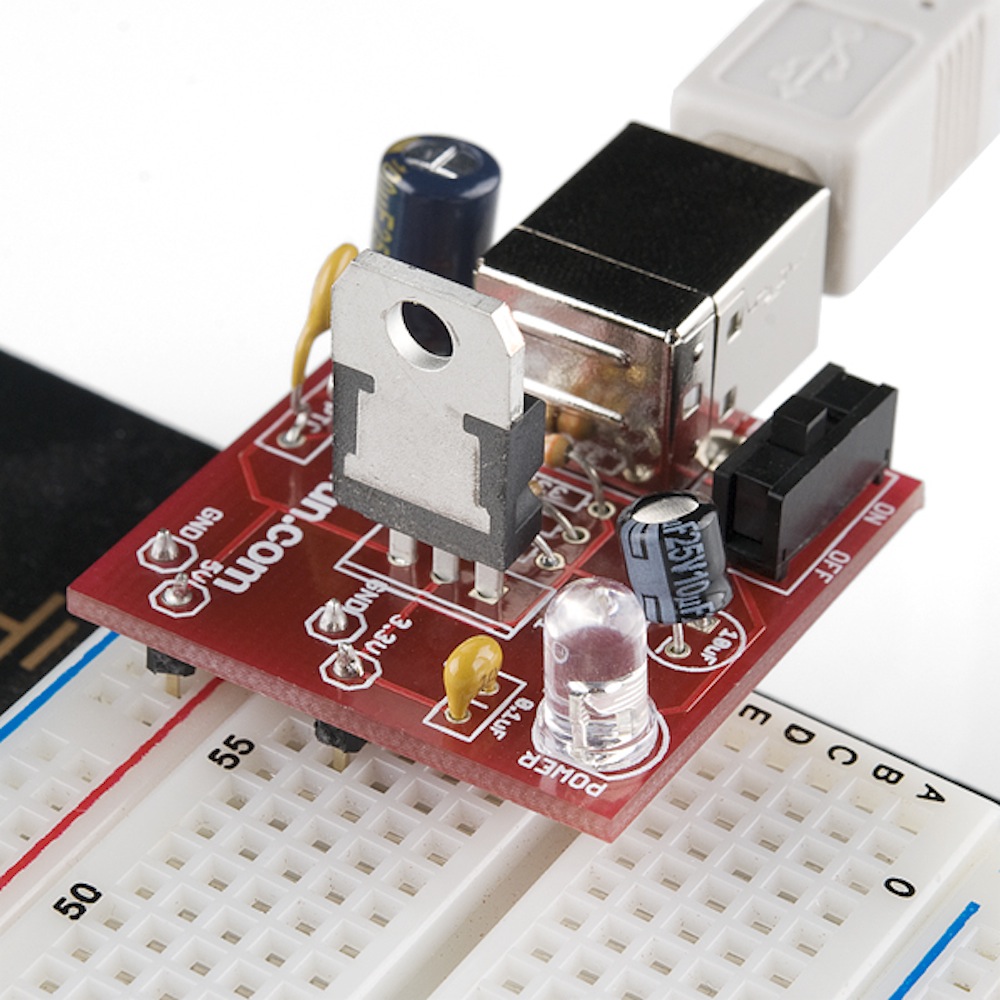
Breadboard Power Supplies
Yet another method for powering your breadboard is to use one of the many breadboard power supplies available. SparkFun carries a number of kits and boards that you can use to plug power directly into your breadboard. Some allow you to plug a wall wart directly into the breadboard. Others allow you to pull power directly from your computer via the USB connections. And, almost all of them have the capability to adjust the voltage, giving you a full range of the common voltages needed when building circuits.