Using OpenSegment
 Nate
Nate 
I2C/SPI Communication
If you need to control lots of displays at the same time, OpenSegment has the ability to communicate over I2C and SPI.
I2C Communication
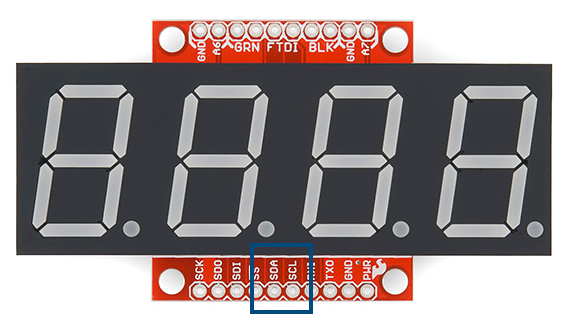
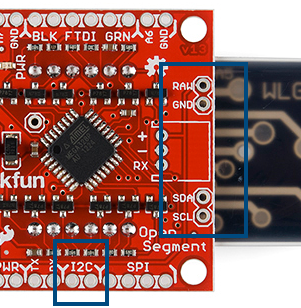
The I2C pins are labeled on the edge of the backpack and on the sides to make it easier to chain many displays together.
The default 7-bit I2C address is 113 in base10 or 0x71 in HEX or 01110001 in binary.
OpenSegment supports standard 100kHz as well as Fast 400kHz I2C speeds. Use the following code to enable Fast I2C within Arduino:
Wire.begin(); //Join the bus as controller.
//By default .begin() will set I2C SCL to Standard Speed mode of 100kHz
Wire.setClock(400000); //Optional - set I2C SCL to High Speed Mode of 400kHz
Checkout the I2C examples on GitHub for good code to start from.
You can find many more I2C examples here on GitHub. There are sketches to show you:
SPI Communication
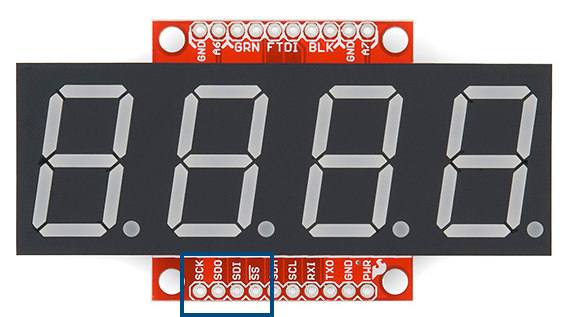
SPI communication requires 6 pins: SDO, SDI, SCK, CS, PWR, and GND. We may add a feature in the future, but for now OpenSegment does not pass data out of the SDO (serial data out) pin and can be left disconnected. If you’re hooking multiple OpenSegments together on the same SPI bus, the CS pin on each display must be connected to a different GPIO on your microcontroller.
You can find many more SPI examples here on GitHub. There are sketches to show you: