Spectral Triad (AS7265x) Hookup Guide
 Nate
Nate Hardware Overview
Sensors
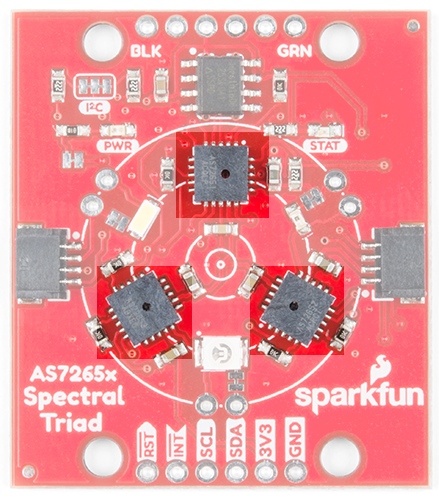
The Triad is made up of three sensors; AS72651 (UV), AS72652 (VIS), and AS72653 (NIR). The AS72651 communicates with the x2 and x3 sensors over a dedicated I2C bus (the AS72651 is the master, the AS72652 and AS72653 are slaves). The AS72651 combines its sensor data with the data from the x2 and x3 sensors and exposes the datums to the user as a single array of registers. The SparkFun AS7265x Spectral Library makes it seamless to read any of the 18 frequencies of sensing.
EEPROM
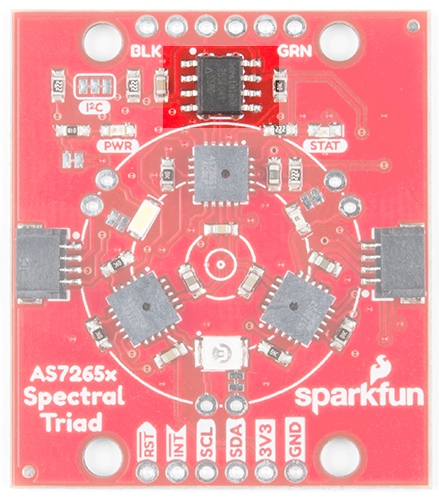
These sensors from AMS are interesting in that they ship without firmware. The firmware to drive the system is loaded onto a 4Mbit EEPROM that is read by the AS72651 at power on.
LEDs / Bulbs
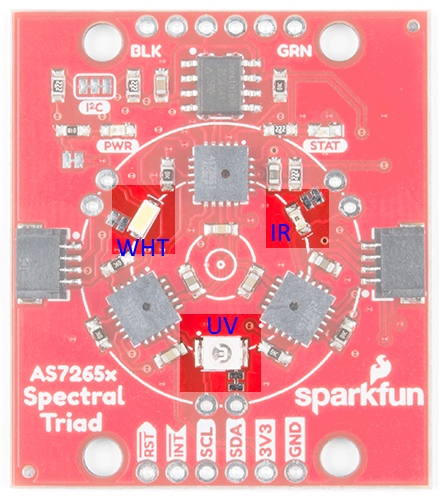
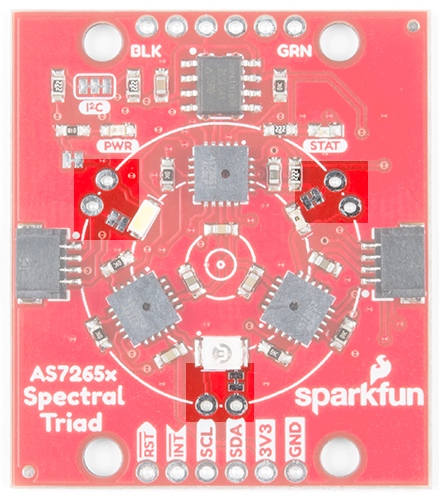
The Triad contains a 5700k white LED, a 405nm UV LED, and a 875nm IR LED mounted alongside the sensors. These LEDs were chosen to illuminate the target with the largest swath of visible and invisible light. The LEDs are individually enabled with software configurable drive current.
The board also has multiple ways for you to illuminate the object that you are trying to measure for a more accurate spectroscopy reading. If you aren’t satisfied with the on-board, LEDs you can grab your own through hole incandescent bulbs. While you should find a bulb rated for 3.3V, a bulb rated for higher voltage, like 5V, will still work, but will not run as bright as it normally would with 5V. We’ve found that Mouser is a good place to look for these. If you are going to go that route and use your own bulb, be sure to disable the onboard LED by removing cutting the jumper to any 'bulb' footprint that is used. Cut the jumper next to each bulb footprint to disconnect the LED from the controller IC and solder in a bulb. We use the word ‘bulb’ to indicate any DC device (limited to 100mA max) but this signal pin could also be used to activate a larger MOSFET or control device to activate a much larger current device.
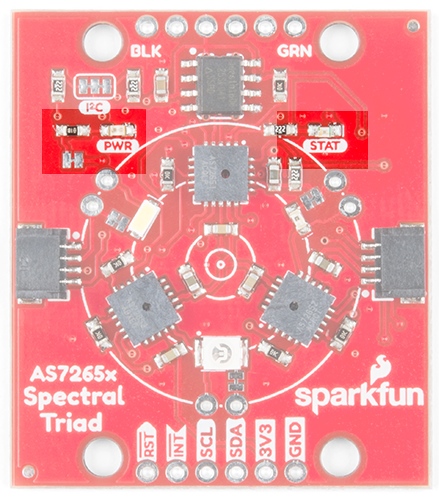
In addition to the illumination LEDs, there is a power LED and a status LED. The blue status LED indicates various states of the AS72651 sensor and can be disabled through the SparkFun library. The red power LED is provided to indicate the board is properly energized. If the red light is interfering with readings it can be disabled by cutting the neighboring jumper.
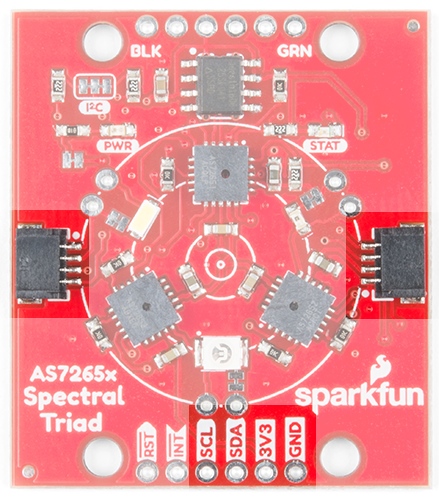
I2C / Qwiic Interface
The Qwiic connectors provide a quick and easy way to connect the Triad over I2C. Alternatively, you can solder to the four pins: GND/3.3V/SDA/SCL. The sensors are 3.3V compatible so don’t use with a 5V Arduino Uno without proper conversion (use the Qwiic shield instead!). If you're using a 3.3V development platform that doesn't have a Qwiic connector, consider using the Qwiic Breadboard Cable.
Serial UART Interface
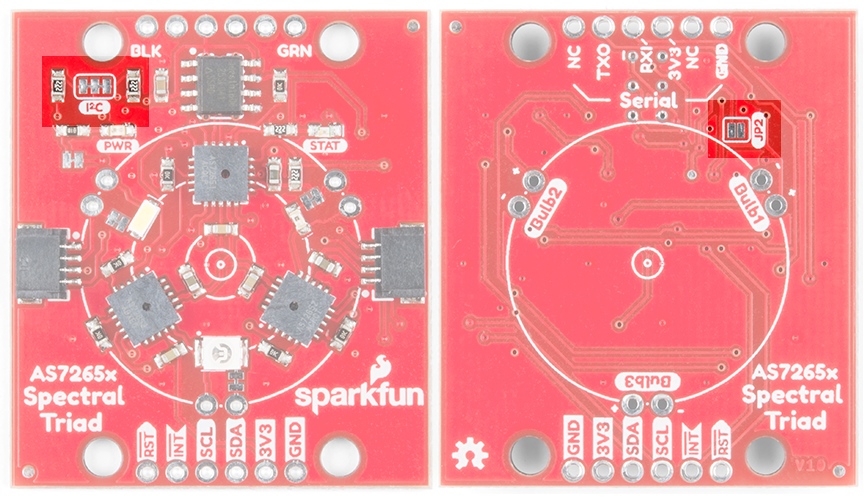
A serial interface is also available for those users who prefer using AT commands. Please refer to the AS7265x datasheet for a full list of commands. To enable the serial interface (and disable the I2C interface) you must modify two jumpers:
- The I2C jumper on the front of the board must be opened to remove the pull-up resistors from the TX and RX lines.
- The JP2 on the rear of the board must be closed with a solder jumper.
Next, solder in a 6-pin right angle male header to the serial port.
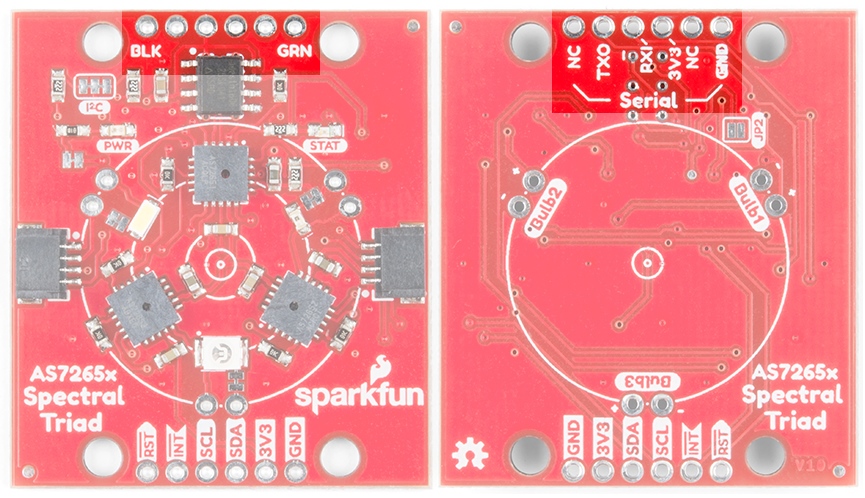
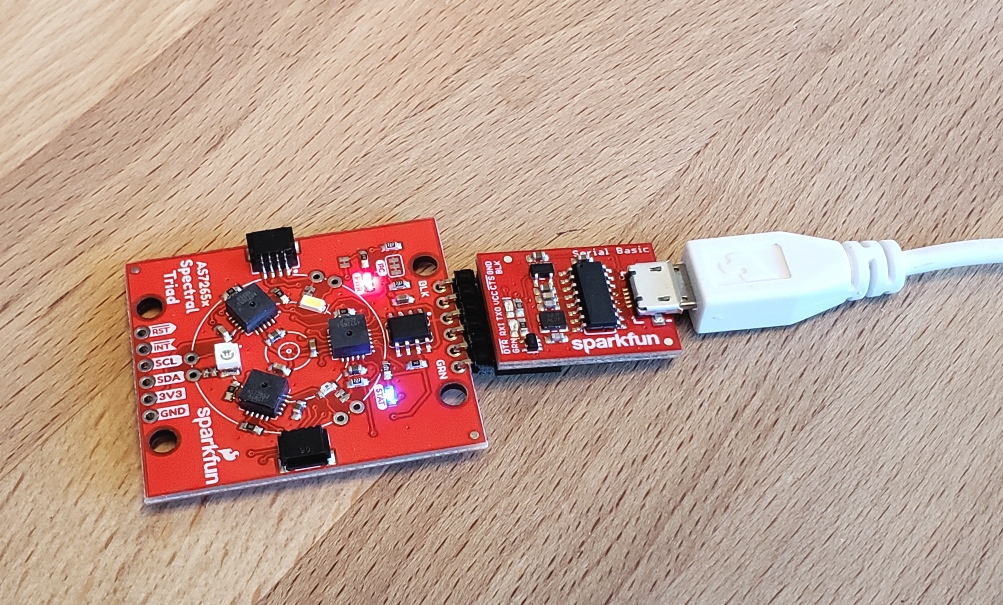
The SparkFun Serial Basic connects directly to the Triad. The Serial Basic is set to 3.3V by default but if you’re using a different board, be sure it provides 3.3V on VCC and uses 3.3V logic signals.
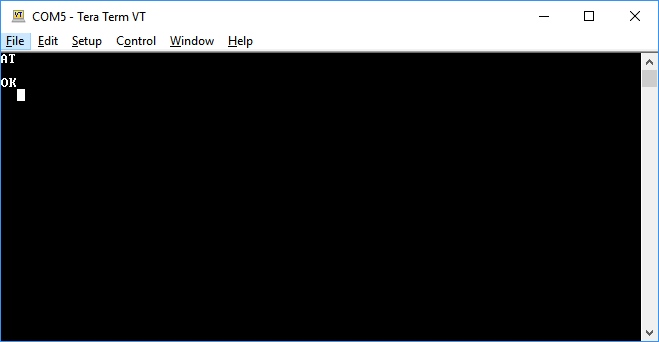
The serial interface operates at 115200. To test the connection, open TeraTerm or your favorite terminal and connect to the Serial Basic. Send the command AT and look for an OK response. You’re all set! Check the AS7265x datasheet for a full list of AT commands.