Spectacle Motion Board Hookup Guide
 SFUptownMaker
 Example Project
Let's use the Spectacle Motion Board to make a project! We're going to program the project to move the servo from one position to another and back at regular intervals.
Connect the boards
Start by connecting up the boards. You'll need the following hardware:


Spectacle Director Board
DEV-13912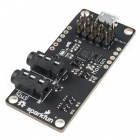
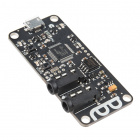
Spectacle Motion Board
DEV-13993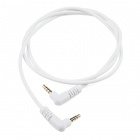
Audio Cable TRRS - 3ft
CAB-14164Note that you'll need two of the TRRS cables.
First, plug one end of one of the TRRS cables into the "Direct" jack on the Director Board.
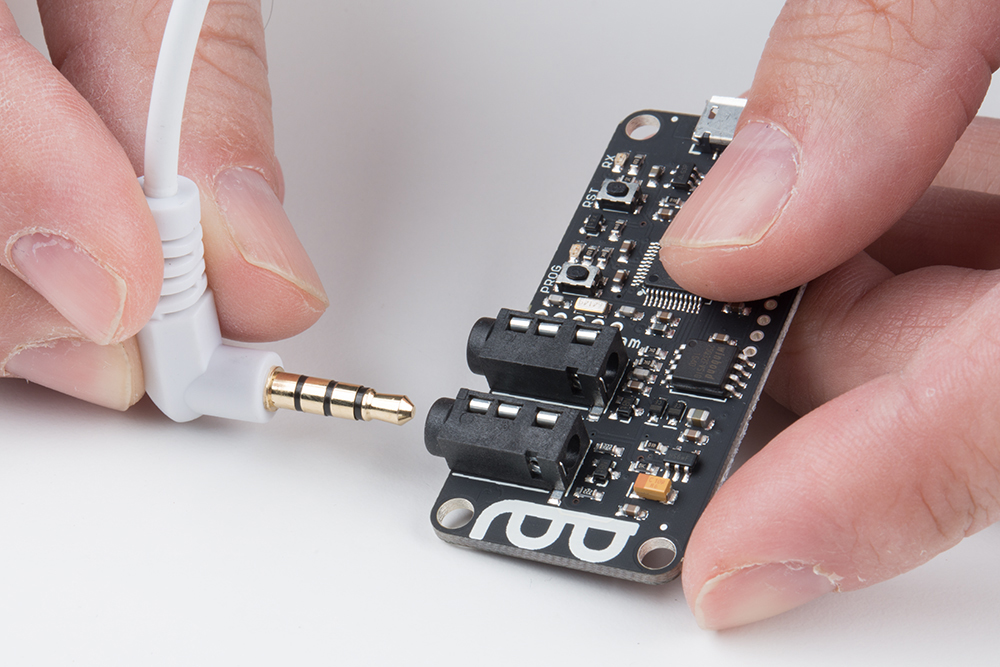
Next, plug a cable into the "Program" jack on the Director Board.
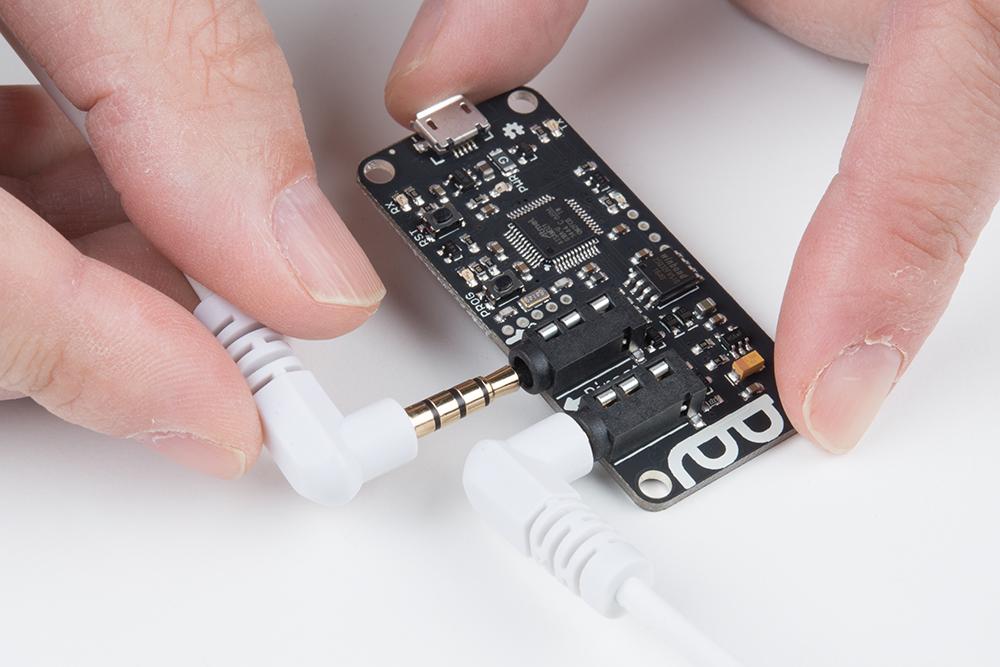
Plug the end of this cable into the audio output jack on your phone, tablet, or whatever device you're using to program the system.
Plug the other end of the first cable (the one plugged into the "Direct" jack) into the "In" jack on your Motion Board.

Now, plug the servo connector onto the Motion Board

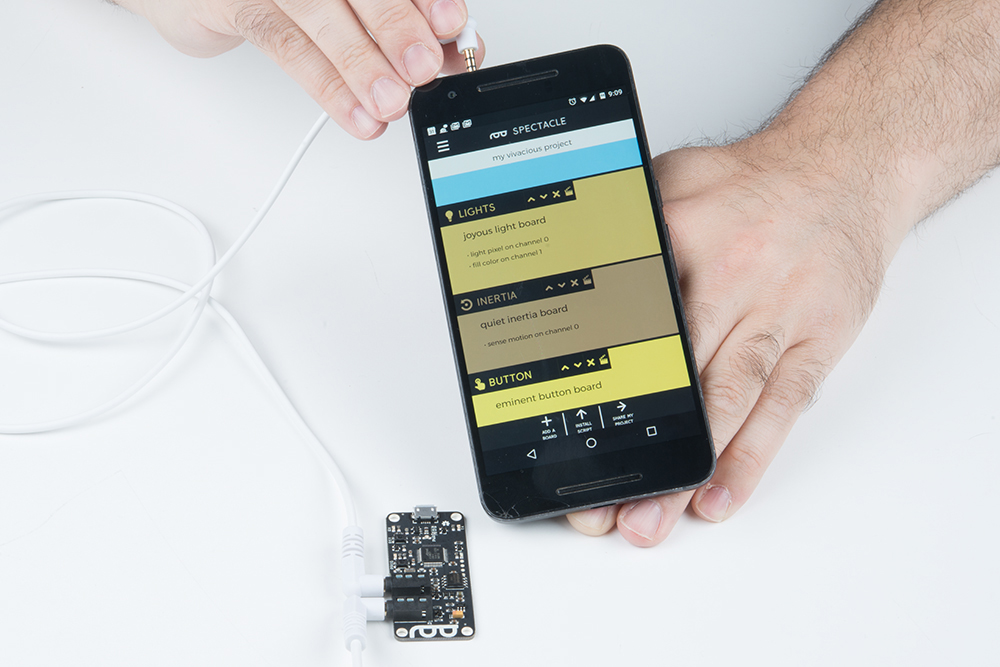
Finally, plug the Micro B end of the USB cable into the Director Board, and the other end into the wall adapter. Plug the adapter into the wall. You should see one solid light and one blinking light on the Motion Board. On the Director Board, you'll see one solid light and one light which blinks one time, then pauses, then repeats. This shows that power is present and the boards are up and running.
Setting up the board configuration
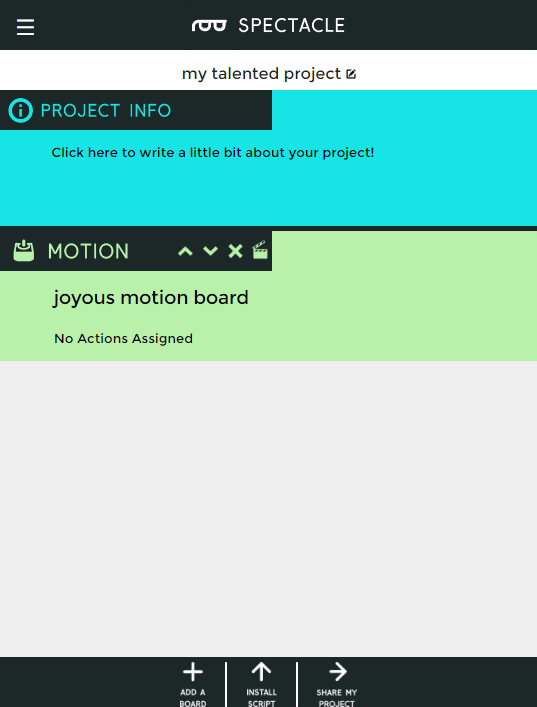
When you first open the Spectacle app webpage, this is what you'll see.
Your project name will differ from mine, as Spectacle assigns a random name to each project.
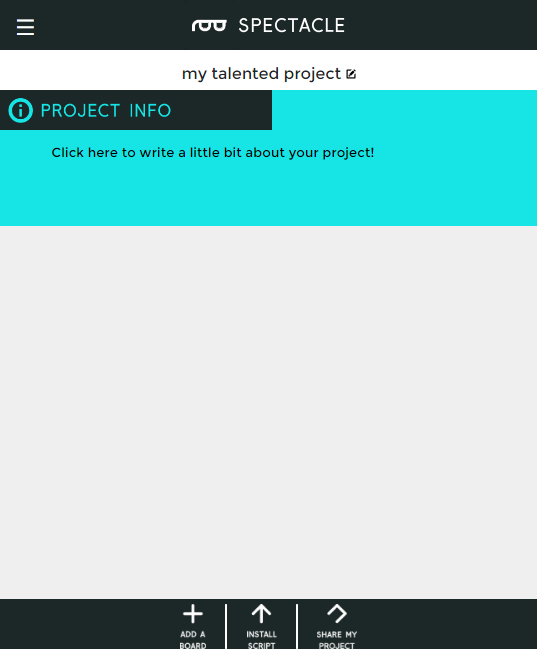
To continue, we must tell the project which boards we wish to use. Start by clicking the "Add a Board" button at the bottom of the page.

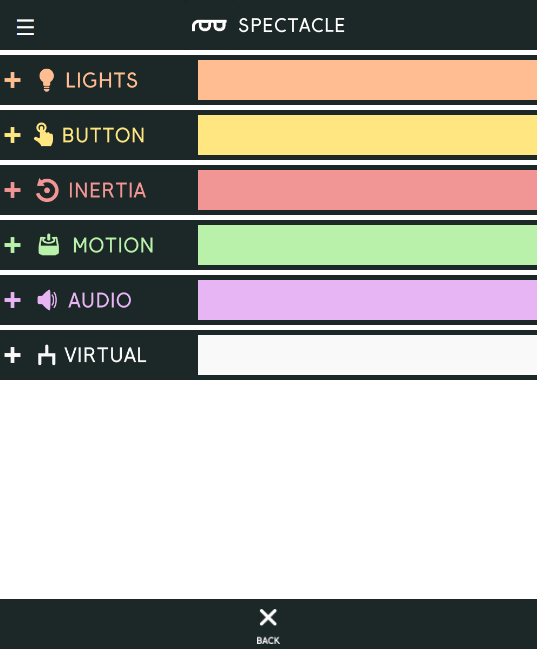
This brings up a list of available boards. We're going to start with a Motion Board and add a Virtual Board later. Click anywhere in the "Motion" box to add it to the project.
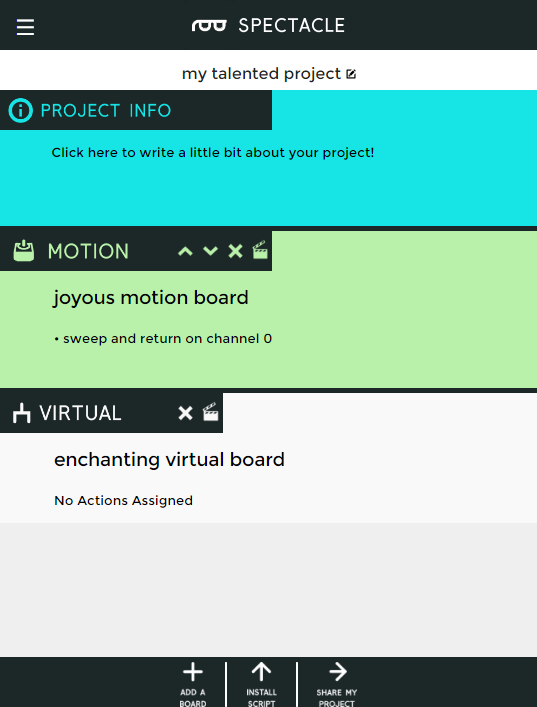
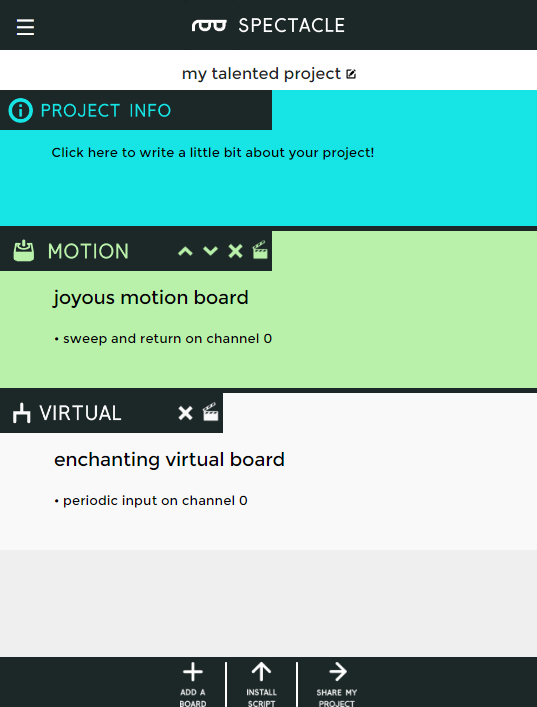
Here you can see that the Motion Board has been added to the list of boards in the main window.
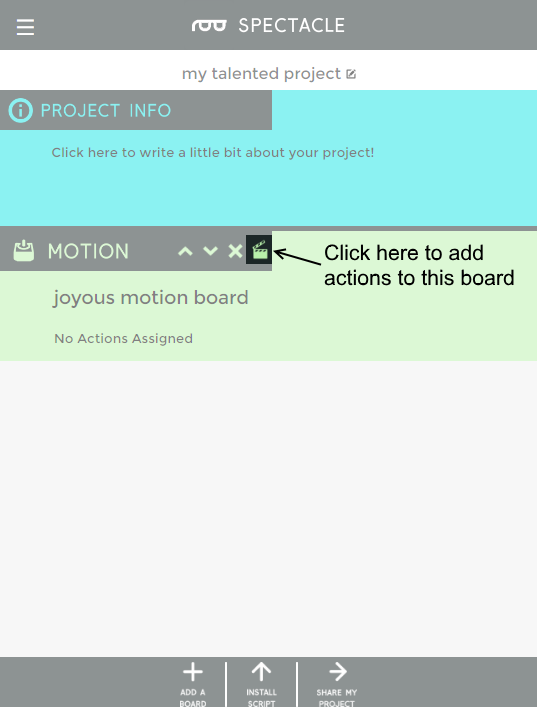
To add actions to a board, click on the clapboard icon highlighted below.
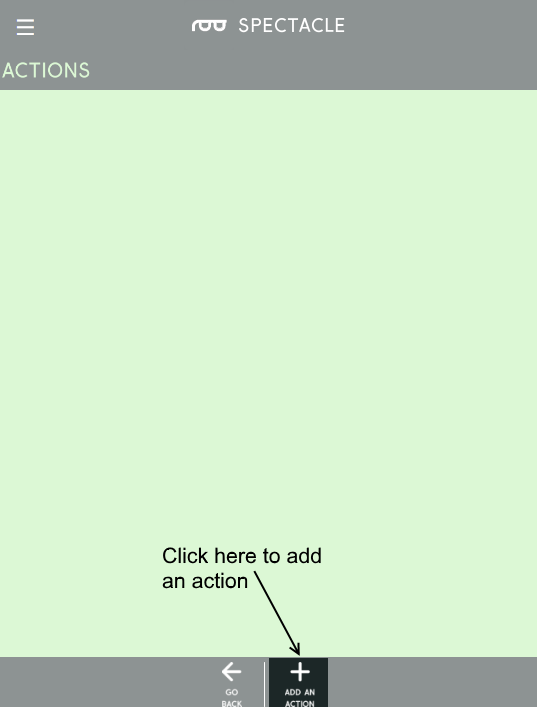
This is the action list, empty. To add an action click the highlighted "Add an Action" button at the bottom of the page.
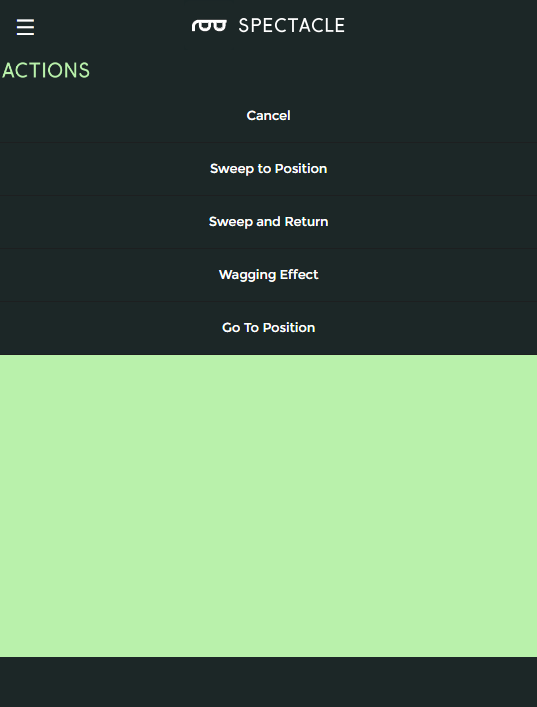
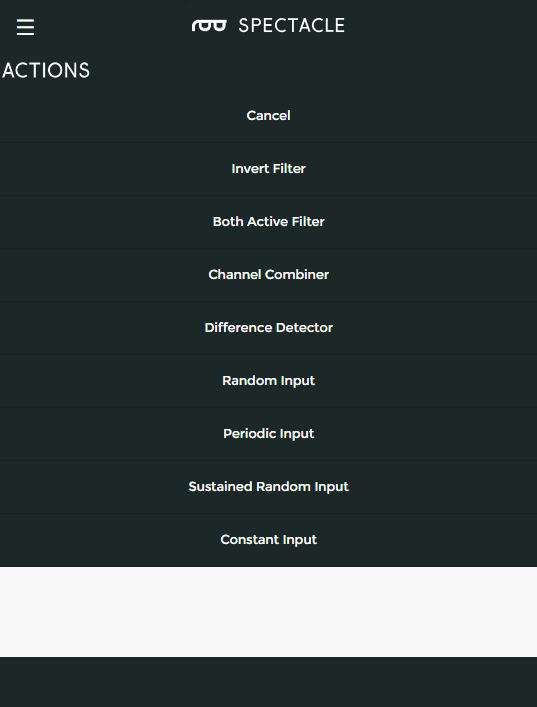
You'll be presented with this list of available actions. Select the "Sweep and Return" action.
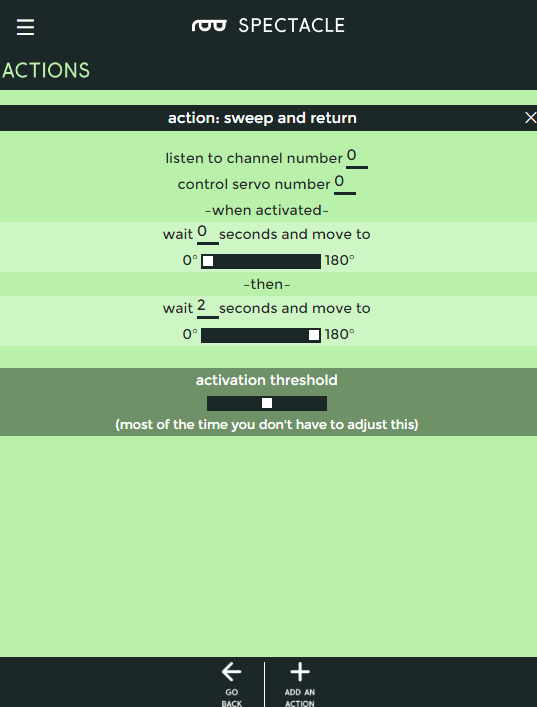
There are a number of settings needed for the Sweep and Return action. In the image below, you'll find that I've already entered the data needed to drive the servo actions we want for our system.
Click the "Go Back" button at the bottom of the screen to return to the main board list. This will automatically save your work.
Now, click the "Add a Board" button again to bring up the boards list and this time, choose "Virtual".
Here's the board list with the Virtual Board added to it. Again, click the clapboard icon followed by "Add an Action" to bring up the actions menu.
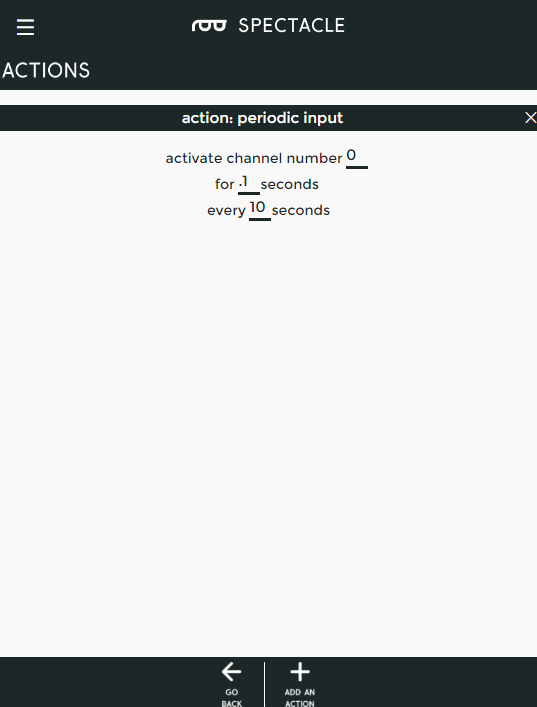
Here are the options for "Periodic Input". We tied the action on the Motion Board to channel 0, so we'll do the same here. We only need a short signal to trigger the Motion Board, so we'll set it to 0.1 seconds. Finally, we want the motor to activate every 10 seconds.
Again, click the "Go Back" button to return to the main page and save your actions.
Congratulations! You've finished the configuration step of the process. Now it's time to move on to loading the project onto your Director Board.
Uploading
Now that you've created your Spectacle program it's time to upload it to the Director Board. If you followed the instructions above, your uploading device is connected to the board and ready to go, so all you need to do is touch the "Install Script" button at the bottom of the page. That will bring up the page seen below.
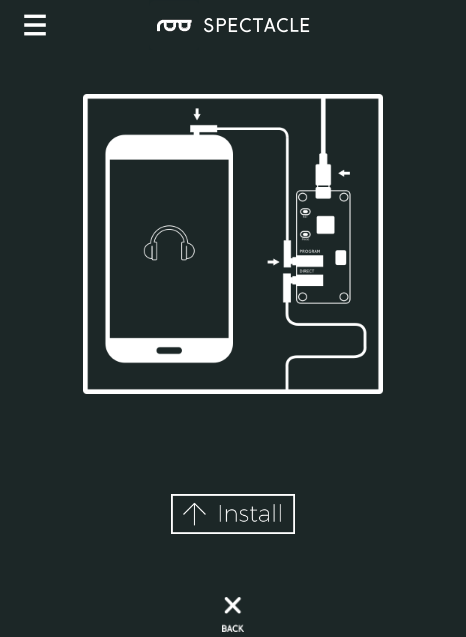
Make sure the volume on your device is turned all the way up, and that no other audio source (music, video, etc) is playing in the background. Then press and hold the "RST" button on the Director Board, press and hold the "PROG" button, then release the "RST" button.
This will put the Director Board into program mode. You'll see the light on the board blink three times, pause, then repeat. This is your visual indicator that the board is in program mode. Once you've established that the board is in program mode, you can begin programming by touching the "Install" button on the Spectacle app screen. The button will gray out during the programming process, which should only last for a few seconds. Once programming is done, you'll see the light on the Director Board blink 10 times, pause, then repeat. That's your cue that the program was uploaded successfully.
Press the "RST" button again to reset the system and begin the program!
If you have any troubles, visit the troubleshooting page for help resolving your issues.