SparkFun Temperature Sensor - STTS22H (Qwiic) Hookup Guide
Introduction
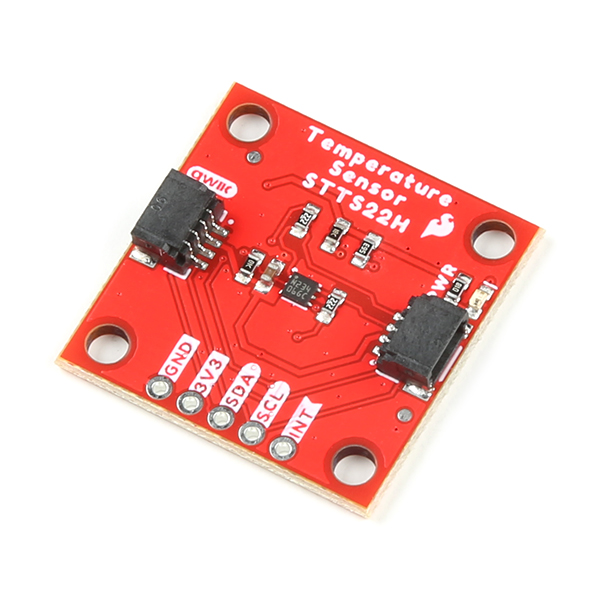
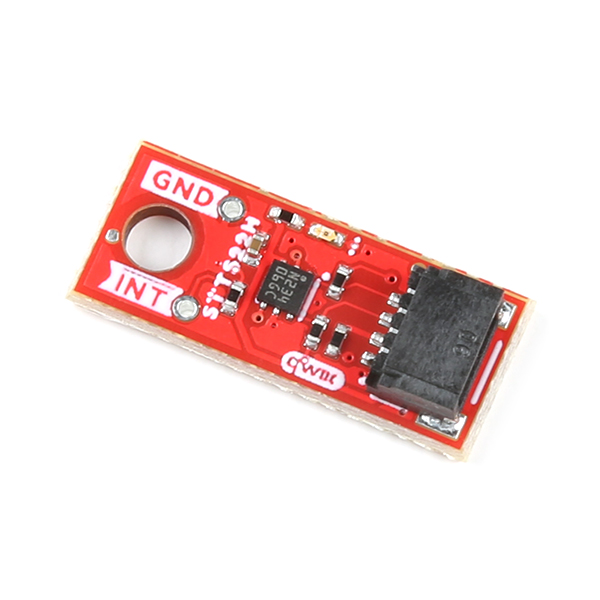
The SparkFun Temperature Sensor - STTS22H (Qwiic) and the SparkFun Micro Temperature Sensor - STTS22H (Qwiic) are Qwiic enabled breakout boards based on the ultralow-power, high-accuracy, digital temperature sensor STTS22H from ST Microelectronics. Thanks to its factory calibration the STTS22H offers high-end accuracy performance over the entire operating temperature range, reaching as low as ±0.5 °C without requiring any further calibration at the application level.
Required Materials
To follow along with this tutorial, you will need the following materials. You may not need everything though depending on what you have. Add it to your cart, read through the guide, and adjust the cart as necessary.
Suggested Reading
If you aren't familiar with the Qwiic system, we recommend reading here for an overview.
 |
| Qwiic Connect System |
We would also recommend taking a look at the following tutorials if you aren't familiar with them.
What is an Arduino?
Installing Arduino IDE
How to Install FTDI Drivers
Using the Arduino Pro Mini 3.3V
Hardware Overview
STTS22
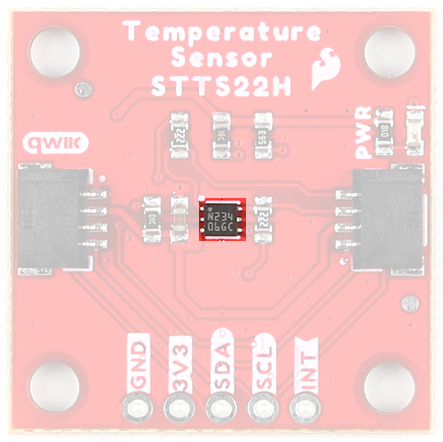
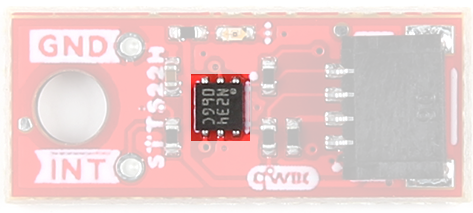
The STTS22H is an ultralow-power, high-accuracy, digital temperature sensor offering high performance over the entire operating temperature range. Thanks to its factory calibration the STTS22H offers high-end accuracy performance over the entire operating temperature range, reaching as low as ±0.5 °C without requiring any further calibration at the application level. The sensor operating mode is user-configurable and allows selecting between different ODRs (down to 1 Hz) or the one-shot mode for battery saving. In one-shot mode, the sensor current consumption falls to 1.75 µA. For more information, refer to the datasheet.
 |
 |
|---|---|
| STTS22 | STTS22 on Micro |
Qwiic Connectors
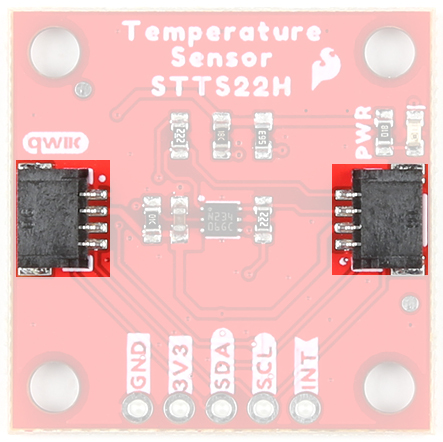
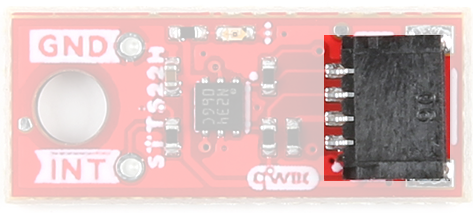
There are two Qwiic connectors on either side of the SparkFun Temperature Sensor - STTS22H to provide power and I2C connectivity simultaneously. The Micro version has a single Qwiic connector that again provides power and I2C connectivity. The I2C address of both boards is 0x3C by default, but the 1x1 board has 3 other addresses the board can be configured to use, while the Micro has 1 other address available.
 |
 |
|---|---|
| Qwiic Connectors | Qwiic Connector on Micro |
Power
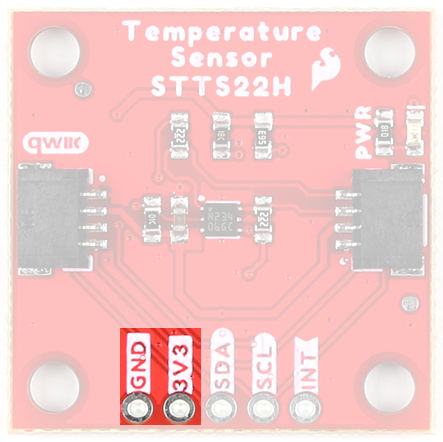
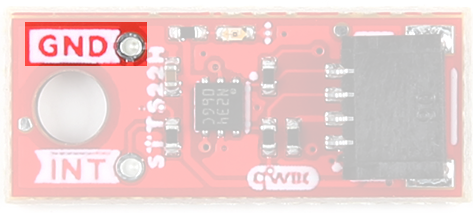
Ideally, power will be supplied via the Qwiic connector(s). Alternatively, power can be supplied through the header along the bottom side of the board labeled 3V3 and GND. The input voltage range should be between 1.5-3.6V. The Micro version has a single Ground Pin available.
 |
 |
|---|---|
| 3.3V & GND Pins | GND Pin on Micro |
Interrupt Pin
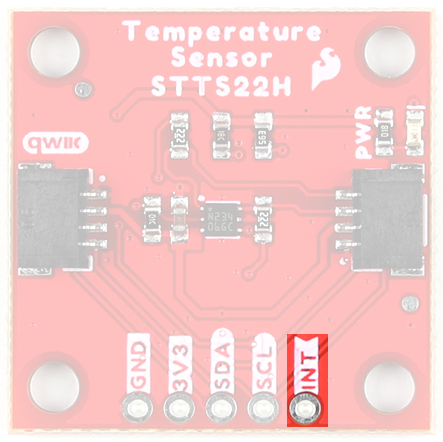
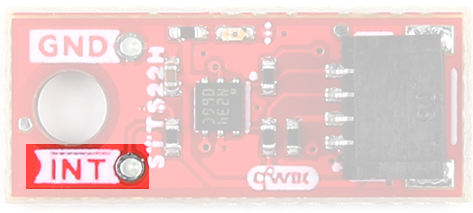
An interrupt pin is available to signal the application whenever the selectable high or low threshold has been exceeded.
 |
 |
|---|---|
| Interrupt Pin | Interrupt Pin on Micro |
Power LED
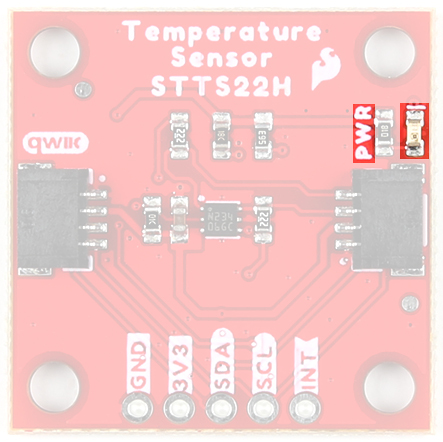
Hopefully this is self-explanatory, but this LED lights up when power is supplied to the board.
 |
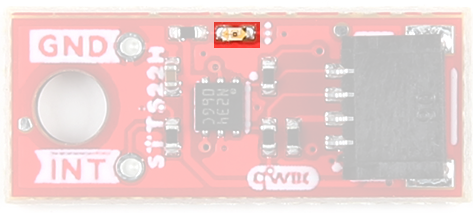 |
|---|---|
| Power LED | Power LED on Micro |
Exposed Pad
There's an extra pad on the bottom side of each board that allows for the most accurate possible readings.
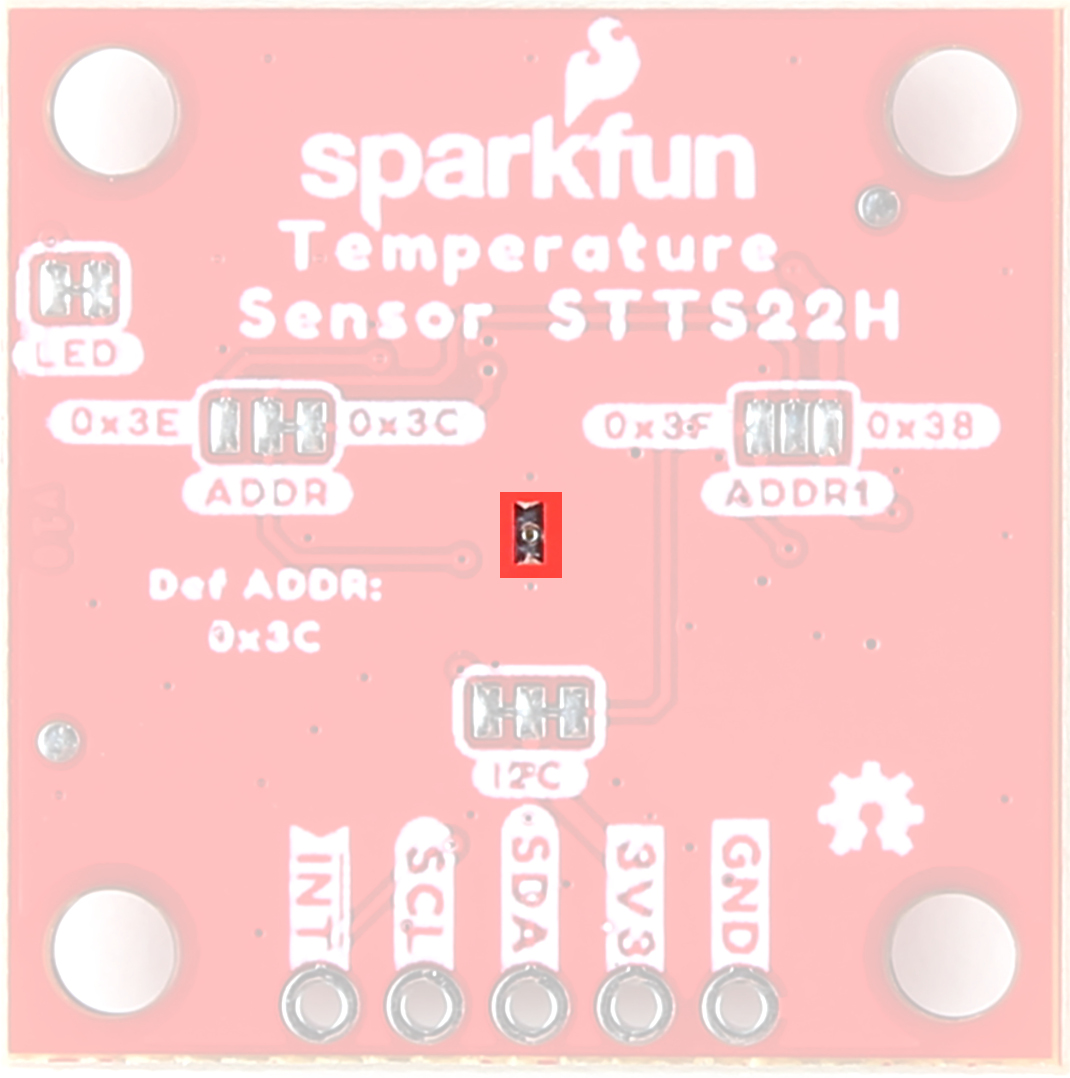 |
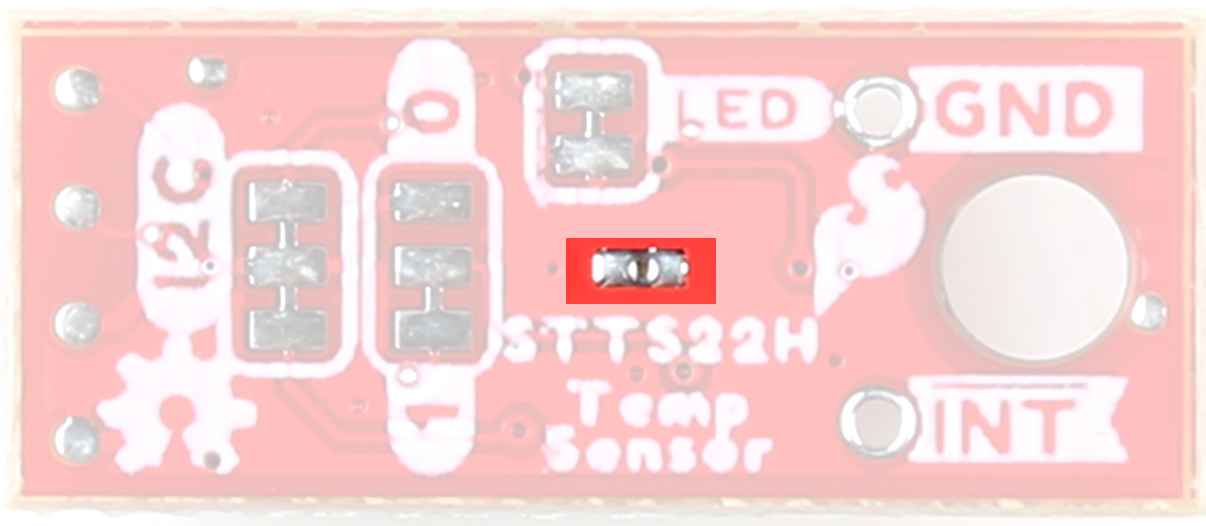 |
|---|---|
| Exposed Pad | Exposed Pad on Micro |
Jumpers
LED Jumper
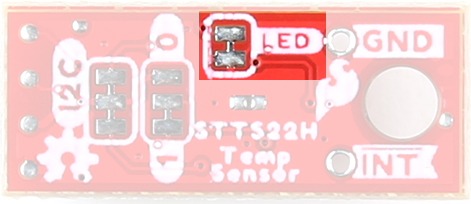
If power consumption is an issue, cut this jumper to disable the LED on the front of the board.
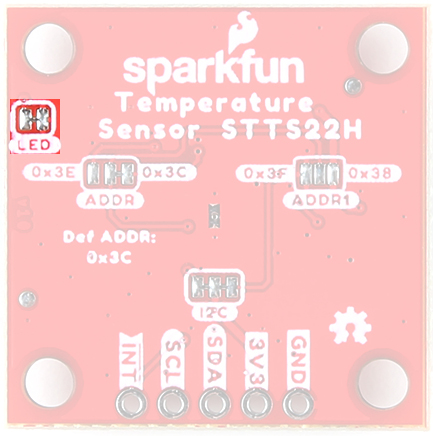 |
 |
|---|---|
| Power LED Jumper | Power LED Jumper on Micro |
Address Jumpers
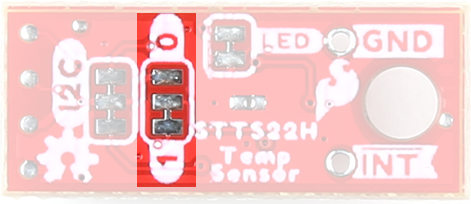
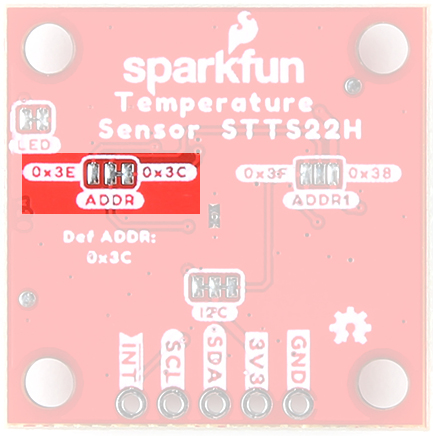
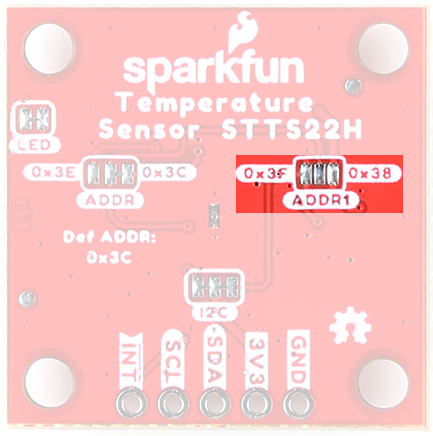
The 1x1 board has two address jumpers available. The default I2C address is 0x3C. By cutting various trace combinations, there are three other I2C addresses available.
| ADDR | |
|---|---|
| R8(15K) | 0x3C (Default) |
| R7(56K) | 0x3E |
| VDD | 0x38 |
| GND | 0x3F |
| OPEN | Undefined |
 |
 |
|---|---|
| Address Jumper | Address Jumper 1 |
The Micro version of this board has a single address jumper that affords the ability to change the I2C address from 0x3C (Default) to 0x38.
I2C Jumper
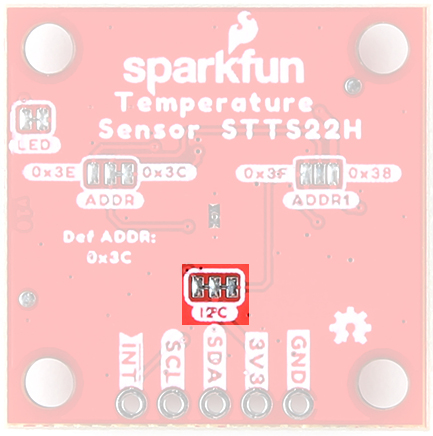
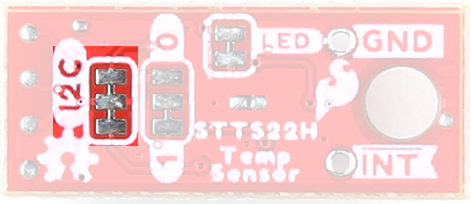
These boards are both equipped with pull-up resistors. If you are daisy-chaining multiple Qwiic devices, you will want to cut this jumper; if multiple sensors are connected to the bus with the pull-up resistors enabled, the parallel equivalent resistance will create too strong of a pull-up for the bus to operate correctly. As a general rule of thumb, disable all but one pair of pull-up resistors if multiple devices are connected to the bus. To disable the pull up resistors, use an X-acto knife to cut the joint between the two jumper pads highlighted below.
 |
 |
|---|---|
| I2C Jumper | I2C Jumper on Micro |
Board Outline
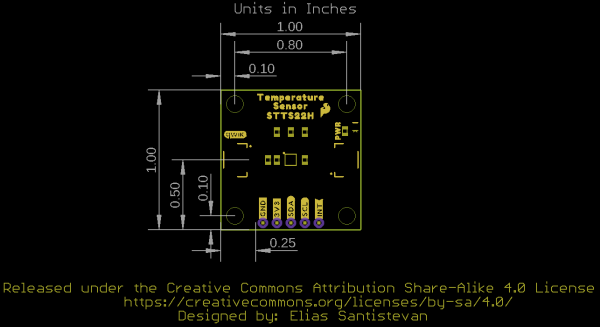
The standard Temperature Sensor STTS22H Breakout measures 1" x 1".
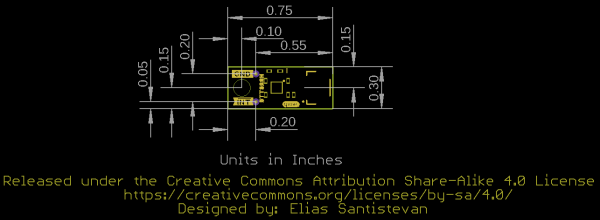
The Micro Temperature Sensor STTS22H Breakout measures 0.75" x 0.3".
Hardware Hookup
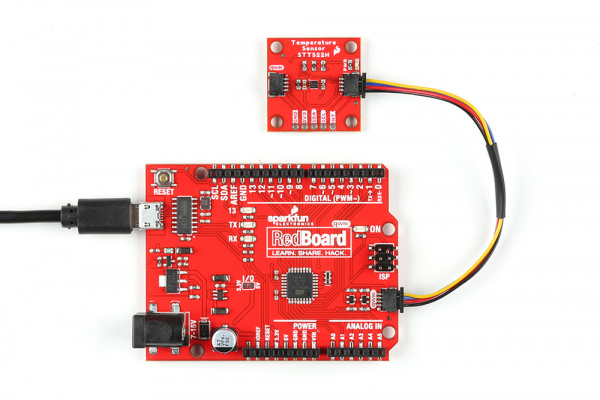
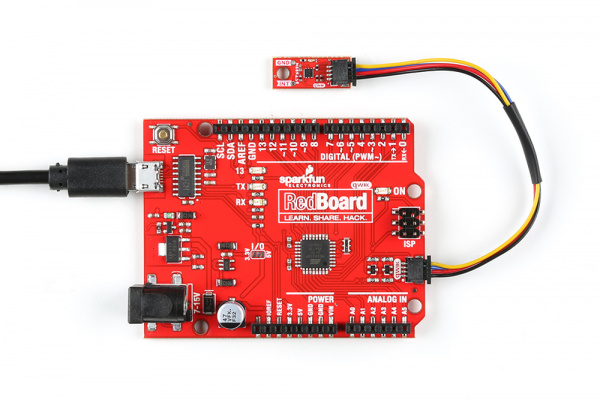
The delightful thing about our Qwiic System is that it makes hooking up your project as easy as plug and play. Pop one end of your Qwiic connector into the controlling board and plug the other end of your Qwiic connector into your Temperature Sensor board! Voila!
Software Setup
SparkFun has written a library to work with the SparkFun Temperature Sensor - STTS22H (Qwiic). You can obtain this library through the Arduino Library Manager by searching for "STTS22H". Find the one written by SparkFun Electronics and install the latest version. If you prefer downloading libraries manually, you can grab them from the GitHub Repository.
Examples
Example 1: Basic
Now that we've got our library installed and our hardware all hooked up, let's look at some examples.
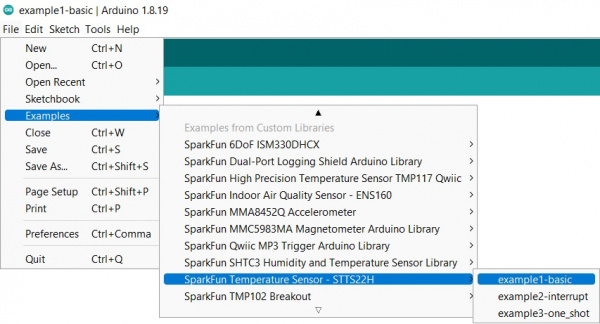
This first example just does some basic measurements. To find Example 1, go to File > Examples > SparkFun Temperature Sensor - STTS22H > example1-basic:
Or alternatively you can copy and paste the code below into a nice shiny new Arduino window:
language:c
/*
example1-basic.ino

This example shows basic data retrieval from the SparkFun Temperature Sensor - STTS22H.

Output Data Rates:

STTS22H_POWER_DOWN
STTS22H_ONE_SHOT
STTS22H_1Hz
STTS22H_25Hz
STTS22H_50Hz
STTS22H_100Hz
STTS22H_200Hz

Written by:
Elias Santistevan @ SparkFun Electronics December, 2022

Products:
   SparkFun Temperature Sensor - STTS2H              https://www.sparkfun.com/products/21262
   SparkFun Micro Temperature Sensor - STTS2H        https://www.sparkfun.com/products/21051

Repository:
     https://github.com/sparkfun/SparkFun_STTS22H_Arduino_Library

SparkFun code, firmware, and software is released under the MIT
License(http://opensource.org/licenses/MIT).

*/

#include <Wire.h>
#include "SparkFun_STTS22H.h"

SparkFun_STTS22H mySTTS;

float temp;

void setup()
{

    Wire.begin();

    Serial.begin(115200);

    if( !mySTTS.begin() )
    {
        Serial.println("Did not begin.");
        while(1);
    }

    Serial.println("Ready");

    // Other output data rates can be found in the description
    // above. To change the ODR or mode, the device must first be
    // powered down.
    mySTTS.setDataRate(STTS22H_POWER_DOWN);
    delay(10);
    mySTTS.setDataRate(STTS22H_1Hz);

    // Enables incrementing register behavior for the IC.
    // It is not enabled by default as the datsheet states and
    // is vital for reading the two temperature registers.
    mySTTS.enableAutoIncrement();

    delay(100);
}

void loop()
{

    // Only use data ready for one-shot mode or 1Hz output.
    if( mySTTS.dataReady() )
    {

        mySTTS.getTemperatureF(&temp);

        // Temperature in different units can be retrieved
        // using the following functions.

        //mySTTS.getTemperatureC(&temp);
        //mySTTS.getTemperatureK(&temp);

        Serial.print("Temp: ");
        Serial.print(temp);
        Serial.println("F");

    }

    // delay = 1/ODR
    delay(1000);

}
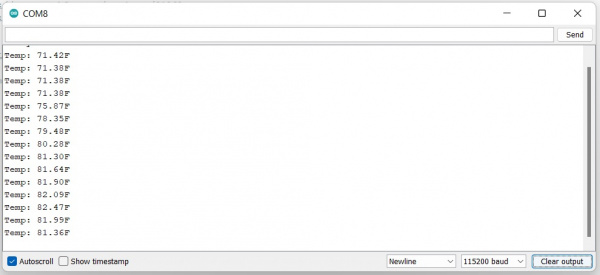
Once you're ready to go, go ahead and hit the upload button (the right facing arrow button under the "Edit" menu item). Once your code is uploaded, open the Serial Monitor and you'll see information start printing out.
Example 2: Interrupt
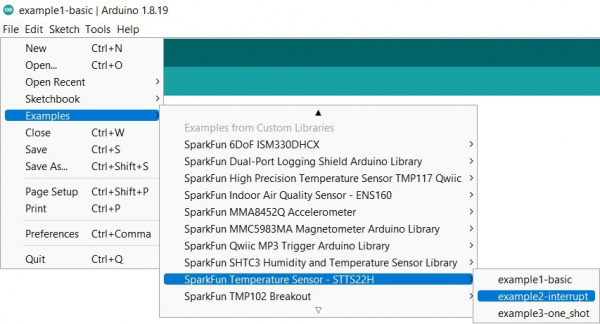
Example 2 can be found under File > Examples > SparkFun Temperature Sensor - STTS22H > example2-interrupt:
You can also copy the code below into a new Arduino file:
language:c
/*
example2_basic.ino

This example desmonstrates how to set temperature thresholds to trigger an interrupt.

Output Data Rates:

STTS22H_POWER_DOWN
STTS22H_ONE_SHOT
STTS22H_1Hz
STTS22H_25Hz
STTS22H_50Hz
STTS22H_100Hz
STTS22H_200Hz

Written by:
Elias Santistevan @ SparkFun Electronics December, 2022

Products:
   SparkFun Temperature Sensor - STTS2H              https://www.sparkfun.com/products/21262
   SparkFun Micro Temperature Sensor - STTS2H        https://www.sparkfun.com/products/21051

Repository:
     https://github.com/sparkfun/SparkFun_STTS22H_Arduino_Library

SparkFun code, firmware, and software is released under the MIT
License(http://opensource.org/licenses/MIT).

*/

#include <Wire.h>
#include "SparkFun_STTS22H.h"

SparkFun_STTS22H mySTTS;

float temp;

// These values are in Farenheit
float interruptHighValue = 90.5;
float interruptLowValue = 42.0;

int tempInterrupt = 2;

void setup()
{

    Wire.begin();

    Serial.begin(115200);

    pinMode(tempInterrupt, INPUT);

    if( !mySTTS.begin() )
    {
        Serial.println("Did not begin.");
        while(1);
    }

    Serial.println("Ready");

    // Other output data rates can be found in the description
    // above. To change the ODR or mode, the device must first be
    // powered down.
    mySTTS.setDataRate(STTS22H_POWER_DOWN);
    delay(10);
    mySTTS.setDataRate(STTS22H_25Hz);

    // Enables incrementing register behavior for the IC.
    // It is not enabled by default as the datsheet states and
    // is vital for reading the two temperature registers.
    mySTTS.enableAutoIncrement();


    // Set interrupts for both lower and higher thresholds.
    // Note: These functions accept Farenheit as their arguments.
    // Other functions for different units just below.
    mySTTS.setInterruptLowF(interruptLowValue);
    mySTTS.setInterruptHighF(interruptHighValue);

    //mySTTS.setInterruptLowC(interruptLowValue);
    //mySTTS.setInterruptHighC(interruptHighValue);

    //mySTTS.setInterruptLowK(interruptLowValue);
    //mySTTS.setInterruptHighK(interruptHighValue);

    delay(100);
}

void loop()
{

    // Checking if data ready is not necessary when output is set higher
    // than 1Hz.
    mySTTS.getTemperatureF(&temp);

    // Temperature in different units can be retrieved
    // using the following functions.

    //mySTTS.getTemperatureC(&temp);
    //mySTTS.getTemperatureK(&temp);

    Serial.print("Temp: ");
    Serial.print(temp);
    Serial.println("F");

    if( digitalRead(tempInterrupt) == LOW )
    {
        Serial.println("Temperature threshold");
        while(1);
    }

    // delay = 1/ODR
    delay(1000);

}
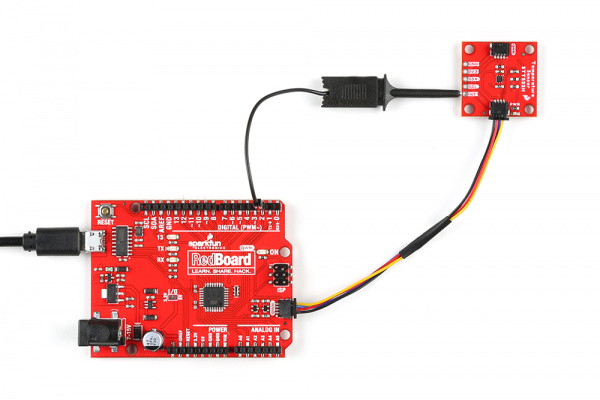
Note that depending on which processor board you are using, you may need to alter the Interrupt Pin. Since we're using a RedBoard here, our Interrupt Pin is 2 (int tempInterrupt = 2;). Also, in this example, we've used an IC hook with a pigtail to connect the Interrupt Pin to the RedBoard pin 2, but you can also solder headers to the STTS22H Temperature Sensor so you can use the interrupt pin. Your hardware hookup should look something like the following:
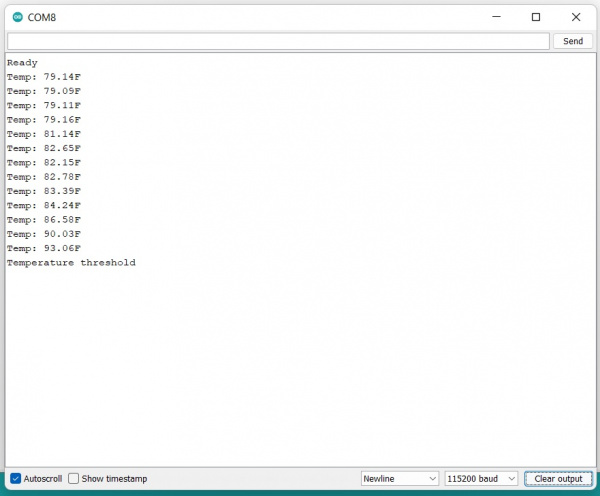
Once you're ready to go, go ahead and hit the upload button (the right facing arrow button under the "Edit" menu item). Once your code is uploaded, open the Serial Monitor and you'll see information start printing out.
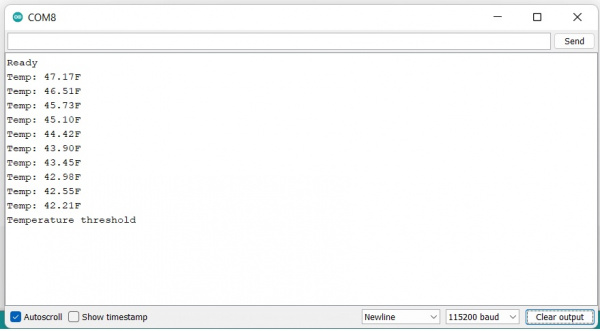
If you have a look at the code, you'll notice that we've set our upper threshhold to 90.5 degrees F, and our lower threshhold to 42 degrees F. I held the sensor in front of a heater to hit the upper threshhold:
The lower threshhold was reached by sticking the sensor in a plastic bag and then putting that plastic bag into ice water:
Example 3: One Shot
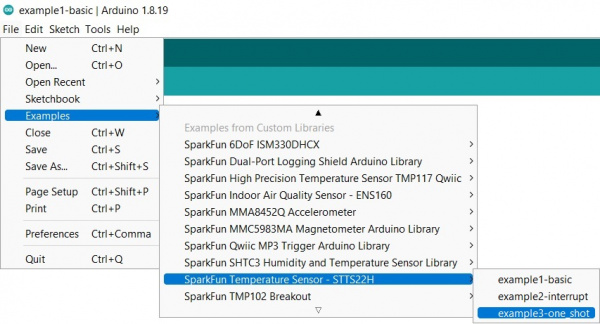
In Example 3, we're going to have a look at the One Shot functionality. To find Example 3, go to File > Examples > SparkFun Temperature Sensor - STTS22H > example3-one_shot:
Or you can copy and paste the code below into a clean Arduino sketch:
language:c
/*
example3-one_shot.ino

This example shows basic data retrieval using the "one-shot" feature i.e. - get the temp
now feature.

Output Data Rates:

STTS22H_POWER_DOWN
STTS22H_ONE_SHOT   < -------- This one.
STTS22H_1Hz
STTS22H_25Hz
STTS22H_50Hz
STTS22H_100Hz
STTS22H_200Hz

Written by:
Elias Santistevan @ SparkFun Electronics December, 2022

Products:
   SparkFun Temperature Sensor - STTS2H              https://www.sparkfun.com/products/21262
   SparkFun Micro Temperature Sensor - STTS2H        https://www.sparkfun.com/products/21051

Repository:
     https://github.com/sparkfun/SparkFun_STTS22H_Arduino_Library

SparkFun code, firmware, and software is released under the MIT
License(http://opensource.org/licenses/MIT).

*/

#include <Wire.h>
#include "SparkFun_STTS22H.h"

SparkFun_STTS22H mySTTS;

float temp;

void setup()
{

    Wire.begin();

    Serial.begin(115200);

    if( !mySTTS.begin() )
    {
        Serial.println("Did not begin.");
        while(1);
    }

    Serial.println("Ready");

    // Other output data rates can be found in the description
    // above. To change the ODR or mode, the device must first be
    // powered down.
    mySTTS.setDataRate(STTS22H_POWER_DOWN);
    delay(10);
    // Force new reading, temp sensor will power down after conversion.
    mySTTS.setDataRate(STTS22H_ONE_SHOT);

    // Enables incrementing register behavior for the IC.
    // It is not enabled by default as the datsheet states and
    // is vital for reading the two temperature registers.
    mySTTS.enableAutoIncrement();

    delay(100);
}

void loop()
{

    // Temp sensor will power down automatically after single read.
    if( mySTTS.dataReady() )
    {

        mySTTS.getTemperatureF(&temp);

        // Temperature in different units can be retrieved
        // using the following functions.

        //mySTTS.getTemperatureC(&temp);
        //mySTTS.getTemperatureK(&temp);

        Serial.print("Temp: ");
        Serial.print(temp);
        Serial.println("F");

        // Wait 10 seconds for until we initiate another read.
        delay(10000);

        // Enable another reading.
        mySTTS.setDataRate(STTS22H_ONE_SHOT);

    }

    // Demonstrative delay.
    delay(100);

}
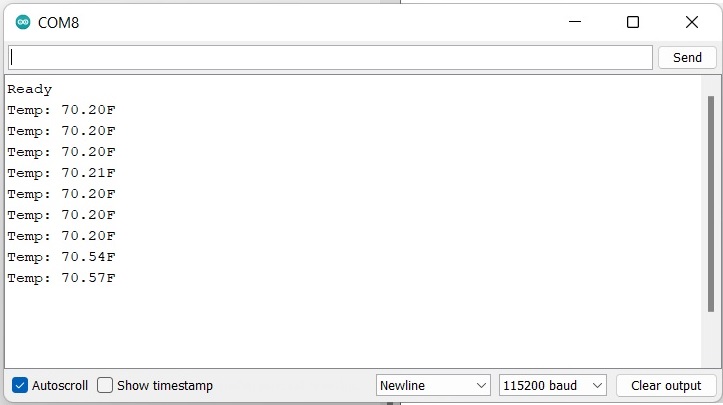
Once you're ready to go, go ahead and hit the upload button (the right facing arrow button under the "Edit" menu item). Once your code is uploaded, open the Serial Monitor and you'll see information start printing out.
This really isn't all that exciting until you measure the current consumption!
Troubleshooting
If you need technical assistance and more information on a product that is not working as you expected, we recommend heading on over to the SparkFun Technical Assistance page for some initial troubleshooting.
If you don't find what you need there, the SparkFun Forums are a great place to find and ask for help. If this is your first visit, you'll need to create a Forum Account to search product forums and post questions.
Resources and Going Further
SparkFun Temperature Sensor - STTS22H (Qwiic):
SparkFun Micro Temperature Sensor - STTS22H (Qwiic):
General Information:
Need some inspiration for your next Qwiic project? The tutorials below may help you come up with some ideas:
