Sewing with Conductive Thread
This Tutorial is Retired!
This tutorial covers concepts or technologies that are no longer current. It's still here for you to read and enjoy, but may not be as useful as our newest tutorials.
View the updated tutorial: LilyPad Basics: E-Sewing
How Do I Sew with Conductive Thread?
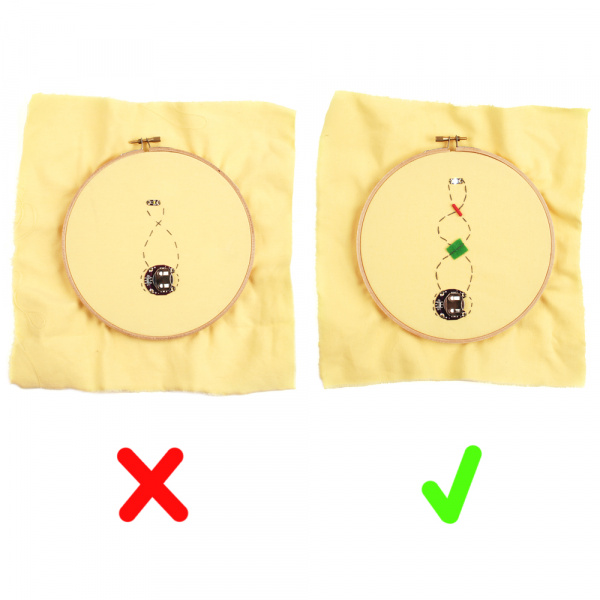
You won't need any special equipment to sew with conductive thread- regular needles, scissors, etc. will be fine. There are, however, a few things you need to know about the texture of the thread. The ends can fray easily. If you find yourself having trouble, beeswax can help. The thread is also entirely uninsulated. That means that it isn’t coated with a non-conductive material, and if two strands touch one another, they’ll conduct between them. When you design your project, you’ll have to try and prevent threads carrying individual signal from touching each other. If you need to cross traces, you'll have to add an insulating layer.
Thick fabric, fabric paint, electrical tape, or any other highly resistive material that is compatible with your project should work. When two traces that aren’t supposed to touch do, and current flows through them, it’s called a short circuit, or a short. A short circuit will prevent your circuit from working, and more importantly, can be dangerous. It allows the battery to release energy very quickly, which can cause heat, smoke, sparks, or scorching. The amount of potential damage depends on your power supply, but be careful!
To add a little additional protection from accidental shorts, you can wax the entire length of your thread before you begin sewing. This will help smooth down stray fibers as well as coating the thread with a thin layer of insulating wax. It's not enough to truly insulate, but it will make it far less likely that two threads come into contact and immediately cause a short.
