Sewing with Conductive Thread
This Tutorial is Retired!
This tutorial covers concepts or technologies that are no longer current. It's still here for you to read and enjoy, but may not be as useful as our newest tutorials.
View the updated tutorial: LilyPad Basics: E-Sewing
 Dia
Dia 
Conductive Thread Basics
So you'd like to dip your toe into e-textiles, but you're not sure what this conductive thread is all about. Not a problem! It's really not more difficult than other types of sewing, so with a quick tutorial you should be ready to get started.
If you'd like some background information, there are a couple of tutorials that might be helpful:
What is Conductive Thread?
Conductive thread can carry current the same way that wires can, which means it can be used to create a circuit. This allows the user to sew a circuit together, creating flexible circuits that require no soldering. In some textile-based projects, this is the most practical tool to maintain the hang of the fabric. Educationally, it's a very safe and unintimidating way to learn how to use embedded electronics.
SparkFun currently sells silver and stainless steel threads. Beyond our selection of conductive threads, there exists a staggering number of conductive materials. If it's electrically conductive (you can check this with a multimeter), and you can sew with it (this includes hand and machine, sewing and embroidery, crocheting, knitting, all sorts of things, really), I encourage you to consider it a conductive thread. Some traditional embroidery threads have enough metal content to be conductive, and some wires are fine enough to sew with. If you keep an open mind (and a multimeter close at hand!), quite a few materials can find new life in your projects!
How Do I Choose the Best Conductive Thread For My Project?
There are many types of conductive thread, but in the interest of brevity, I'm going to focus on the ones SparkFun carries; they fit into two categories.
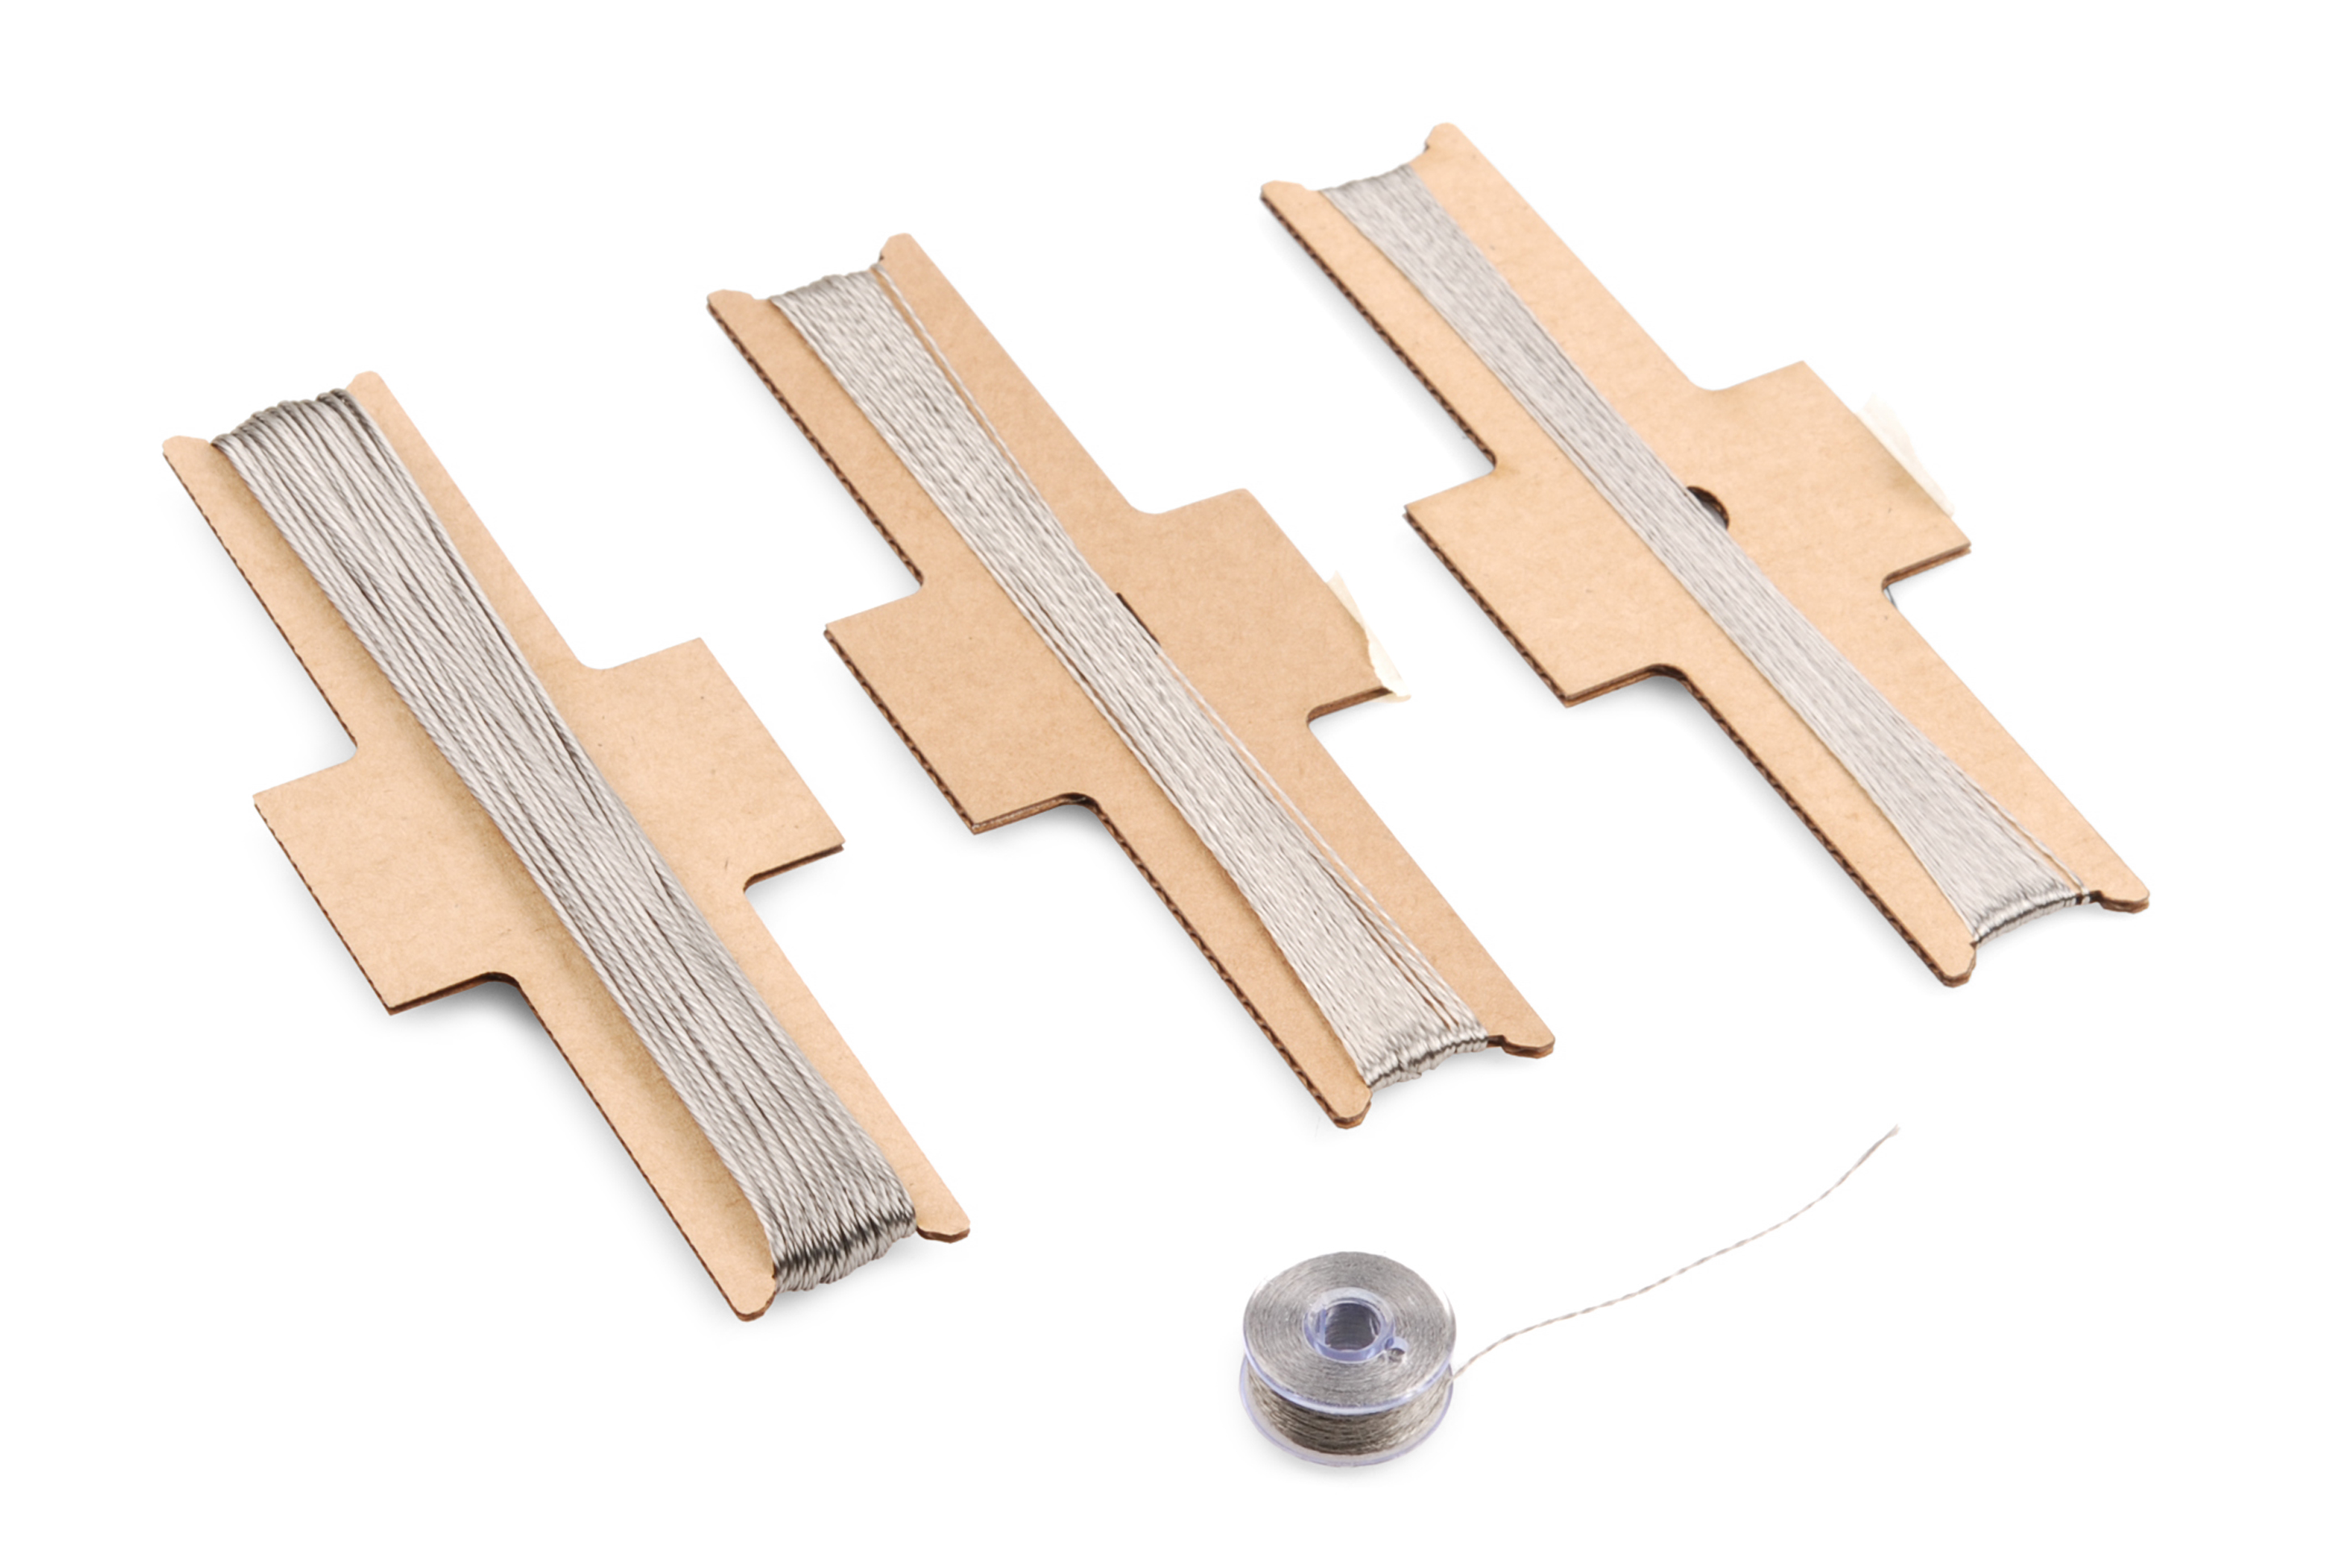
First, we have silver-coated threads. These are nylon thread, like you've seen before, but they've been coated with silver, which is conductive. The resistance of silver threads can vary a great deal. If your project is large (think a quilt, or a circuit that spans an entire full-length dress), make sure you check the resistance of the thread you are considering against the needs of your circuit. If your project is small (a painting canvas, a t-shirt, anything where the traces won’t go more than a couple of feet) and the acceptable resistance is high, silver is great! Our finest, easiest to use thread is the 2-ply silver, which is hand sewable and useable as a top and bobbin thread in most sewing machines. Because the base of these silver threads is nylon, they're completely incompatible with soldering. The nylon interior of the thread is just too susceptible to heat; it can't take the temperature necessary to melt solder.
Second, we have stainless steel threads, which are a little bit different. There is no traditional thread core; these threads are made entirely of stainless steel. They're a little bit more difficult to sew with because they can be a bit 'twisty', but they make up for it with very reliable (and low) resistance. If you've got a project in mind that requires very long traces (more than a few feet), you’ll need low resistance. Currently, our lowest resistance threads are all stainless, so that’s where you’ll want to start. The lowest resistance threads are VERY thick, more like twine than thread, and can't really be stitched. These are great to use in casings, piping, or stitched down with embroidery or a machine zig-zig stitch.
Because these threads are composed entirely of stainless steel, they're much more soldering-friendly. The heat of a soldering iron won't damage the thread (although it will discolor it a bit, so be warned), so you can solder on, near, or to the thread. Do be aware that stainless steel is not an easy material to solder to, so you've still got a tough job ahead if you want to solder something directly to the thread.
Choosing the correct thread is very project-specific. Your safest bet on a complicated project is to calculate the resistance your circuit can handle using Ohm's Law. Divide that resistance by the feet of distance you anticipate between your power supply and components, and look for the thinnest thread of that resistance or less. If that all sounds a little bit complicated, don’t worry. You can use trial and error to get a feel for which threads work best for you, and most projects don’t require the lowest resistance available. The stainless steel bobbin is an excellent starting point. It’s useable by hand or in a sewing machine and relatively low resistance (about 28 ohms per foot.) It’s also cheap, so it’s a small commitment. If you DO find that your resistance is too high, it’s not a hard fix. Every time you add another strand of the same thread to the trace, you halve the resistance. If you don’t want to remove and replace the traces, you can pass back over them to bring the resistance down to an acceptable level.
How Do I Sew with Conductive Thread?
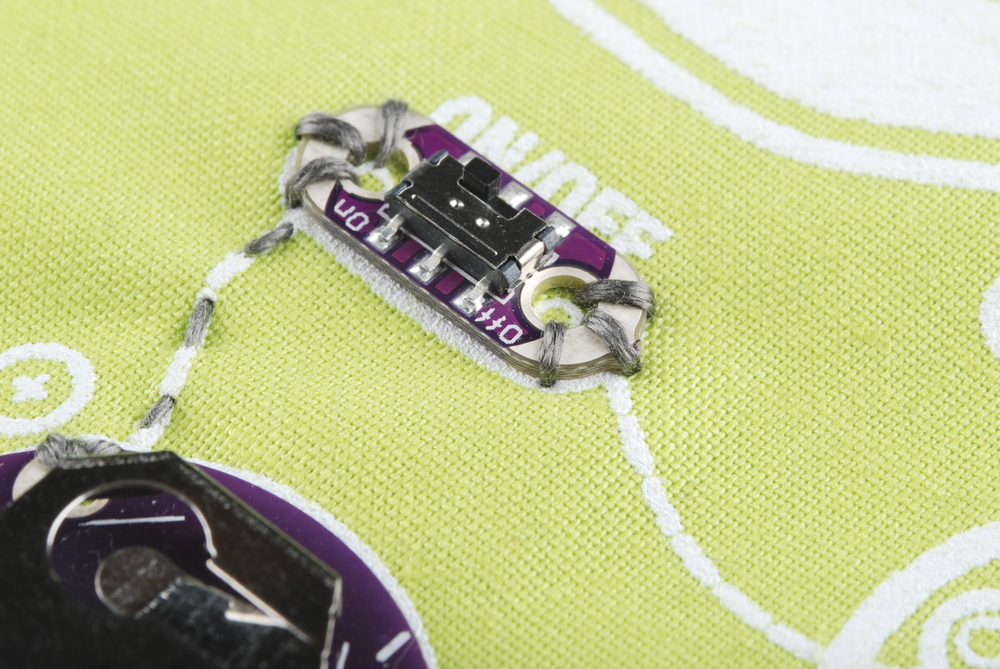
You won't need any special equipment to sew with conductive thread- regular needles, scissors, etc. will be fine. There are, however, a few things you need to know about the texture of the thread. The ends can fray easily. If you find yourself having trouble, beeswax can help. The thread is also entirely uninsulated. That means that it isn’t coated with a non-conductive material, and if two strands touch one another, they’ll conduct between them. When you design your project, you’ll have to try and prevent threads carrying individual signal from touching each other. If you need to cross traces, you'll have to add an insulating layer.
Thick fabric, fabric paint, electrical tape, or any other highly resistive material that is compatible with your project should work. When two traces that aren’t supposed to touch do, and current flows through them, it’s called a short circuit, or a short. A short circuit will prevent your circuit from working, and more importantly, can be dangerous. It allows the battery to release energy very quickly, which can cause heat, smoke, sparks, or scorching. The amount of potential damage depends on your power supply, but be careful!

To add a little additional protection from accidental shorts, you can wax the entire length of your thread before you begin sewing. This will help smooth down stray fibers as well as coating the thread with a thin layer of insulating wax. It's not enough to truly insulate, but it will make it far less likely that two threads come into contact and immediately cause a short.
How Do I Use Conductive Thread with Sewable Components?
Most e-textiles components, including the LilyPad, Aniomagic, and Flora lines, are made out of PCB and have a large hole at each pin. The inside of each hole, as well as the silver pad surrounding it, is conductive.This is intended to give you plenty of room to pass a needle and thread through the hole several times. This helps to guarantee that the thread has a wide surface to make solid conductive contact with. When you’re sewing your components down, it’s important to make sure that each stitch wraps securely around the edge of the component and is pulled down tight so that the thread is in solid contact with the interior of the hole and the surrounding pad. Put in at least three stitches per hole this way, always making sure that each stitch is tight before proceeding to the next.
Resources and Going Further
You now know how conductive thread works, which kind you’ll need, and how to use it in conjunction with electrical components. The only thing left to do is find some projects to try all of this newfound wisdom out on! Here are a few simple tutorials to get started on.