Setup and Using MicroPython for Beginners
 Christo-boots with the-pher, Member #1919784
 Introduction
In this tutorial our goal is to help guide you through setting up and use MicroPython, a simple, yet effective implementation of Python 3 tailored for microcontrollers (MCUs) that are not running an OS. Thanks to its more direct method of coding, MicroPython makes programming embedded systems more accessible and enjoyable than ever. We'll walk you through the entire process, from flashing the firmware to running your first lines of code.
We will also go over Python running on single-board computers (SBCs) as an alternative to running MicroPython on SBCs.
Additionally, this entire guide is featured on GitHub, as well as instructions on how to setup Linux and Qwiic systems. If you would prefer to follow along there, click the button below!
Setup and Using MicroPython on MCUs
In this first section, you'll learn the essential first steps: installing MicroPython firmware onto your specific MCU, with dedicated instructions for popular platforms like the RP2350, Teensy, ESP32 and more. From there, we'll explore several powerful development environments, including the command-line tool mpremote and full-featured IDEs like Thonny and PyCharm. By following along with our examples, you'll gain hands-on experience writing, uploading, and executing code, enabling you with the foundational skills to start building your own MicroPython projects.
Supported Platforms
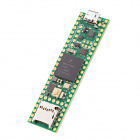
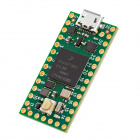
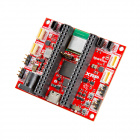
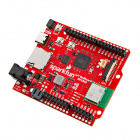
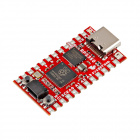
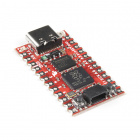
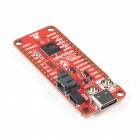
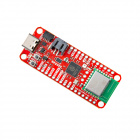
While there are a multitude of boards you can chose from, we will be focusing on the ones capable of working with the SparkFun Firmware Updater (we'll explain more on that in the next section). These boards include:
And more to come...
Installing Firmware
SparkFun Firmware Updater
The recommended way to install MicroPython firmware on a SparkFun board is with the SparkFun MicroPython Firmware Updater. Follow the instructions in that repository to download and install the correct firmware updater version for your computer. Then you can utilize the app to flash your board directly with the latest firmware from GitHub or a custom firmware file from another source. If you follow this route you can skip the platform-specific methods below.
You can also get our latest MicroPython firmware for your board from our directly from MicroPython release page and flash with the dedicated method for your platform. Different platforms have different methods of flashing:
RP2 Boards
While connected to your computer, hold the "boot" button on the RP2 board while you press and release the "reset" button to enter bootloader mode. Your board will appear as a regular drive on your computer that you can add files to. Drag and drop the correct .uf2 file from the most recent release from the link above onto your board and it will reboot, now running MicroPython.
Connect to it with one of the suggested development environments below.
ESP32 Boards
Download the .zip archive for your board from the release link above and extract it. If you have not already, download the esptool utility. Then, use esptool to flash your board using the command specified below. Make sure you run the command from within that directory as well. For example, one ESP32 release contains a bootloader.bin, partition-table.bin, micropython.bin, and README.md. By reading the README.md I see that the command I must run FROM WITHIN THIS EXTRACTED DIRECTORY is:
python -m esptool --chip esp32 -b 460800 --before default_reset --after hard_reset write_flash --flash_mode dio --flash_size 4MB --flash_freq 40m 0x1000 bootloader.bin 0x8000 partition-table.bin 0x10000 micropython.bin
Connect to it with one of the suggested development environments below.
Suggested Development Environments
mpremote: MicroPython remote control
mpremote is a command line utility that provides tons of options for interfacing with a MicroPython board. A simple way to use it is to execute it standalone with no options. If you have installed mpremote you can simply execute mpremote in a command line to get direct access to the Python REPL on your board. A useful way to navigate the file system from this repl is to execute import os and then use the os methods. For example, os.listdir() will show everything in the current directory on your MicroPython board. os.getcwd() will print the name of the current directory and os.chdir('dir_name') will change the directory. An example of navigating around directories for a user who has installed the mpy_tmp117_web_server demo from this repository can be seen below.
C:\Users\qwiic_guy> mpremote

Connected to MicroPython at COM14
Use Ctrl-] or Ctrl-x to exit this shell
MicroPython on SparkFun IoT RedBoard RP2350 with RP2350
Type "help()" for more information.
>>>
>>>
>>> import os
>>> os.listdir()
['lib', 'static', 'tmp117_server_ap.py']
>>> os.getcwd()
'/'
>>> os.chdir('static')
>>> os.getcwd()
'/static'
>>> os.listdir()
['index.css', 'index.html', 'logo.png']
Once you have navigated to the directory containing the python script that you want to run, run it with the exec command:
>>> exec(open('your_script.py').read())
Other MicroPython development environments like the IDE's below will also provide you with a REPL where you can directly execute MicroPython commands. So skills gained from navigating the REPL directly with mpremote will carry over into other environments.
To get files from your computer onto your micropython board you can use mpremote cp or install them directly from repositories that support mip installation with mpremote mip install github:reponame for example, to install our qwiic_i2c_py driver, execute:
mpremote mip install github:sparkfun/qwiic_i2c_py
Let's walk through a quick example where we develop a program on a local code editor and then run it on a MicroPython board.
We can either develop our files first and then manually copy them over to our board (with mpremote cp) each time we want to test them, or we can "mount" a directory such that files are "shared" between the local file system and the MicroPython board.
Let's explore using mpremote mount to map a local directory onto our remote device. First create a new directory named hello_world and then open it in your code editor of choice. Now lets add our Python/MicroPython program. Add a file called print_platform.py to your hello_world directory. Paste the following code into the file:
import sys

print ("Hello from (Micro)Python! I am running on the following platform:", sys.platform)
The sys module exists both in Python and MicroPython so this code can run on both, and will let us know if we are successfully running it on an MCU. sys.platform will display your computer's OS if we interpret this program with a Python interpreter on your computer (for example on Windows it is win32 and on linux it is linux or linux2). However, if we interpret/execute it via MicroPython on your MCU, it will be the MicroPython port representing your MCU (for example for RP2350 it is rp2 and for ESP32 it is esp32).
Now, our local directory structure in our code editor should look like this:

If we run mpremote and use os.listdir to list the current contents on my board, we see that it is empty:
C:\Users\awesome_qwiic_user> mpremote
Connected to MicroPython at COM14
Use Ctrl-] or Ctrl-x to exit this shell

>>> import os
>>> os.listdir()
[]
>>>
Now let's mount our directory. Issue mpremote mount {path to your hello_world directory}. When we issue the command and again view the contents on our board, we see that our file has appeared!
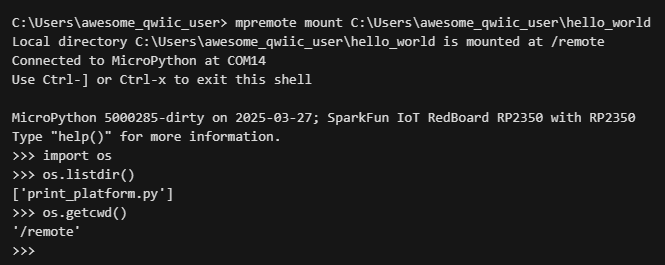
Notice that our file print_platform.py is now accessible to us from our MicroPython board and how we have automatically been moved into a directory called /remote on the remote device that maps to the local hello_world directory.
Now let's run our file using the same exec(open('print_platform.py').read()) and see what happens.
>>> exec(open('print_platform.py').read())
Hello from (Micro)Python! I am running on the following platform: rp2
If all went well, we'll see our hello message and the name of an MCU platform (in this case RP2 for the RP2350).
You can add any number of files to the hello_world directory in a local code-editor, and modify them as you wish and the changes will be reflected "on-the-fly" in your mpremote session.
Thonny
Thonny is an IDE that provides a GUI environment with builtin support for MicroPython development. To get started, visit the Thonny Downloads page and download the correct version for your operating system. Run the installation/setup program that you just downloaded for Thonny and click through each of the setup pages by accepting the default settings and pressing Next.
Connect your board that already has MicroPython Firmware installed to your computer and then configure your interpreter by clicking the bottom right-hand corner of Thonny. If your serial drivers are up to date and your board has proper MicroPython firmware installed, clicking this interpreter box should show several MicroPython options:

Select the version of MicroPython that makes the most sense for your board. Not sure? Select MicroPython (generic).
This will connect to your board and show a Python REPL in the "shell" tab. To run a MicroPython program, open it from the MicroPython device tab. Then press the green arrow (Run Current Script). If you ever want to stop the running program, soft reset your board, or reconnect to your board, click the red stop sign (Stop/Restart backend).
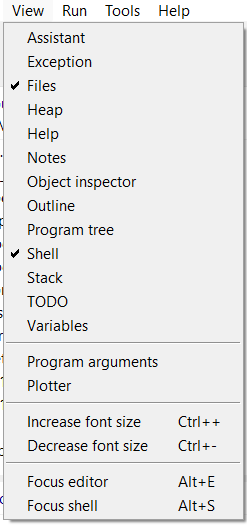
Let's run the same Python example in Thonny as we did for mpremote. Once connected to your board, via the instructions above, ensure that the View > Files option is selected from the Toolbar:
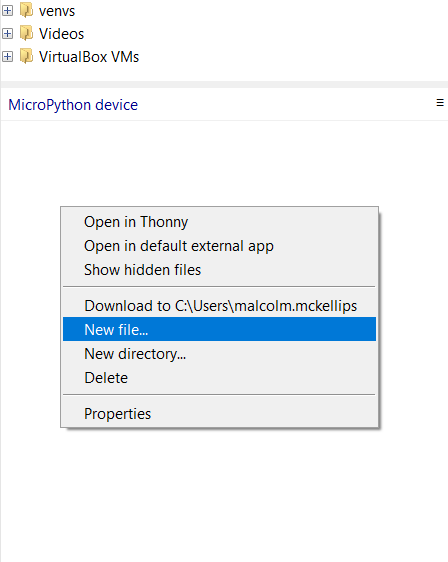
Now, in the Files tab, you should see two filel explorers, one called "This computer" for your local filesystem and one called "MicroPython device" representing the files on your board. Right click in the "MicroPython device" area and select New file....
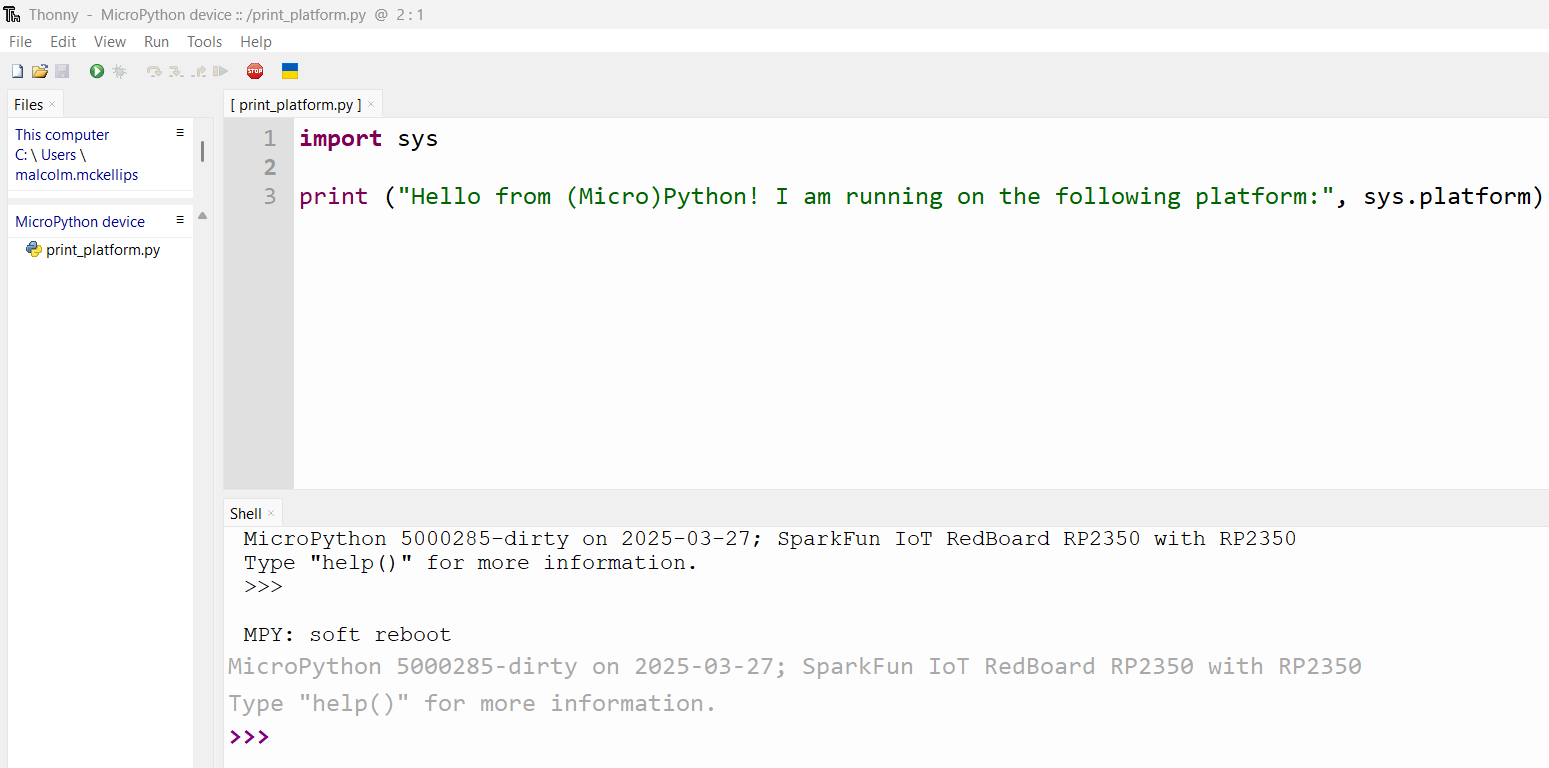
Lets call our new file print_platform.py. Let's copy and paste the same python code from the mpremote section above into our new file and save it. Now it should appear in our Files > MicroPython device tab:
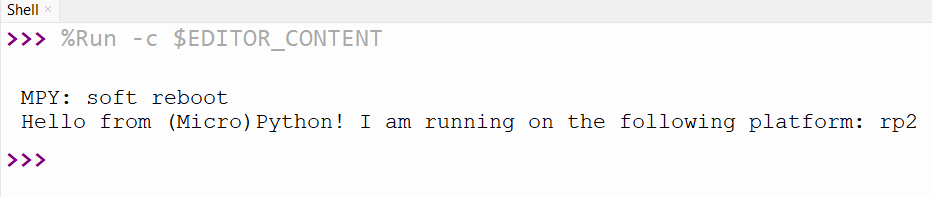
Finally, let's click on the green Run current script button and in the Shell tab we should see the expected print with a platform that matches the MCU of our MicroPython board:

Remember that you can also still use the REPL directly from the Shell tab and execute MicroPython commands on your board just as if you were using mpremote.
PyCharm
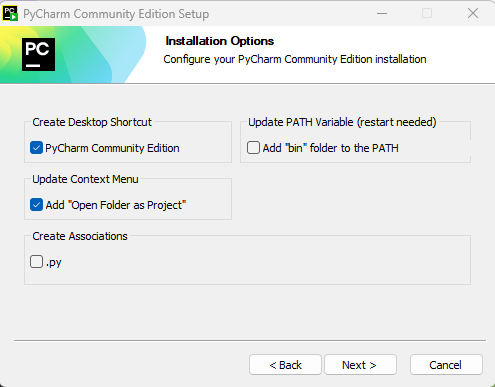
PyCharm is a popular and modern Python IDE with plugin support for interfacing with MicroPython boards. PyCharm Professional is a paid version, but we suggest installing the free community version. To get started, visit the PyCharm Downloads Page and scroll down until you see the "PyCharm Community Addition" section and click the Download button. Open the setup executable that you downloaded and configure your installation. We suggest accepting the default installation folder and adding the Desktop Shortcut and Context Menu.
Once your install is complete, open PyCharm. Skip any import settings that pop up when you open it for the first time.
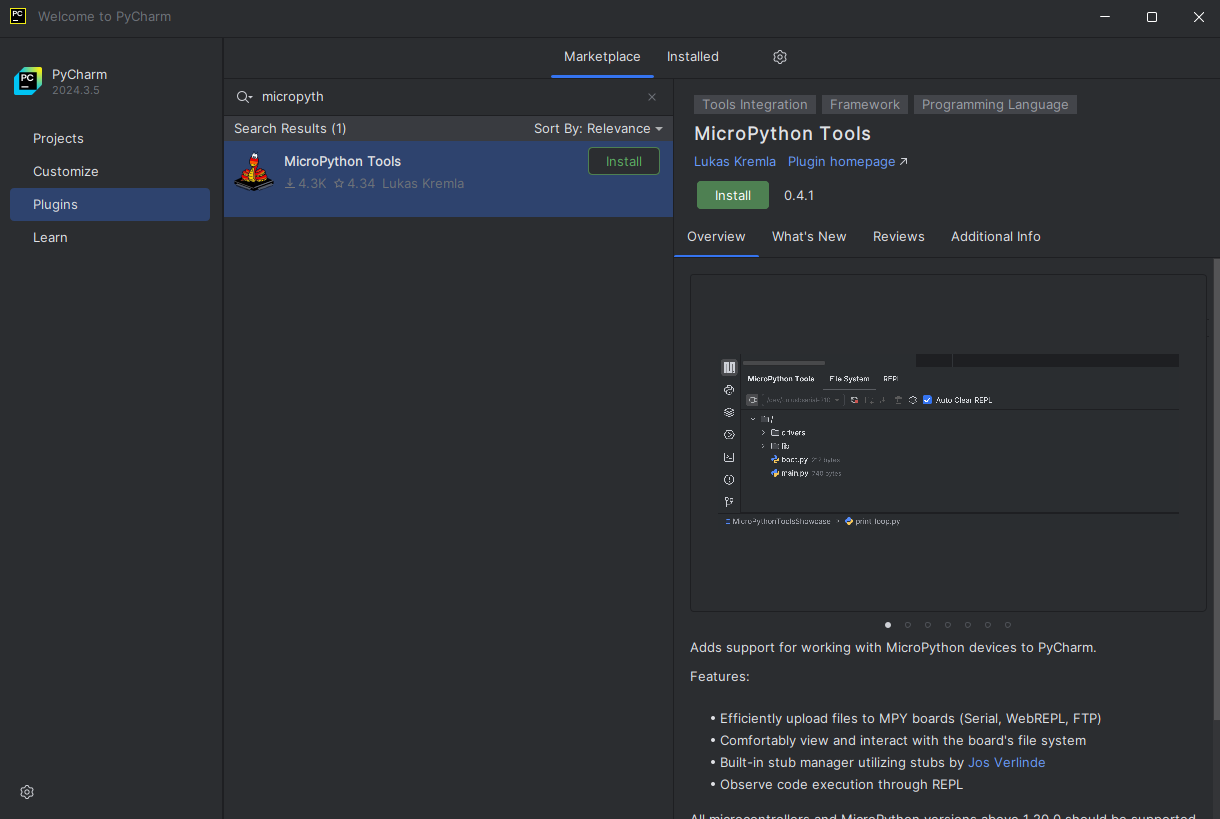
Navigate to Plugins and in the "Marketplace" tab search for "MicroPython Tools".
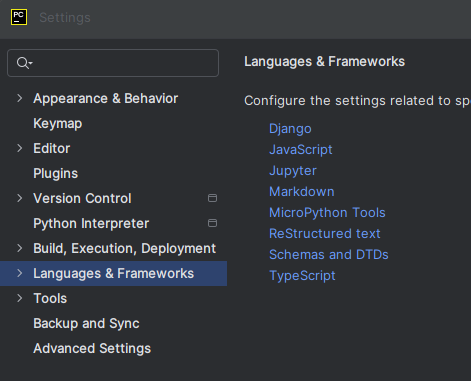
After installing the plugin, restart your IDE. Then, select the gear icon and choose "Settings" then navigate to Languages & Frameworks and select MicroPython Tools.
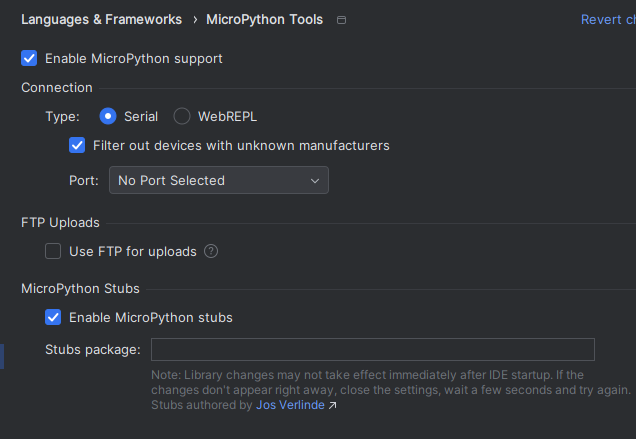
Select Enable MicroPython support and leave the other defaults checked. SparkFun is in the process of getting stubs for SparkFun MicroPython boards added to the official repository, but in the meantime in the stubs package field, choose a generic MicroPython stubs package corresponding to your MCU. For an RP2350 or RP2040 board, we suggest the most recent version of micropython-rp2-stubs_x.xx.x. For ESP32 boards, we suggest the most recent version of micropython-esp32-stubs_x.xx.x. These stubs packages simply provide useful code-completion, highlighting, and warnings for MicroPython development.
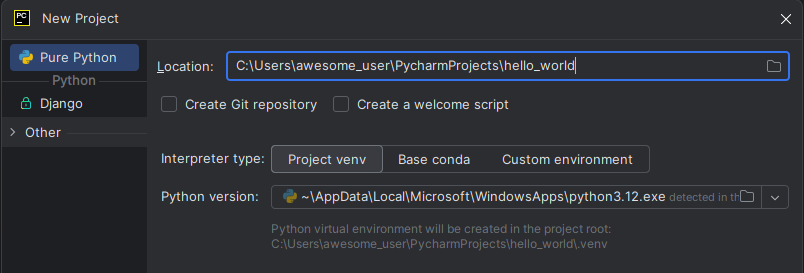
A good starting place for the use of this plugin is the MicroPython Tools README. Let's create our first project. Click the "+" sign or select file > New Project... to create a new project. Let's name our project "hello_world" and accept the default interpreter/environment:
When our new project first opens up, it has our hello_world directory as well as several components like .venv and External Libraries that are helpful when doing regular Python Development.
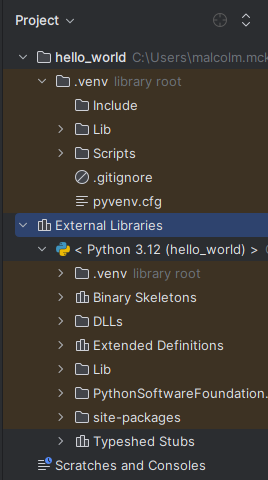
But we are anything but regular. We will be using the MicroPython running on our MCU to interpret our code, not a Python interpreter installed on your computer. So you can mostly disregard these files.
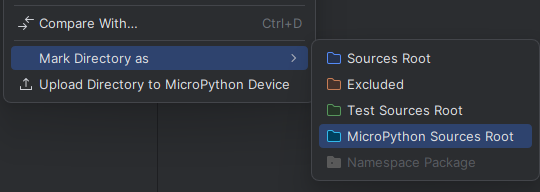
Now, right click the hello_world directory and select Mark Directory as > MicroPython Sources Root. The MicroPython Tools plugin will now map this hello_world directory that exists on our computer to the root file system of our MicroPython board when we perform upload commands.
Now lets add our MicroPython program. Right click the hello_world directory and select new > Python File and add a file called print_platform.py. Paste the following code into the file:
import sys

print ("Hello from (Micro)Python! I am running on the following platform:", sys.platform)
This is the same code as is discussed in the mpremote section.
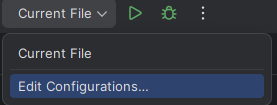
Now lets configure an upload command and a run command. At the top of PyCharm next to the execute and debug buttons, select Current File > Edit Configurations:
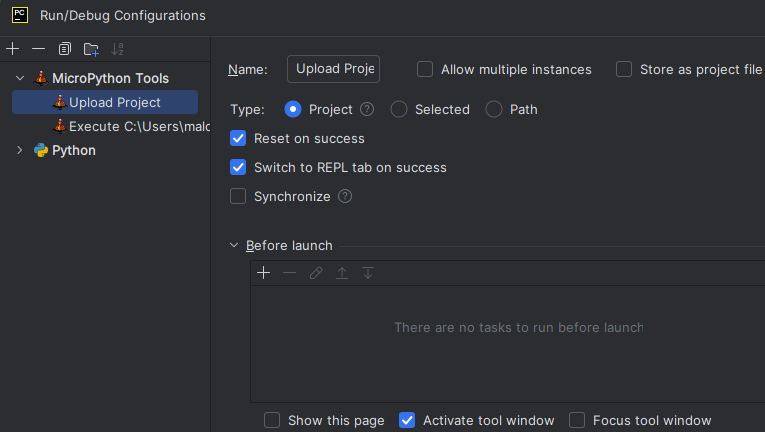
In the Run/Debug Configurations window that pops up, select the "+" sign and then select MicoPython Tools > Upload Project. Check the boxes for Reset on success, Switch to REPL tab on success. Then, click Apply.
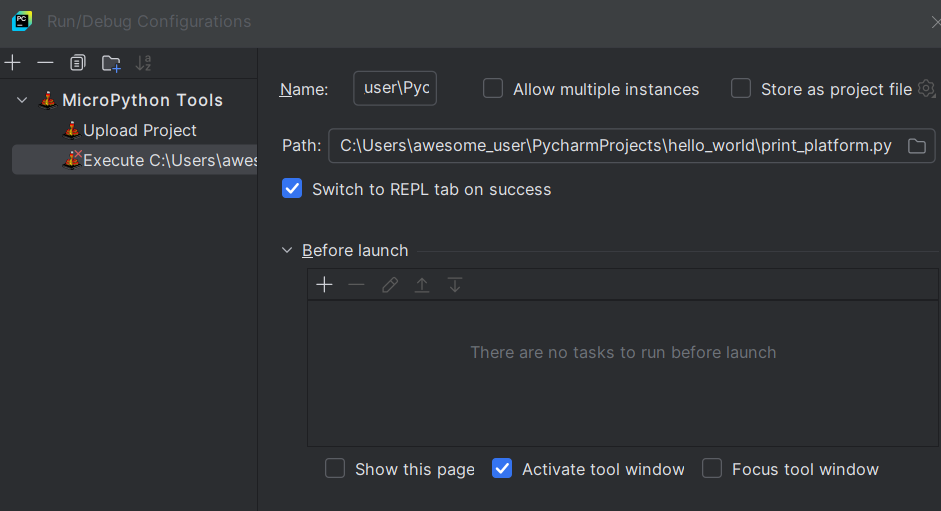
While we're at it, lets create an execute command. Again, click the "+" sign and select MicroPython Tools > Execute. Input the path to our print_platform.py file we have created and check the box for Switch to REPL tab on success. Click Apply and finally OK to save our upload and execute commands.
The upload command will take the directory that is configured as MicroPython Sources Root (in our case the hello_world directory) and load that onto the root directory of our MicroPython connected board. The execute command will run whatever file we have selected from the local computer's file system and run it on our board (without explicitly uploading it to the device).
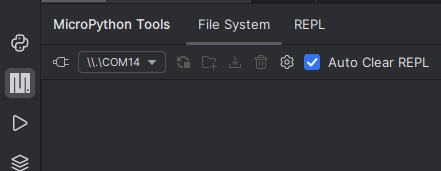
Now, let's connect to our device! Plug in your board that already has MicroPython Firmware installed and then in the bottom-left of PyCharm, select the MicroPython Tools extension. Select the correct COM port for your board. And then click the plug symbol to connect.
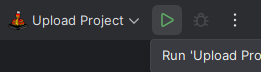
Now that we are connected, let's upload our program. Select our upload configuration from the drop-down at the top of PyCharm and then click the green Run arrow.
Select the File System tab in the MicroPython tools extension tab and we should now see print_platform.py file uploaded to the device!
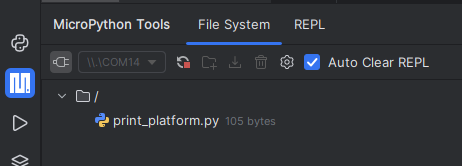
Finally, let's select our execute configuration and run it as well.

If all goes well, you should see a hello statement printed in the REPL tab of the MicroPython Tools extension. The platform printed should match the MCU of your board and not be your computer's operating system.

hello_world directory and runs it directly without uploading it. The upload step is helpful however if we have multiple files that we want to upload at once, for example if the file we are actually running relies on other files.File System tab of the extension to copy files from your local computer to your MicroPython board.Execute file in MicroPython REPL or Upload file to MicroPython device.REPL tab and execute MicroPython commands on your board just as if you were using mpremote.Other Tools
- VSCode with MicroPico Extension: If you happen to be developing on a Raspberry Pi pico platform, this offers a similar experience to Thonny and PyCharm.
- Arduino Lab For MicroPython: Offers a simple IDE for MicroPython development with a similar look and feel to Arduino IDE.
Using Python on Linux
Alternatively, you can use Python on Linux-based, single-board computers (SBCs)!
This next section of the tutorial focuses on on just that, getting you up and running on the Raspberry Pi and NVIDIA Jetson Orin Nano. We'll walk you through the entire setup process, starting with the initial hardware configuration. This includes preparing your SBC's operating system and safely connecting your Qwiic devices then we'll dive into the software installation, where you'll learn how to create a clean Python virtual environment (venv) and install the core qwiic_i2c library. By the end of this tutorial, you'll have a fully configured system, ready to install any of our Qwiic Python drivers and start bringing your projects to life.
Supported Platforms
We carry plenty of linux-based SBCs in our catalog, but for the intents and purposes of this section of our tutorial, we'll be focusing on Raspberry Pi 5 line and the NVIDIA Jetson Orin Nano via the SparkFun Qwiic SHIM and/or Qwiic Cable. These boards include:


SBC Setup
Raspberry Pi Setup
Follow the instructions here to to download a Raspberry PI OS image. It is expected that most/all RaspberryPi OS versions will work with our Qwiic I2C drivers, but testing was done with Kernel v6.6, Debian GNU/Linux 12 (bookworm). Image an SD card with your favorite SD card imager, we recommend the Raspberry Pi Imager.
Jetson Orin Nano Setup
Follow the in-depth instructions here to set up your Jetson Orin Nano Developer kit with a JetPack 6.2 (or higher) Linux image.
Qwiic Shim or Qwiic Cable Female Jumper Setup
On either of the above platforms, a pysical hardware interface is required to connect the I2C pins of the board to a qwiic connector on a qwiic device. Connect a Qwiic Shim or a Qwiic Cable Female Jumper to your board, making sure to connect the correct pins for PWR, GND, SDA, and SCL. See the instructions here for more information. Then connect a qwiic cable to your SparkFun Qwiic Device.
SBC Python Installation
You can install the qwiic_i2c_py package to get Qwiic I2C support for your board. Also check out our comprehensive qwiic_py repository.
The qwiic_i2c_py package is primarily installed using the pip3 command, downloading the package from the Python Index - "PyPi".
First, setup a virtual environment from a specific directory using venv:
python3 -m venv ~/sparkfun_venv
You can pass any path instead of ~/sparkfun_venv, just make sure you use the same one for all future steps. For more information on venv click here.
Next, install the qwiic package with:
~/sparkfun_venv/bin/pip3 install sparkfun-qwiic-i2c
Now you should be able to run any example or custom python scripts that have import qwiic_i2c by running e.g.:
~/sparkfun_venv/bin/python3 example_script.py
To get started with any of the Qwiic Drivers, check out our list of Qwiic Python Driver Repos below and follow the device-specific "PyPi Installation" instructions in your device's repository.
As an alternative to pip, at you could also manually clone/download the qwiic_i2c_py repository and the repository for your desired driver and then utilize the qwiic files directly.
Using the Qwiic Python Drivers
SparkFun offers an ever-growing list of Qwiic Python Drivers that enable interfacing with SparkFun Qwiic devices in Python, MicroPython, and CircuitPython. Generally, each qwiic driver relies on the qwiic_i2c_py driver to provide the cross-platform I2C functions used by each driver. To get started with the Qwiic Python drivers, grab a qwiic connector, your Qwiic device, a supported controller board with MicroPython, CircuitPython, or Linux installed and visit the qwiic_
List of Drivers
Check out our growing list of Python Drivers: https://github.com/topics/sparkfun-python
Follow the installation instructions for the repository in the list above that corresponds to your Qwiic device. Make sure to follow the instructions for which Python you are using (i.e. Python (Linux), MicroPython, or CircuitPython).
Qwiic I2C Repository
Check out the qwiic_i2c_py directory as well as the qwiic_py directory for more information on Qwiic, I2C, and Python.