Reading and Writing Serial EEPROMs
 Nate,
Nate,  Nick Poole
Arduino Hardware Hookup
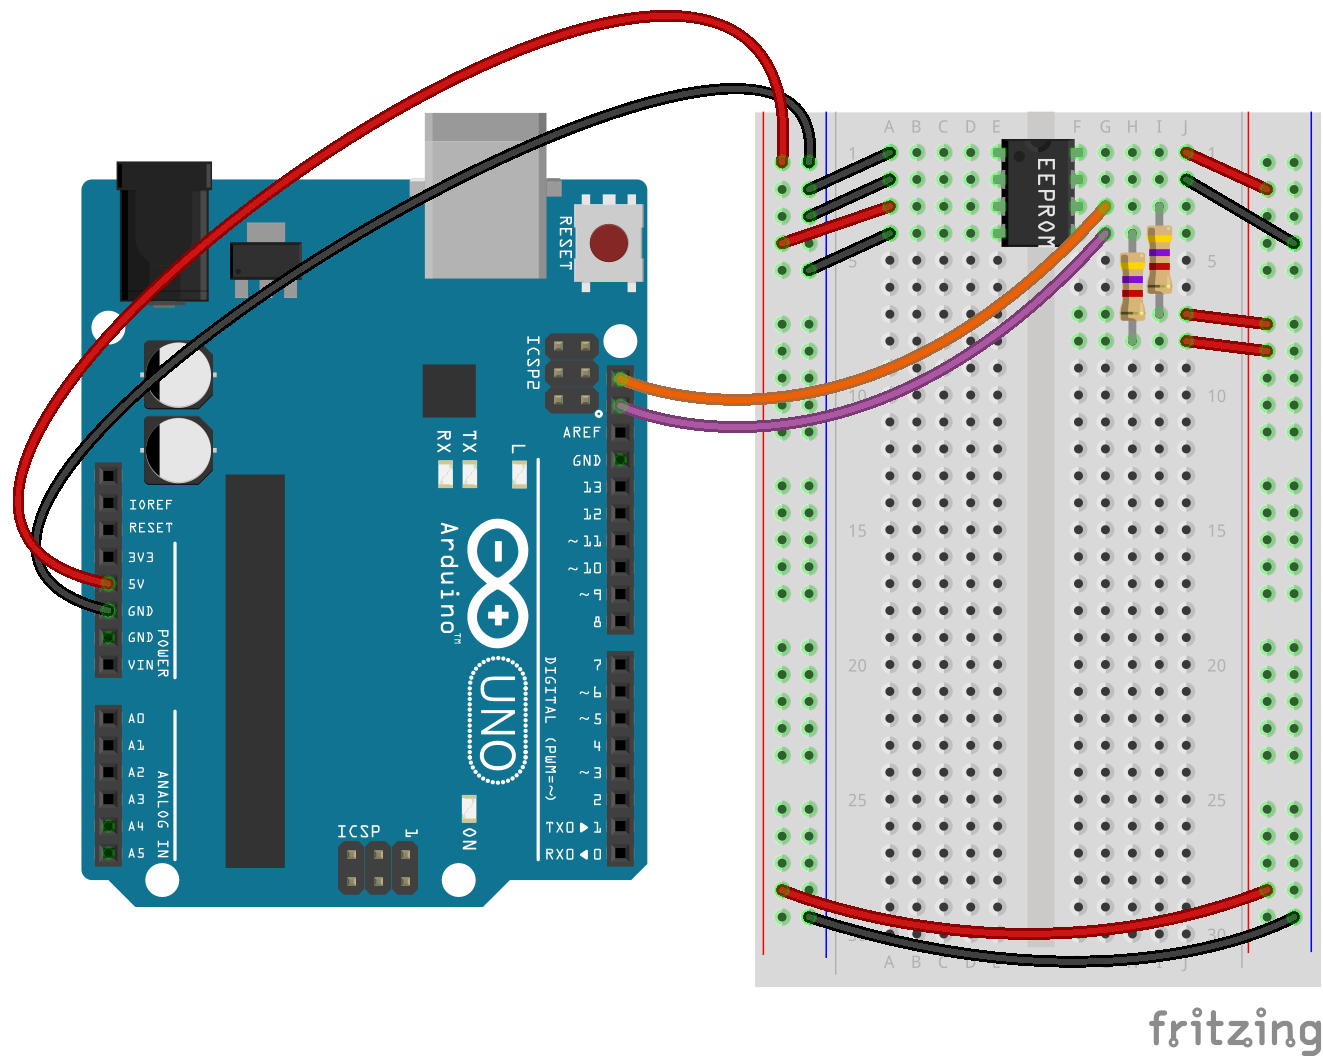
Okay, now that we know what EEPROM is, let's hook one up and see what it can do! In order to get our device talking we'll need to connect power as well as I²C serial lines. This device in particular runs at 5VDC so we'll connect it to the 5V output of our Arduino UNO. Also, the I²C lines will need pullup resistors for communication to happen correctly. The value of these resistors depends on the capacitance of the lines and frequency you want to communicate at, but a good rule of thumb for non-critical applications is just keep it in the kΩ range. In this example, we'll use 4.7kΩ pullup resistors.
There are three pins on this device to select the I²C address, this way you can have more than one EEPROM on the bus and address them each differently. You could just ground them all, but we'll be wiring them so that we can drop in a higher-capacity device later in the tutorial.
We'll use a breadboard to connect everything together. The diagram below shows the correct hookup for most I²C EEPROM devices, including the Microchip 24-series EEPROM that we sell.
That's it! Like most I²C devices, the hardware hookup is a breeze. Now we can move on to the code.