Contributors:
 Englandsaurus
 Introduction
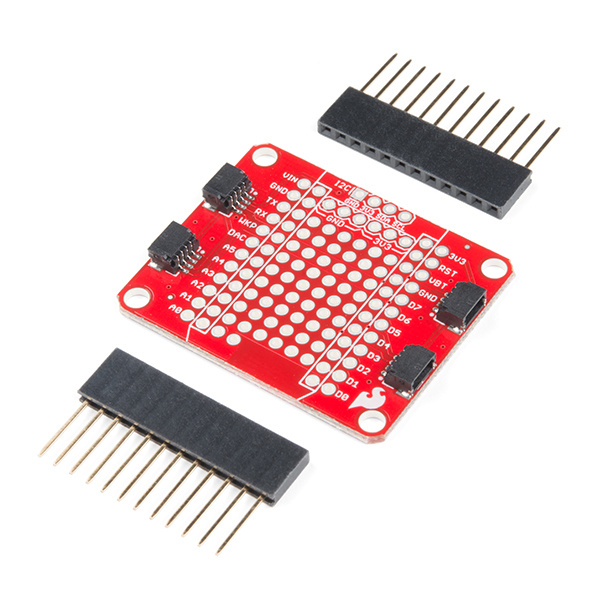
The Qwiic Shield (for Arduino or Particle Photon) is the first step in getting acquainted with SparkFun's Qwiic connect ecosystem. It connects the I2C bus (GND, 3.3V, SDA, and SCL) on your Arduino or Photon board to a series of SparkFun Qwiic connectors. The board already has the circuitry to convert the 5V given to the 3.3V required by I2C boards in our Qwiic ecosystem. The Arduino shield also has holes for mounting Qwiic boards. Since the Qwiic system allows for daisy chaining (as long as your devices are on different addresses) you can stack as many sensors as you'd like to create a tower of sensing power!
DEV-14352
The SparkFun Qwiic Shield is an easy-to-assemble board that provides a simple way to incorporate the Qwiic Connect System wit…
DEV-14477
The SparkFun Qwiic Shield for Photon is an easy-to-assemble board that provides a simple way to incorporate the Qwiic System …
Retired
Here's a quick overview of the Qwiic shield for Arduino. The Qwiic shield for Photon is similar but made for the Particle Photon's footprint.
Required Materials
To follow along with this hookup guide, you will need any Arduino with the R3 header footprint, or a Photon Board. This includes the Uno, RedBoard and many other Arduino compatible boards! Here are just a few of the compatible boards.
DEV-13975
The SparkFun RedBoard combines the simplicity of the UNO's Optiboot bootloader, the stability of the FTDI, and the shield com…
DEV-11021
This is the new Arduino Uno R3. In addition to all the features of the previous board, the Uno now uses an ATmega16U2 instead…
WRL-13774
Particle's IoT (Internet of Things) hardware development board, the Photon, provides everything you need to build a connected…
Retired
Now you probably didn't buy the Qwiic shield if you didn't have any Qwiic products to use with it, right? Well, if you don't have any Qwiic products, the following might not be a bad place to start.
DEV-14495
The SparkFun Qwiic Adapter provides the perfect means to make any old I2C board into a Qwiic enabled board.
GPS-14414
The SparkFun XA1110 GPS Breakout is a small I2C-supported module built for easy hookup, thanks to our Qwiic Connect System. E…
SEN-14347
The SparkFun AS7262 Visible Spectral Sensor Breakout brings spectroscopy to the palm of your hand, making it easier than ever…
SEN-14348
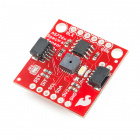
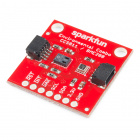
The SparkFun CCS811/BME280 Environmental Combo Breakout takes care of all your atmospheric-quality sensing needs with the pop…
Retired
Finally, you'll need our handy Qwiic cables to easily connect sensors to your Qwiic shield. Below are a few options.
PRT-14427
This is a 100mm long 4-conductor cable with 1mm JST termination. It’s designed to connect Qwiic enabled components together…
Retired
PRT-14426
This is a 50mm long 4-conductor cable with 1mm JST termination. It’s designed to connect Qwiic enabled components together …
Retired
PRT-14428
This is a 200mm long 4-conductor cable with 1mm JST termination. It’s designed to connect Qwiic enabled components together…
Retired
PRT-14429
This is a 500mm long 4-conductor cable with 1mm JST termination. It’s designed to connect Qwiic enabled components together…
Retired
Required Tools
You will need a soldering iron, solder, and general soldering accessories to solder the header pins to the Qwiic shields.
TOL-09163
This is your basic tube of unleaded (Pb-free) solder with a no clean, water soluble resin core. 0.031" gauge and 15 grams
TOL-09507
This is a very simple fixed temp, quick heating, 30W 110/120 VAC soldering iron. We really enjoy using the more expensive iro…
Suggested Reading
If you aren't familiar with the Qwiic system, we recommend reading here for an overview.
We would also recommend taking a look at the following tutorials if you aren't familiar with them.
I2C
An introduction to I2C, one of the main embedded communications protocols in use today.
Arduino Shields v2
An update to our classic Arduino Shields Tutorial! All things Arduino shields. What they are and how to assemble them.


