Qwiic HAT for Raspberry Pi Hookup Guide
Configuring the Pi
The peripherals are not turned on by default. For those using Qwiic-enabled devices, you will want to enable I2C port. There are two methods to adjust the settings. This is outlined in our Raspberry Pi I2C tutorial.
Raspberry Pi SPI and I2C Tutorial
We've included the following instructions from the tutorial. To enable it, follow the steps below.
Raspberry Pi Configuration via Desktop GUI
You can use the Desktop GUI by heading to the Pi Start Menu > Preferences > Raspberry Pi Configuration.
A window will pop up with different tabs to adjust settings. What we are interested is the Interfaces tab. Click on the tab and select Enable for I2C. At this point, you can enable additional interfaces depending on your project needs. Click on the OK button to same.
We recommend restarting your Pi to ensure that the changes to take effect. Click on the Pi Start Menu > Preferences > Shutdown. Since we just need to restart, click on the Restart button.
 |
 |
| Shutdown | Turn Off, Restart, Log Off |
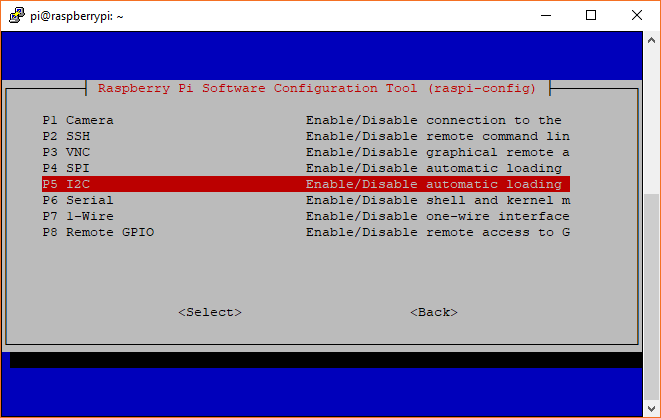
raspi-config Tool via Terminal
Again, we can use raspi-config to enable it.
- Run
sudo raspi-config. - Use the down arrow to select
5 Interfacing Options - Arrow down to
P5 I2C. - Select
yeswhen it asks you to enable I2C - Also select
yesif it asks about automatically loading the kernel module. - Use the right arrow to select the
<Finish>button. - Select
yeswhen it asks to reboot.
The system will reboot. When it comes back up, log in and enter the following command
language:bash
ls /dev/*i2c*
The Pi should respond with
language:bash
/dev/i2c-1
Which represents the user-mode I2C interface.


