$4.95
The Qwiic EEPROM is a simple and cost effective option to add some extra storage space to any project. With 512 kilo-bits (or 64 kilo-bytes) of storage, this product is great for any microcontroller that doesn't have any EEPROM storage space, like the SAMD21.
Maybe your project needs to store data, like a public-key, in non-volatile memory? Maybe you want to use multiple boards as configuration keys with different default settings for your project? Whatever your project needs might be, this guide will help users familiarize themselves with the Qwiic EEPROM and its operation.
The Qwiic EEPROM does need a few additional items for you to get started. The RedBoard Qwiic will be used for the Arduino examples. A single board computer and the Qwiic pHAT are required for the Python examples (see note below). You may already have a few of these items, including the required Qwiic cable, so feel free to modify your cart based on your needs. Additionally, there are also alternative parts options that are available as well (click button below to toggle options).

If you're unfamiliar with serial terminals, jumper pads, or I2C be sure to checkout some of these foundational tutorials.
The Qwiic EEPROM utilizes the Qwiic connect system. We recommend familiarizing yourself with the Logic Levels and I2C tutorials (above) before using it. Click on the banner above to learn more about our Qwiic products.
Note: First time Raspberry Pi users should also head over to the Raspberry Pi Foundation website and check out their quickstart guides:
1st Edition (December 2018)
2nd Edition (June 2019)
3rd Edition (November 2019)
We have also listed a few additional resources for users to familiarize themselves with the Raspberry Pi:
Note: First time Nvidia Jetson Nano users should also head over to the Nvidia website and check out their guides and tutorials:
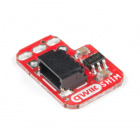
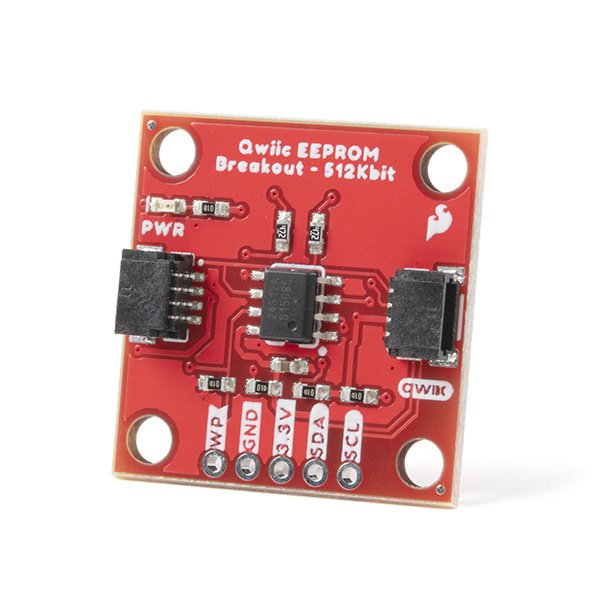
The Qwiic EEPROM Breakout is laid out on the standardized 1" x 1" (2.54 x 2.54 cm) Qwiic breakout board and includes the standard four 0.13" mounting holes, which are compatible with 4-40 screws.

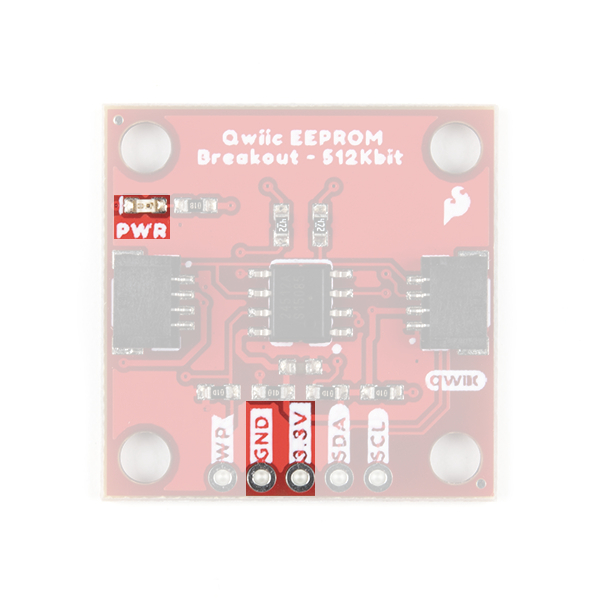
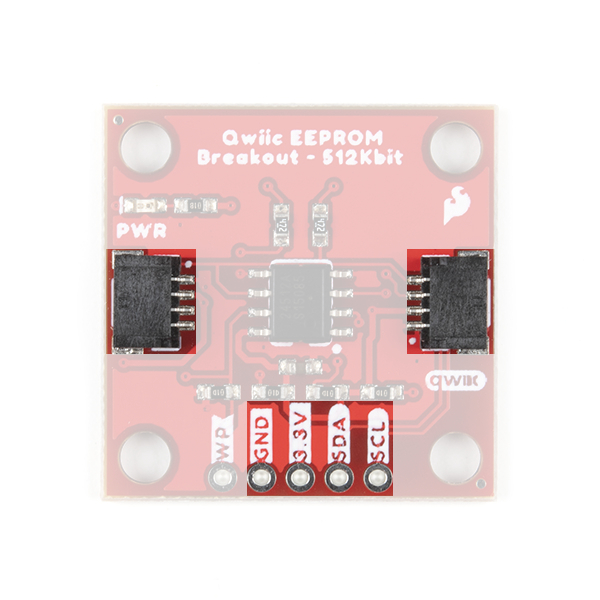
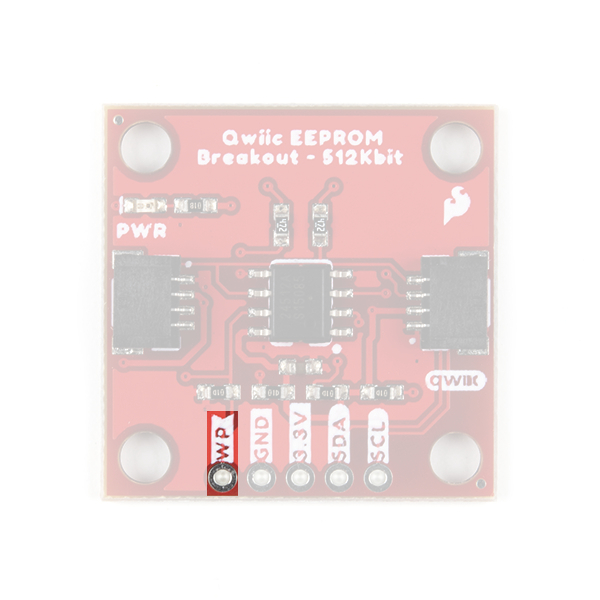
There is a power status LED to help make sure that your Qwiic EEPROM is getting power. You can power the board either through the polarized Qwiic connector system or the breakout pins (3.3V and GND) provided. The Qwiic system is meant to run on 3.3V, be sure that you are NOT using another voltage when using the Qwiic system.
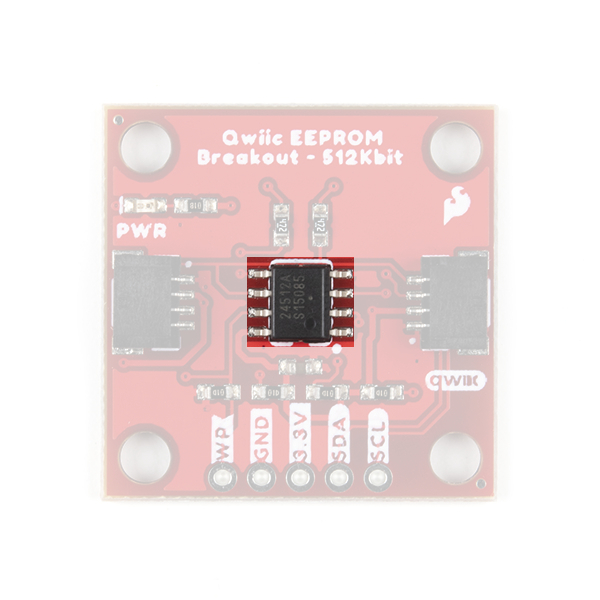
The CAT24C512 IC is a 512-Kb (kilobit) EEPROM flash memory is organized as 65,536 words of 8 bits each with a 128-byte page write buffer. An on board ECC (Error Correction Code) makes this EEPROM suitable for high reliability applications. The IC also offers write protection, which inhibits write operations by pulling the WP pin High (protects the entire memory). The external address pins make it possible to connect up to eight CAT24C512 EEPROM chips on the same I2C bus.
For more details on how the serial EEPROM works, check out our guide below:
Below, is a table of the characteristics of the EEPROM chip. For more details, please refer to the datasheet.
| Characteristic | Description |
|---|---|
| Power |
Supply Voltage: 1.8 to 5.5V Supply Current:
|
| Reliability |
Endurance: 1,000,000 Program/Erase Cycles Data Retention: 100 Years |
| Page Write Buffer | 128 bytes |
| Write Protection | Entire Memory |
| I2C Address (7-bit) |
1010[E2][E1][E0] 0x50 (Default), 0x51, 0x52, 0x53, 0x54, 0x55, 0x56, 0x57 |
The Qwiic EEPROM’s I2C address, 0x50 (7-bit), is factory set. An alternate I2C address can be configured to 1010[E2][E1][E0] by modifying the address jumpers E0, E1, E2 (see Jumpers section below).
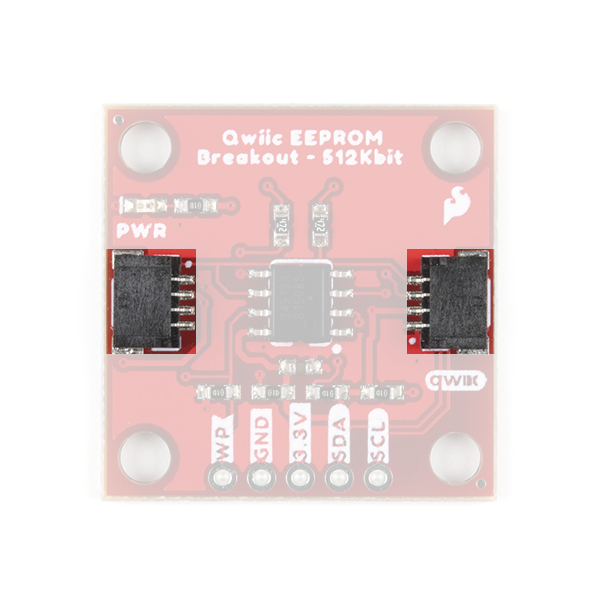
The simplest way to use the Qwiic EEPROM is through the Qwiic connect system. The connectors are polarized for the I2C connection and power. (*They are tied to the corresponding power and I2C breakout pins.)
The board also provides five labeled breakout pins.
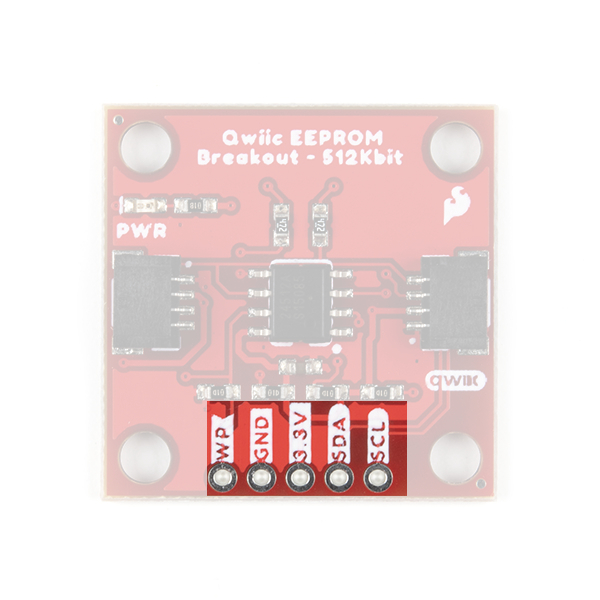
You can connect these lines to the I2C bus of your microcontroller and power pins (3.3V and GND), for a more permanent connection.
Pulling the WP pin high, will disable all write operations to the entire memory space.
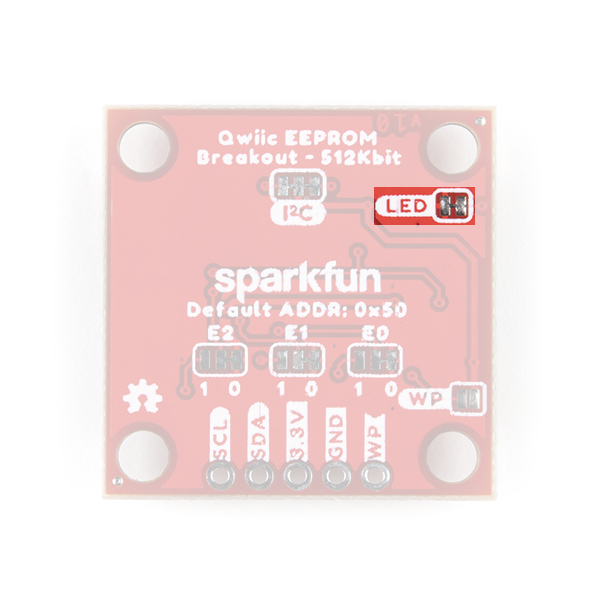
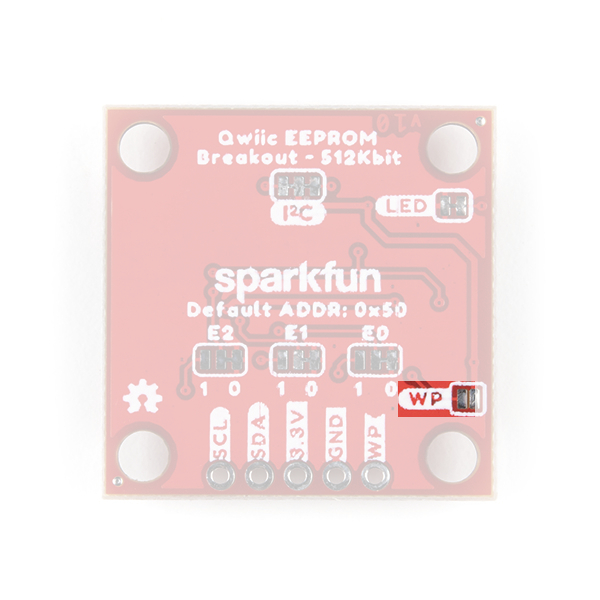
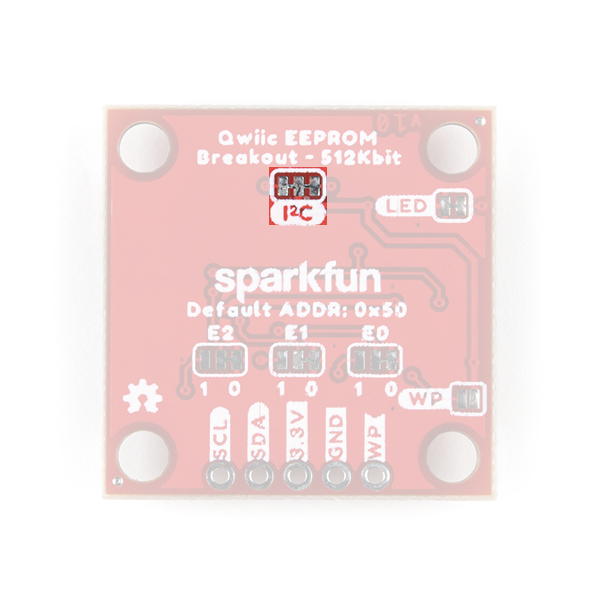
There are five jumpers on the board. Not sure how to cut or modify a jumper? Read here!
Cutting the LED jumper will remove the 1kΩ resistors and PWR LED from the 3.3V power. This is useful for low power applications.
Bridging the WP jumper will pull the pin high (to the 3.3V power) and disable any write operations.
Cutting the I2C jumper will remove the 2.2kΩ pull-up resistors from the I2C bus. If you have many devices on your I2C bus you may want to remove these jumpers.
Modifying the address jumpers (E0, E1, E2) allows users to configure the I2C address. This can be used to configure the default I2C address of the device to 1010[E2][E1][E0] (7-bit).

With the Qwiic connector system, assembling the hardware is simple. All you need to do is connect your SparkFun Qwiic EEPROM Breakout - 512Kbit to the RedBoard Qwiic with a Qwiic cable. Otherwise, you can use the I2C pins of your microcontroller; just be aware of logic levels.
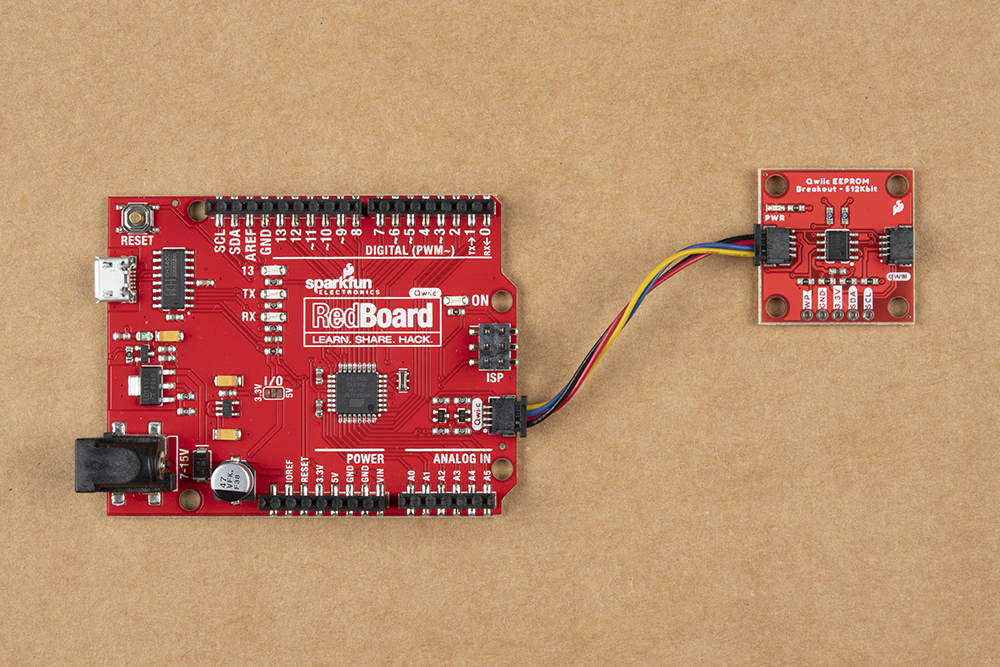
Note: This tutorial assumes users are familiar with Arduino products and are using the latest stable version of the Arduino IDE on your desktop. If this is your first time using the Arduino IDE, please review our tutorial on installing the Arduino IDE.
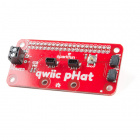
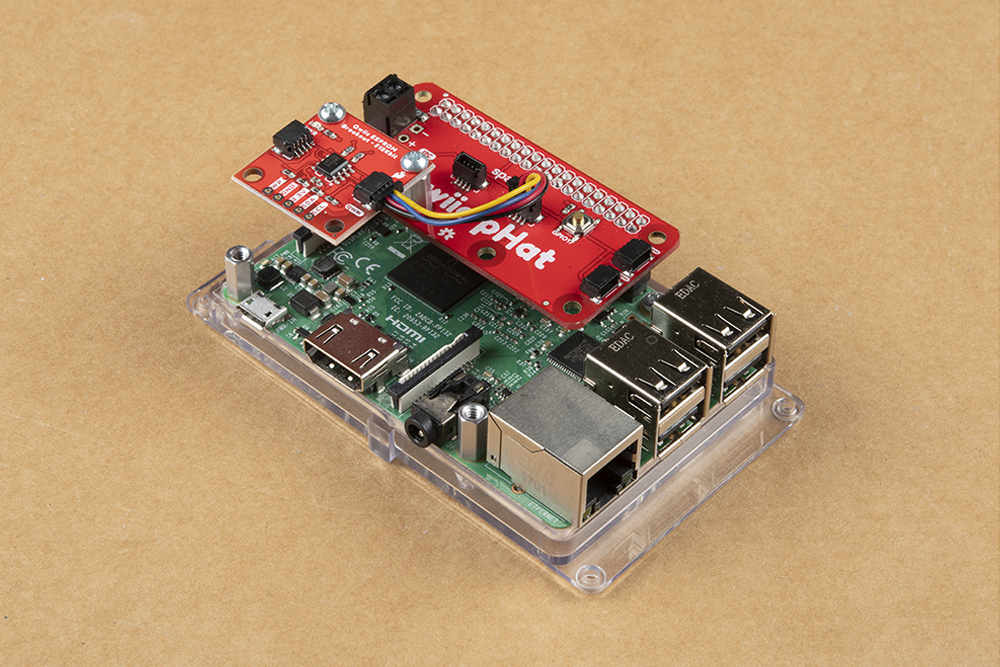
With the Qwiic connector system, assembling the hardware is simple. In addition to the SparkFun Qwiic EEPROM Breakout - 512Kbit, you will need: a Qwiic cable, a SparkFun Qwiic pHAT for Raspberry Pi, single board computer, monitor, and standard peripherals. (*If you are unfamiliar with the Qwiic pHAT, you can find the Hookup Guide here.)
There are two single board computer (SBC) options that we have tested on:

Note: Don't forget to connect any necessary peripherals, such as a monitor, keyboard and mouse, and power supply to the single board computer.
Note: This tutorial assumes users are familiar with using a Raspberry Pi and have the latest version of Raspbian OS (full... with recommended software) your Raspberry Pi. You can download the latest version of the Raspbian OS from the Raspberry Pi Foundation website.
If this is your first time using a Raspberry Pi, please head over to the Raspberry Pi Foundation website to use their quickstart guides. We have listed a few of them here:
Note: This tutorial assumes users are familiar with using a Jetson Nano and you have the latest version of L4T OS your Jetson Nano. You can download the latest version of the L4T OS from the Jetson Download Center on Nvidia's website.
If this is your first time using a Jetson Nano, please head over to the Nvidia website to use their quickstart guides. We have listed a few of them here:
Note: This example assumes you are using the latest version of the Arduino IDE on your desktop. If this is your first time using Arduino, please review our tutorial on installing the Arduino IDE. If you have not previously installed an Arduino library, please check out our installation guide.
We've written a library to easily get setup and read/write data on the SparkFun Qwiic EEPROM Breakout - 512Kbit. You can install this library through the Arduino Library Manager. Search for SparkFun External EEPROM Arduino Library and you should be able to install the latest version. If you prefer manually downloading the libraries from the GitHub repository, you can grab them here:
For more details on this Arduino library and its use, please refer to the Serial EEPROM hookup guide:
Note: This tutorial assumes you are using the latest version of Python 3. If this is your first time using Python or I2C hardware on a Raspberry Pi, please checkout our tutorial on Python Programming with the Raspberry Pi and the Raspberry Pi SPI and I2C Tutorial. Jetson Nano users can check out this tutorial on Working with Qwiic on a Jetson Nano through Jupyter Notebooks.
We've written a Python package to easily get setup and read/write data on the SparkFun Qwiic EEPROM Breakout - 512Kbit. There are two methods for installing the Python package for the Qwiic EEPROM.
The all inclusive SparkFun Qwiic Python package, is recommended as is also installs the required I2C driver as well.
Note: Don't forget to double check that the hardware I2C connection is enabled on your single board computer.
This repository is hosted on PyPi as the sparkfun-qwiic package. On systems that support PyPi installation via pip3 (use pip for Python 2) is simple, using the following commands:
For all users (note: the user must have sudo privileges):
language:bash
sudo pip3 install sparkfun-qwiic
For the current user:
language:bash
pip3 install sparkfun-qwiic
You can install the sparkfun-qwiic-eeprom Python package independently, which is hosted by PyPi. However, if you prefer to manually download and install the package from the GitHub repository, you can grab them here (*Please be aware of any package dependencies. You can also check out the repository documentation page, hosted on ReadtheDocs.):
This repository is hosted on PyPi as the sparkfun-qwiic-eeprom package. On systems that support PyPi installation via pip3 (use pip for Python 2) is simple, using the following commands:
For all users (note: the user must have sudo privileges):
language:bash
sudo pip3 install sparkfun-qwiic-eeprom
For the current user:
language:bash
pip3 install sparkfun-qwiic-eeprom
To install, make sure the setuptools package is installed on the system.
Direct installation at the command line (use python for Python 2):
language:bash
python3 setup.py install
To build a package for use with pip3:
language:bash
python3 setup.py sdist
A package file is built and placed in a subdirectory called dist. This package file can be installed using pip3.
language:bash
cd dist
pip3 install sparkfun_qwic_eeprom-<version>.tar.gz
Before we jump into getting readings, let's take a closer look at the available functions in the Python package. Below, is a description of the basic functionality of the Python package. This includes the package organization, built-in methods, and their inputs and/or outputs. For more details on how the Python package works, check out the source code and package documentation.
This Python package has a very few dependencies in the code, listed below:
language:python
import math
import time
import qwiic_i2c
import smbus2
import struct
The default variables, in the code, for this Python package are listed below:
language:python
# qwiic_eeprom GLOBAL VARIABLES
#----------------------------------------------------------------------------------------------------
# Define the device name and I2C addresses. These are set in the class defintion
# as class variables, making them avilable without having to create a class instance.
# This allows higher level logic to rapidly create a index of qwiic devices at
# runtine

# The name of this device
_DEFAULT_NAME = "Qwiic EEPROM"

# Some devices have multiple availabele addresses - this is a list of these addresses.
# NOTE: The first address in this list is considered the default I2C address for the
# device.
_AVAILABLE_I2C_ADDRESS = [0x50, 0x51, 0x52, 0x53, 0x54, 0x55, 0x56, 0x57]
language:python
# QwiicEEPROM CLASS VARIABLES
#----------------------------------------------------------------------------------------------------
memory_size_bytes = 512000 / 8
page_size_bytes = 64
page_write_time_ms = 5
poll_for_write_complete = True

I2C_BUFFER_LENGTH = 32
QwiicEEPROM() or QwiicEEPROM(address)
This Python package operates as a class object, allowing new instances of that type to be made. An __init__() constructor is used that creates a connection to an I2C device over the I2C bus using the default or specified I2C address.
A constructor is a special kind of method used to initialize (assign values to) the data members needed by the object when it is created.
__init__(address=None, i2c_driver=None):
_AVAILABLE_I2C_ADDRESS variable.qwiic_i2c.getI2CDriver(). Users should use the default I2C driver and leave this field blank.A function is an attribute of the class, which defines a method for instances of that class. In simple terms, they are objects for the operations (or methods) of the class. A list of all the available functions are detailed on the API Reference page of ReadtheDocs for the Qwiic_EEPROM_Py Python package.
In the future, changes to the Python package might be made. Updating the installed packages has to be done individually for each package (i.e. sub-modules and dependencies won't update automatically and must be updated manually). For the sparkfun-qwiic-eeprom Python package, use the following command (use pip for Python 2):
For all users (note: the user must have sudo privileges):
language:bash
sudo pip3 install --upgrade sparkfun-qwiic-eeprom
For the current user:
language:bash
pip3 install --upgrade sparkfun-qwiic-eeprom
There are several examples written for the Qwiic_EEPROM_Py Python package. They can be found in the Examples folder of the GitHub repository or view on the repository documentation page, hosted on ReadtheDocs. Users can also grab them here, using the link below. (*Please be aware of any package dependencies.):
This example is hosted on ReadtheDocs: Example 1.
In this example, various data types are written to and read from the EEPROM at different memory locations.
Users can also check out the more advanced examples below:
Below, we have also included some troubleshooting tips for issues that you may come across.
If neither of the troubleshooting guides above were able to help, here are some resources you might have missed. (Most of this material is summarized from the tutorial.)
For comprehensive information or troubleshooting issues, on the Raspberry Pi, users should check out the Raspberry Pi Foundation website and their forum.
As a general guideline, users should use the following resources when looking for technical information or assistance that is specifically related to the Raspberry Pi itself:
For comprehensive information or troubleshooting issues, on the Nvidia Jetson, users should check out the Nvidia website and their forum.
As a general guideline, users should use the following resources when looking for technical information or assistance that is specifically related to the Jetson Nano itself:
For more information on the SparkFun Qwiic EEPROM Breakout, check out the links below:
For more sensor action, check out these other great SparkFun tutorials.
learn.sparkfun.com | CC BY-SA 3.0 | SparkFun Electronics | Niwot, Colorado