Mini FET Shield Hookup Guide
This Tutorial is Retired!
This tutorial covers concepts or technologies that are no longer current. It's still here for you to read and enjoy, but may not be as useful as our newest tutorials.
 Joel_E_B
Assembly
There is no one, correct way to assemble the Mini FET Shield. It can have a variety of headers added to it to customize it for your project. However, the method we show here could be considered the "standard" assembly method.
Although this is a mini shield, it acts just like a full-sized Arduino shield. Many of the same tips and techniques covered in our Arduino shield tutorial can be applied to this shield, particularly the Installing Headers section.
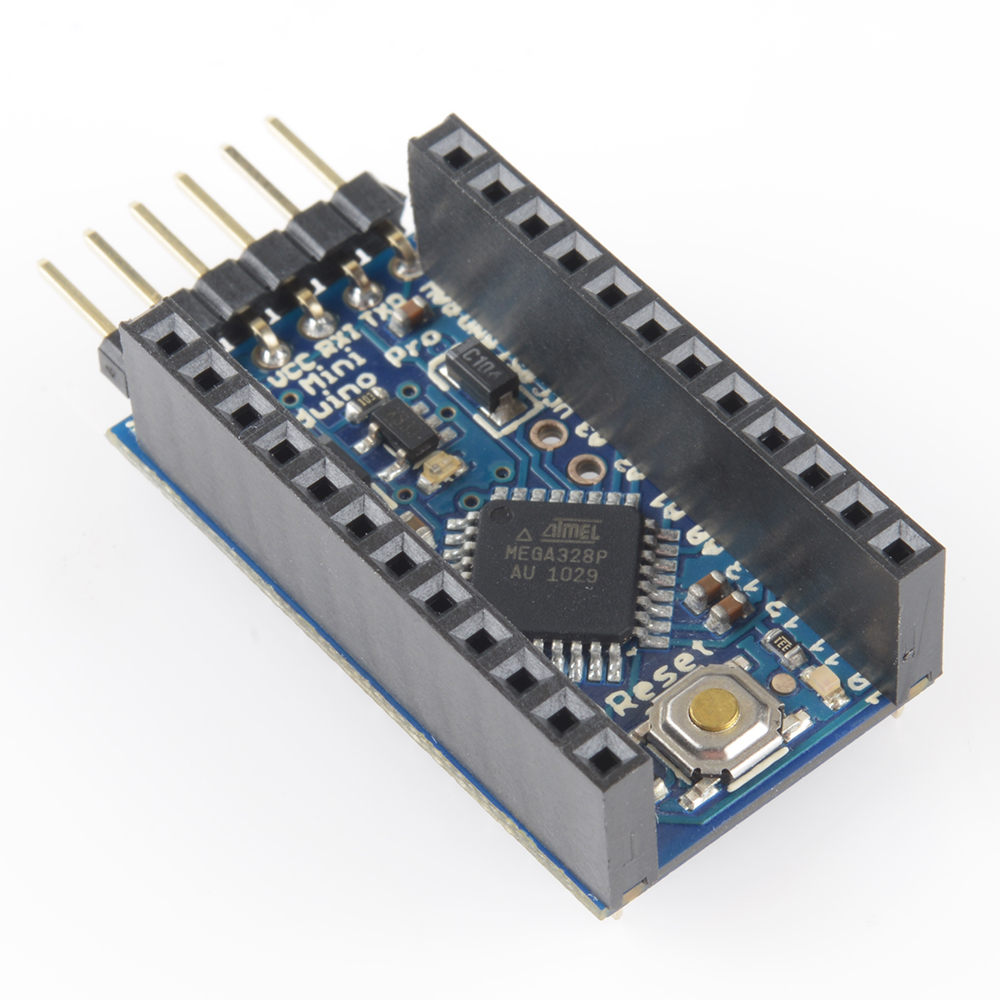
We recommend using female headers on the Pro Mini, and straight male headers on the Mini FET Shield. Alternatively, you could use machine pin female headers and machine pin male headers. They're slightly more expensive, but they'll give you a better looking final product as well as a thinner overall package.
Start by soldering the female headers to the Pro Mini. You can also add some right-angle male headers to the Pro Mini's FTDI port.
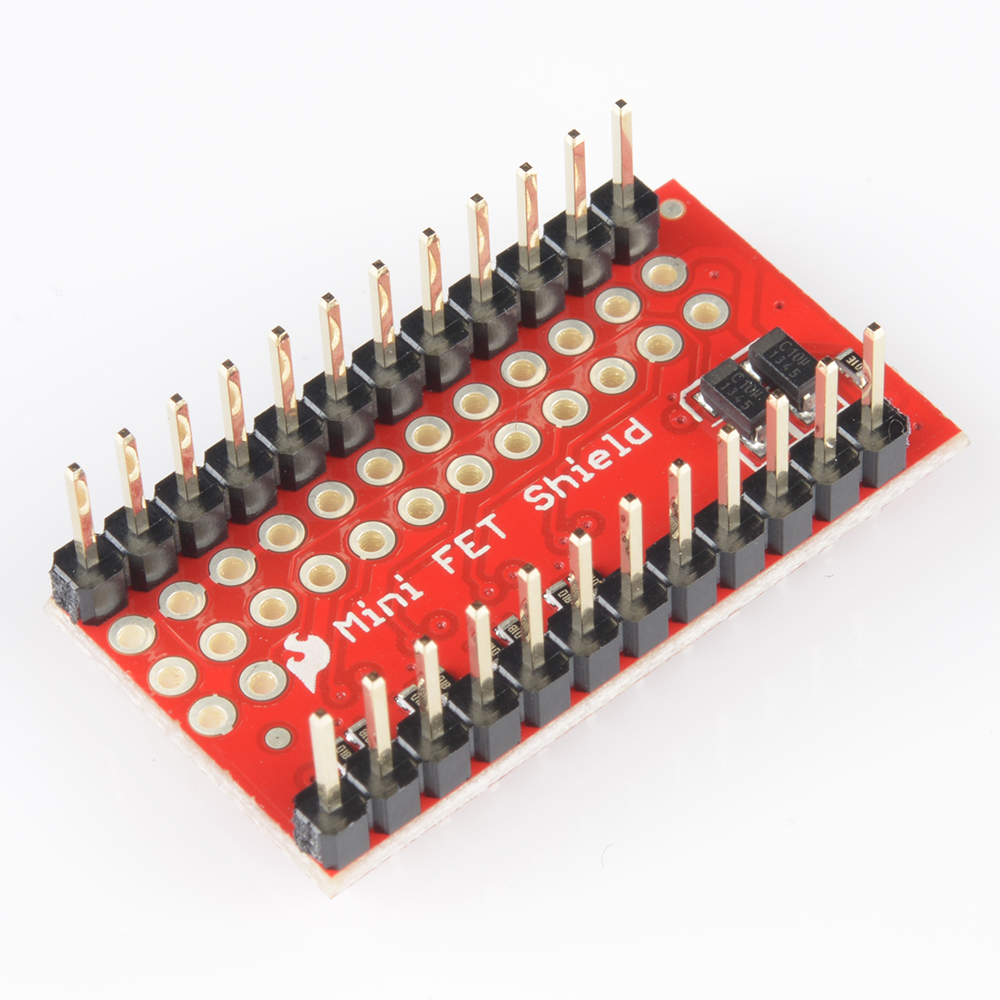
Next, solder the male headers onto the shield. Make sure the side with the MOSFET ICs is the side facing up. You can use the female headers on the Pro Mini to hold the male headers in place while you solder, just like on a full-sized Arduino.
The two should mate together like so...
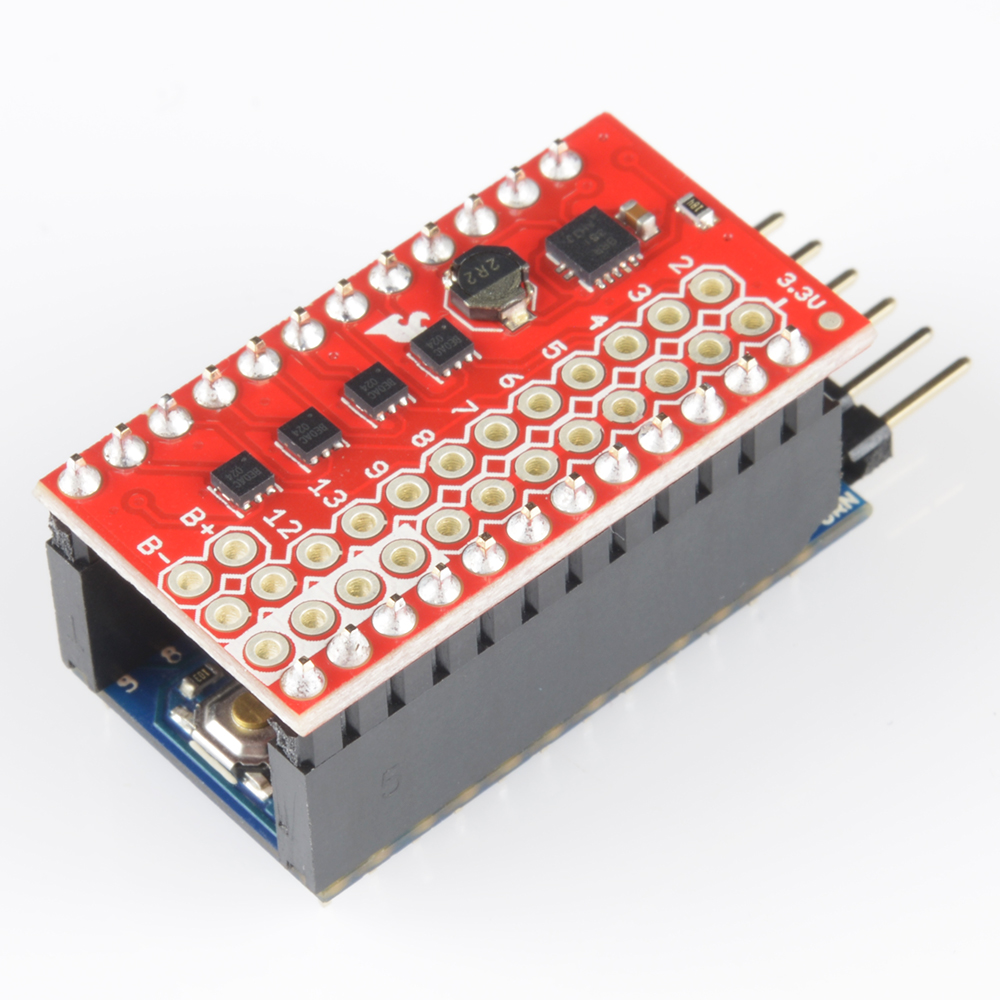
Power
Now, we need to figure out a way to power our stack. The simplest way is to just solder a right-angle JST connector directly to the B+ and B- pins. The positive and negative pins on all our LiPo batteries should line up with B+ and B- as long you solder the JST connector in the correct orientation, with the opening facing pins 8 and 9. You will also need to clip the headers on pins 8 and 9 as flush as you can if you go this route. Otherwise, the battery may not fit correctly.
Other options include using one of our many battery holders and soldering it directly to the B+ and B- pins. If you want power and charging built into one device, you could use the Power Cell. Or, if mobile power isn't what you're after, you could just attach this female barrel jack to JST adapter to the JST on B+ and B- and power it from the wall. You could also clip off the JST altogether, and solder the barrel jack directly to the board.
Peripherals
Now comes the fun part, adding all the things we want to move, spin, light up, and turn on. This is where your project may differ the most from this example. Just keep a few things in mind as you add your devices:
- The Mini FET Shield can provide a lot more current than the Arduino alone, but, it too, has limitations. Each MOSFET within each IC is rated for 5A continuous drain current and 6A if it's pulsed. Exceeding these ratings may damage the shield or the other boards attached to it. Still, 5A is a lot of current for such a tiny board!
- The more devices you hook up, the more power draw you're going to have and the quicker the battery will drain. Also keep the capacity of your battery in mind as you plan out your project.
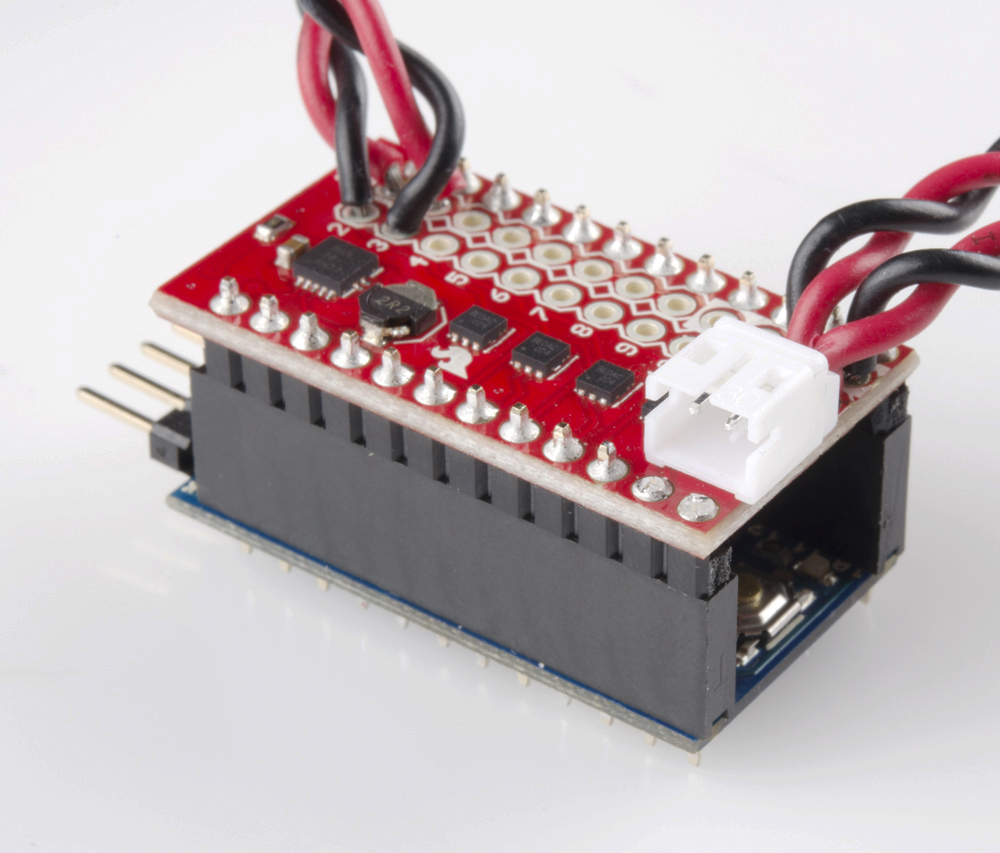
In this example, I'm going to hook up a laser and one of our many varieties of 3-12V motors* to the shield, as well as a button and switch to control them. I used some good ol' stranded wire to connect everything to the shield.
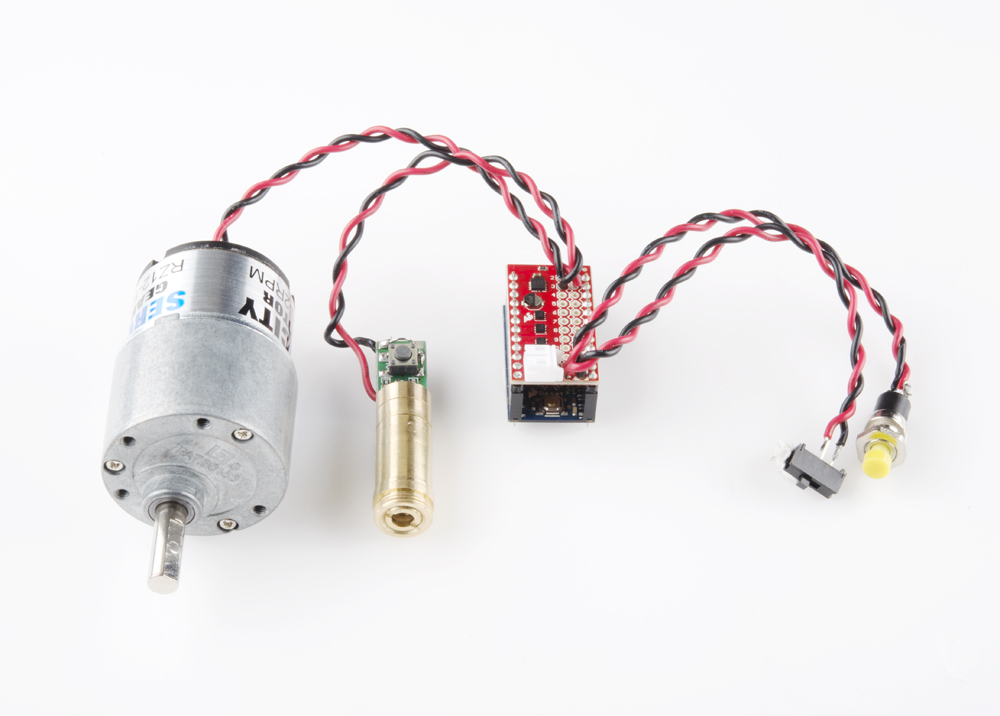
The connections in the picture above are as follows:
- Motor (+) → 3.3V
- Motor (−) → FET pin 2
- Laser (+) → 3.3V
- Laser (−) → FET pin 3
- Switch → pin 10 & GND
- Button → pin 11 & GND
*I later discovered that this particular motor does not draw a lot of current, about 10mA, which makes driving it with the Mini FET Shield a little on the overkill side. However, many DC motors will draw up to several hundred mA and will need to be driven by an external device.