Measuring Internal Resistance of Batteries
Contributors:
 Shawn Hymel
Shawn Hymel 
Build a Voltmeter
NOTE: This part is optional if you already have access to a voltmeter or multimeter. That being said, it can be fun to build a voltmeter to understand how to use an analog-to-digital converter.
Hardware Hookup
Connect the components as shown in the Fritzing diagram:
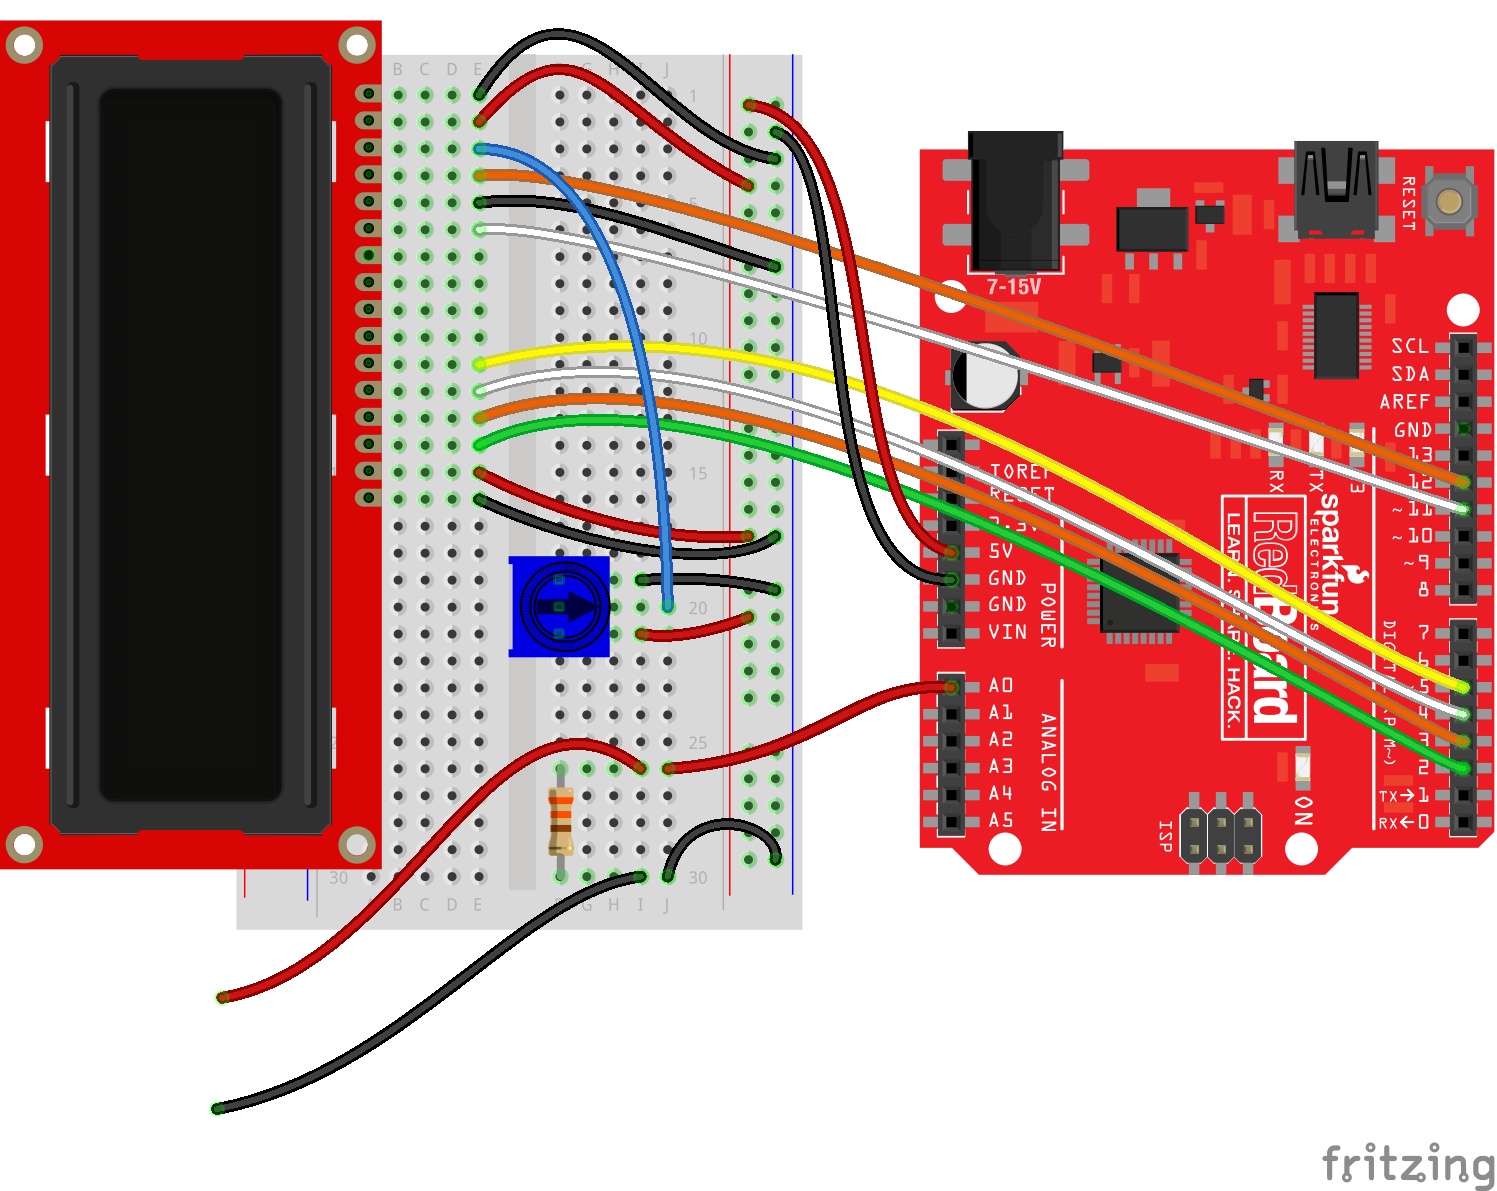
Having a hard time seeing the circuit? Click on the Fritzing diagram to see a bigger image.
Once you are done, you should have 2 wires hanging out from the side of your breadboard. These will be your probes for testing voltage across terminals.
Note that we have a 330 Ω resistor across the probes. This will act as our load for the first test.
The Code
Note: This example assumes you are using the latest version of the Arduino IDE on your desktop. If this is your first time using Arduino, please review our tutorial on installing the Arduino IDE.
If you have not previously installed an Arduino library, please check out our installation guide.language:c
/**
* SparkFun Inventor's Kit Project
* Voltmeter
* Date: May 3, 2016
*
* Description:
* Connect a resistor between A0 and GND to measure the loaded
* voltage across a voltage source, such as a battery. Remove
* the resistor to measure the open circuit voltage.
*
* NOTE: The voltmeter is only capable of sensing 0 - 5V.
*
* License:
* Public Domain
*/
#include <LiquidCrystal.h>
// Constants
int VOLTAGE_PIN = A0;
// Global variables
LiquidCrystal lcd(12, 11, 5, 4, 3, 2);
void setup() {
// Initialize the LCD and clear it
lcd.begin(16, 2);
lcd.clear();
}
void loop() {
int sensorValue;
float voltage;
// Read the analog value from A0
sensorValue = analogRead(VOLTAGE_PIN);
// Convert the analog value to a voltage
voltage = ((float)sensorValue * 5.0) / 1023;
// Display the voltage on the LCD
lcd.setCursor(0, 0);
lcd.print(voltage);
lcd.print(" V");
// Wait 200 ms before taking another reading
delay(200);
}
What You Should See
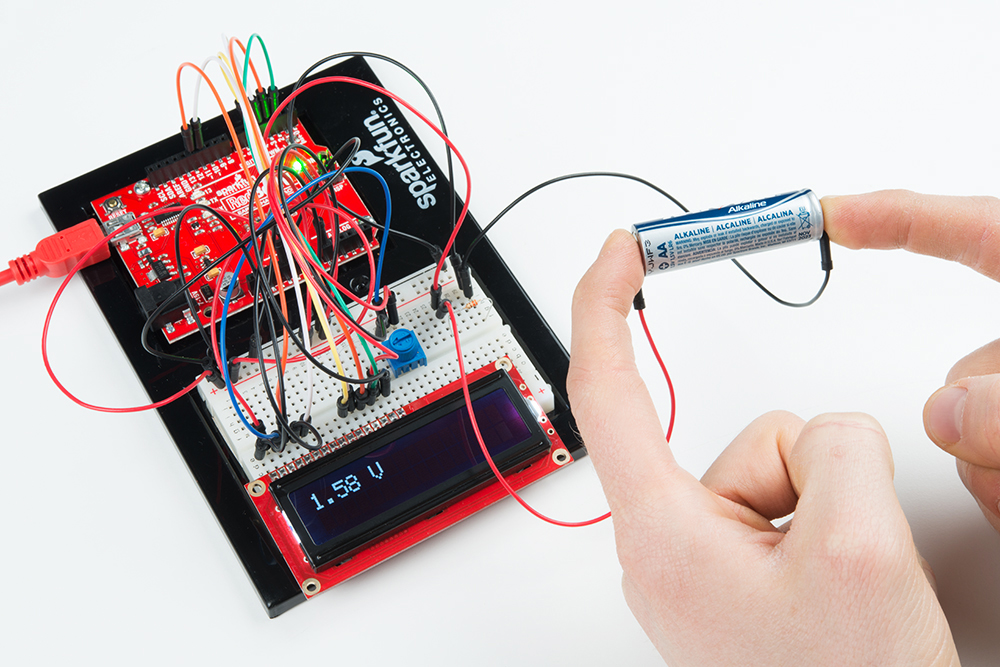
Once you have uploaded the code to the RedBoard, try touching the ends of the probes across the terminals of the AA battery. You should see a voltage reading appear on the LCD.
IMPORTANT: The voltmeter we just made cannot sense negative voltages! Make sure you touch the A0 probe (red wire) to the positive (+) terminal of the battery and the GND probe (black wire) to the negative (-) terminal of the battery.
NOTE: If you cannot see text on the LCD, try turning the potentiometer's knob to adjust the LCD's contrast.