
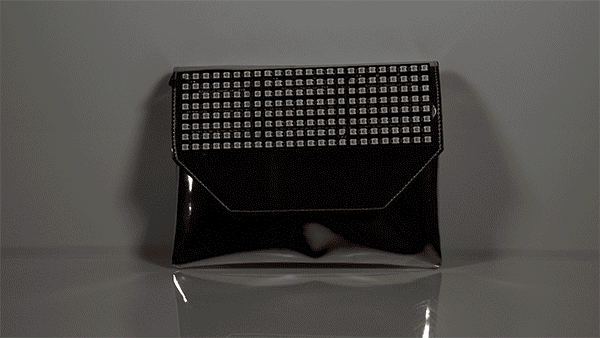
The Marquee Party Bag is a purse embedded with several LED Matrices and a Lilypad Microcontroller. The LEDs are easily programmable for the user to convey marquee messages or to simply make beautiful patterns. In this tutorial we will go through the step by step process of making this project.
To follow along with this guide, you will need the following:
If you aren't familiar with the following concepts, we recommend checking out these tutorials before continuing.
The two main components that the Marquee Party Bag use are the following:
The brains behind the Marquee Party Bag is an LilyPad Arduino USB - ATmega32U4 Board, a sewable Arduino-compatible microcontroller. It features the ATmega32U4. The LilyPad Arduino can be powered either from the USB connection or a 3.7V LiPo battery. The board runs at 3.3V; applying more voltage (e.g. 5V) to its pins may damage it.
The LilyPad Arduino uses only a single microcontroller (the Atmel ATmega32U4) to both run your sketches and communicate over USB with the computer. This means that you only need a USB cable to program the LilyPad Arduino USB (as opposed to an FTDI USB-serial adaptor as with other LilyPads). It is programmable via the Arduino IDE.
LilyPad Arduino USB - ATmega32U4 Board Technical Specifications:
| Microcontroller | ATmega32u4 |
| Operating Voltage | 3.3V |
| Input Voltage | 3.8V - 5V |
| Digital I/O Pins | 9 |
| PWM Channels | 4 |
| Analog Input Channels | 4 |
| DC Current per I/O Pin | 40 mA |
| Flash Memory | 32 KB (ATmega32u4) of which 4 KB used by bootloader |
| SRAM | 2.5 KB (ATmega32u4) |
| EEPROM | 1 KB (ATmega32u4) |
| Clock Speed | 8 MHz |
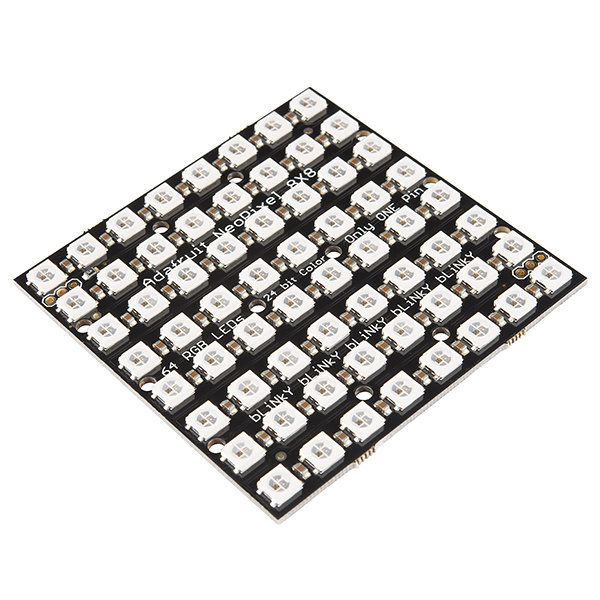
The NeoPixel NeoMatrix from Adafruit is a large board with 64 WS2812 RGB LEDs arranged in an 8x8 matrix. Each individual LED is addressable through your microcontroller.
There are two 3-pin connection ports to wire the NeoMatrix up. Solder wires to the input port, and provide 5VDC to the +5V and ground pins. Then connect the DIN pin to your microcontroller, and make a common ground from the 5V power supply to the microcontroller/Arduino.
Additionally, you can chain as many NeoMatrix panels together as you’d like. For the second panel, connect the DIN connection to the first panel’s DOUT. Connect the ground pins together and power with 5V.
Please refer to the NeoPixel Überguide for a more in depth view of Neopixels.
To build your own Marquee Party Bag at home, you will need to collect all of your supplies fist.
The following diagram illustrates the circuit we will be putting together visually.
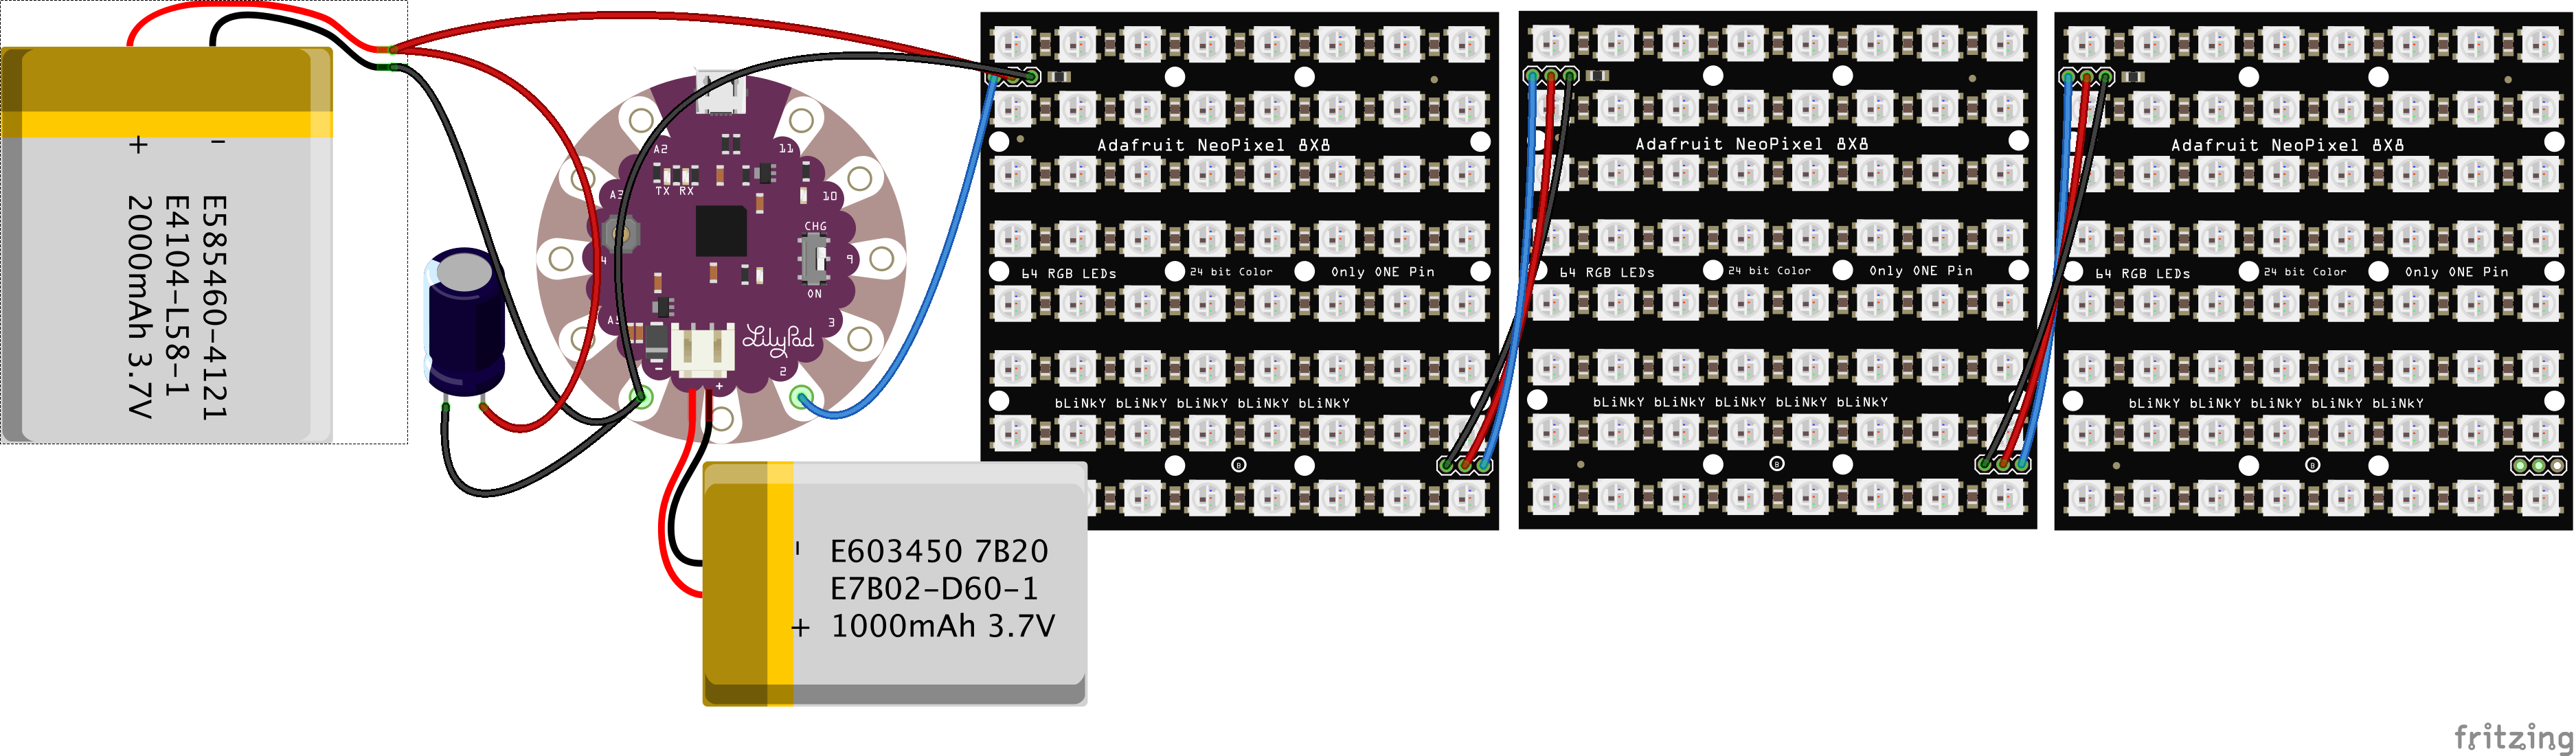
Start by plotting out the position of your three matrices.
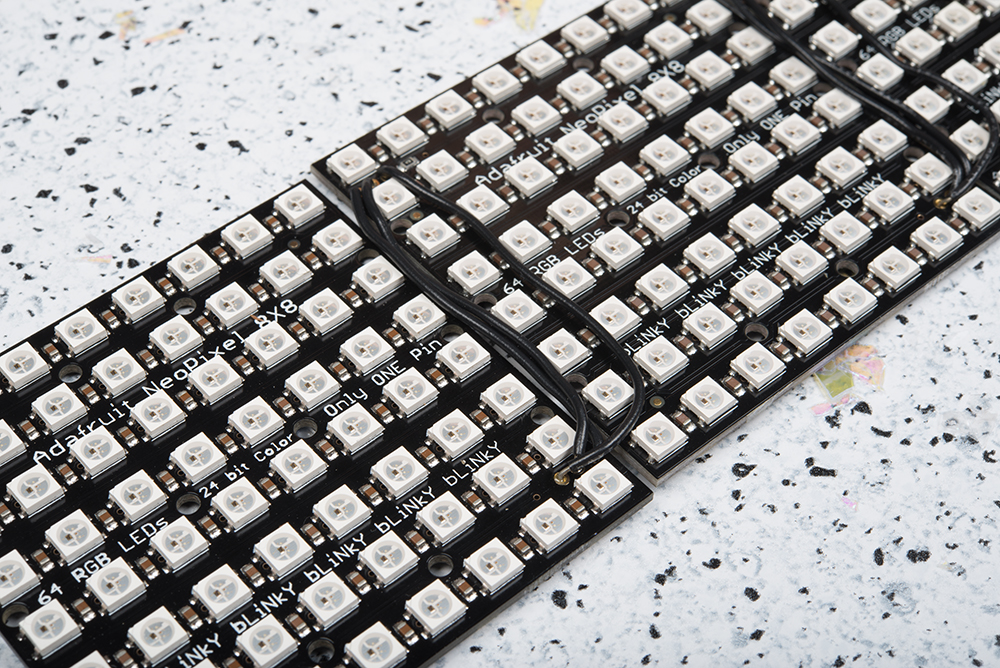
Solder the matrices in a row according to the Fritzing diagram above. I used all black wires to make them as invisible as possible.
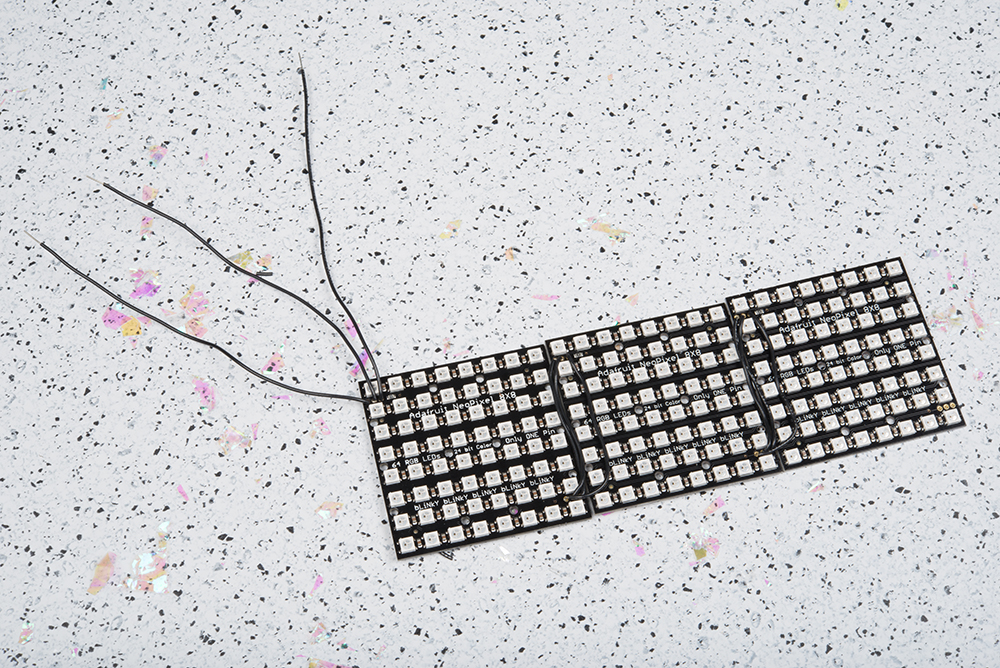
When you finish this step, your three matrices should look like this:
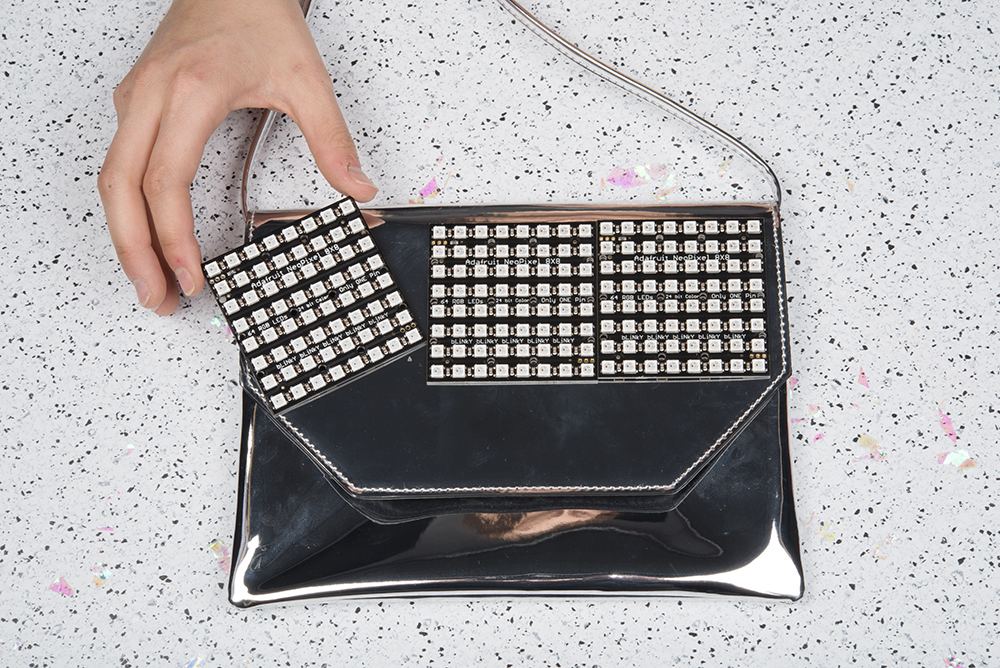
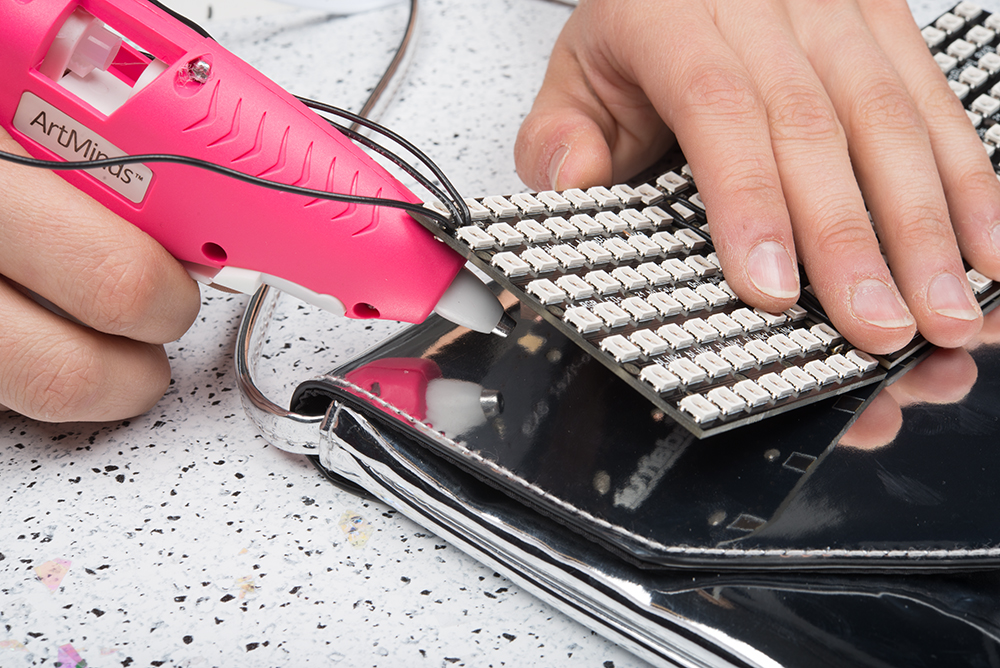
Use your hot glue gun to glue the matrices onto the front of your bag.
Bend the three hook up wires from the first matrix around to the inner flap of the bag, and solder your connections according to the Fritzing Diagram above.
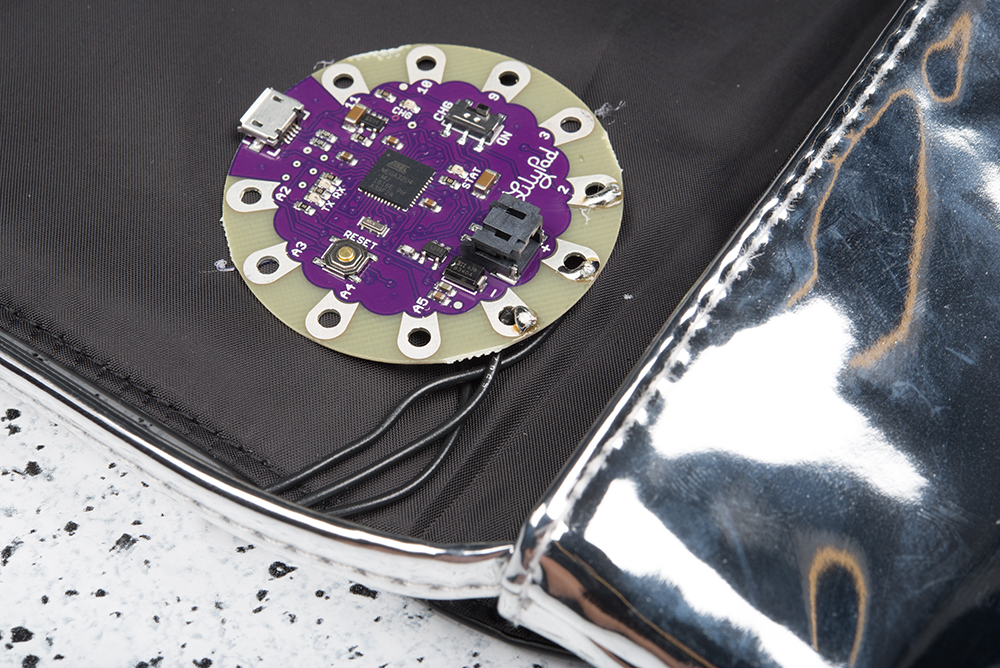
This inside flap of your bag should look something like this when you are done:

Now our circuit is done, and it's time to move onto programming.
The LilyPad Arduino USB - ATmega32U4 Board is programmable via the Arduino IDE. If this is your first time using Arduino, please review our tutorial on installing the Arduino IDE.
If this is your first time working with neopixels, you will also need to download the Adafruit Neopixel Library. For Arduino IDE users, click on the button below to download a copy of the NeoPixel library along with some example code SparkFun has created.
If you have not previously installed an Arduino library, please check out our installation guide.
I am providing two separate programs for you to work with:
The first is the Marquee option. I have added a handful of comments in the code to show you how and where to edit for customization.
language:c
//Marquee Party bag by Melissa Felderman for SparkFun Electronics.
// Based on Adafruit_NeoMatrix example for single NeoPixel Shield.
// Scrolls 'PARTY BAG!' across the matrix in a landscape (horizontal) orientation.

#include <Adafruit_GFX.h> //include graphics library
#include <Adafruit_NeoMatrix.h> //include neopixel matrix library
#include <Adafruit_NeoPixel.h> //include neopixel library
#ifndef PSTR
 #define PSTR // Make Arduino Due happy
#endif

#define PIN 2

Adafruit_NeoMatrix matrix = Adafruit_NeoMatrix(8, 8, 3, 1, PIN,
  NEO_MATRIX_TOP     + NEO_MATRIX_LEFT +
  NEO_MATRIX_ROWS + NEO_MATRIX_PROGRESSIVE,
  NEO_GRB            + NEO_KHZ800);

//Inlcude the colors that you would like your writing to reflect in the colors array
const uint16_t colors[] = {
  matrix.Color(255, 0, 0), matrix.Color(0, 255, 0), matrix.Color(0, 0, 255) };


void setup() {
  matrix.begin();
  matrix.setTextWrap(false);
  matrix.setBrightness(40);
  matrix.setTextColor(colors[0]);
}

int x    = matrix.width();
int pass = 0;

void loop() {
  matrix.fillScreen(0);
  matrix.setCursor(x, 0);
  matrix.print(F("PARTY BAG!")); //replace 'PARTY BAG!' with your personal message
  if(--x < -36) {
    x = matrix.width();
    if(++pass >= 3) pass = 0; //if you included more than three colors in the color array, change the number in the if statement to reflect that amount
    matrix.setTextColor(colors[pass]);
  }
  matrix.show();
  delay(100);
}
The second is a simple rainbow cycle.
language:c
//rainbow LED bag by Melissa Felderman for Spsarfun
//This sketch is an edited version of the Adafruit Neopixel Strand Test example code from the Neopixel Library.

#include <Adafruit_NeoPixel.h>
#ifdef __AVR__
  #include <avr/power.h>
#endif

#define PIN 2


Adafruit_NeoPixel strip = Adafruit_NeoPixel(198, PIN, NEO_GRB + NEO_KHZ800);


void setup() {
  // This is for Trinket 5V 16MHz, you can remove these three lines if you are not using a Trinket
  #if defined (__AVR_ATtiny85__)
    if (F_CPU == 16000000) clock_prescale_set(clock_div_1);
  #endif
  // End of trinket special code


  strip.begin();
  strip.show(); // Initialize all pixels to 'off'
}

void loop() {


  rainbow(20);
  rainbowCycle(20);
  theaterChaseRainbow(50);
}


void rainbow(uint8_t wait) {
  uint16_t i, j;

  for(j=0; j<256; j++) {
    for(i=0; i<strip.numPixels(); i++) {
      strip.setPixelColor(i, Wheel((i+j) & 255));
    }
    strip.show();
    delay(wait);
  }
}

// Slightly different, this makes the rainbow equally distributed throughout
void rainbowCycle(uint8_t wait) {
  uint16_t i, j;

  for(j=0; j<256*5; j++) { // 5 cycles of all colors on wheel
    for(i=0; i< strip.numPixels(); i++) {
      strip.setPixelColor(i, Wheel(((i * 256 / strip.numPixels()) + j) & 255));
    }
    strip.show();
    delay(wait);
  }
}


//Theatre-style crawling lights with rainbow effect
void theaterChaseRainbow(uint8_t wait) {
  for (int j=0; j < 256; j++) {     // cycle all 256 colors in the wheel
    for (int q=0; q < 3; q++) {
      for (int i=0; i < strip.numPixels(); i=i+3) {
        strip.setPixelColor(i+q, Wheel( (i+j) % 255));    //turn every third pixel on
      }
      strip.show();

      delay(wait);

      for (int i=0; i < strip.numPixels(); i=i+3) {
        strip.setPixelColor(i+q, 0);        //turn every third pixel off
      }
    }
  }
}

// Input a value 0 to 255 to get a color value.
// The colours are a transition r - g - b - back to r.
uint32_t Wheel(byte WheelPos) {
  WheelPos = 255 - WheelPos;
  if(WheelPos < 85) {
    return strip.Color(255 - WheelPos * 3, 0, WheelPos * 3);
  }
  if(WheelPos < 170) {
    WheelPos -= 85;
    return strip.Color(0, WheelPos * 3, 255 - WheelPos * 3);
  }
  WheelPos -= 170;
  return strip.Color(WheelPos * 3, 255 - WheelPos * 3, 0);
}
When you are ready, pick your program, copy it, and paste it into a new window in your Arduino IDE. Make sure the correct board is selected by going to Tools > Board > Lilypad Arduino USB. Then, connected your Lilypad to your computer via USB. Turn the Lilypad on, and select the active port from Tools > Port. Now all you need to do is upload the program to your Lilypad by hitting the upload button!
Now that you've successfully made your own Marquee Party Bag, it's time to design your own LED animation! If you'd like to learn more about Neopixels, you should check out the Adafruit NeoPixel Überguide.
Need some inspiration for your next project? Check out some of these related tutorials:
learn.sparkfun.com | CC BY-SA 3.0 | SparkFun Electronics | Niwot, Colorado
