Light Up Silk Flower Corsage
Introduction
Create a one of a kind corsage that can change color to match your ensemble! This project explores one option for creating an accessory with the Silk Flower LED - an organza flower with a built-in common cathode 5mm RGB LED. We'll be showing you how to make a corsage with it, but this circuit could also be built into a headband, brooch, or other small accessory.
We'll be attaching a switch to each powered leg of the LED - red, green, and blue - to control them individually. This allows us to mix up to 7 colors - red, green, blue, yellow, cyan, purple, and white - depending on the combination of switch states.
Suggested Reading
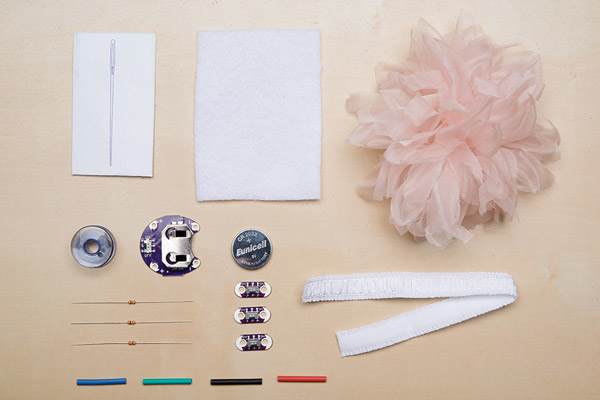
Materials and Tools
Let's gather up the materials we'll need to put together this project:
If you don't like the look of this particular silk flower, you can also craft your own by gluing a 5mm common cathode LED into a silk flower of your choice. Check out our wishlist for the DIY flower version.
We'll be soldering for part of this project, so you'll need a soldering station/setup. Here's our suggestion if you don't have one:
Additional Materials:
- Heat shrink (or some kind of insulator such as electrical tape) in red, green, blue, and black or a color than can be easily labeled/marked on
- Felt or sturdy fabric ~2"x4" to sew electronics to
- Decorative elastic or ribbon, cut to wrist size
- Hot glue gun (and glue)
- Needle nose pliers
- Scissors
- Additional decorative accents - smaller fake flowers, ribbon, etc to hide battery holder and add finishing touches to corsage
Prep LED Flower
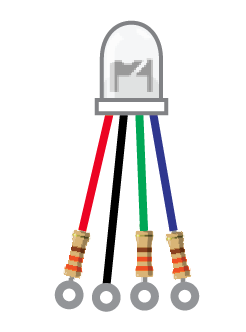
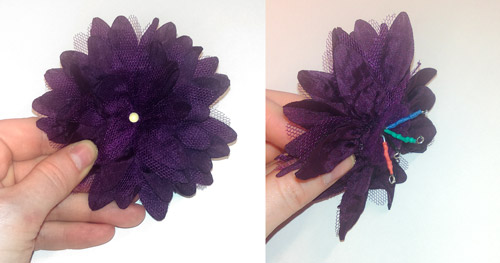
The Silk Flower LED is an RGB LED stuck through the middle of a decorative flower. As it comes, it is not quite ready to be sewn into a project. We'll be doing some prep work by soldering resistors to the three LED wires and creating sewable loops. It will end up looking something like this:
Identify LED Legs
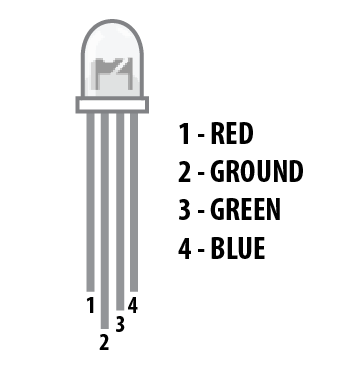
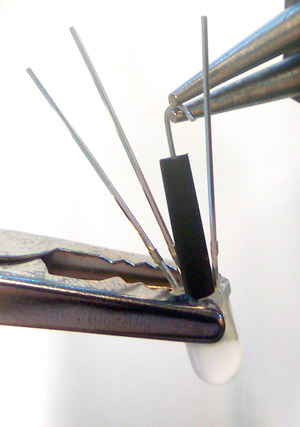
Before we do any soldering, we'll have to keep track of which legs on the LED go to which color in the LED. This is a common cathode LED, meaning all 3 LEDs inside share one ground wire. Find wire 2 (the longest wire) - this is the ground wire. Gently bend the wires away from each other so they are easier to access when soldering.
If you don't have heat shrink, you can also wrap electrical tape tightly around the wires or paint them with white liquid electrical tape and color with permanent markers after soldering.
Soldering
Cut a small piece of heat shrink that will cover all but the last 1/4" of wire and slip it over the GROUND wire. Use a pair of needle nose pliers to curl the end of the wire into a loop. Double check that the loop is big enough for your needle and thread, then solder closed.
Now we have an easy to sew loop for attaching the wire to our conductive thread. Finish the process by setting the heat shrink - use a heat gun or hold the side of the soldering iron close to (but not touching) the tube until it shrinks around the wire.
We'll repeat the process with the other three LED legs, but this time we'll attach a current limiting resistor. Feel free to clip the LED legs a little shorter at this point since the resistor will add some additional length.
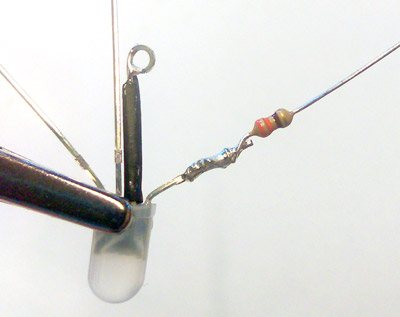
Wrap one wire of the resistor around a leg of the LED. Solder the two wires together.
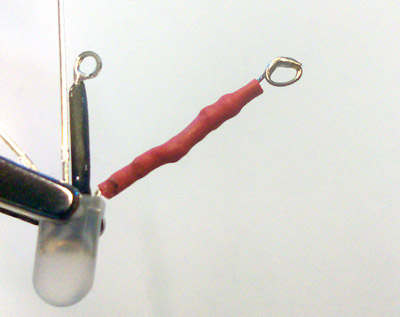
Then cover both the wire and resistor with a length of heat shrink. Bend the remaining wire on the resistor into a loop and solder closed. Finish by setting the heat shrink. We used heat shrink colors that match the LED - red, green, and blue.
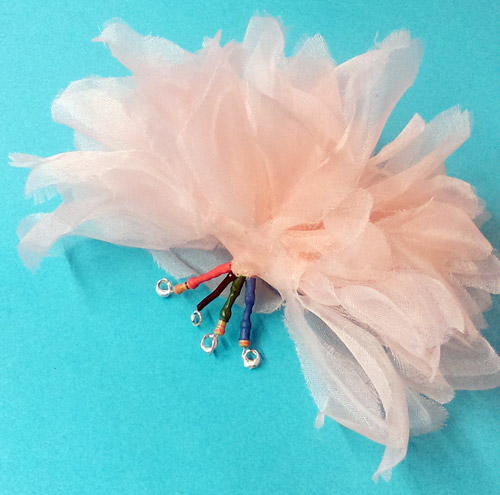
The finished flower should look something like this:
DIY Flower
To create your own LED flower, carefully cut a hole in the center of a fabric flower and glue the LED in place.
Circuit Layout
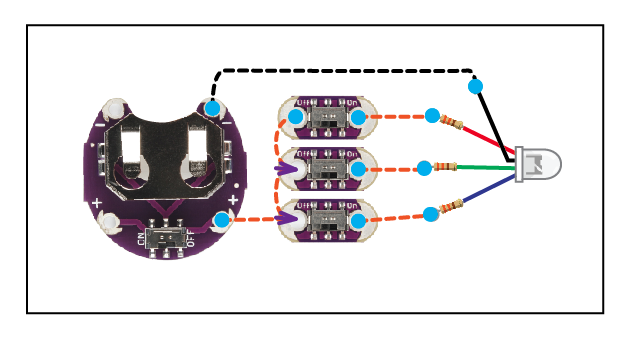
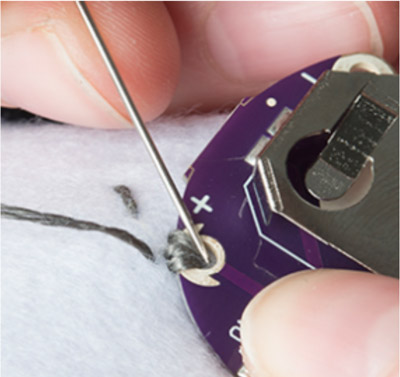
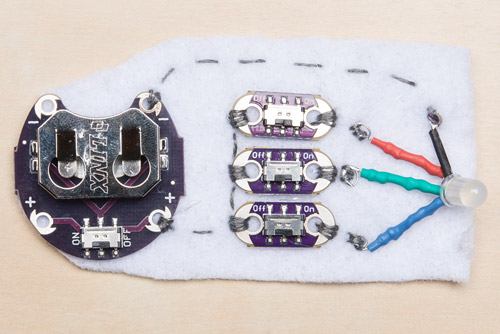
Time to put our circuit together. Cut a piece of felt big enough to attach all the components, approximately 2" x 4". With conductive thread, attach all components as shown in the diagram. Make sure to leave enough space so that thread paths don't accidentally touch each other.
Each LED will connect to a LilyPad Switch to turn them on/off. The other sides of the switches connect to the positive hole of the battery holder. The ground wire of the LED connects to the negative hole on the battery holder. You will need to carefully bend the ground wire over across the red LED wire towards the top edge of the felt.
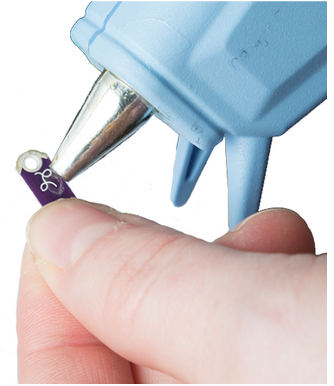
After stitching, make sure to snip any thread tails and check for short circuits. If needed, insulate any areas where threads may be close with hot glue or clear nail polish. Your circuit should look something like this:
Finishing Touches
Once all your stitching is done, insert the coin cell battery, and test out your circuit. Try each switch to see the combinations of colors you can create.
To finish the project, measure a length of elastic ribbon that will fit comfortably around your wrist, and hot glue to each end of the felt. Embellish with additional flowers, ribbon, or other decorative accents to hide the switches and battery holder. Make sure to leave access to the switches and enough room to slide the battery in and out of the holder.
As added protection for the thread and for comfort while wearing, line the back of the project with a scrap piece of fabric or cover the conductive thread with a thin layer of hot glue.
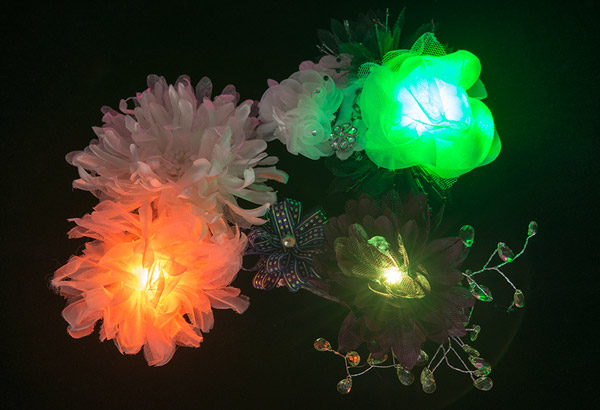
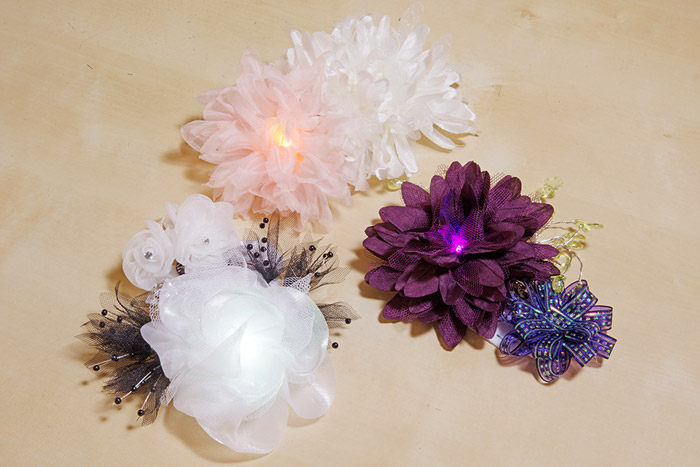
Here are some examples of corsages that we made:
Resources and Going Further
Looking for more LilyPad projects? Here are some other e-textiles projects to try:
