Making Custom Footprints in EAGLE
 Joel_E_B,
  TheoS
TheoS 
Creating a Bitmap Image of the Footprint
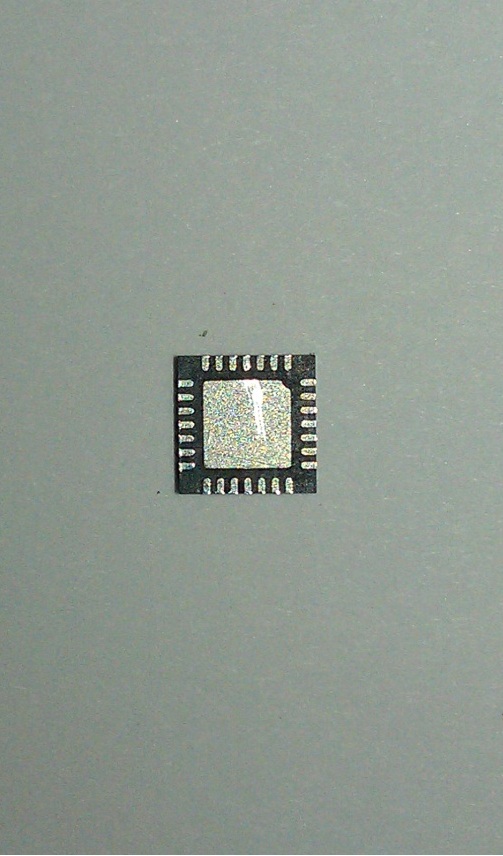
The first step is the creation of a monochromatic Bitmap (*.bmp) image of the part you are customizing. Eagle really only likes to import images with solid colors, and black and white works very well. In this tutorial I will be using a Microstep Motor Driver (IC A4983SETTR-T) in a 28-QFN package. This IC can be found on the Quadstepper Motor Driver Board.
Using the macro setting on a digital camera (I recommend 8Mp or higher) take a picture of the underside of your part (where the legs or pads will be touching your board).
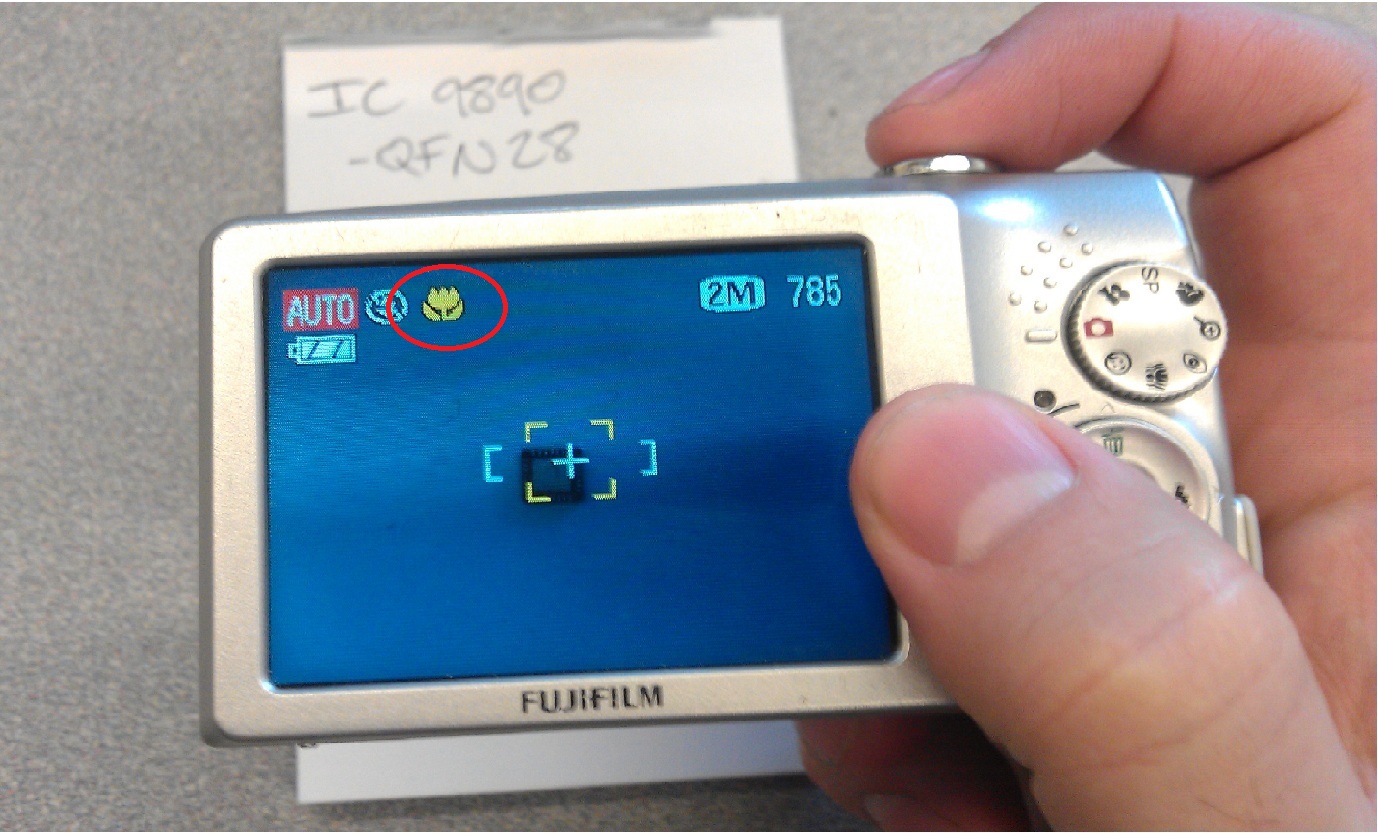
Try to position the part as straight and as centered as possible in the camera lens so that there will be less correction needed later. Use flash if necessary, but try to minimize shadows as much as possible.
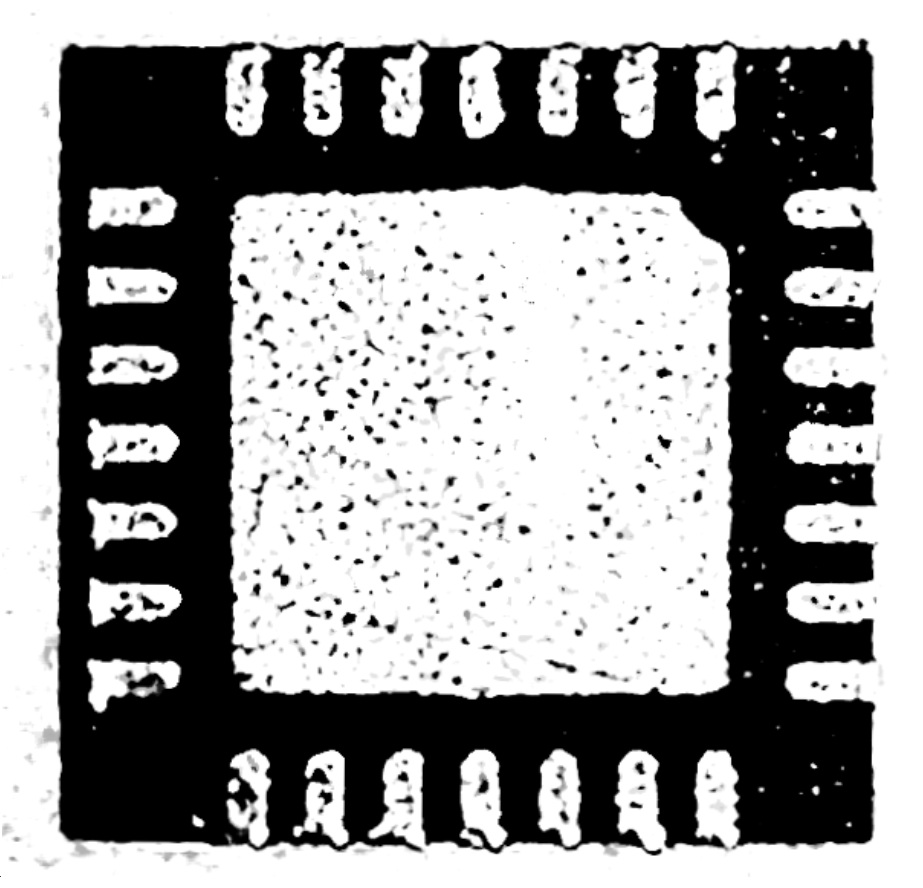
Once a picture of your liking has been taken, it's time to correct it, convert it to a Bitmap, and prepare it to be imported into Eagle. I used a program called Digital Photo Professional, because I like that it has a grid feature, but any program with an incremental rotate function and a saturation and contrast adjustment will work.
The goal is to make sure the part is absolutely straight/square in the frame so that it will be on-grid for Eagle.

Next, adjust the contrast (usually higher) and the saturation (always as low as it can be) to get the picture as close to black and white as possible.
At this point, it's a good idea to save a new version of the picture, and open that with the Windows default MS Paint, or something similar in Mac OS.
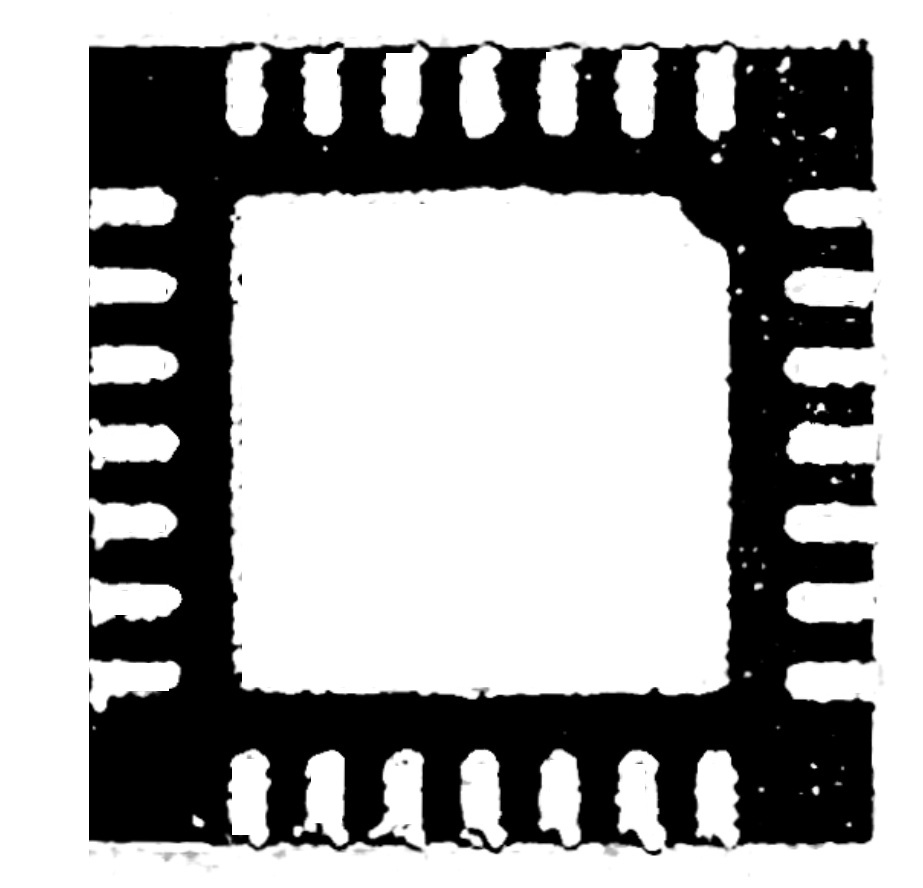
To clean up the shadows, use the CUT function (ctrl + X). Notice the righthand side, the black body is flush with the white pad. That is how you want the lefthand side to be as well. Simply highlight along the edge of the pads, and cut the shadow off.
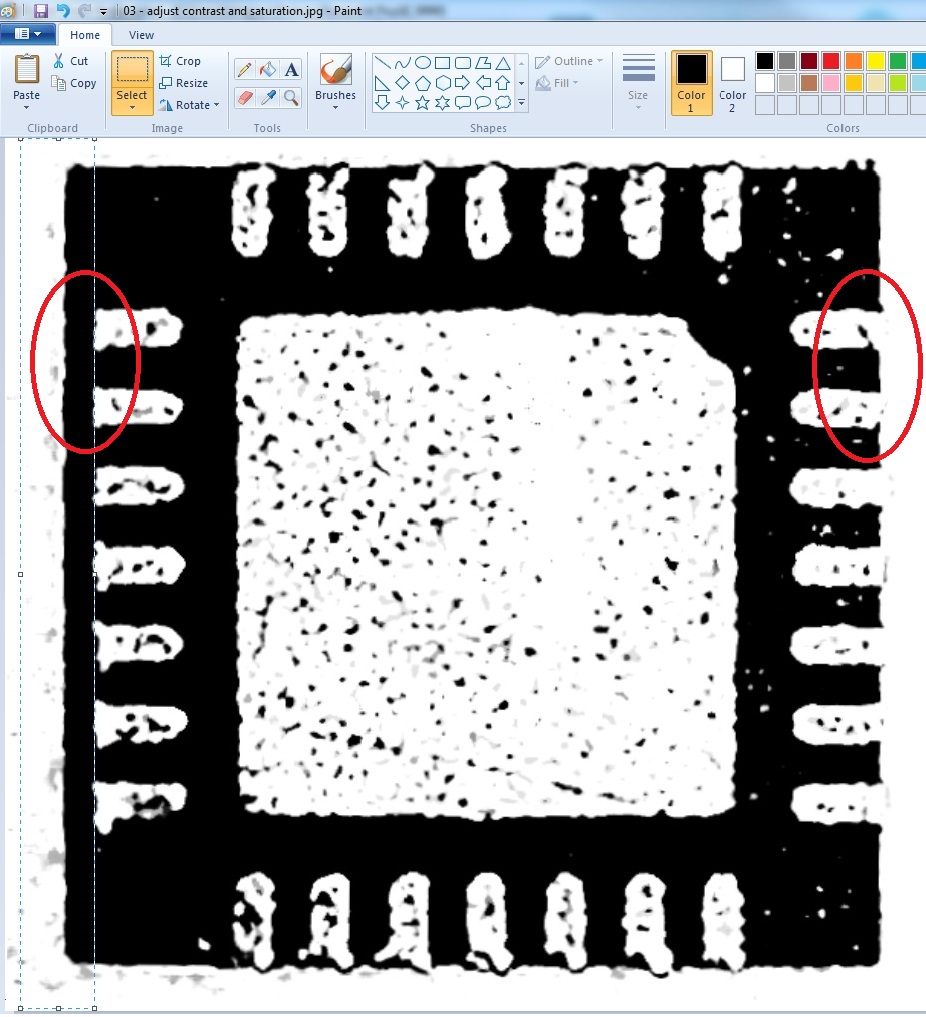
After that, use the ERASE tool to clean up the stray bits of black as much as possible. We want the white in the picture to be the metal pads, and we want them to be as clear as possible. This helps immensely when imported into Eagle, and it prevents a lot of confusion later on. The more pixels that are fixed now, the less time there will be spent trying to figure out where pads begin or end in Eagle.
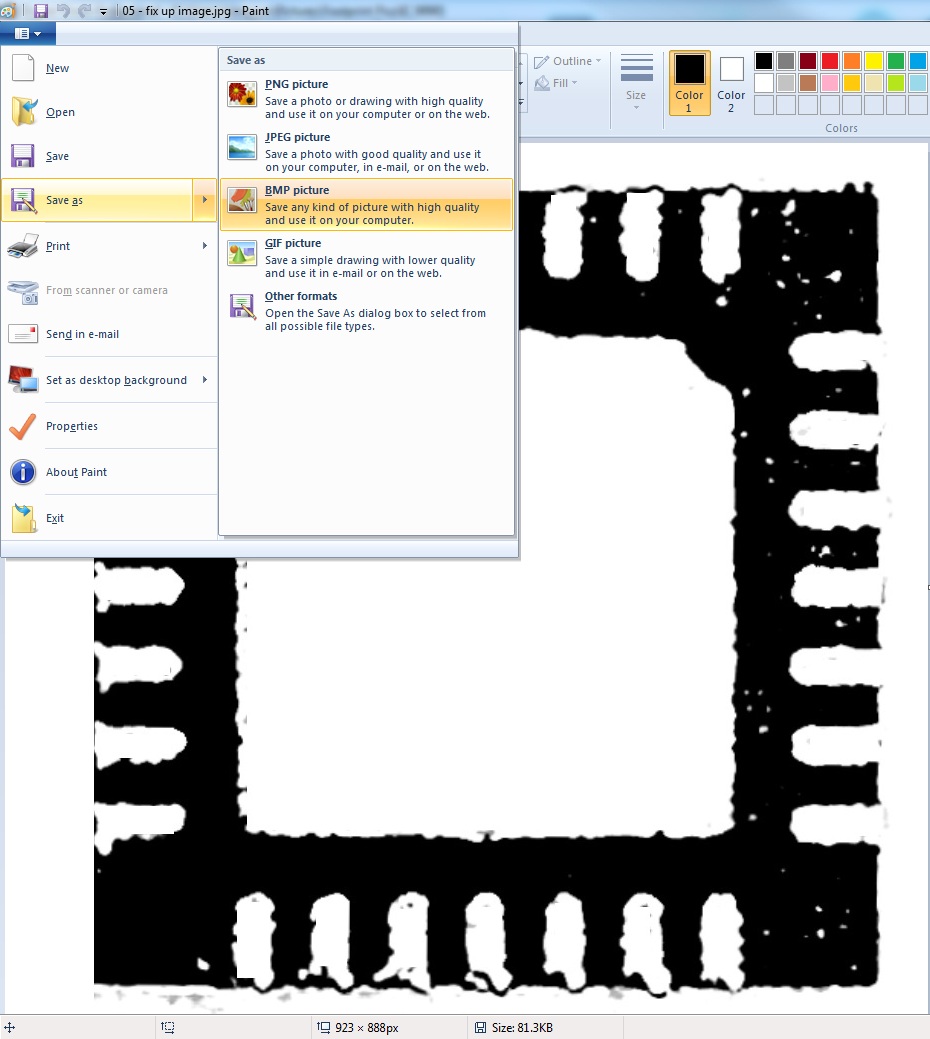
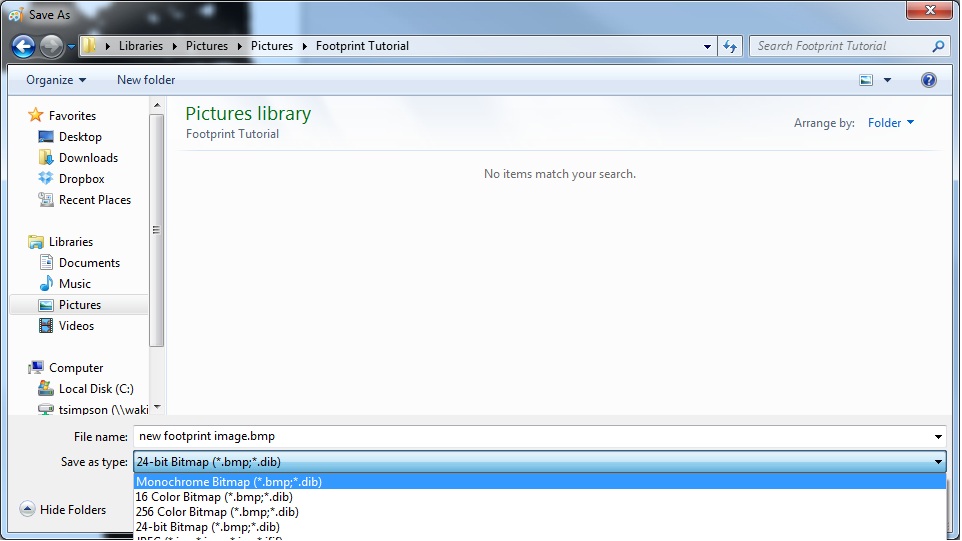
Saving the image as a monochromatic BMP is the easiest way to convert the picture into a usable form for Eagle.Click File → Save-As → and select Monochromatic Bitmap. Some programs have a dropdown menu, and this can be selected under “Type”.
Now you have a single-layer (monochromatic), black and white Bitmap image or your part, ready to be inserted into Eagle.