Ludus Protoshield Hookup Guide
This Tutorial is Retired!
This tutorial covers concepts or technologies that are no longer current. It's still here for you to read and enjoy, but may not be as useful as our newest tutorials.
View the updated tutorial: Wireless Motor Driver Shield Hookup Guide
Hardware Overview
There are two versions of the Ludus Shield available: SparkFun Ludus ProtoShield and Ludus ProtoShield Wireless! First, let's have a look at the hardware that they have in common.
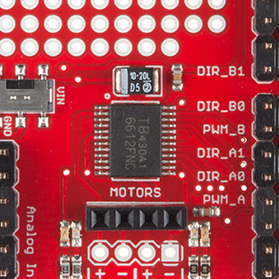
The heart of both versions of the Ludus ProtoShield is an H-Bridge Motor Driver. This allows the ProtoShield to drive two DC motors at once in both directions and even brake electronically. This H-Bridge Driver in particular, the TB6612FNG, is rated up to 1.2A per channel at 13V which means it will drive a fairly beefy hobby motor. This makes it ideal for small rover-style robots and kinetic sculptures.
Another feature that both versions have in common is the addition of power (PWR) and ground (GND) rails alongside the GPIO pins. Not only does this help you to avoid the common inconvenience of running out of GND and PWR pins, but because the pins are arranged with PWR in the center, plugging in servos is a snap! The PWR rail can even be switched between 5V (from the Arduino's voltage regulator) and Vin using the on board slide switches.
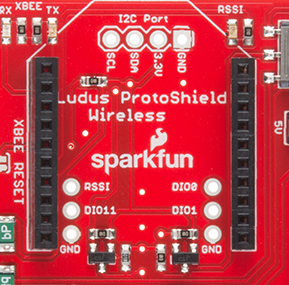
The difference between the two boards is that the standard Ludus ProtoShield includes an I2C header whereas the Ludus ProtoShield Wireless adds to that an XBee socket.
The I2C header on the standard Ludus ProtoShield is laid out so that you can plug in a device such as a Triple Axis Magnetometer or even the 9DOF Sensor Stick. With these sensors it's possible to set up a dead reckoning navigation system.
If autonomy isn't your thing, though, the Ludus ProtoShield Wireless is perfect for setting up XBee based remote control. Simply plug an XBee radio module into the socket on the shield, and you're ready to transmit wireless data using the common zigbee standard!

