LilyPad Simple Power Hookup Guide
 Toni_K
Hardware Hookup
In our example, we are going to assume you are powering a basic LilyPad LED. However, you can use the Simple Power to power a LilyPad Main board, or various other products.
One thing to note about the Simple Power- it is designed for e-textile applications, but you can solder to the board. Just keep in mind it's going to take more solder and more heat to attach wires to the sew taps.
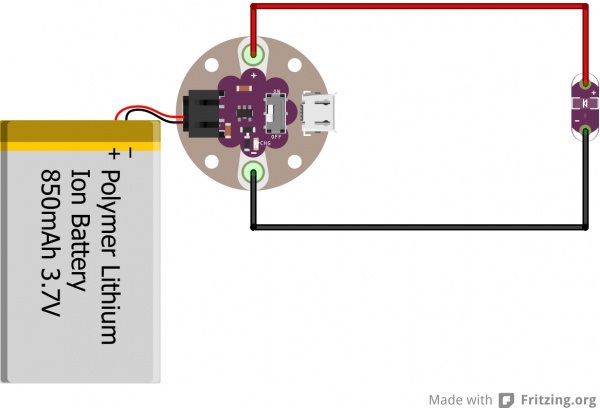
Find the '+' terminal on the Simple Power and run a stitch/wire to the '+' sew tap on the LED (or whatever board you are powering). Then run a wire or stitch from the '-' terminal on the Simple Power to the '-' sew tap on the LED. If you are using conductive thread, make sure you don't let the two lines touch! This will short out your battery, possibly short out your Simple Power, and you'll have a bad time.
Once your boards are connected, plug in your battery, and flip the Simple Power switch to the 'on' position. Bask in that happy LED glow!
Charging the Battery
If your battery runs down, have no fear! Simply plug in a microUSB cable into your computer and also into the LilyPad Simple board, and have some patience. There's a yellow LED that indicates when the board is charging the battery. The board may also get warm while charging, but this is totally normal. Charging times will vary depending on the capacity of the battery connected to the Simple Power.