LDK Experiment 4: Make Your Own Button
 Dia
Dia 
Constructing the button
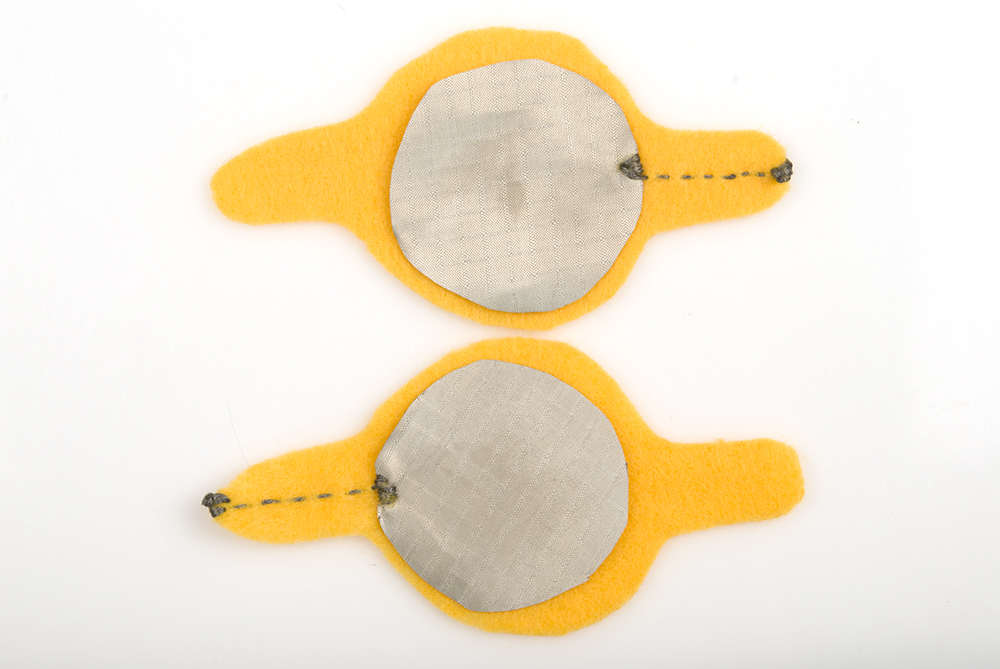
With a small dot of glue, affix one conductive circle to the center of the circle of each exterior piece. You should be able to sandwich these so that the felt shapes match up and the two conductive circles touch. With your conductive thread, sew a couple of stitches into the edge of one of the conductive circles, close to one of the tabs. You’re trying to establish a conductive connection between the thread and the fabric, so make these stitches neat and tight. Sew from the edge of the fabric out to the tip of the tab, and sew several stitches into the felt. You’re creating a small conductive pad here, so put in as many stitches as you need to feel comfortable that you’ll have an easy time connecting to it with a different trace later. Repeat these steps with the other felt case half and conductive circle, extending out to the opposite tab. Now, if you sandwich the covering halves together, conductive fabric inside and touching, you should have a trace extending from the top half to one tab, and from the bottom half to the other tab.
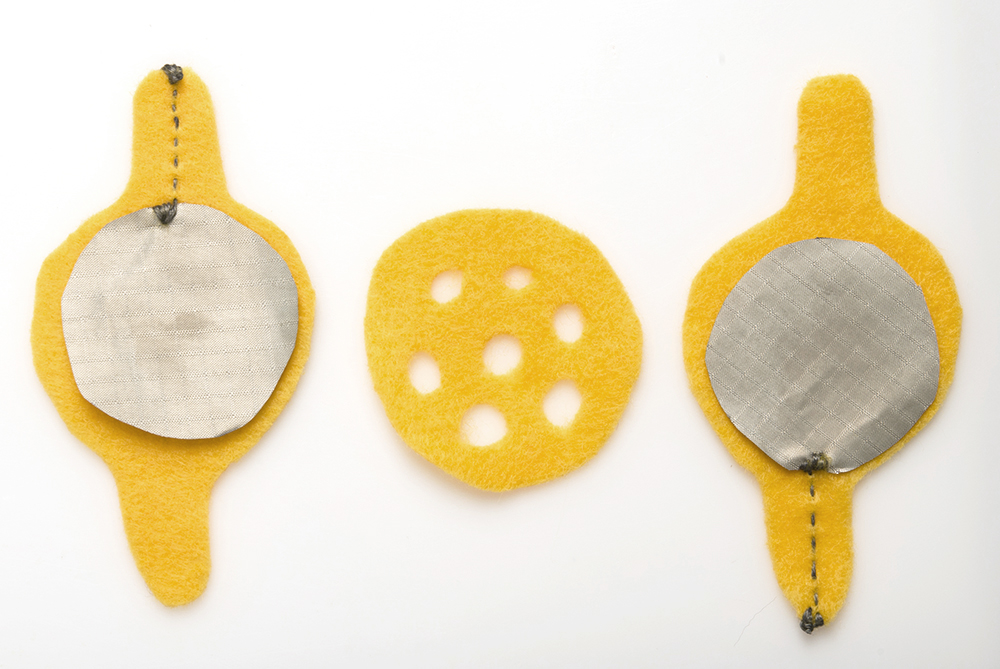
The last piece left is the felt circle. This is going to serve as the permeable barrier between the conductive fabric circles, but it isn’t permeable yet. In order to make it work for our purposes, we need to cut a few small holes in the circle. These should all be within the perimeter of the circle; you don’t want any to overlap the edge.
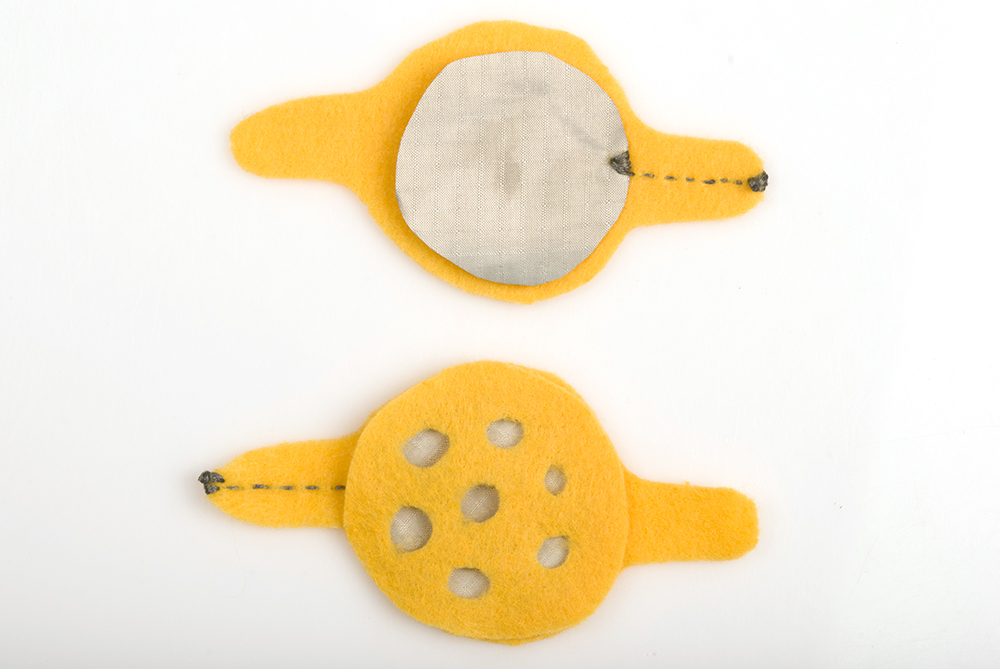
The felt circle needs to sit firmly in the center, protecting the two conductive circles from each other. In order to ensure this, spread a small dot of glue around the edge of it, and carefully set it down on top of one of the conductive circles. You should see the conductive fabric through the holes in the felt, but none should be visible around the edges.
Finally, place the top layer of felt and conductive fabric over the whole thing, conductive fabric side down and in contact with the felt you cut holes in. You should have, from top to bottom:
- Felt cover
- Conductive circle
- Felt circle with holes
- Conductive circle
- Felt cover
There should also be a line of stitching from the bottom conductive circle to one tab of the cover, and from the top conductive circle to the other tab. To finish the button up, sew all the way around the edge with a whip stitch, using regular, non-conductive thread. It's very important not to use conductive thread for this part! This is a great time to check the function of your button before you get the whole thing sewn in.
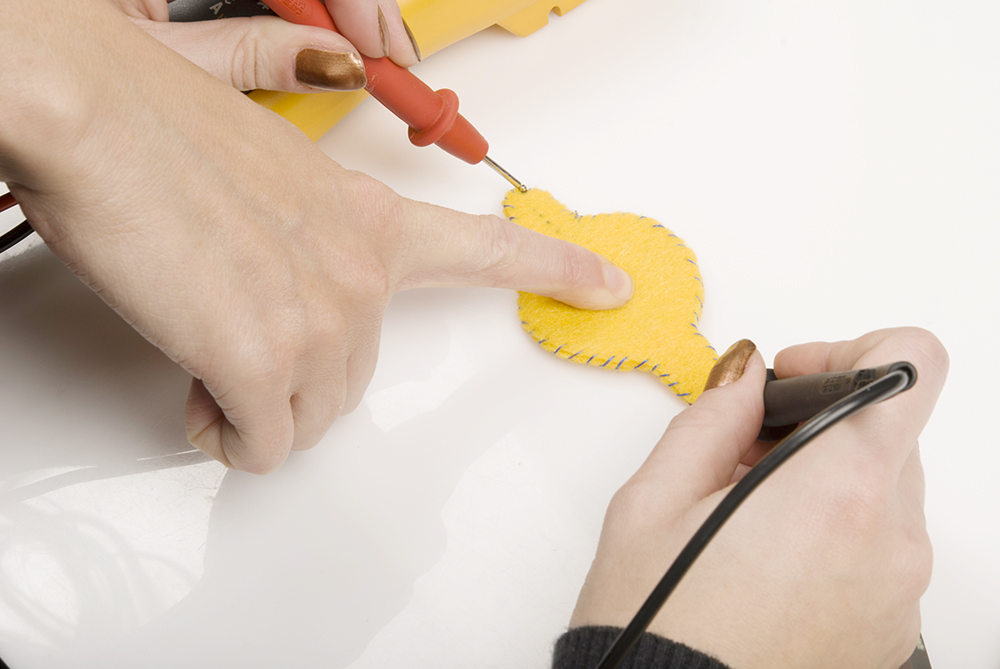
You can check this with a multimeter; use the continuity setting and press one probe to each of the conductive thread pads you made at the ends of the tabs. You should not have continuity. Now, while still pressing the probes down, have someone push the button. If there isn’t anybody around to press the button, try using a foot, or perhaps your chin. When the button is pressed, you should hear a tone from your multimeter. No press, no tone; press, tone. Do this for a while, because it’s really satisfying.