LDK Experiment 2: Multiple LED Circuits
 Dia
Dia 
Creating a Multi-LED Series Circuit
One of the things that’s very different about a series circuit is the power requirement. To create this circuit, you’re going to need more power than you needed for the parallel circuit, so we’ll be using two batteries instead of one. In the parallel circuit, we connected all of the positive pins to each other, and all of the negative pins to each other. In the series circuit, things are very different. We’ll be creating our circle by connecting each positive to a negative, each negative to a positive. You’ll want to use red and yellow LEDs for this circuit, because they have the lowest forward voltage drop requirement.
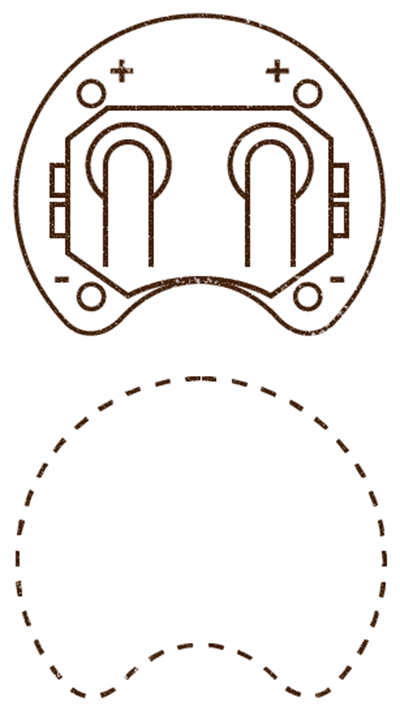
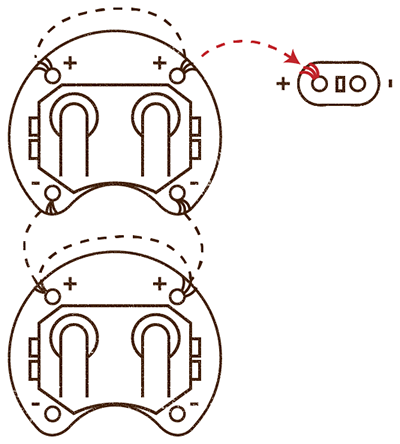
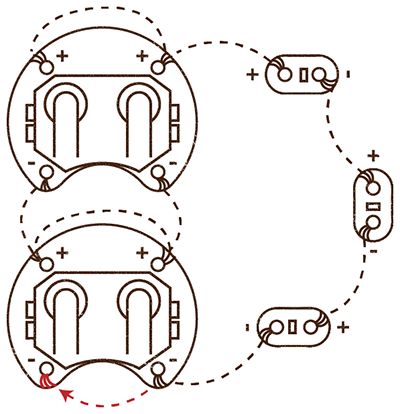
Once again, let’s start with the battery packs. You’ll need two of them, so we're going to combine them in a series circuit. Start by placing the battery pack you’d like to be on top, and make sure you leave room for another one on the fabric below it. Point the negative pins down towards the second battery pack location.

Sew down one negative pin with a few stitches.
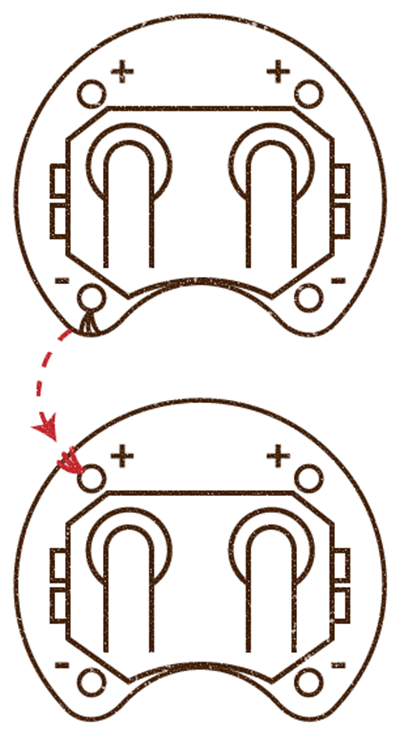
Next, place your second battery pack directly underneath the first one, with the positive pins pointed towards the negative pins of the first battery pack. Sew just one or two stitches from the negative pin you’ve already sewn down to the closest positive pin on the other pack, and stitch that positive pin down.
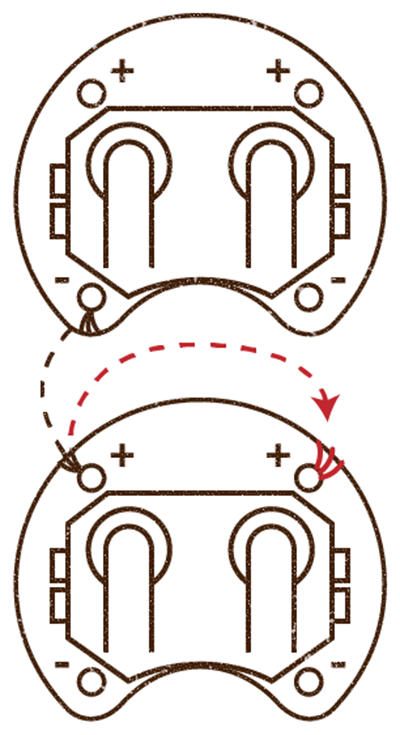
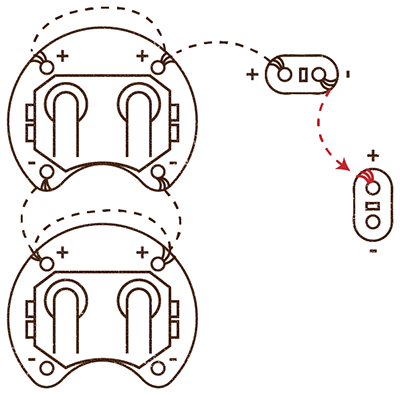
Sew from this positive pin, in several stitches to the other positive pin on this board, and sew the second pin down.
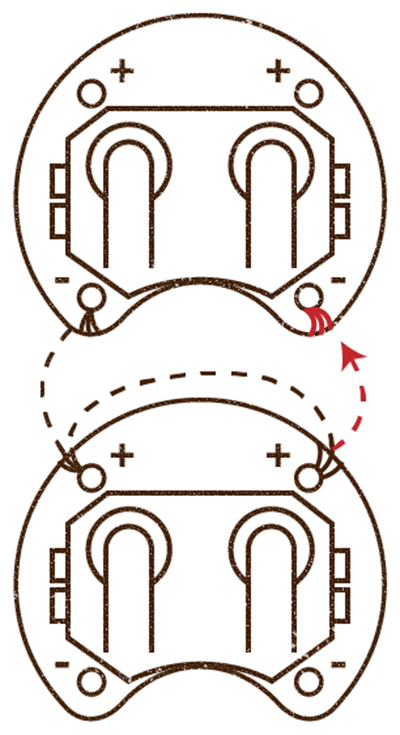
From this positive pin, take another stitch or two up to the remaining negative pin on the first battery pack.

You should now have one set of negative pins attached to one set of positive pins, with another set of each unsewn positives and negatives pointed up and down, respectively. Knot and cut your thread, getting ready to sew a new trace. Start up at the unsewn positive traces, which should be at the top edge of your top battery pack. Sew down the pin furthest from the side you’d like your LEDs on, then sew a few stitches to the other positive pin and sew that down as well.
From here, sew to where you’d like your first LED, and sew down the positive pin. Knot and cut your thread here.
Re-knot your thread and sew down the negative pin of the same LED with the new length of thread. The positive and negative sides of this LED should not be connected to each other by any thread. Sew from this negative pin to where you would like the positive pin of the next LED to be, and sew that positive pin down. Once again, knot and cut your thread.
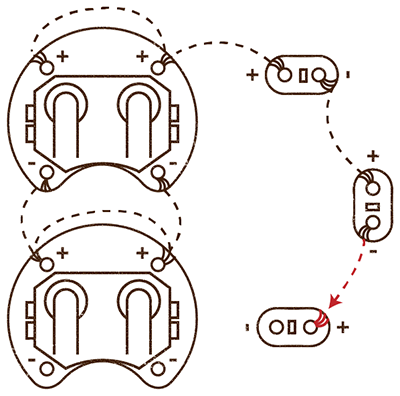
Start again with your new thread and sew the negative pin of the second LED to the positive pin of the third LED, then knot and cut your thread.
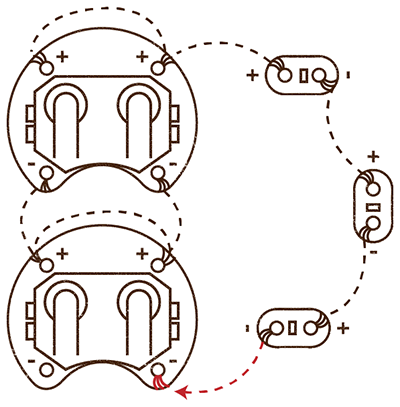
With this last independent length of thread, sew down the negative pin of the third LED, and sew from there to the nearest negative pin of the bottom battery pack; these negative pins should be the last ones left unsewn. continuing this trace, sew the first negative battery pin down.
Sew a few stitches to the other negative pin of the battery pack, and sew that down as well. Knot and cut your thread, and take a quick look for long thread end, dangling thread, loose stitches, or other problems that could cause shorts.

Once you’re sure you don’t have any extraneous thread mucking up your circuit, put both batteries in. All three LEDs should light up! Depending on the colors you’ve used, you’re likely to see that the lights in the parallel circuit are significantly brighter than the ones in the series circuit.