Insulation Techniques for e-Textiles
Embroidery/Decorative Stitching
If you have a lot of patience (or a sewing machine), using embroidery to cover conductive thread traces can add a beautiful finishing touch to your project. Depending on your project size and fabric type, hand embroidery may be easier to do than fitting the project on a machine. This method also works well if you are insulating the front of a project. For just the interior, try a quicker method like interfacing or fabric layers.
Difficulty: Intermediate
Drying/Setting Time: None
Mess Level: Minimal
Materials Needed:
- Embroidery Thread
- Embroidery Needle
- Scissors
- Sewing Machine (optional)
Instructions:
Hand Stitching:
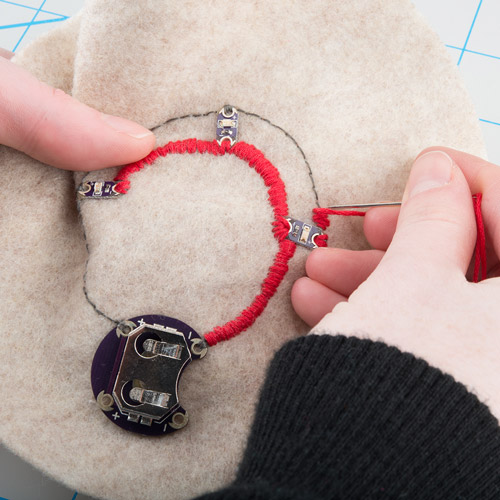
Carefully follow the line of conductive thread and cover using a satin stitch. Here's a tutorial from Sublime Stitching on the satin stitch. You can also add additional embroidery around the conductive thread to incorporate it into a larger design. Get creative!
Machine Stitching:
If you project fits easily on a sewing machine, use a zig zag (or button hole) stitch on a small setting and sew over the conductive thread. Be careful not to sew over any components - they could get damaged by the needle, or more likely break your needle and get caught in the machine. Leave about an inch around any components and a long tail of thread to finish the stitching by hand.
Lynne Bruning published a tutorial on this technique that walks you through loading your project into a machine.
Tips:
- Make sure the embroidery stitches are close together and completely cover the conductive thread - any gaps will expose the thread and leave more room for short circuits.
Pros:
- No wet paint or glue to deal with
- Creative stitching will completely camouflage your traces
- Can insulate both front and back of stitching in one step
Cons:
- Embroidery can be tedious work for beginners
- Time intensive
Examples:
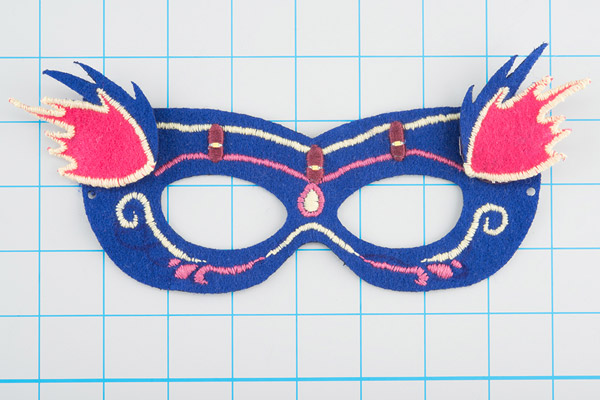
This embellished version of our E-Textile Mask project uses embroidery to add detail and cover up the conductive thread and LEDs.

