Installing an Arduino Bootloader
Uploading Code - Easy Way
Note: This example assumes you are using the latest version of the Arduino IDE on your desktop. If this is your first time using Arduino, please review our tutorial on installing the Arduino IDE.
The easy way to upload the bootloader involves using the Arduino IDE.
Upload Arduino as ISP
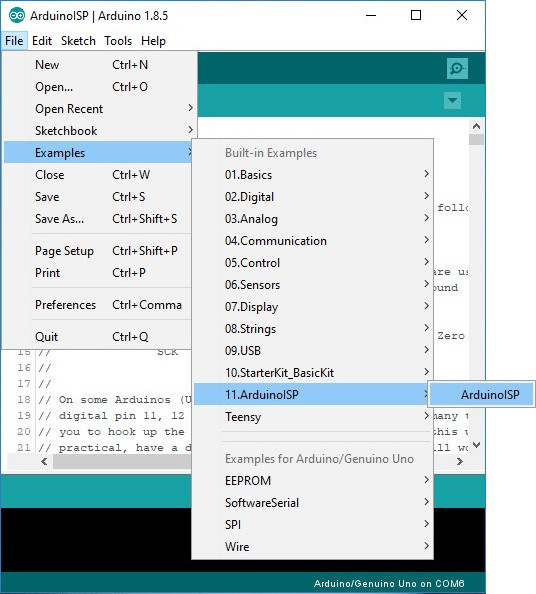
Grab a known good RedBoard or Arduino Uno. Open your Arduino IDE. In your menu, select File > Examples > 11.ArduinoISP > ArduinoISP to open up the Arduino as ISP sketch
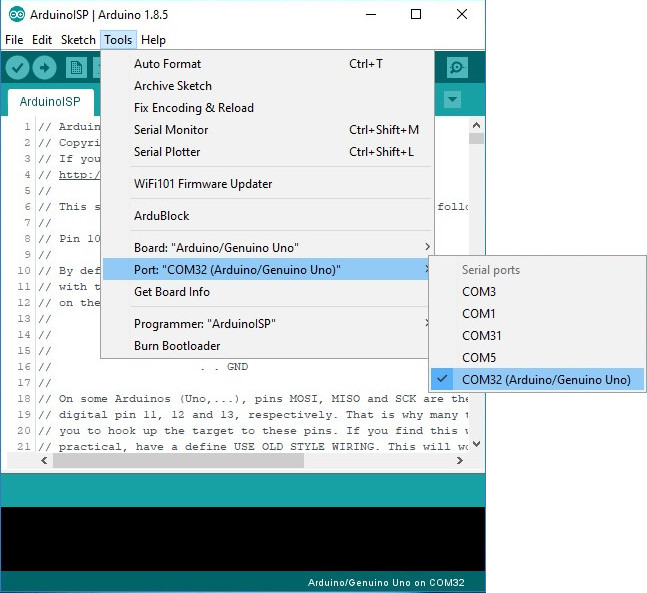
Select the COM port for your Arduino as ISP. The COM port may be different depending on how it enumerated on your computer.
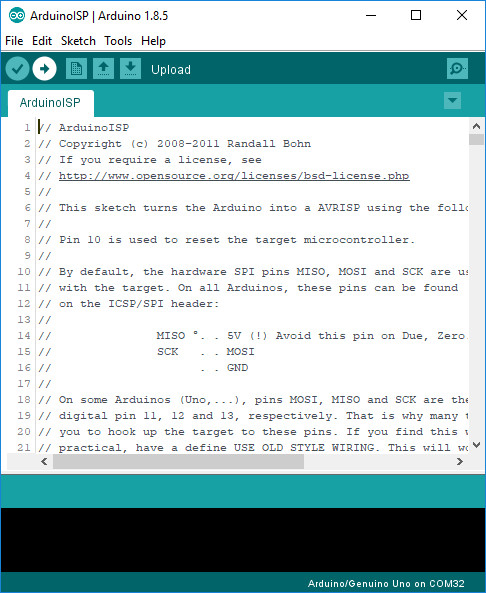
Upload the code to your Arduino to turn it into a AVRISP.
Burning a Bootloader to Your Target
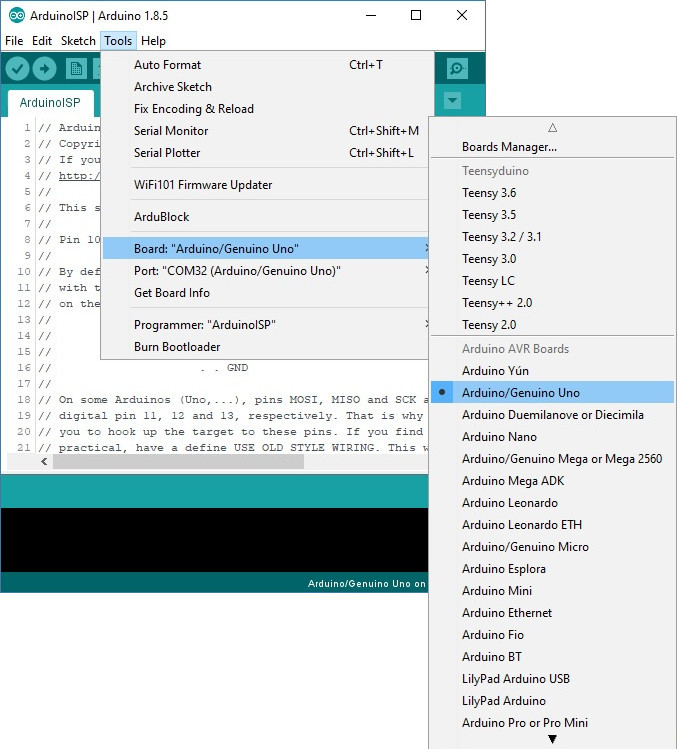
Leave the Arduino as ISP (i.e. your programmer) connected to your computer. If you have not already, connect your target Arduino. Then select the board definition for your target Arduino under Tools > Board.
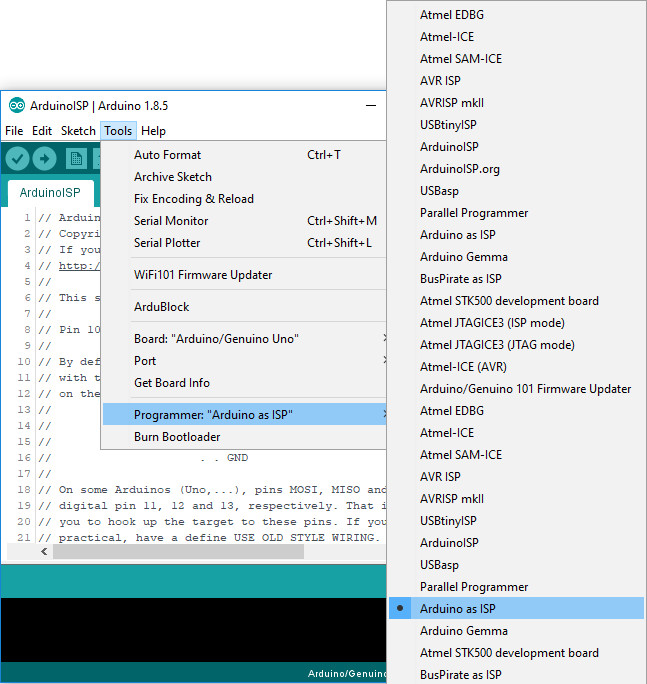
Select the programmer that you are using under Tools > Programmer. In this case, our programmer is an Arduino as ISP so select Arduino as ISP. You will also need to select the COM port that the Arduino as ISP is connected to if you have not selected the COM port already.
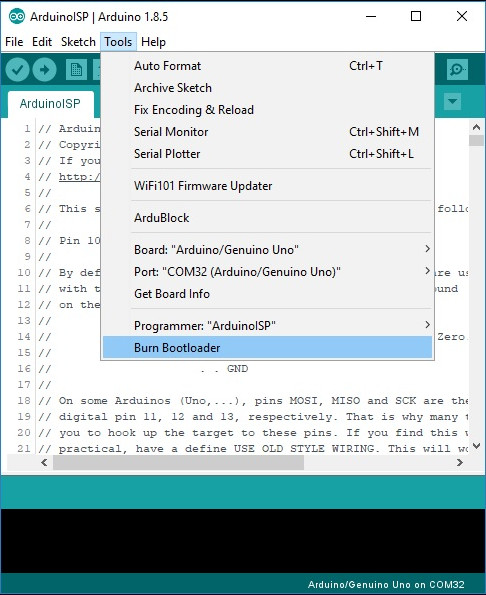
Finally, select Burn Bootloader. This will take the board you selected in the Arduino IDE and look up the associated bootloader in the board.txt file. Then, it will find the bootloader in the Arduino IDE's program folder (specifically "...\Arduino\hardware\arduino\avr\bootloaders") and install it. This only works if the board is installed correctly in the IDE and you have the correct bootloader.
If for some reason you want to use a bootloader that isn't installed in the Arduino IDE, visit the next section. However, it's probably easier to just install the bootloader from the Arduino IDE. For those who are curious about settings such as fuse bits, have no fear. Arduino takes care of all the messy details for you when you burn bootloaders through it.
