Heartbeat Straight Jacket
Introduction
The Heartbeat Straightjacket is a standard canvass straight jacket, with some fancy electronics, to create a sweet costume with remote wireless capabilities. To get the full effect, a person holds a special stethoscope to their heart, and they see their heartbeat displayed on the straight jacket that I am wearing.
I wanted to create a project around EL (electroluminescent) wire - sometimes called cold neon. It's this neat, very bendable, very bright wire that glows nicely in low-light situations (like Halloween!). With a little work, you can control EL and get some interesting displays. On top of that, I needed a warm costume as the weather in Boulder can get pretty ugly at the end of October (it usually sleets). A straight jacket was the perfect platform for the electronics, warm, and just weird enough for Halloween (and Burning Man).
Stethoscope Interactivity
I wanted to create a fun way to interact with the jacket. I could have used a heart-rate strap or some other way of picking up the user's heartbeat, but I wanted to use a stethoscope because I thought it would be more friendly than asking someone to strap
Required Materials
Several different materials are required for this project. We've made this handy wishlist to help aid in you picking out your parts.
Additional materials required:
- Straight Jacket- Start by looking on EBay. Monkey Dungeon is pretty epic. ~$60
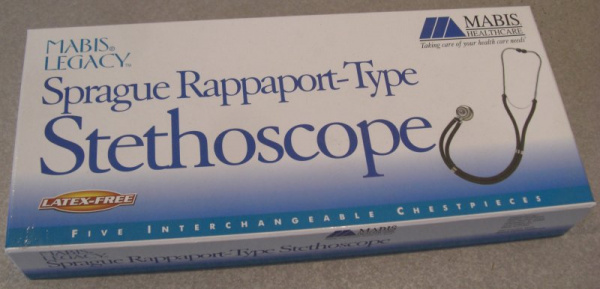
- Stethoscope - Shop around on Froogle. I spent around ~$25. "Sprague Rappaport", whatever that means.
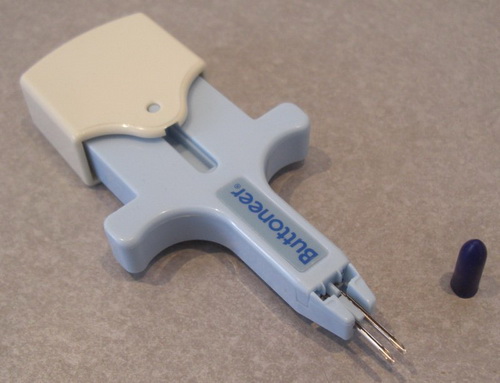
- Buttoneer - The creator of this device probably never expected it to be used to attach EL wire to clothing, but it works magnificently!
Suggested Reading:
If you aren't familiar with the following concepts, we recommend reading up on these before attempting to follow along with this project.
Project Development
Figuring Out How To Use EL Wire
This first thing I had to do was to get my ATmega168 microcontroller to be able to control a single channel. In other words, turn on and off one string of EL wire. EL wire is a bit intense when it comes to control. EL wire requires something like 125V AC at 425Hz. This is a pretty high voltage, and a weird frequency, but with very little current. I might be able to design a circuit to generate this, or I could just buy an inverter.
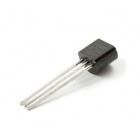
Connecting the AC inverter to the EL wire, sure enough, it lit up. Now, I wanted control. How do I turn the AC power going to a strand of EL wire on and off? With a TRIAC! These are nifty 'switches' that allow you to turn on/off an AC source. Perfect. I settled on the following part listed below. Cheap, TO92 thru-hole easy to solder, and can handle up to 0.6A at 200V. Wow. Let's hope we don't do anything nearly that big.
TRIAC
COM-09234The schematic symbol for the TRIACs look similar to the image below.
Here's the DC current readings I found going into the inverter:
- 86mA no load
- 110mA load under control
I found that you could run this inverter without a load, without problems. Results may vary. So you can see that strand of EL wire uses around 25mA(DC) depending on length. On par with LED power consumption.
The next step was to get the wireless working between the straight jacket and the stethoscope. I choose the nRF2401A (Please note this part is now retired. we will be using the nRF24L01+ for this example). These low power, low cost ICs are great for a simple 'Hey! Beat the heart' type signal. The signal that will be broadcast by the stethoscope is a low data rate (I need something like 4 bytes) and low bandwidth (4 bytes * ~70 beats per minute).
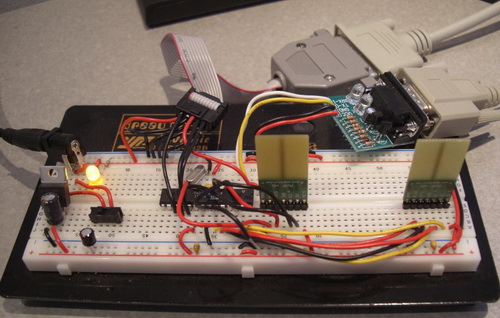
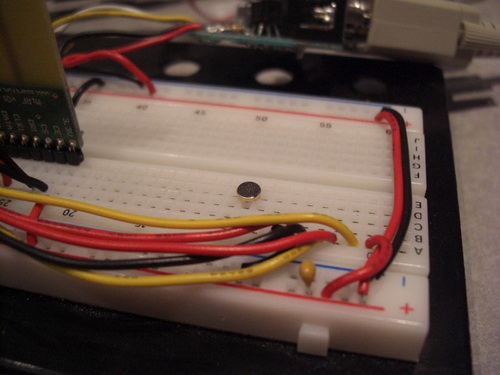
Initially, I used two radios in the same breadboard so that I could get firmware sending and receiving. Eventually, I boiled all this down to a few nRF libraries that work pretty well. When in doubt, RTFM for the Nordic ICs.
Control Boards
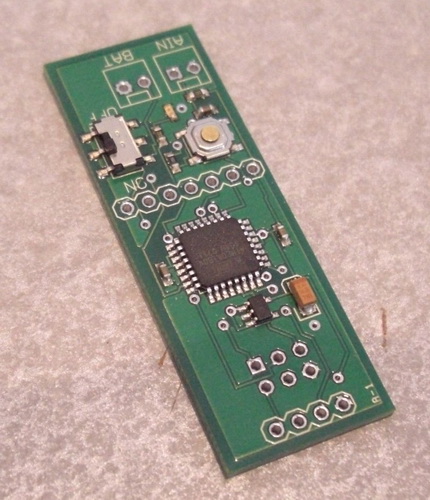
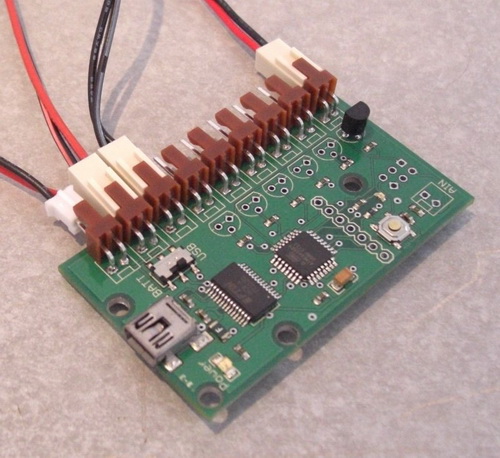
Now using all this learned knowledge from the breadboard of the triac and the radios, I created two PCBs, the EL-controller and the Stethoscope transmitter.
The EL sequencer receives RF triggers and controls the EL strings. In this case, each channel is an EL wire in the shape of concentric hearts.
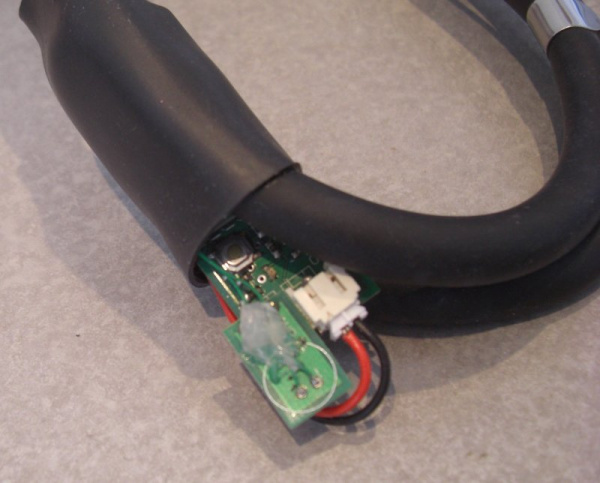
The Stetho RF board that goes into the stethoscope had to be made as small as possible. It is powered by a small lithium polymer battery and does nothing but read the analog level on the microphone in an attempt to pick up and heart beat, and broadcast a 'Hey! Beat the heart' signal to the straight jacket.
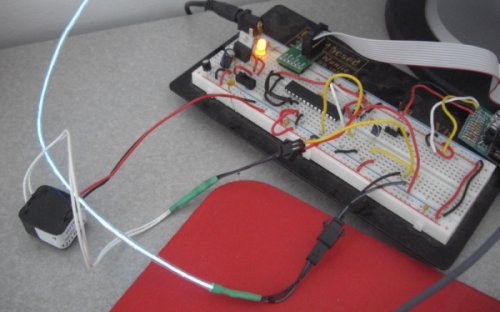
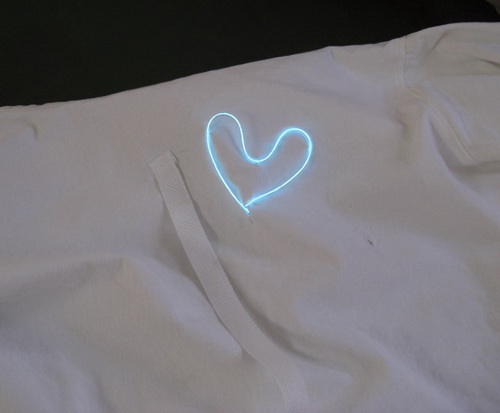
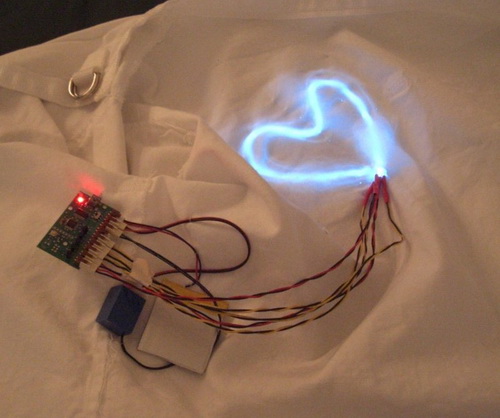
Now some testing! The first step was to get the EL sequencer to control one string, within the jacket:
Here is the sequencer hooked up to LiPo, inverter power, AC output, and one string there on the end.
Jacket Electronics Hookup
We recommend reading over the EL Sequencer Hookup Guide for detailed board information and electrical specifications.
EL Sequencer/Escudo Dos Hookup Guide
Solder Headers
You will need to solder headers onto the EL Sequencer to give yourself programming access. You can either program the board via the FTDI header using the Arduino IDE, or you can use the ICSP header and program the board via AVR-GCC.
For our example, we will be using the FTDI header.
You will also need to solder headers to connect the nRF24L01+ pins and module. We recommend using male headers on the EL Sequencer, and female headers on the nRF24L01+ breakout.
Connect the nRF24L01+ module
Plug the nRF24L01+ module into the headers you previously soldered onto the board. If you prefer to use jumper wires between the two boards, simply plug in wires directly across.
Connect the EL Wire
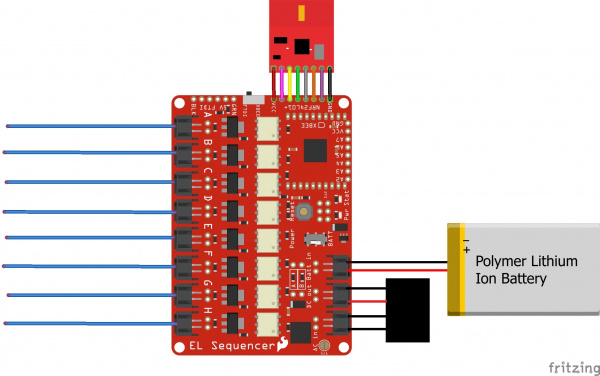
Plug in the JST connectors of the EL wire into the first 5 channels of the EL sequencer. You can add additional channels of EL wire, but keep in mind that you will need to also modify the code later on.
Connect the Inverter
For this project, we will be using the 3V inverter. Connect the red/black wires to the DC Output header, and connect the black/black wire pair to the AC Input header.
Connect the Power Supply
Since this is a costume, we need to be mobile! Therefore we are using a Lipo battery to as the power supply for this project. We recommend the 2000mAh battery though there are smaller batteries available, depending on the fabric you will be attaching this to. Keep in mind your battery capacity requirements will vary depending on how many wires you have turned on simultaneously and how long you intend the project to run.
Final Circuit
Once everything is connected, your circuit should look like the following example.
Connect the Electronics and Jacket
Once you have all of the electronics wired, it's time to attach it to the jacket.
To hide the electronics, we recommend placing those on the inside of the jacket and feeding the EL wire to the outside.
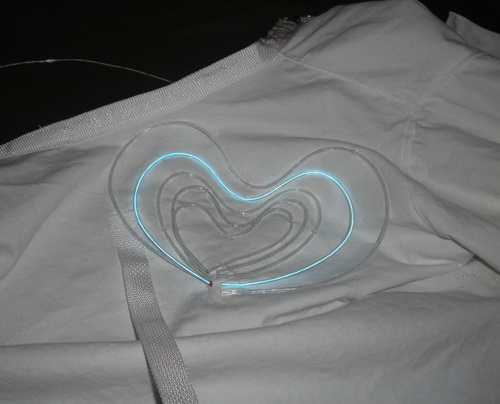
Once the EL wire is on the outside of the jacket, you will need to shape it into hearts. To form and attach the EL wire to the straight jacket, I used the handy Buttoneer. This device uses this neat plastic 'staples' to re-attach buttons to clothing. It also works surprisingly well for attaching EL wire to clothing!
Please check out our EL basics guide for more information on alternative methods of shaping EL wire. When you have the shape of the EL wire laid out, you may need to trim some of the wires down to size.
Once the hearts have all been shaped and attached, the outside of the jacket should look like the following:
Hacking a Stethoscope
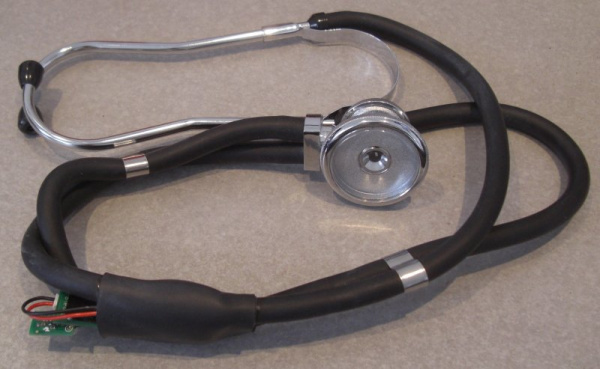
The next phase of the project was to wire up the stethoscope. I wanted the scope to look as 'off-the-shelf' as possible. I bought a cheap stethoscope online and then began to hack it.
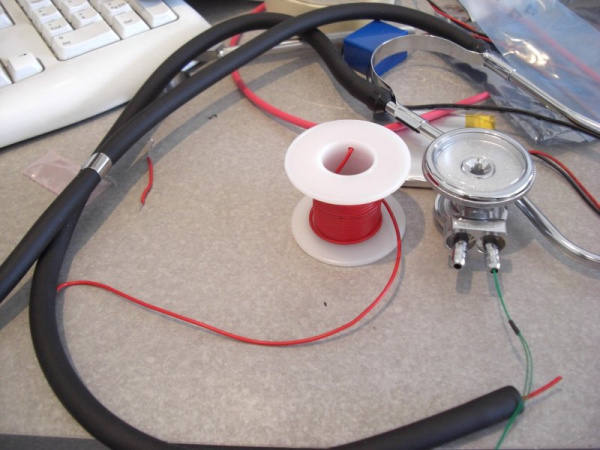
I found the smallest electret microphone on I could find online. Unfortunately I've lost the part number.
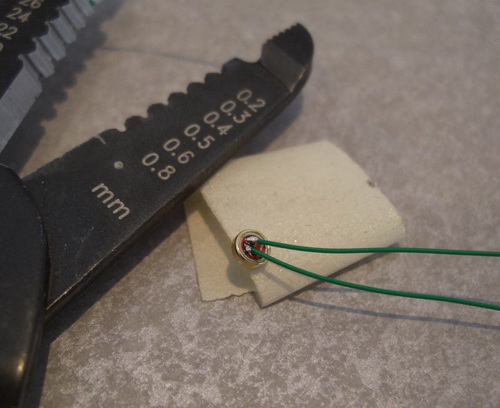
The next step was to solder wires to this little guy. Not trivial, but not too hard. Be sure to get two mics in case you lift a pad during soldering.
Notice the tape to hold the mic still while I was working with it. I used 30AWG wire wrap wire so that I could easily feed the wires through the flexible tubes of the stethoscope.
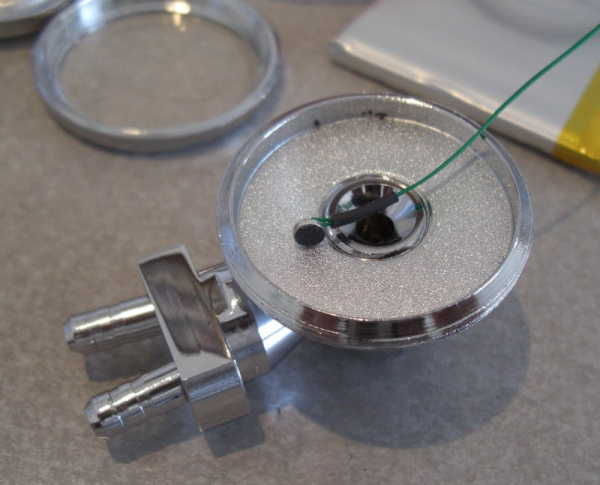
The next step was to insert the mic into the head of the stethoscope.
The head of the stethoscope comes off the tubes if you pull hard enough. And the diaphragm covers come unscrewed on this cheap version. I used small heat shrink to keep the wires together.
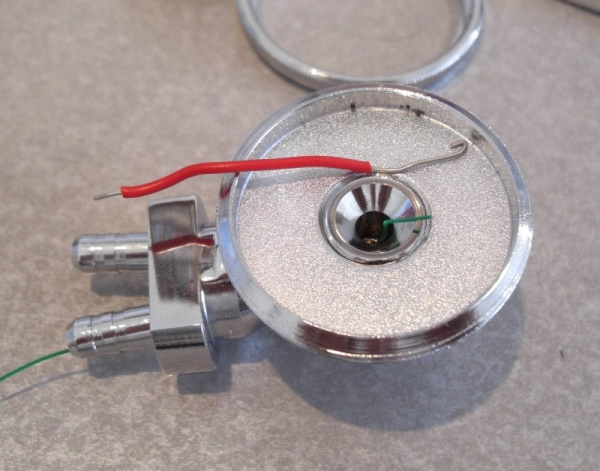
I created a small hook so that I could fish the wire through the head. 30AWG wire is a little hard to work with so I first fished a 'pull' wire through the head, attached the pull wire to the actual microphone wires, and then pulled everything back through the head.
Next, I cut a small slit in the rubber tube roughly where the electronics would be attached to the tube. I used thicker 22AWG wire, again so that I could fish down the tube, attached the mic wires to this thicker wire, and pulled it all back through.
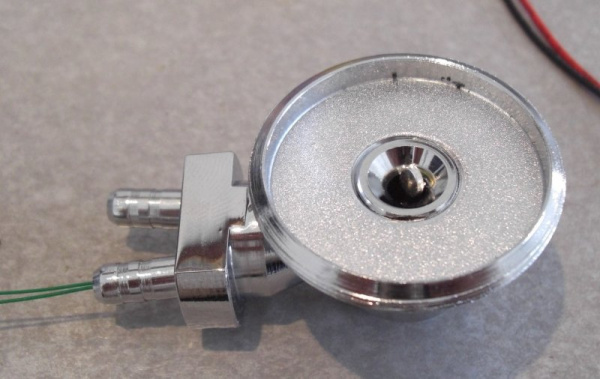
Re-assembling the head to the tubes, I wired the microphone wires to the RF Stetho board.
I used a hacked microphone board to amplify the audio signal. Hot glue secured the fragile 30AWG wires in place. The amp'd signal was then fed into the ADC on the ATmega168. I had to leave the electronics partially exposed so that I could re-charge the battery and turn the board on and off.
In practice, the microphone input is barely able to pickup the audible sound of a heartbeat. It works, but it's not clean. When it did work, I find the effect really astounding! However in public, most people found a blinking straight jacket far more intriguing than the stethoscope 'feature'.
Code
Download the RF24 library with the nRF24L01+ boards. We have a tutorial with more information regarding installing this library here.
Take a look at the RF24/examples/Usage/led_remote.ino example sketch. This is already configured to be compatible with the EL Sequencer with 7 channels of EL wire attached and will trigger each channel based on buttons hit on the remote unit. In this case, you will need to modify the speed control to be based on the mic input from the stethoscope.
If you don't have 6 channels attached, have no fear! The code will still run - it will simply cycle the open channels high and low. This may add additional
Upload this to your EL Sequencer using the FTDI port.
Once you have the code uploaded and can verify functionality of your straight jacket, you can hack away at the code to customize your 'heartbeat'.
Resources and Going Further
What did I learn? I learned that this project was more of a sociological experiment! A lot of people are rather timid about putting a stethoscope against their bare skin (no, they don't work through clothing). Maybe it's the fear of sterile, cold metal against their skin - the doctor's office coming back to haunt them. Maybe they're afraid of contracting a deadly viral skin chewing horse disease (silly). I'm not sure. The other funny thing I learned was that people can rarely find their own heart (oh no! I'm dead!).
Going Further
Once you have your straight jacket up and running, it's time to go test out the readings on your friends. You could also expand the project by swapping to XBees and setting up a mesh network between multiple straight jackets or other costumes! We'd love to see what new exciting things you come up with.
If you have any feedback, please visit the comments or contact our technical support team at TechSupport@sparkfun.com.
Additional Resources
Check out these resources for additional information or project inspiration.
