GPS-RTK2 Hookup Guide
 Nate
Nate 
Connecting the ZED-F9P to a Correction Source
Before you go out into the field it’s good to understand how to get RTCM data and how to pipe it to the GPS-RTK2 and GPS-RTK-SMA. We recommend you read Connecting a Correction Source section of the original GPS-RTK tutorial. This will give you the basics of how to get a UNAVCO account and how to identify a Mount Point within 10km of where your ZED-F9P rover will be used. This section builds upon these concepts.
 |
| GPS RTK Hookup Guide: Connecting a Correction Source |
For this example, we will show how to get correction data from the UNAVCO network and pull that data in using the Android app called NTRIP Client. The correction data will then be transmitted from the app over Bluetooth to the ZED-F9P using the SparkFun BlueSMiRF v2.
Required Materials
- 1x GPS-RTK2 or GPS-RTK-SMA
- 1x GPS or GNSS Antenna
- 1x Metal Plate of 4” or larger
- 1x SMA extension cable (if needed to get a clear view of the sky)
- 1x USB C 2.0 Cable
- 1x BlueSMiRF v2
- 1x male and female header pair
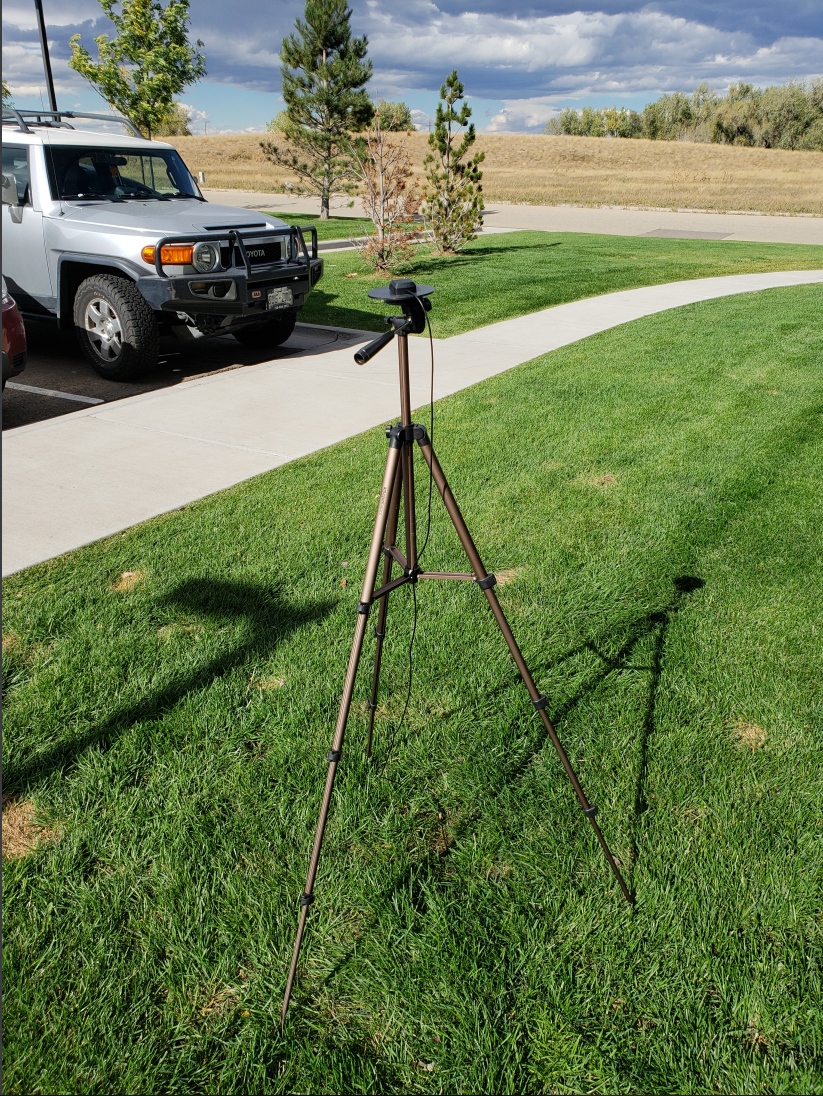
Now setup your GPS receiver such that you can work from your desk but have the antenna outdoors with a clear view of the sky.
Required Software
- Credentials with a free RTCM provider such as UNAVCO
- U-Center
- Get the NTRIP By Lefebure app from Google Play. There seem to be NTRIP apps for iOS but we have not been able to verify any one app in particular. If you have a favorite, please let us know.
First, we need to attach the Bluetooth Module to the ZED-F9P's breakout board. Solder a female header to the BlueSMiRF (Bluetooth Mate is shown, but the assembly is the same) so that it hangs off the end.

On the GPS-RTK2 or GPS_RTK-SMA board we recommend soldering the right-angle male header underneath the board. This will allow the Bluetooth module to be succinctly tucked under the board.
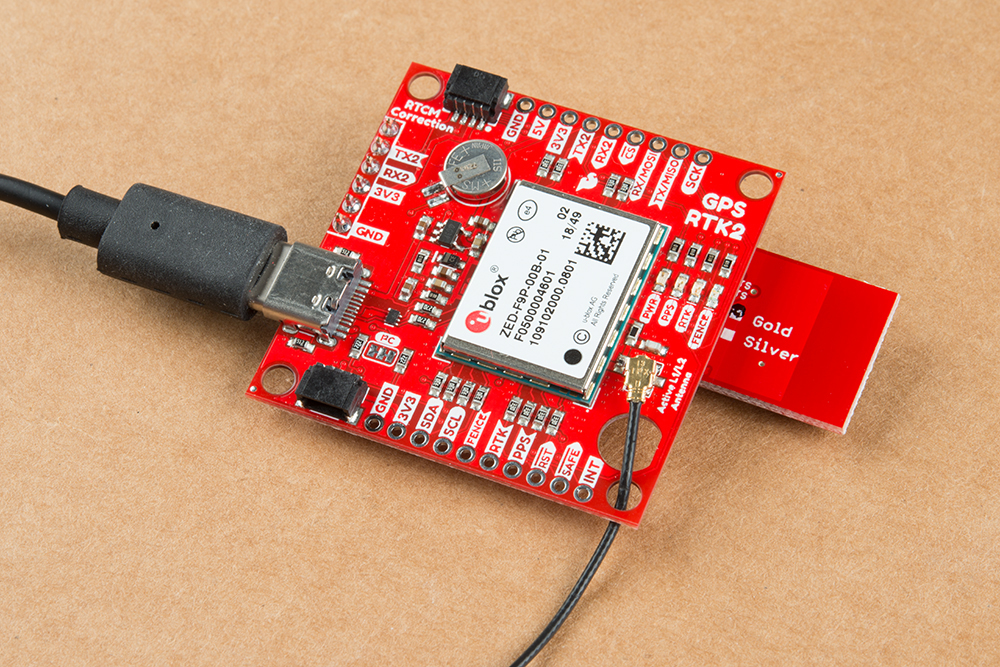
When attaching the BlueSMiRF to board be sure to align the pins so that the GND indicator align on both boards. Once Bluetooth has been installed attach your GNSS antenna and connect the board over USB. This will power the board and the BlueSMiRF.
Where the male and female headers go is personal preference. For example, here are two Bluetooth Mates; one with male headers, one with female.
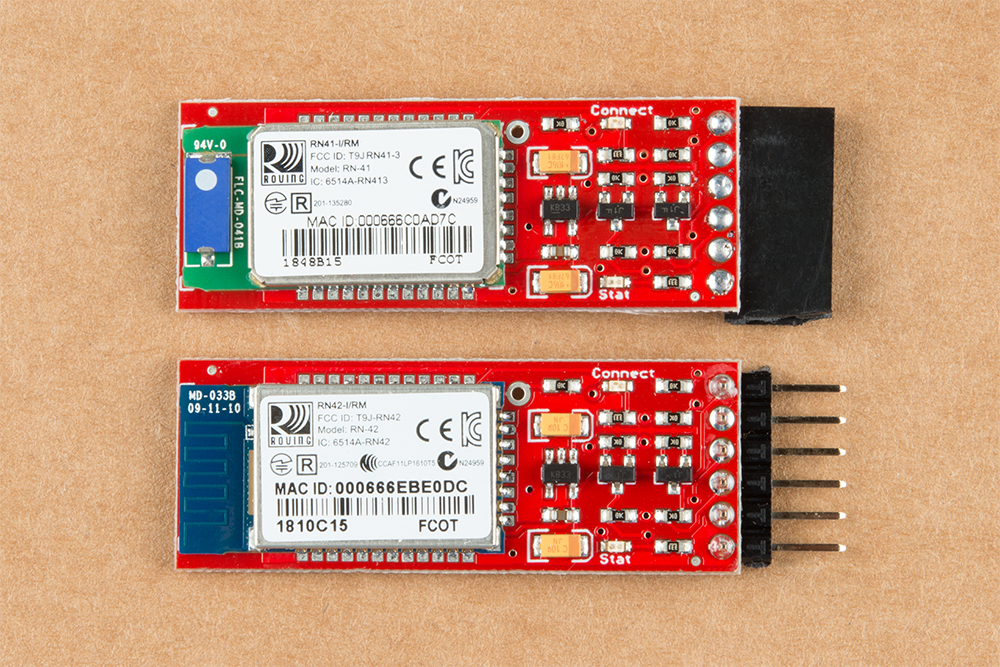
Soldering a female header to a Bluetooth Mate makes it easier to add Bluetooth to boards that have a 'FTDI' style connection like our OpenScale, Arduino Pro, or Simultaneous RFID Reader. Whereas, soldering a male header to the Bluetooth Mate makes it much easier to use in a breadboard. It's really up to you!
The Bluetooth Mate and BlueSMiRF v2 both default to 115200bps whereas the ZED-F9P is expecting serial over UART2 to be 38400bps. To fix this we need to open u-center and change the port settings for UART2. If you haven’t already, be sure to checkout the tutorial Getting Started with U-Center to get your bearings.
Open the Configure window and navigate to the PRT (Ports) section. Drop down the target to UART2 and set the baud rate to 115200. Finally, click on the ‘Send’ button.

By this time you should have a valid 3D GPS lock with ~1.5m accuracy. It’s about to get a lot better.
We are going to assume you’ve read the original RTK tutorial and obtained your UNAVCO credentials including the following:
- Username
- Password
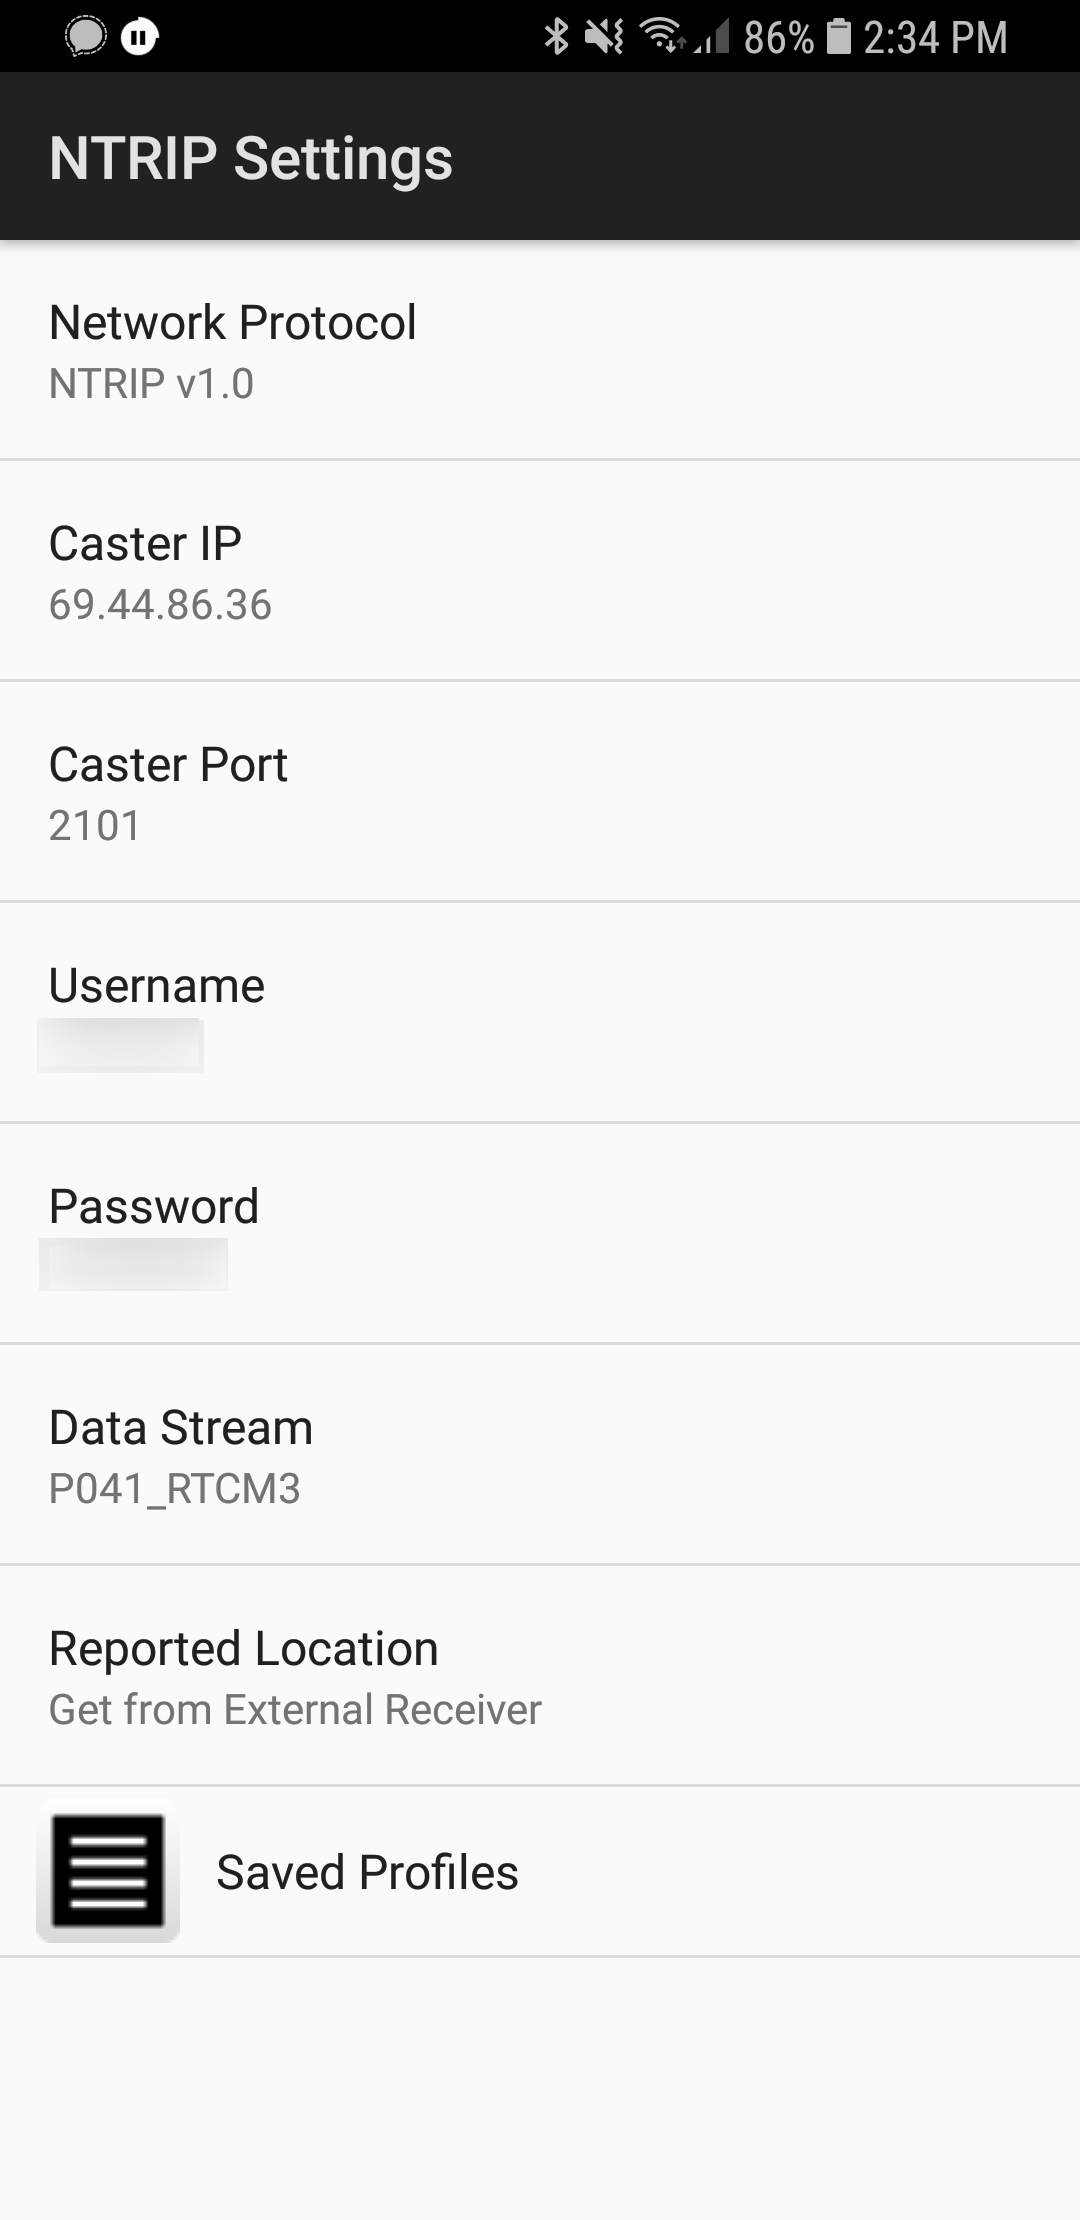
- IP Address for UNAVCO (69.44.86.36 at time of writing)
- Caster Port (2101 at time of writing)
- Data Stream a.k.a. Mount Point (‘P041_RTCM3’ if you want the one near Boulder, CO - but you should really find one nearest your rover location)
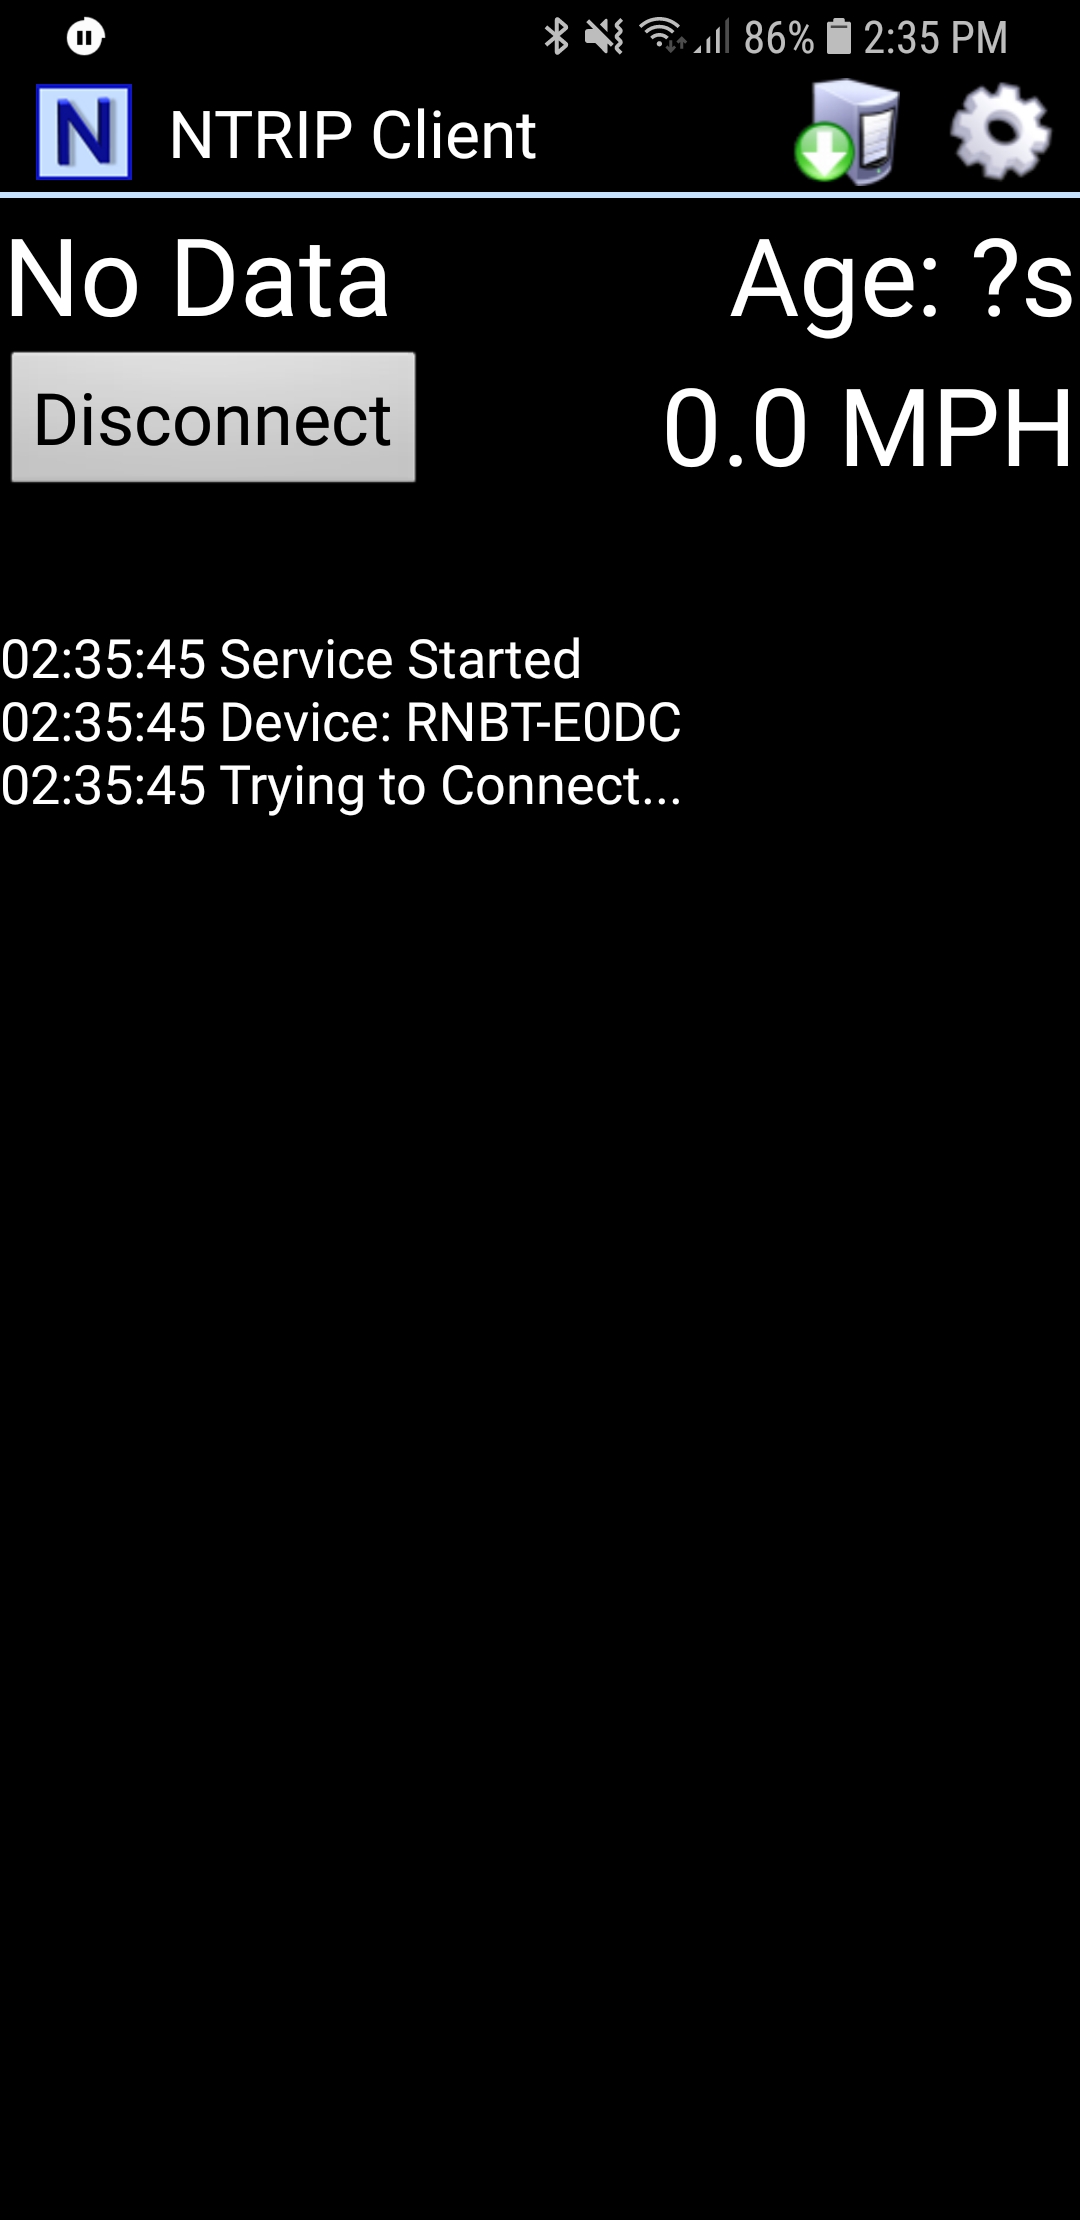
The BlueSMiRF should be powered up. From your phone, discover the BlueSMiRF and pair with it. The module used in this tutorial was discovered as RNBT-E0DC where E0DC is the last four characters of the MAC address of the module and should be unique to your module.
Once you have your UNAVCO credentials and you’ve paired with the Bluetooth module open the NTRIP client.
From the home screen, click on the gear in upper right corner then Receiver Settings.
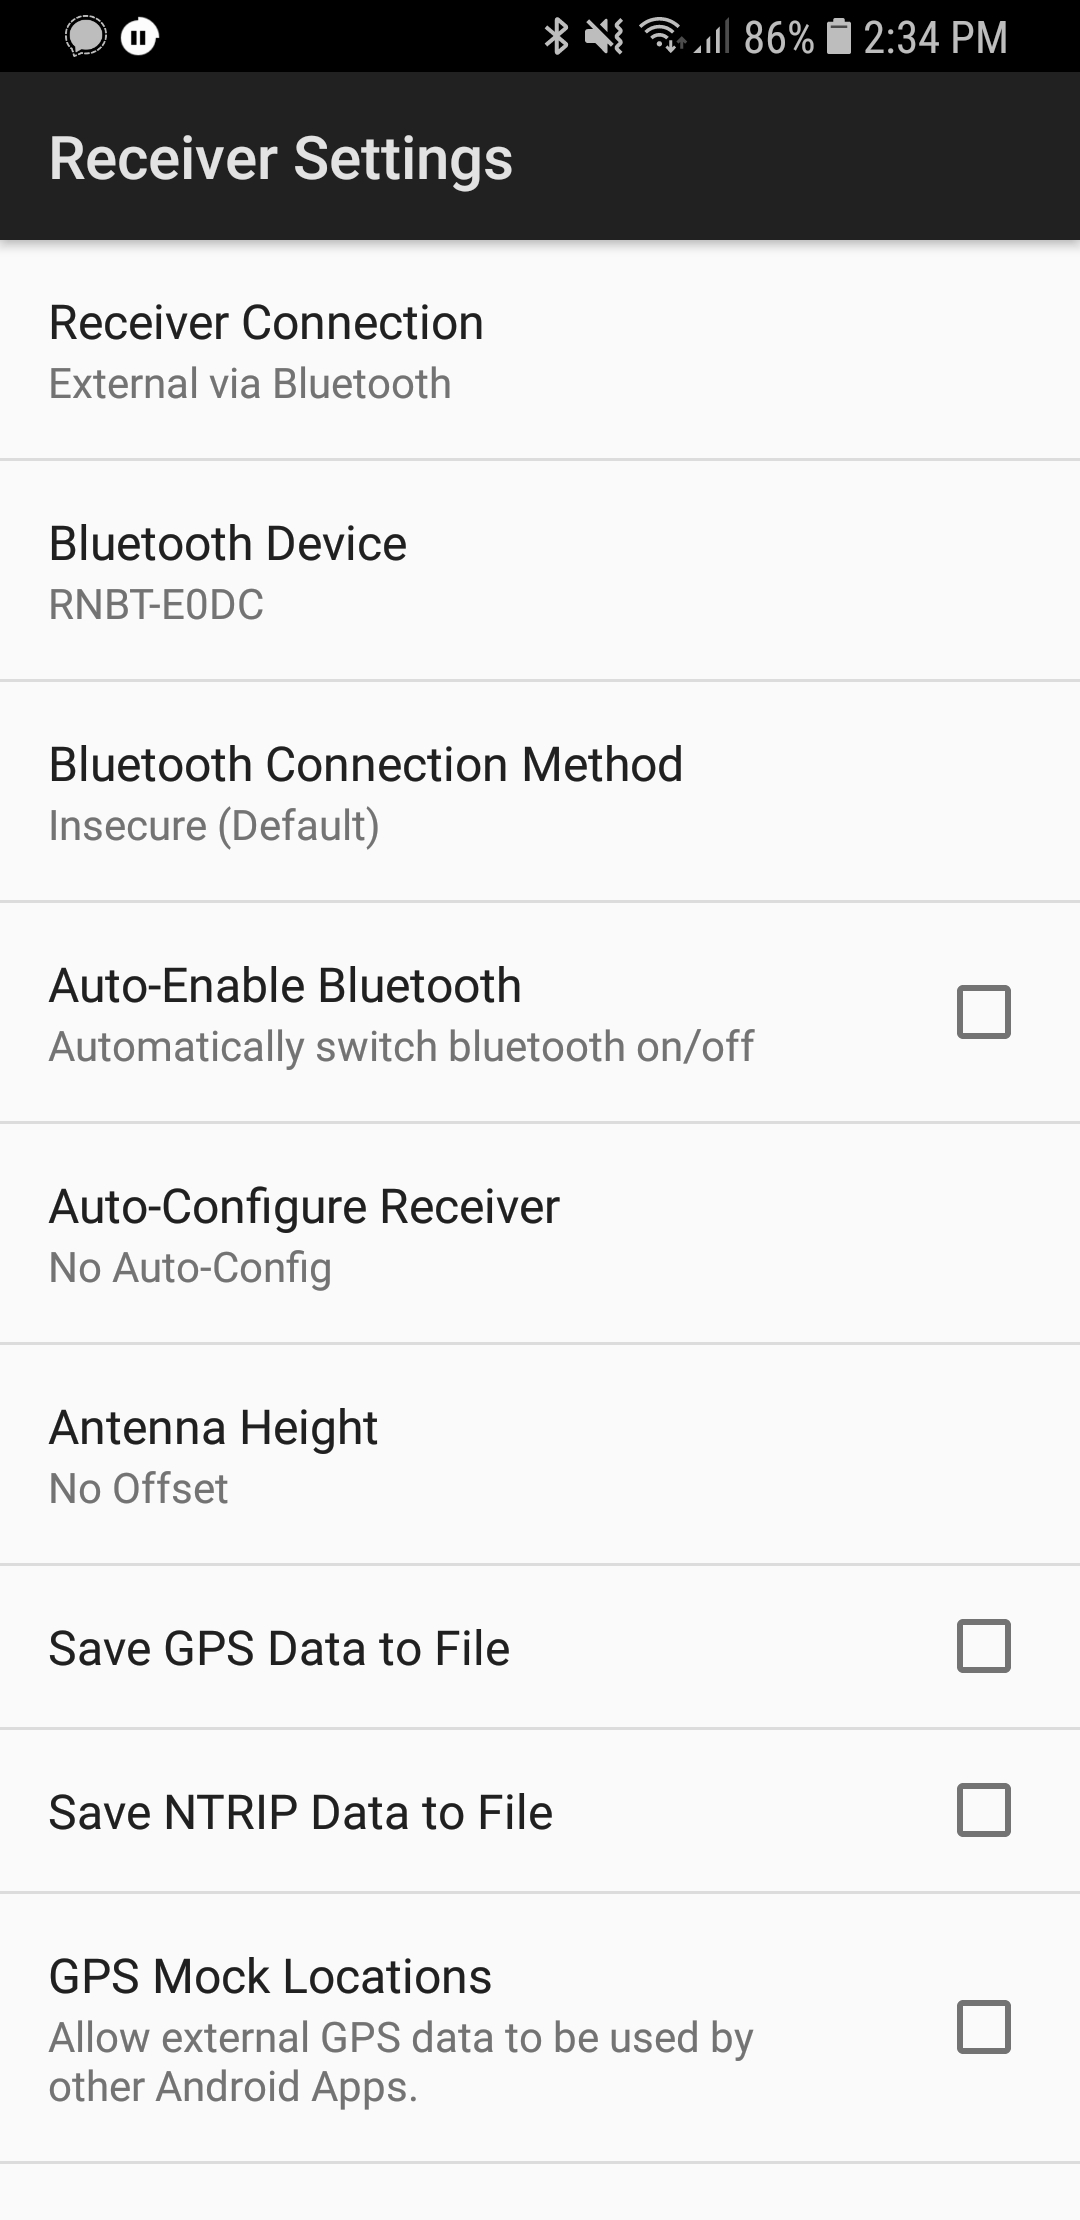
Verify that the Receiver Connection is set to Bluetooth then select Bluetooth Device and select the Bluetooth module you just paired with. Next, open NTRIP settings and enter your credentials including mounting point (a.k.a. Data Stream).
This example demonstrates how to obtain correction data from UNAVCO’s servers but you could similarly setup your own base station using another ZED-F9P and RTKLIB to broadcast the correction data. This NTRIP app would connect to your RTKLIB based server giving you some amazing flexibility (the base station could be anywhere there’s a laptop and Wifi within 10km of your rover).
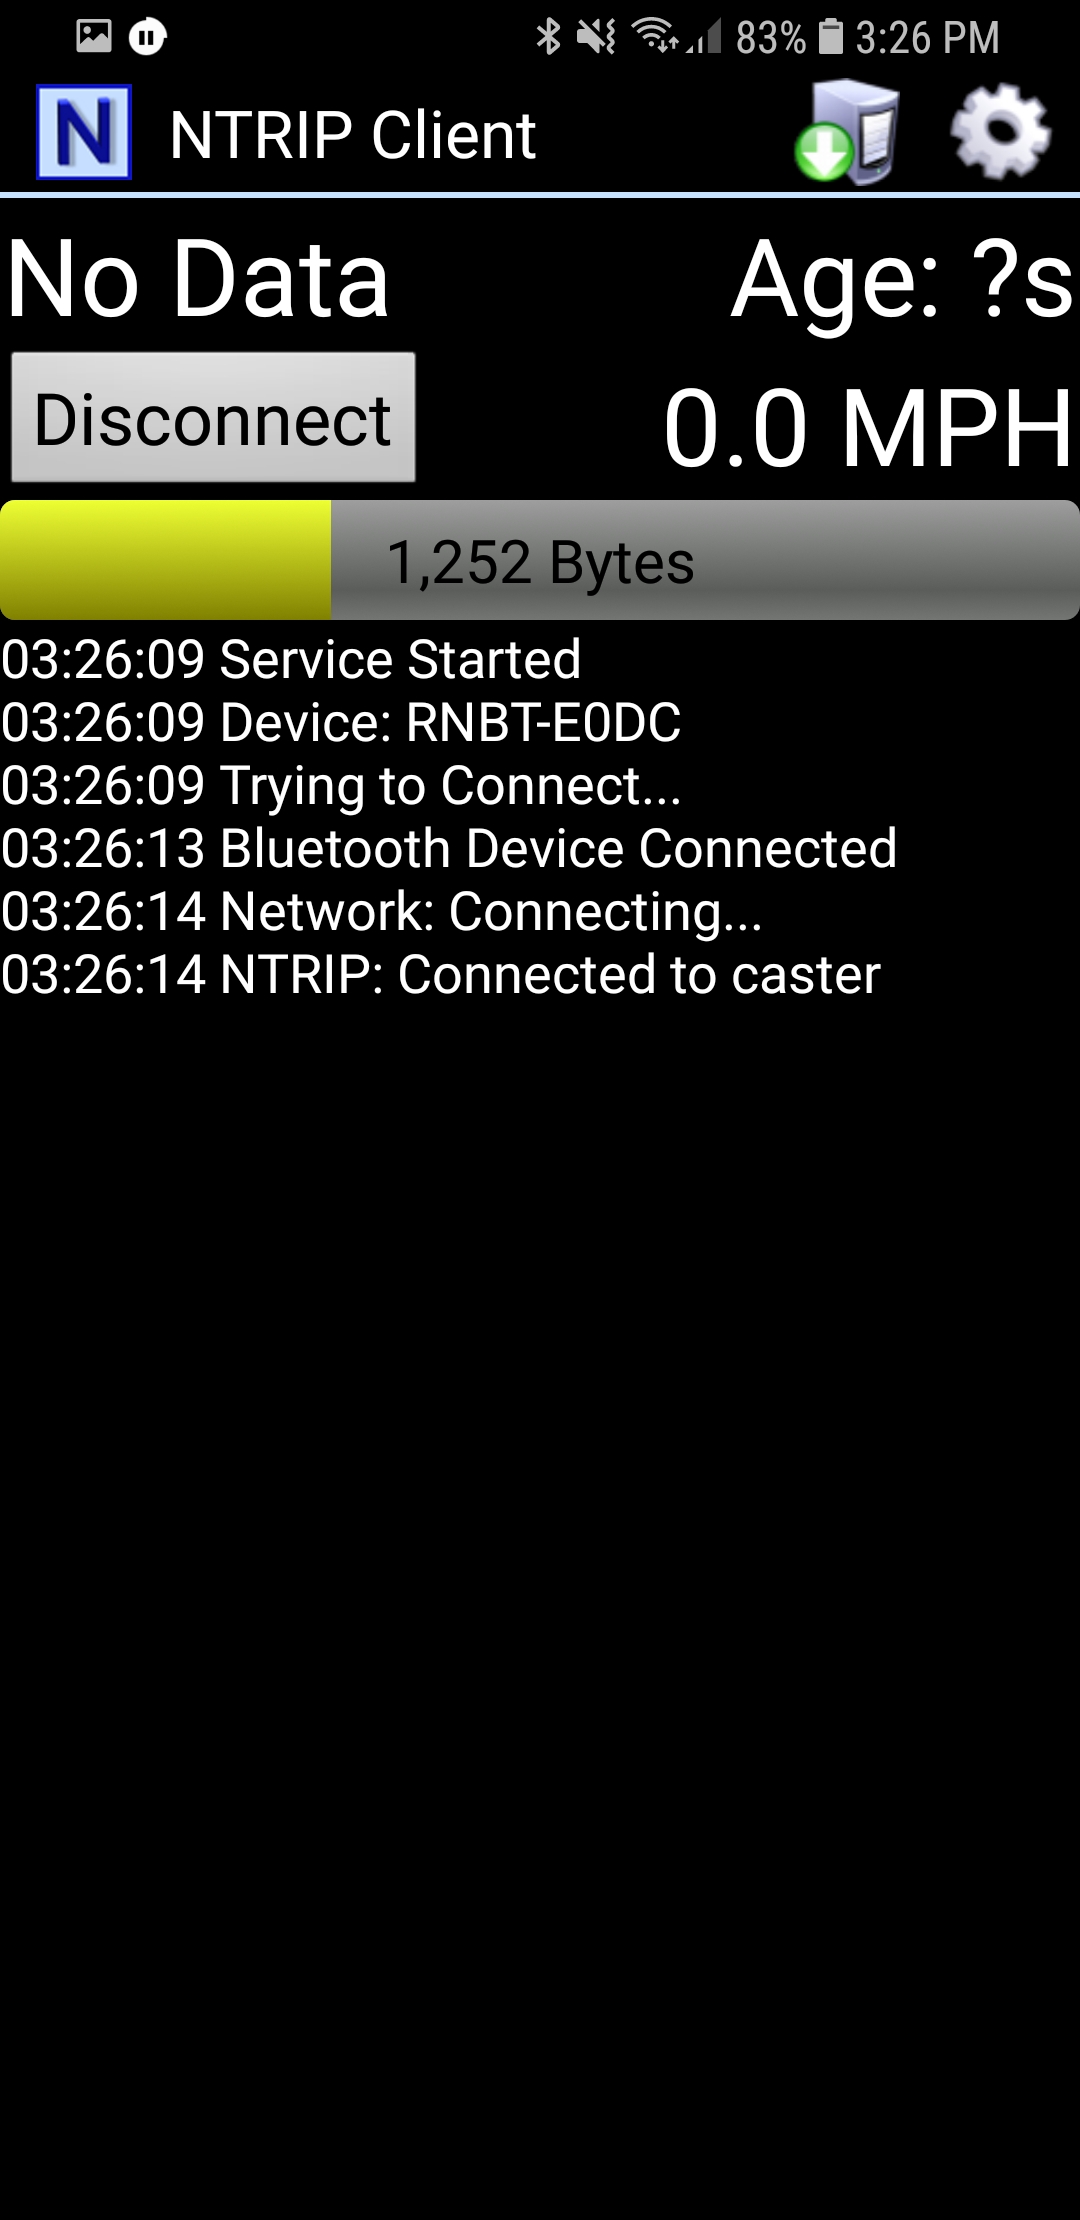
Ok. You ready? This is the fun part. Return to the main NTRIP window and click Connect. The app will connect to the Bluetooth module. Once connected, it will then connect to your NTRIP source. Once data is flowing you will see the number of bytes increase every second.
Within a few seconds you should see the RTK LED on the ZED-F9P's breakout board turn off. This indicates you have an RTK fix. To verify this, open u-center on your computer. The first thing to notice is that Fix Mode in the left hand black window has changed from 3D to 3D/DGNSS/FIXED.
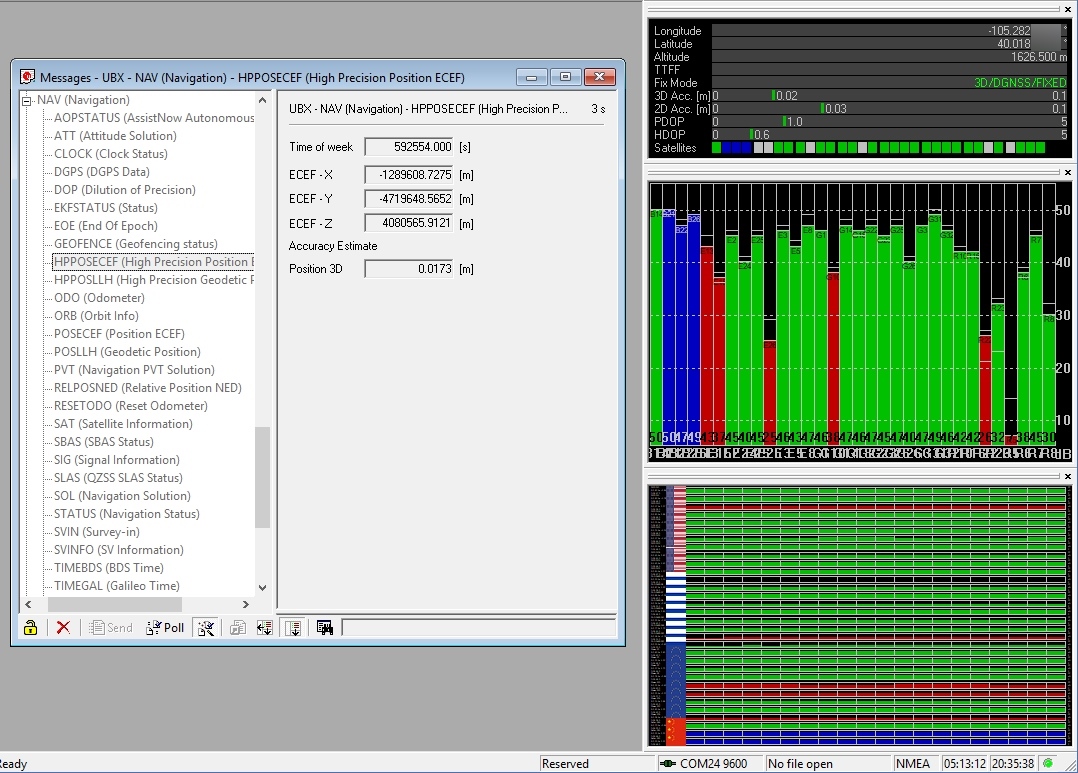
Navigate to the UBX-NAV-HPPOSECEF message. This will show you a high-precision 3D accuracy estimate. We were able to achieve 17mm accuracy using a low-cost GNSS antenna with a metal plate ground plane and we were over 10km from the correction station.
Congrats! You now know where you are within the diameter of a dime!