Getting Started with the RedBot
This Tutorial is Retired!
This tutorial covers concepts or technologies that are no longer current. It's still here for you to read and enjoy, but may not be as useful as our newest tutorials.
 SFUptownMaker
Arduino Library
To help you make getting your robot moving as easy as possible, we've written an Arduino Library, which can be downloaded here. Here's a walk-through of the commands that the library provides. We'll see them in action later, with an example sketch. If you need a refresher on how to install an Arduino library, please see our library tutorial.
RedBot SoftwareSerial
The RedBot library includes a re-implementation of the SoftwareSerial library that comes with Arduino. This was necessary to integrate the other sensor functions with the interrupts that drive the SoftwareSerial library.
If possible, it's best to use the hardware serial port for interfacing with the XBee. There may be times where that is undesirable, however, so software serial support is provided.
For the most part, RedBotSoftwareSerial behaves just like normal SoftwareSerial, with a couple of exceptions:
- You no longer have a choice of which pins to use--the library always uses A0 and A1, which are the pins connected to the XBee module footprint.
- Incoming data is not reliable above 38400bps. Data transmission still works at higher speeds.
- Since the incoming data reception shares an interrupt with the sensors on the board, incoming data may be missed if other inputs are in use. In particular, incoming serial data may interfere with bump sensor detection or encoder counts, and incoming encoder data and bump sensing may interfere with serial data reception.
Motor Functions
The RedBotMotors class within the library provides control over all basic motor functionality. You should find it very easy to control your robot's motion using this command set.
language:cpp
RedBotMotors();
The constructor for the class, which is used to create a class object that can be referred to later, accepts no parameters. It will automatically configure all the peripherals and I/O lines you need to drive the motors. For example, creating an instance of the the RedBotMotors named motor
RedBotMotors motor;
will allow you to call all of the other functions from that class. Such as
motor.drive(255);
Now, let's go over some of the functions that live within that class.
void drive(int speed);
void rightDrive(int speed);
void leftDrive(int speed);
The three drive commands cause the motors to start turning. drive() starts both motors at (approximately) equal speeds; rightDrive() and leftDrive() activate their appropriate motors. Sign is important; positive speeds go forward, negative speeds go backwards. The range of speeds is from 0-255, although speeds below about 75 may not provide enough torque to start the motor turning. If you want very slow motion, try starting at a higher speed, then turning the speed down a bit.
void pivot(int speed);
Pivot turns the robot on its axis by spinning one motor one way and the other the opposite direction. Positive values correspond to anti-clockwise rotation; negative values to clockwise rotation.
void stop();
void rightStop();
void leftStop();
These commands discontinue the PWM output to one or both motors. The motors will continue to coast for a short time after this command is issued; if you need to stop quickly, use...
void brake();
void rightBrake();
void leftBrake();
Brake actually effectively shorts the terminals of the motors together, causing them to stop turning much faster than the stop() commands do. After a brake() has been issued, the wheels will also be much harder to turn, allowing the robot to hold position against a slope.
Line Sensor
The RedBotSensor class supports the line following sensors included in the kit.
RedBotSensor(int pin);
Pass the constructor the name of the pin to which the sensor is attached, and the library will take care of the rest.
void setBGLevel();
void setDetectLevel();
The level setting commands take stock of the surface the sensors are over at the moment and try to characterize it, so the detection of a transition can be automated. For example, if your robot is going to try to follow a black line on a white surface, run setDetectLevel() while the sensor is looking at the line, and setBGLevel() while the sensor is not looking at the line. The library will attempt to figure out a good rule for calling an edge having been seen.
boolean check();
Returns true if the current reading is consistent with the levels determined during the setDetectLevel() call, and false otherwise.
int read();
Returns the analog level of the sensor, if you prefer to do your own processing on the data.
Accelerometer
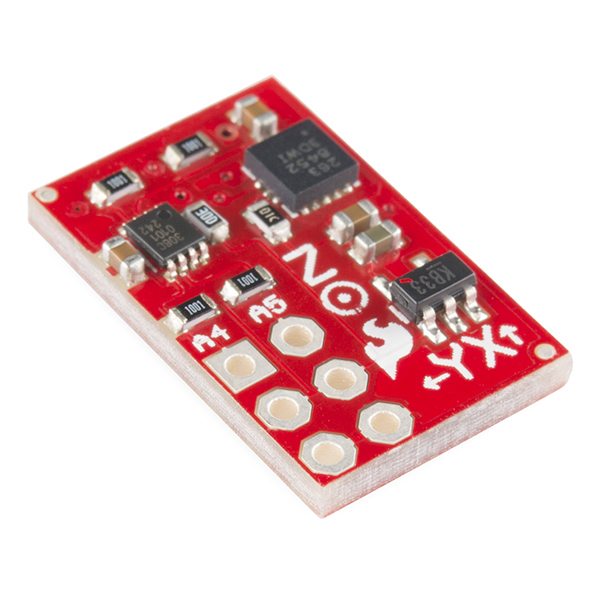
Another sensor provided for the RedBot is a specially designed accelerometer board. This board couples a Freescale MMA8452Q accelerometer with a TI PCA9306 level shifter and is designed to attached directly to the A4/A5 header on the RedBot. In addition to normal accelerometer data collection, it can be used to detect bumps (as in collisions) or taps (for user input).
RedBotAccel();
The class constructor accepts no parameters; simply instantiate an object of the class and the library will handle all necessary configuration. Including the I2C library provided by Arduino is not necessary either; all that is handled by the library.
void read();
Unlike most read-type functions, read() does not actually return a value. What it does is copy the most recent accelerometer values into three variables (naturally enough, named x, y and z. Those values can then be easily referred to using the class object name.
void enableBump();
boolean checkBump();
void setBumpThresh(int xThresh);
These three functions allow the user to enable and check bump detection. Under normal circumstances, the setBumpThresh() function shouldn't be needed; the bump threshold is already set to a good value. Users may find it useful to increase or decrease the sensitivity level; the range for that number is 0-127.
checkBump() returns a true if a bump has been detected since the last time checkBump() was called. It may be useful to call checkBump() to clear any existing bumps before attempting to detect a bump for decision making purposes, as the bump flag will remain set until it is read.
Whisker Bumper
RedBotBumper(int pin);
RedBotBumper(int pin, &bumpHandler);
The only two functions that the RedBotBumper class supports are constructors; by default, calling the first constructor will cause any falling edge on pin to stop the motors, and calling the first constructor will cause a falling edge on pin to call function bumpHandler(), where bumpHandler() is a user created function which accepts no parameters and returns no values.
Note that bumpHandler() is just a placeholder; you can tie the bump event to any function you want, and can have multiple pins tied to multiple different bump handling functions (so long as they have different names, of course).
Also note that the 'bumpHandler()' function executes in interrupt time. If that doesn't mean anything to you, here's what you need to know: functions like delay(), millis(), and serial reads/writes/prints will not work properly if you call them within bumpHandler(). It's best to do something simple in bumpHandler(), like set a flag, and then deal with the ramifications of that flag in the main code loop.