Getting Started with the LilyPad MP3 Player
 MikeGrusin
Getting Started with the "Player" Sketch
The "Player" sketch is not preprogrammed onto the LilyPad MP3 Player, but you can easily install it using the free Arduino IDE. It is included with the LilyPad MP3 software that you can download from the GitHub page.
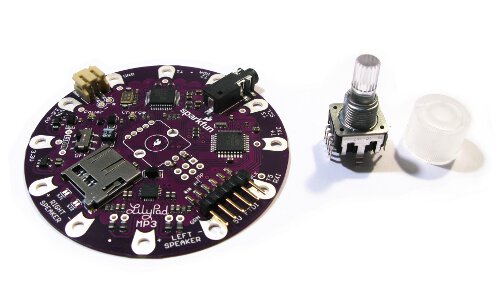
The Player sketch turns the LilyPad MP3 Player into a "real" audio player, allowing you to easily switch between tracks and change the volume. The user interface is a rotary encoder (a knob with a built-in pushbutton) available separately from SparkFun.com that you can solder onto the LilyPad MP3 Player board.
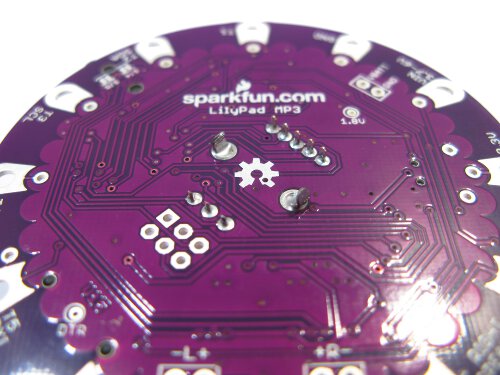
If you plan on using the player sketch and rotary encoder, be sure to install the rotary encoder before sewing the LilyPad MP3 Player into your project. This because you'll need access to the back of the board to install the encoder.
Required Materials
Clear Plastic Knob (Optional)
Soldering tools (soldering tools (i.e. soldering iron, solder, safety glasses, etc.))
A single-cell (3.7V) Lipo battery (500mAh or above recommended. You can use smaller ones if you reduce the charge rate, see the instructions here).
A 5V FTDI BOB or cable (to recharge the battery and reprogram the board if desired).
One or two 4 or 8-ohm speakers, surface transducers or headphones with a 1/8" stereo jack. If you want to connect the LilyPad MP3 Player to an amplifier, see this note.
Conductive thread and sewing supplies, or hook-up wire and soldering tools. (TIP: alligator cables are a great way to quickly test out circuits and programming before committing to needle and thread!)
Some audio files you'd like to play. The LilyPad MP3 Player can play many audio formats, you can see the whole list here.
Instructions
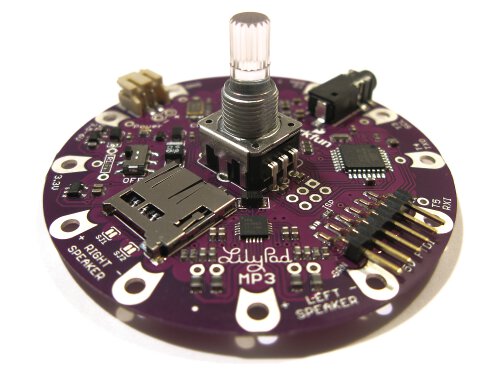
Install the rotary encoder.
- Insert the Rotary Encoder's pins into the holes in the center of the LilyPad MP3 Player. Note that it goes into the "top" side of the board (the side with the silkscreen that indicates where the encoder goes).
- Flip the board over, and solder the encoder's pins to the board.
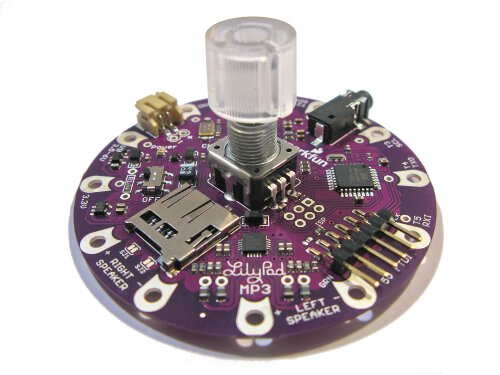
- Optional: place the knob onto the rotary encoder shaft. That's it!
Install the Arduino software.
If you haven't, download and install the free Arduino IDE (Integrated Deveopment Environment) available from www.arduino.cc. Follow the instructions there for your type of computer and operating system.
Plug your FTDI board or cable into your computer. The drivers should install automatically. If they don't, see the instructions at www.arduino.cc for your computer and operating system.
Install the LilyPad MP3 Player libraries.
Download the latest LilyPad MP3 Player software from the product page at SparkFun.com.
Open the archive, and drag the contents of the "Arduino" folder into your personal Arduino sketches directory (this is usually called "Arduino" and will be in your documents folder). This will install a "libraries" folder with several new libraries, and a "LilyPad MP3 Player" folder with example code.
If it's running, restart the Arduino IDE.
Upload the "Player" sketch.
Connect a Lipo battery (or other power source) to the LilyPad MP3 Player.
Connect your 5V FTDI board or cable to the LilyPad MP3 Player. (The yellow "charge" LED may light up, that's fine.)
Turn on the LilyPad MP3 Player's power switch. The red LED should light up.
Start the Arduino IDE, and load the "Player" sketch from the "LilyPad MP3 Player" folder.
From the IDE's "Tools/Board" menu, select "Arduino Pro or Pro Mini (3.3V/8MHz) w/ATmega 328"
From the IDE's "Tools/Serial Port" menu, select the port that your FTDI board or cable is using. This is usually the highest number; you can be sure if you unplug the FTDI and the number disappears.
Upload the "Player" sketch to the LilyPad MP3 Player. If you have compilation problems, double-check that the required libraries were installed correctly from step 3 above.
Once the code is loaded and running, the RGB LED on the rotary encoder will blink if there is no micro-SD card installed. This is normal.
Place the audio files of your choice on a micro-SD card.
The LilyPad MP3 Player understands a wide variety of audio types. The filenames can be anything as long as they use one of the standard file extensions (MP3, WAV, AAC, MID, etc.).
The only limit to the number of audio tracks you can have on your SD card is its storage capacity.
Turn off the LilyPad MP3 Player, and plug your micro-SD card into the socket.
- Push it in until it clicks; if you release it, it will stay seated. To remove it, push again until it clicks, and it will pop out when you release it.
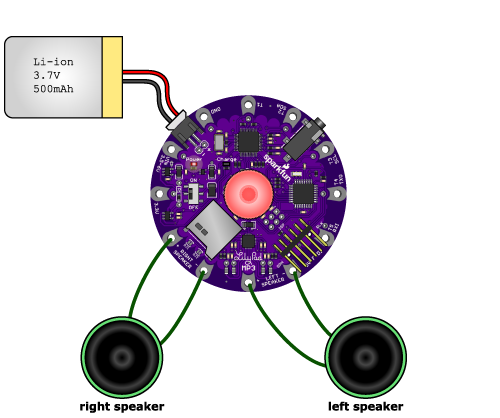
Connect a headphone to the headphone jack, or connect speakers to the left and right speaker terminals. (Note that when anything is plugged into the headphone jack, the speaker terminals are disabled. This behavior can be changed if desired.
- TIP: alligator cables are a great way to quickly test out circuits and programming before committing to needle and thread!
- TIP: alligator cables are a great way to quickly test out circuits and programming before committing to needle and thread!
Plug a 3.7V single-cell Lipo battery into the JST connector. Note that a FTDI USB connection will not provide enough power to run the board, so a battery or other external power source is required.
Turn the power switch ON. The red LED should light up, and after a few seconds, the rotary encoder will turn red, indicating the player is in "track" mode. (If the rotary encoder blinks, there was a startup problem, see the troubleshooting page for help.)
Play music! Here's how:
At any time, to start and stop playback, briefly press the rotary encoder button. When a track has finished playing, the next track will automatically start.
To switch between "track" and "volume" modes, hold the rotary encoder button down for one second until the color changes. Red = track mode, green = volume mode.
In track mode, you can turn the knob forwards or backwards to change tracks (one track per "click" of the knob). If you're currently playing, turning the knob will stop the current track, switch to the next / previous one, and start the new track. If you're not playing, the player will silently keep track of how many clicks you've made. If you click more than the number of tracks on the card, it will loop around to the beginning.
In volume mode, you can turn the knob forwards or backwards to change the volume.
To charge the battery or reprogram the board, connect a 5 volt FTDI board or cable to the FTDI header. The yellow LED will light up while the battery is charging and go out when it's full.
Have fun!