Contributors:
 Christo-boots with the-pher
,
 bboyho
 Introduction
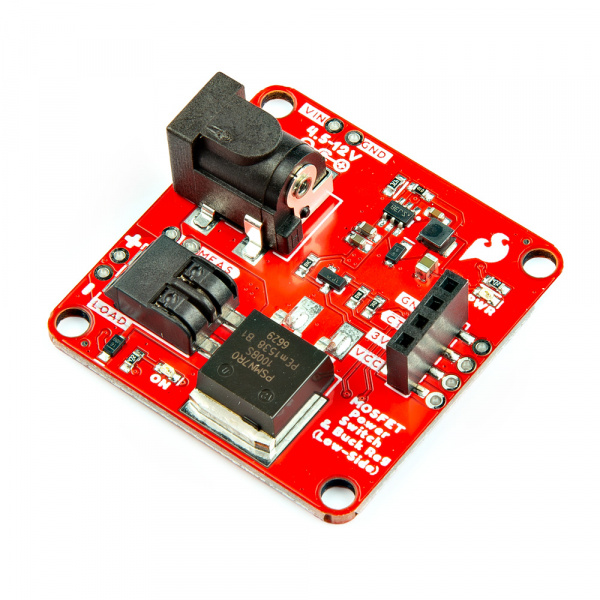
This tutorial will guide you through using the SparkFun MOSFET Power Switch and Buck Regulator (Low-Side) with your Arduino projects. This handy board combines a MOSFET switch for controlling high-power loads (up to 12V) with a built-in buck regulator that conveniently provides stable 3.3V power for your Arduino.
We'll explore various functionalities, starting with basic on/off control and progressing to creating dimming effects for LEDs and controlling motors with variable speeds. By the end, you'll be able to safely manage powerful components and add exciting features to your Arduino projects!
COM-23979
The MOSFET Power Switch and Buck Regulator (Low-Side) can be powered with up to 12V and control up to 10A, all while providin…
If you are looking for the full Hookup Guide for the SparkFun MOSFET Power Switch and Buck Regulator (Low-Side), click the button bellow. This guide only covers a simple project to get you started quickly, while the full Hookup Guide goes over every detail of the sensor.
Tip: The 3.3V output from the MOSFET Power Switch and Buck Regulator (Low-Side) provides another alternative to power microcontrollers that may not be able to accept higher voltages. For example, most of the Thing Plus Development Boards only accept a maximum of 6V at their VIN pin, and they most operate at 3.3V. So this board is especially handy in those use-cases. Additionally, even though the Arduino Pro Mini can accept up to 12V, this will require its onboard linear regulator to work very had to regulate that voltage down to 3.3V. Thus, this MOSFET Power Switch and Buck Regulator (Low-Side) would be the "cooler" choice.
Note: The tutorial focuses on using a microcontroller with Arduino. However, if your microcontroller has a digital or PWM, you can also control the N-channel MOSFET controller as well! You can also use this using a micro:bit with MakeCode or Raspberry Pi's RP2040 microcontroller with MicroPython!