ELasto-Nightlight
 Chelsea the Destroyer
Welcome!

With one notable exception, bunnies are generally a cute and good-natured species, which makes them the perfect icon for a nightlight to reassure children that there is not - for instance - a velociraptor waiting in their closet until the cover of night to emerge and feast joyfully upon their parts. I decided to make this project as a sort of retroactive therapy, because it would have really come in handy for me as a 9-year-old fresh out of my very first PG-13 movie, having learned to my dismay that velociraptors could not only open doors, but were also probably waiting in my closet until the cover of night to emerge and feast joyfully upon my parts.
This project would also be great in a baby's nursery, or anywhere you need a little extra light.
Yeah. So, let's get started!
This tutorial uses ELastoLite - a waterproof, bendable, iron-able electroluminescent panel that will smush accommodatingly into just about anything and also works great in clothing. There's a lot you can do with these panels; we've also used them to make a Captain America shield and an illuminated temporary tattoo, among other projects.
Suggested Reading
Full disclosure: I had never played with ELastoLite before making this project, so if you want to read more before getting started, I recommend checking out the ELastoLite hookup guide and our assembly video, both of which I referenced heavily before I made my light. Some other tutorials that may help get you started with this project include:
Anatomy of a Nightlight
Here are all the bits I started with:
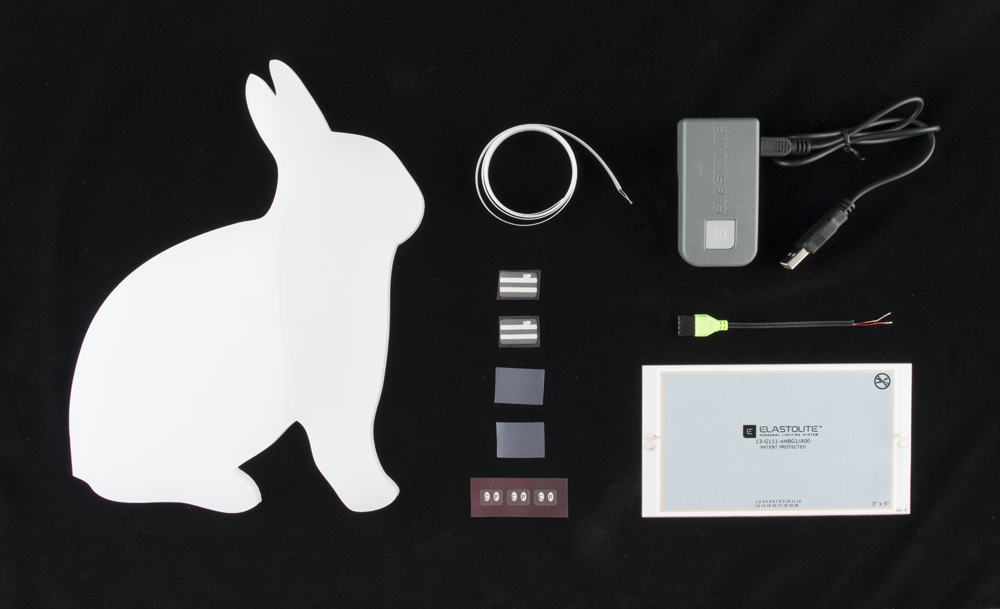
Here is a wishlist of parts to take the guesswork out of it for you.
Note: Once you're comfortable with these materials you are welcome to adjust the size of your inverter and panel as needed (there is a size/power limit on each, so it's important to use the correct inverter depending on the area of your panel). There is more information on the Whys of inverters in the hookup guide.
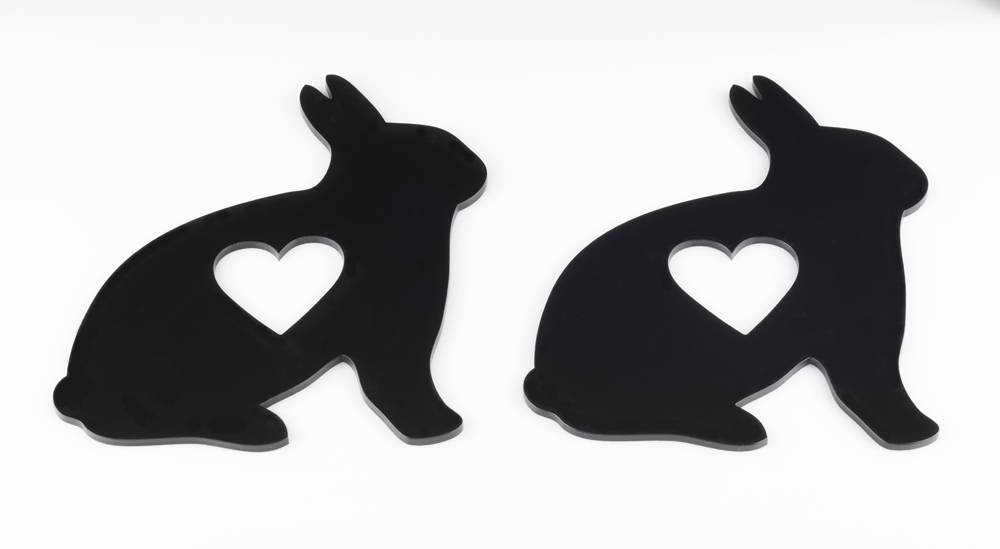
I used SparkFun's laser cutter to make the rabbit-shaped pieces of translucent white acrylic. I realize not everyone has access to one of these, but the good news is that the ELastoLite panel doesn't put out any heat if connected properly. It will get slightly warmer than room temperature, but that's it. So, you can use anything you like for your enclosure: acrylic, fabric, plastic, etc.
You will also need an iron, some wax paper, and a small exacto/hobby knife. Go forth, and gather these things.
I recommend reading through my whole tutorial before getting started, as I learned some valuable and annoying lessons along the way. You might as well save yourself some trouble, and learn from my mistakes, which I will spare you none of.
Let's Build a Rabbit - Pt. 1
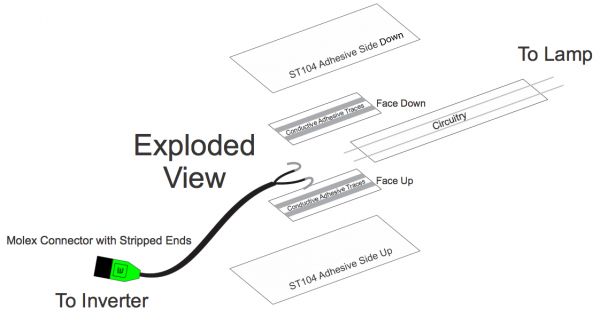
Ok, here we go! Now that you know what we're working toward, here is an exploded diagram of how our circuit will work:
First thing's first, charge your inverter up by plugging the included mini USB cord into the inverter and using your computer or a USB wall adapter to charge it. The light should turn green when it's charged.
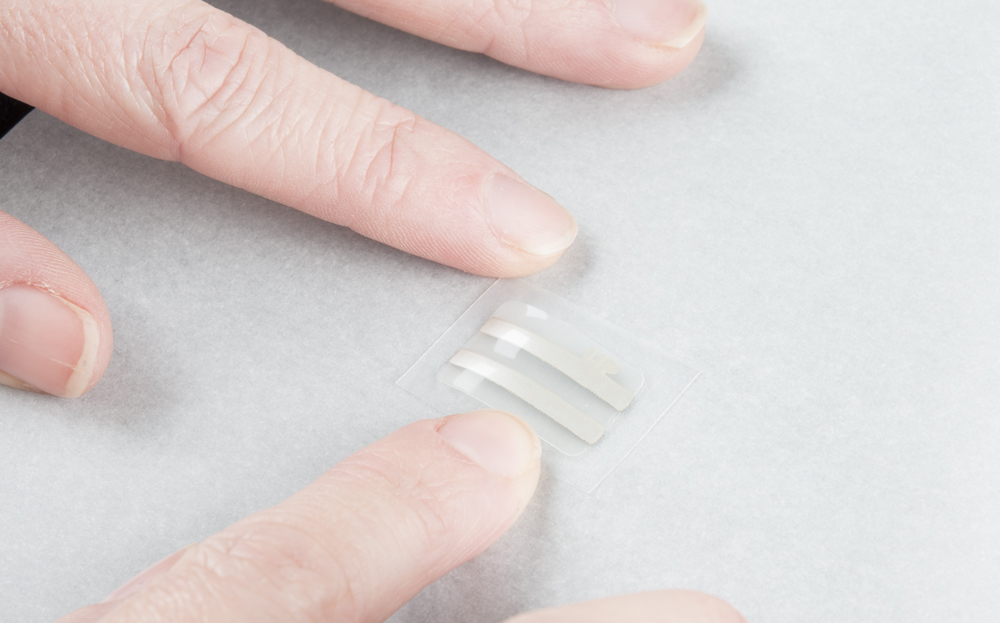
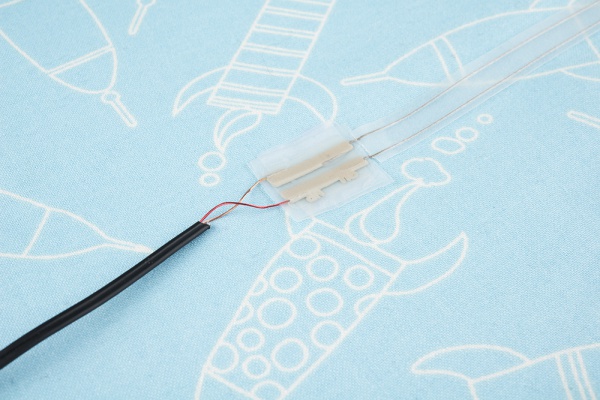
Then we will prep the wire bits that will connect to form our circuit. The Molex connector comes with four wires sticking out: red, tan, blue and green. However, we only need the red and tan ones, so using snippers, your hobby knife, or your BARE HANDS, cut off the green and blue wires, leaving the red and tan intact with some little tails of bare wire sticking out. We're halfway done with the wire parts!
Check out the ribbon of circuit tape, which looks like two parallel, grey strings inexplicably encased in a material that looks like it should glow-in-the-dark but sadly does not. You will notice in the exploded view that the circuit tape has exposed conductive thread at each end and that the circuit tape in your hand does not. This is because nothing comes easy in life, and that's the way it is. So, wield thy hobby knife and make a cut on each edge and across the middle section of the tape, perpendicular to the thread - WITHOUT cutting into the thread at all (because that will make our connection pointless) - and wiggle the sheath of tape right off of those wires, leaving about 1/3 of an inch exposed. Like this:
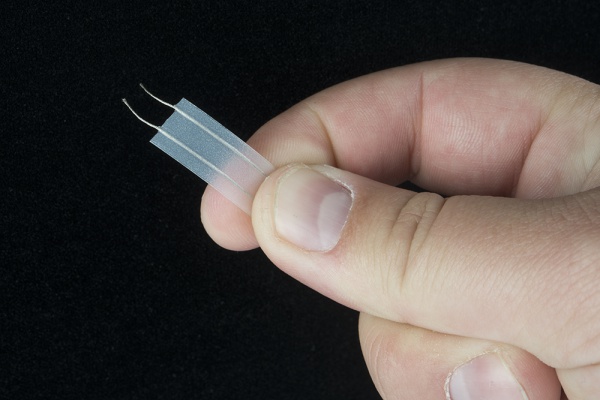
Repeat this on the other end of the tape. Note: You don't have to use ALL of the tape you have, it just depends on how much of a "cord" you need on your lamp. I only used about a foot.
Ok, the wires are ready! Let's push on.
Let's Build a Rabbit - Pt. 2
Now that our wires are ready and our inverter is charged, it's time to connect the circuit. I'll start with a simile because the assembly process was a little frustrating; It may help to think of it like you're assembling an electronics sandwich, and the fixins aren't totally excited about being eaten. Here's a reminder on how our circuit will be assembled:
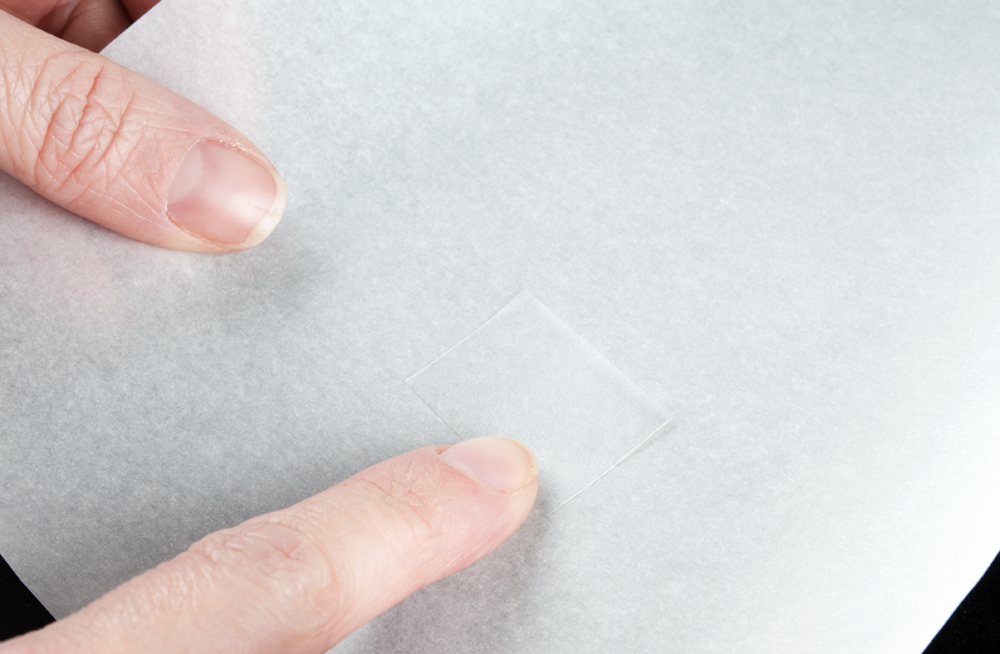
Now's a good time to lay down the wax paper, and turn on the iron to the cotton setting.
You should have received a 2-inch strip of the adhesive iron-on tape. Cut that guy right in half; we'll use each 1-inch piece as our bread. On the wax paper, start by laying down one half of the iron-on tape, adhesive (stickier/rougher) side up, as if you have buttered one side of the bread and it is ready to receive its delicious sandwich ingredients.
Then, take one of the conductive adhesive traces, and lay it face up (so you can read the word "UP") on top of the bread tape.
Now it gets a little tricky. Maneuver the bare ends of the red and tan wires of the Molex connector onto one side of the traces and the exposed conductive thread from the circuit tape onto the other. This requires some patience and heavy breathing.

Once you've gotten those to sit still where they're supposed to, mash that other conductive adhesive trace face-down over them so everything lines up and the wires are held onto the traces (the word "UP" on this second piece of conductive adhesive trace tape is now meaningless and should appear backward).
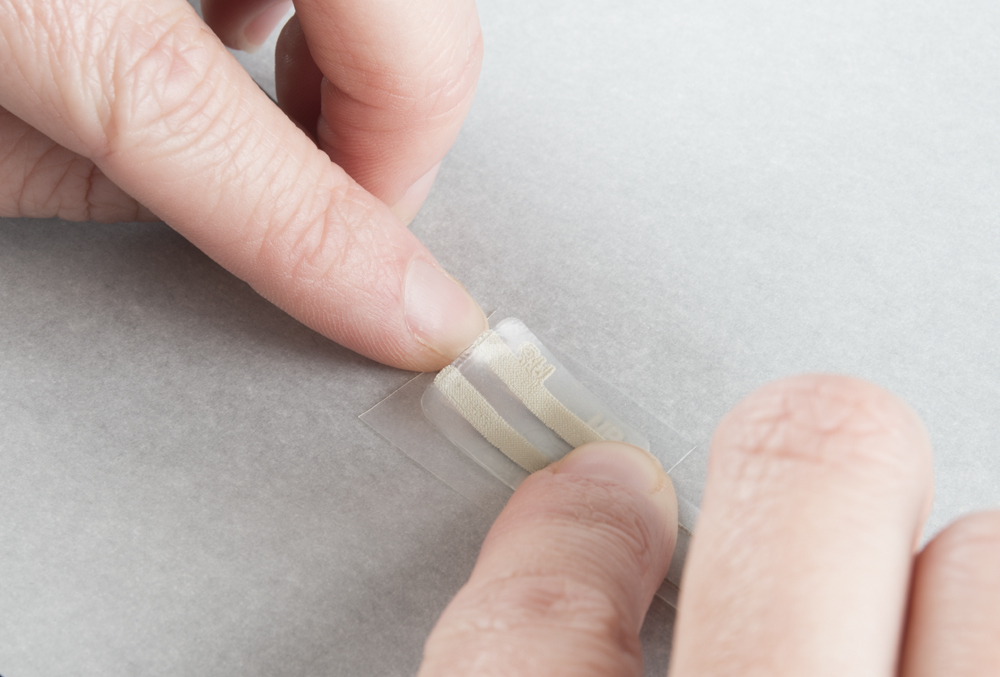
Lastly, we will place our other piece of iron-on tape/sandwich bread adhesive/butter side down to hold it all together, and use the tip of the iron to carefully melt it all together for a few seconds. Let it cool.
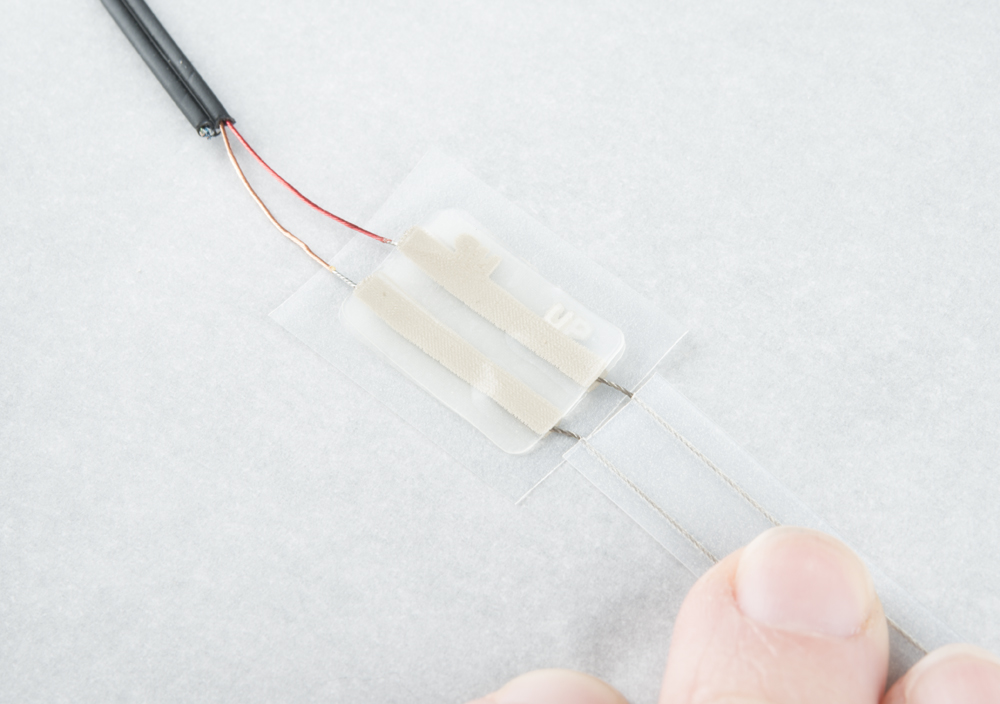
This is the part where I started to lose my mind a little bit, because I did not use just the tip of the iron and accidentally got the iron stuck to a corner of the face-up adhesive tape-bread. My circuit tape thread kept wiggling out of its connection, which meant I had to peel apart the ironed-together circuit, replace everything, and gingerly re-iron it. This happened three times, and in the end I had mostly ruined one side of my circuit and had to patch it together with one of the extra CP stickers that come with the lamp panel (we're getting there, I promise). This is what it SHOULD look like:
Anyway it turns out mine still works great, which fortunately means you can get away with some screw-ups in this process. Don't give up, we're almost there!
Let's Build a Rabbit - Pt. 3
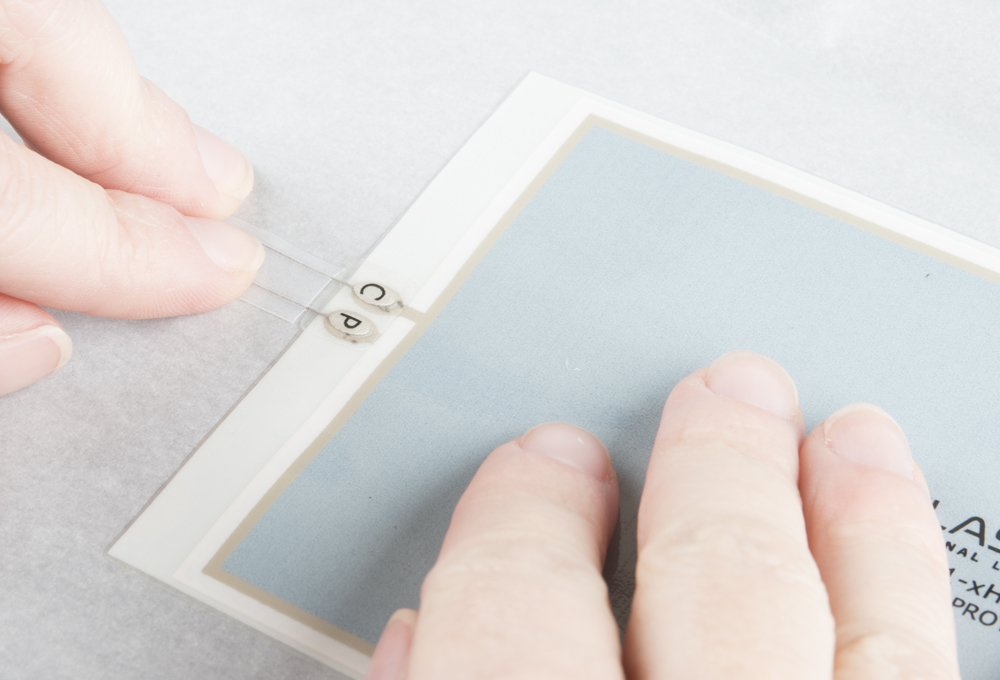
Now that you have survived that part, let's celebrate by connecting the other end of our hand-stripped circuit tape to our ELastoLite panel!
Peel your lamp off its backing, and find one of the CP sticker sets (it comes with three, we will use two, or if you are me we will use them all for triage). With the writing side of the lamp up, put the unattached end of the circuit tape onto the contact ovals, sandwich the CP (Contact Point, I assume? I am not an engineer, I went to school for words) stickers letter side up over them, and use only the tip of the iron to glue them together (Another mistake I made - my iron touched the actual ELastoLite panel and melted a little strip off. But like I said, it still works somehow, so ALL HAIL SCIENCE).

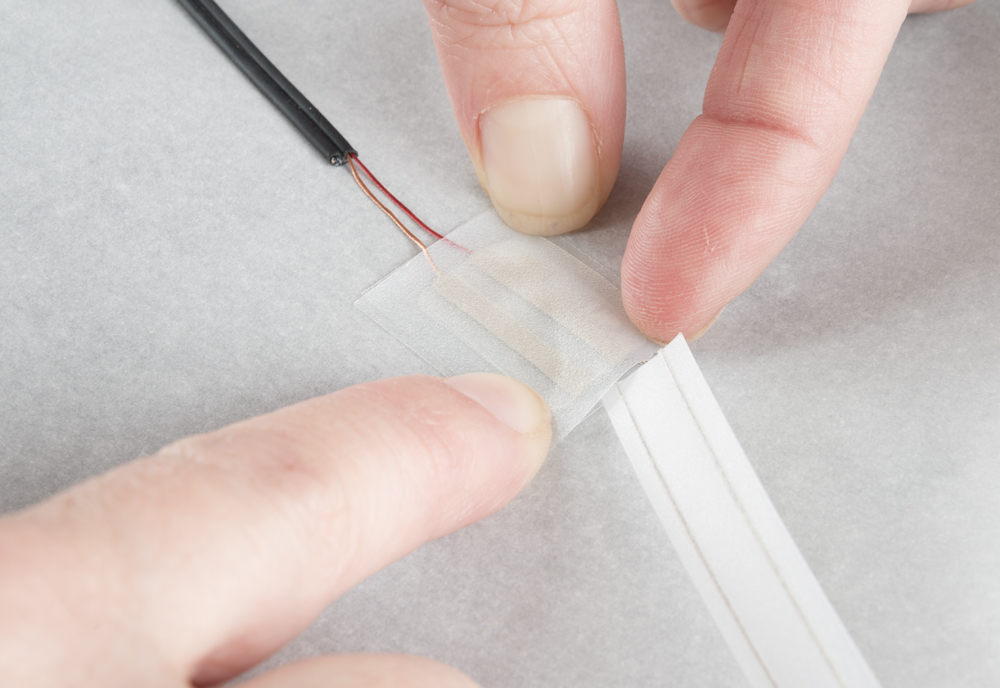
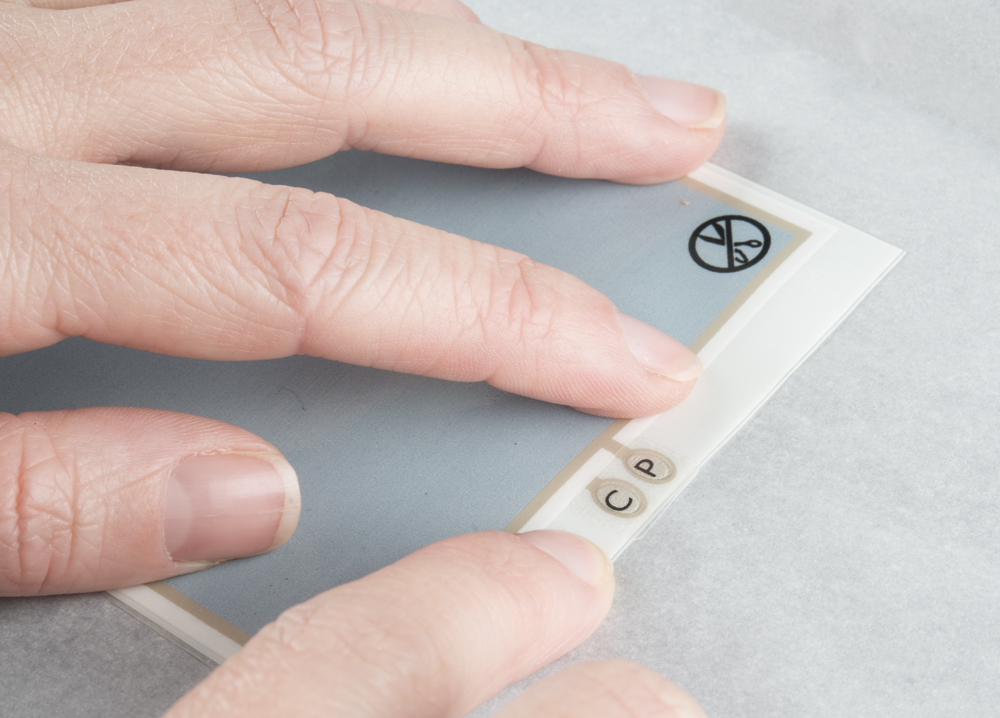
Last (last!!), iron one of the other CP sticker sets over the open contact ovals on the other side of the panel, partially because we are tidy, but also mostly so we don't have a live, open connection just hanging around waiting to turn us into Electro.
CIRCUITRY COMPLETE. We are the champions! Now for the moment of truth, go in a darkened room and push that inverter button.
The first button push will make the light flash, the second button push will make it flash at an alarming, seizure-inducing rate, and the third button push will be a normal sustained light, which is best for sleeping situations.
Let there be li...oh.
Once I got my lamp cobbled together, mess-ups and all, and discovered it miraculously worked, I sandwiched the panel between my two rabbit pieces and turned off the lights to bask in the calming, rabbit-shaped glow of my new nightlight.
However, I discovered that instead of emitting a diffused light through the entire rabbit shape, I got this:
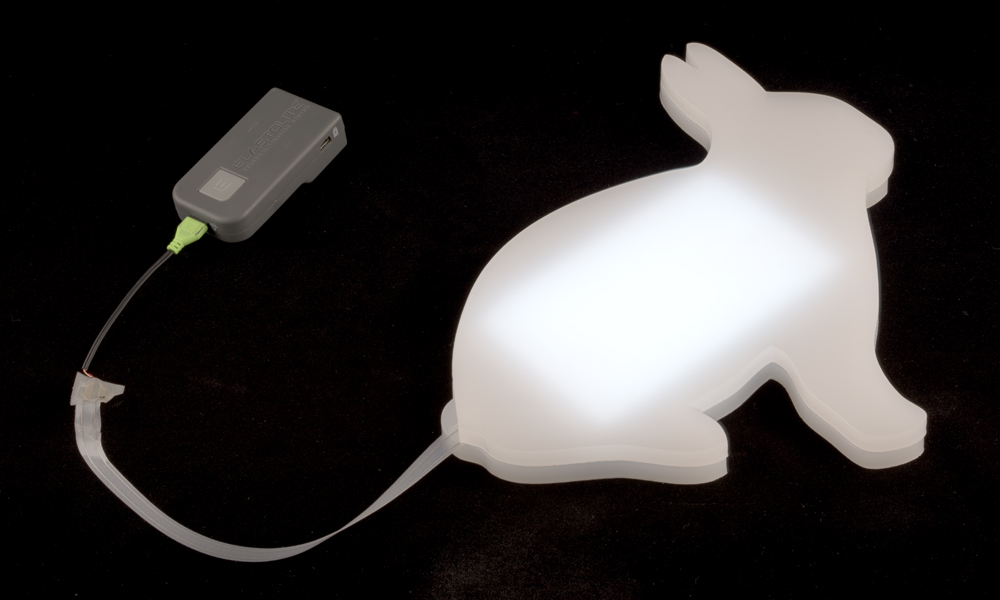
A nightmare creature who has somehow consumed a large rectangle of radioactive material. Not soothing! And honestly I'm not sure how to correct that so it wouldn't look like a sinister glowing rectangle inside a bunny instead of just a benevolent, dinosaur-attack preventing glowing rabbit. So instead I went back to the laser cutter and made these:
And now...
Let there be light!
It's aliiiiive! Now go forth with your creation, and prevent any and all prehistoric carnivore attacks.