EL Wire Light-Up Dog Harness
 jenfoxbot
 Assembly
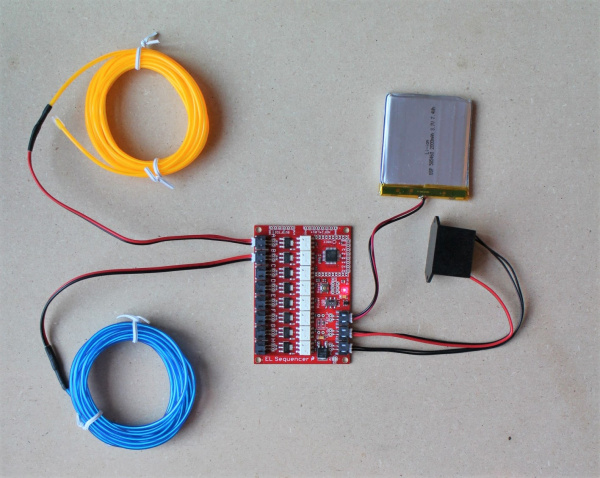
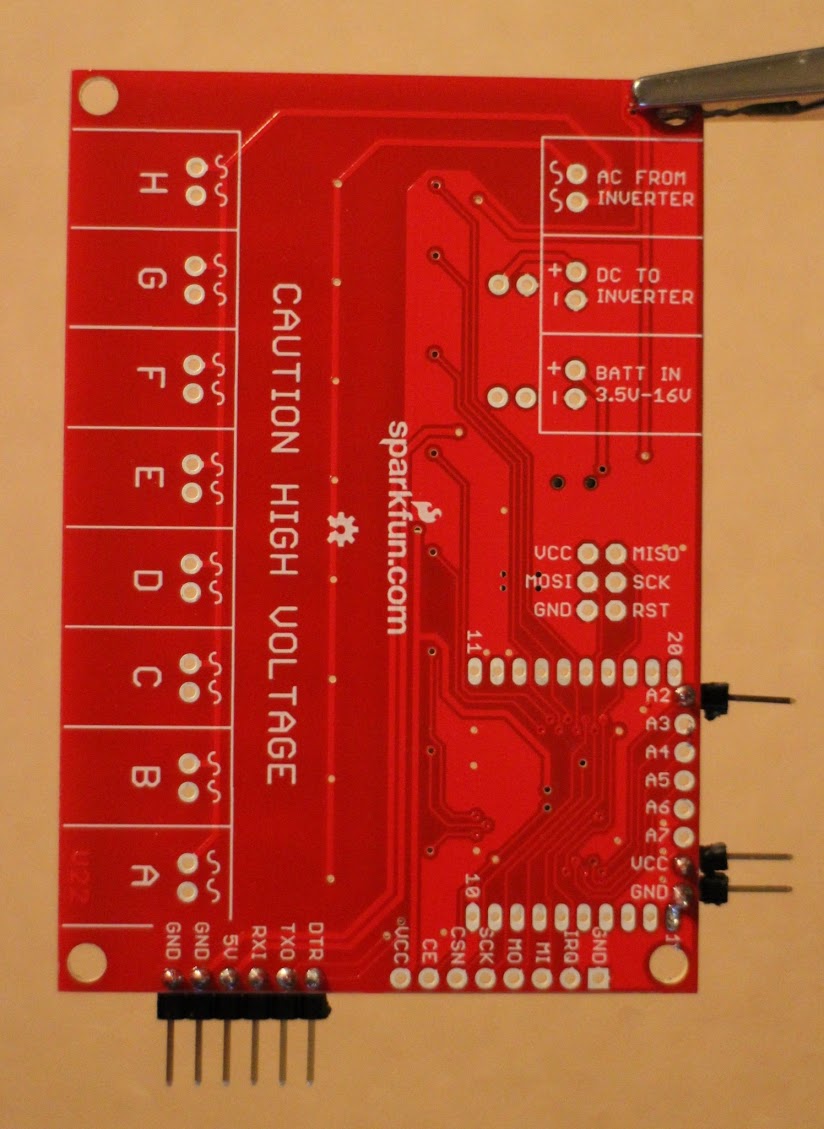
CAUTION: Although it is low current, EL wire runs on high voltage AC (100 VAC). There are exposed connections on the EL Sequencer board so BE CAREFUL when handling the board. Always double (and triple) check that the power switch is OFF before touching any part of the board. For final projects, it is recommended to coat all exposed connections in epoxy, hot glue, electrical tape, or other insulating material.
Test the EL Sequencer with EL wire. Connect EL Wire, inverter, and battery to EL sequencer. Turn on power switch and check that the EL wire turns on (should be blinking). You can connect, and control, up to 8 different strands of EL wire.
Solder header pins onto 5V FTDI pinholes on the EL Sequencer.
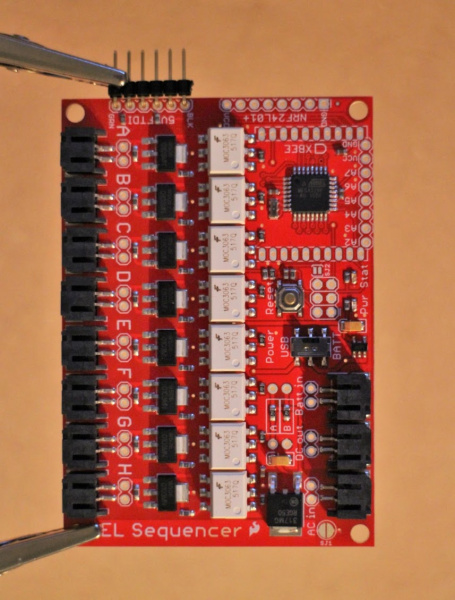
Solder header pins to the "GND," "VCC," and "A2" pinholes EL Sequencer (right side).

Solder male end of breadboard wires to ambient light sensor. Coat exposed metal on the sensor in epoxy (do not coat actual sensor).
Note: Recommended to solder the pins on the bottom of the sensor so that the sensor can more easily be attached to the harness (found this out the hard way..).

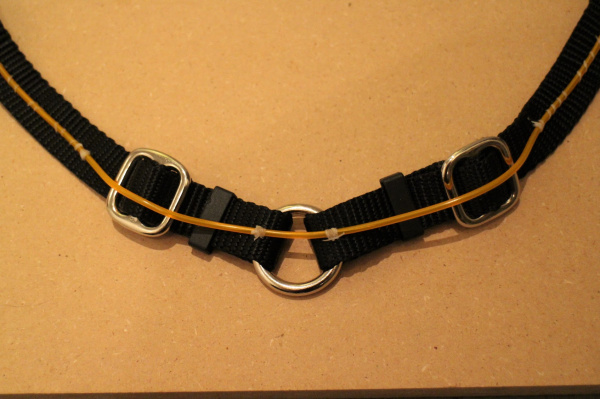
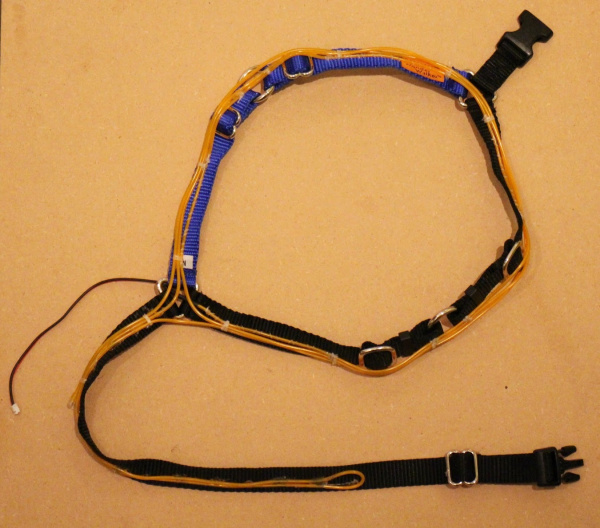
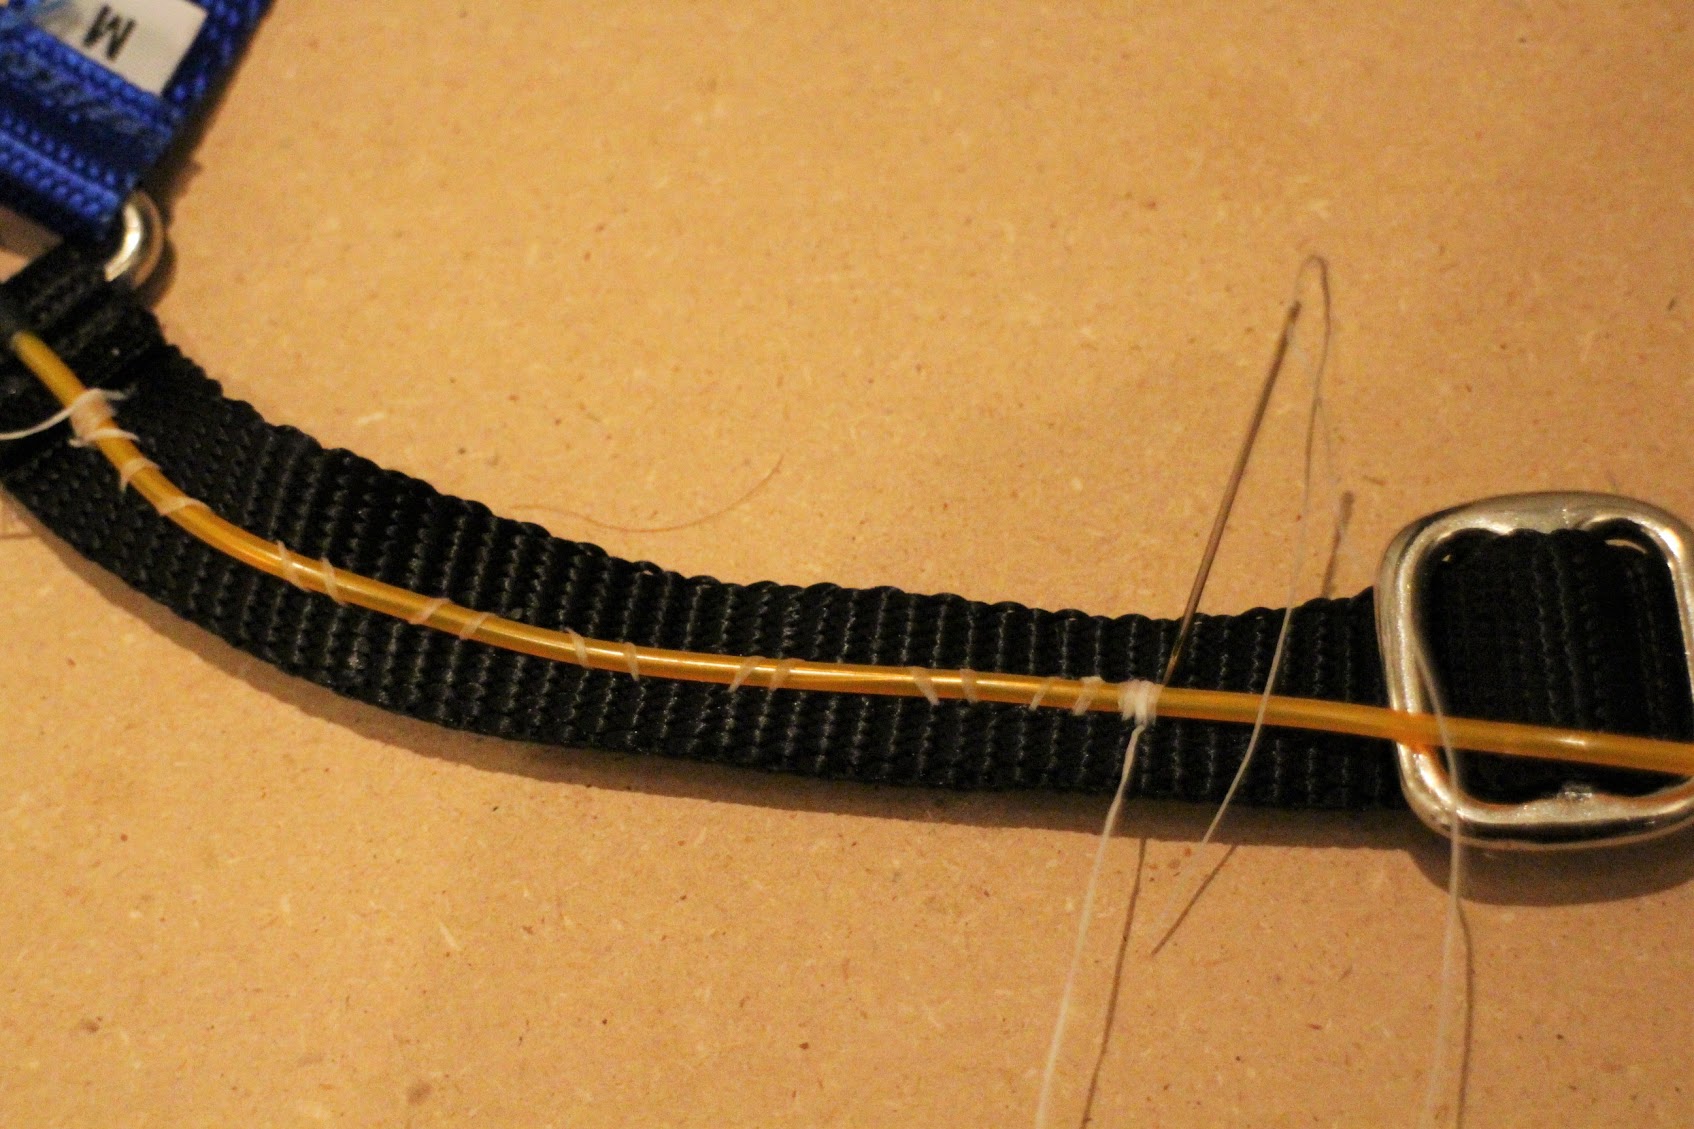
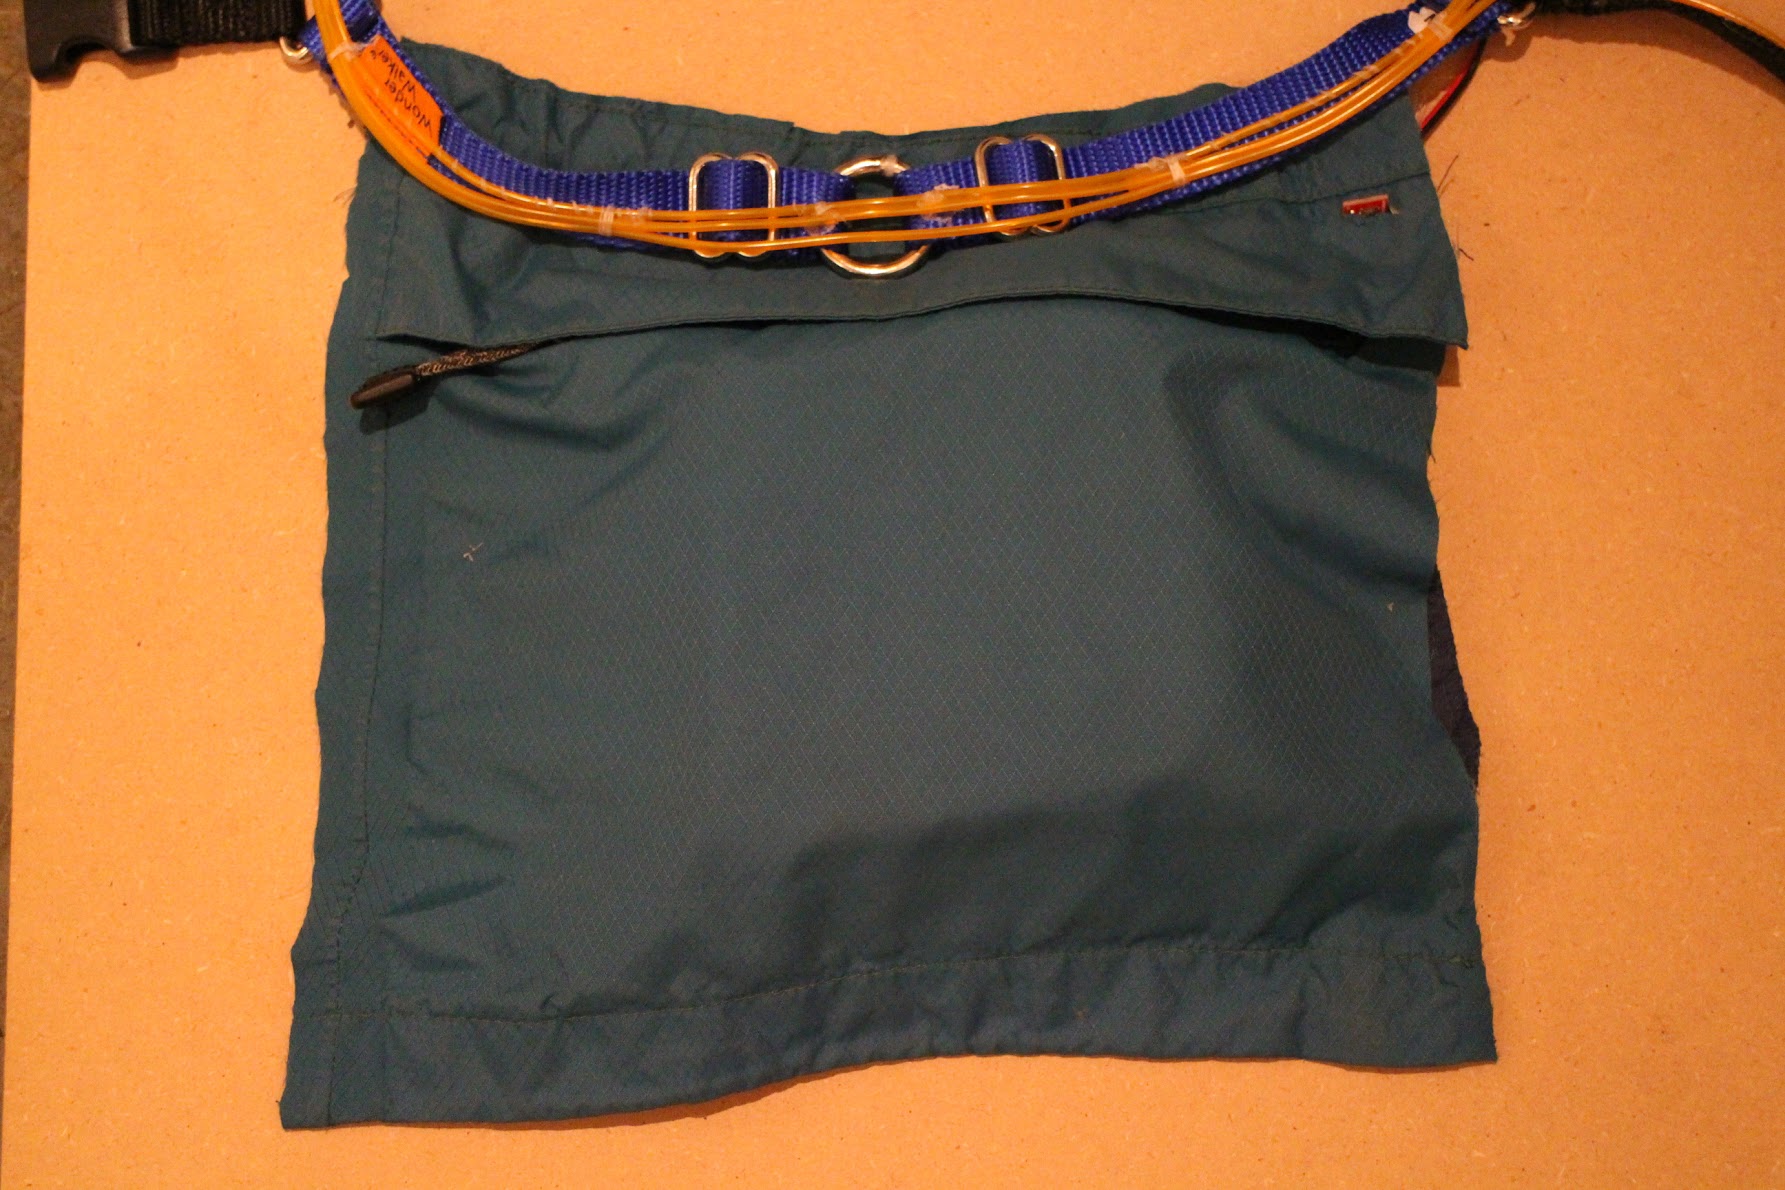
Attach EL wire to harness.
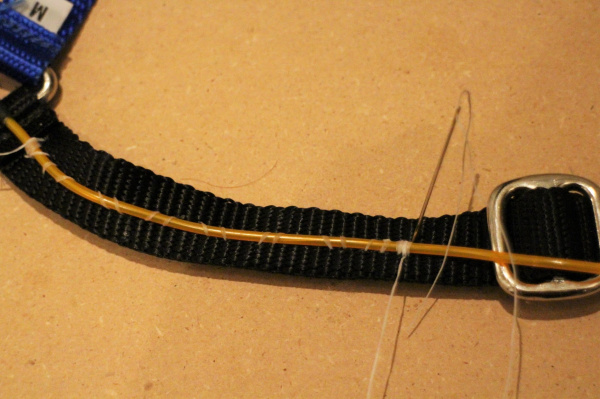
Sew EL wire onto harness with dental floss for a strong, durable bond. Can also use an appropriate fabric adhesive.
 For straps/buckles: leave about 1" of unadhered EL wire on either side of the strap/buckle.
You can either wrap the ELwire for its entire length, or cut it and insulate the ends.
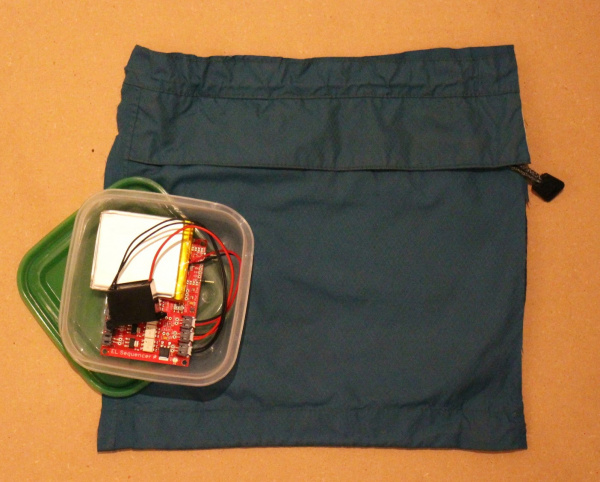
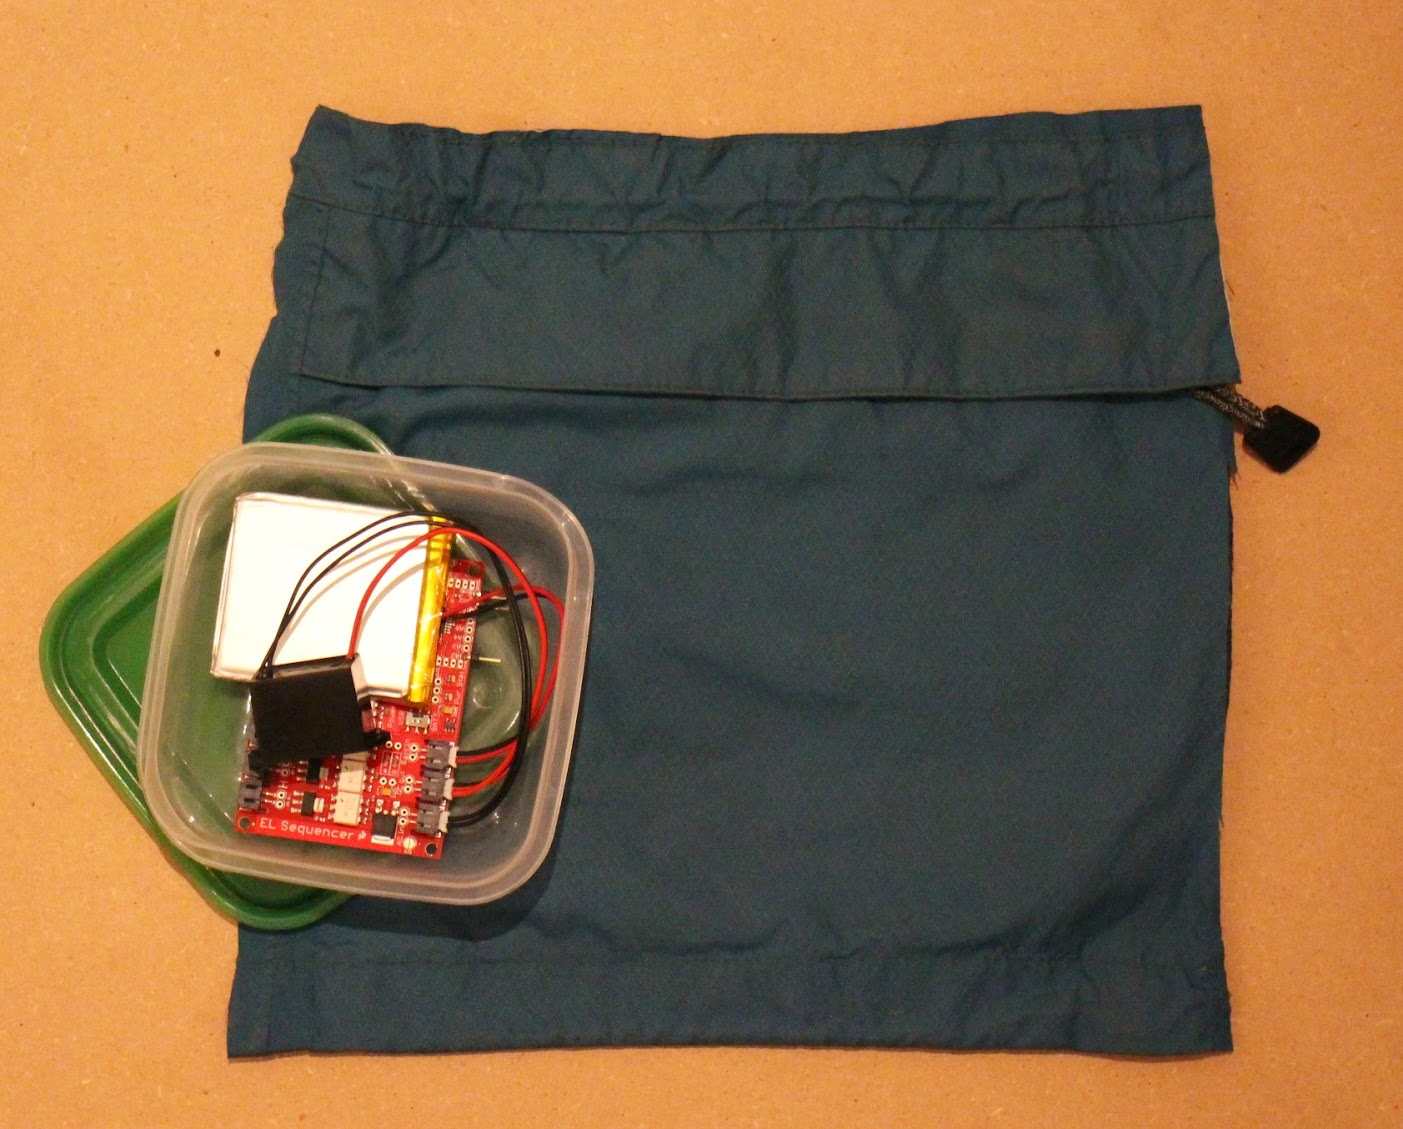
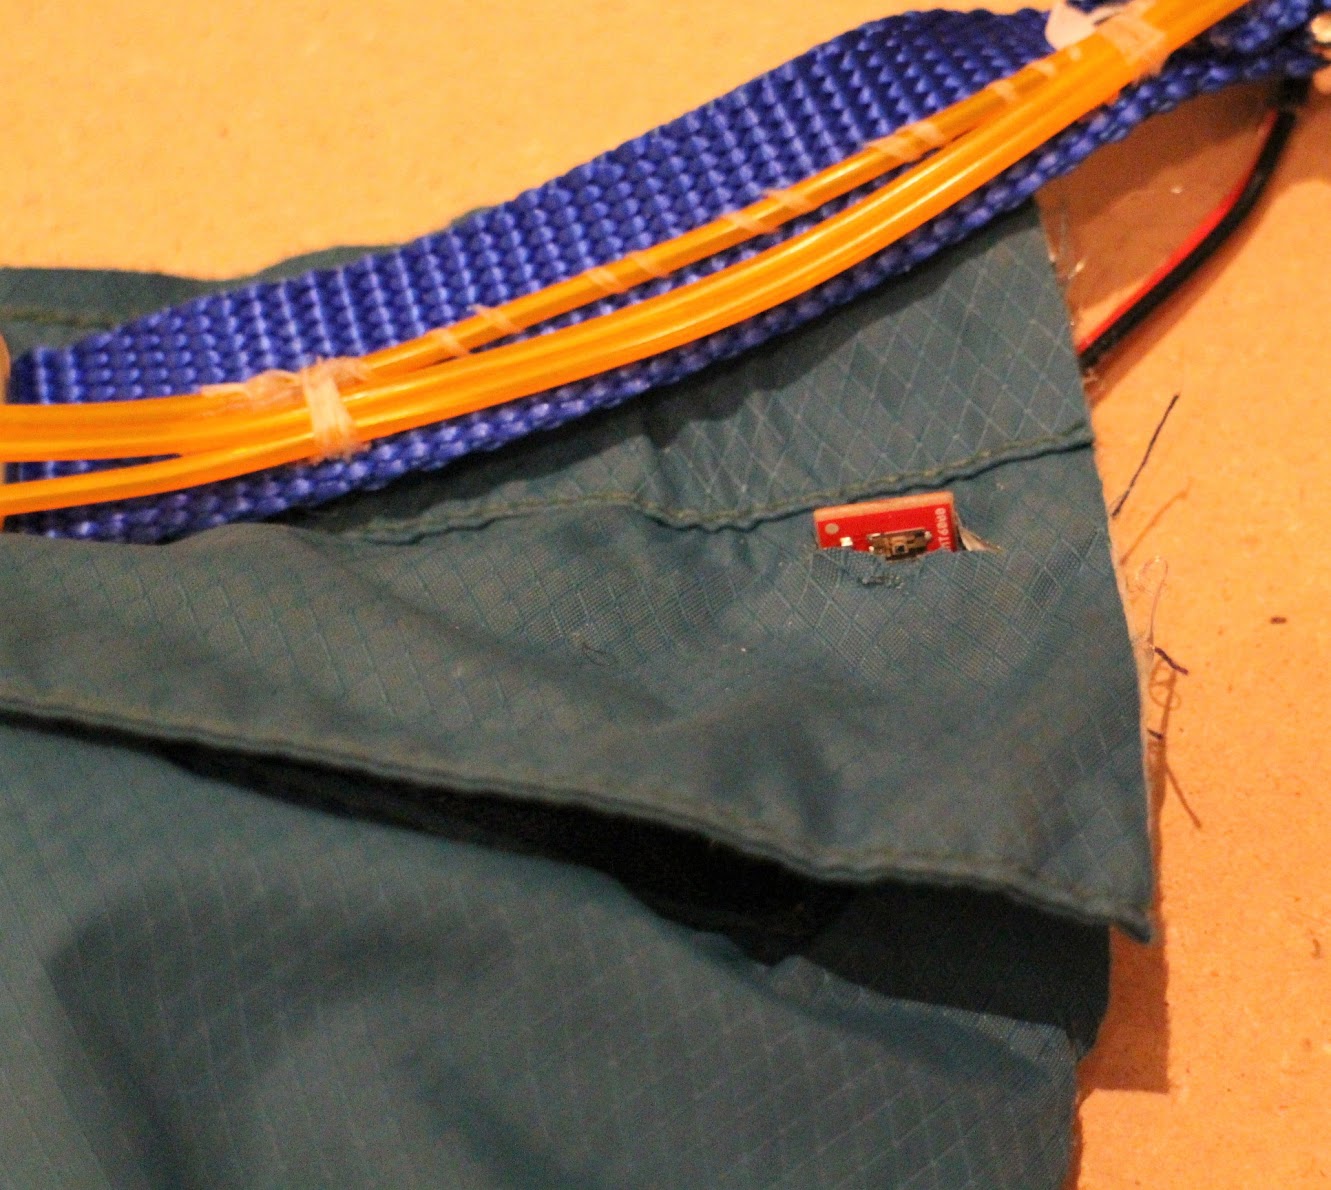
Make a durable pouch for the electronics.
For a waterproof pouch, cut out a pocket in a waterproof jacket. I also included a small tuperware container to house the electronics in the pouch to further insulate and protect them from weather and dog conditions.
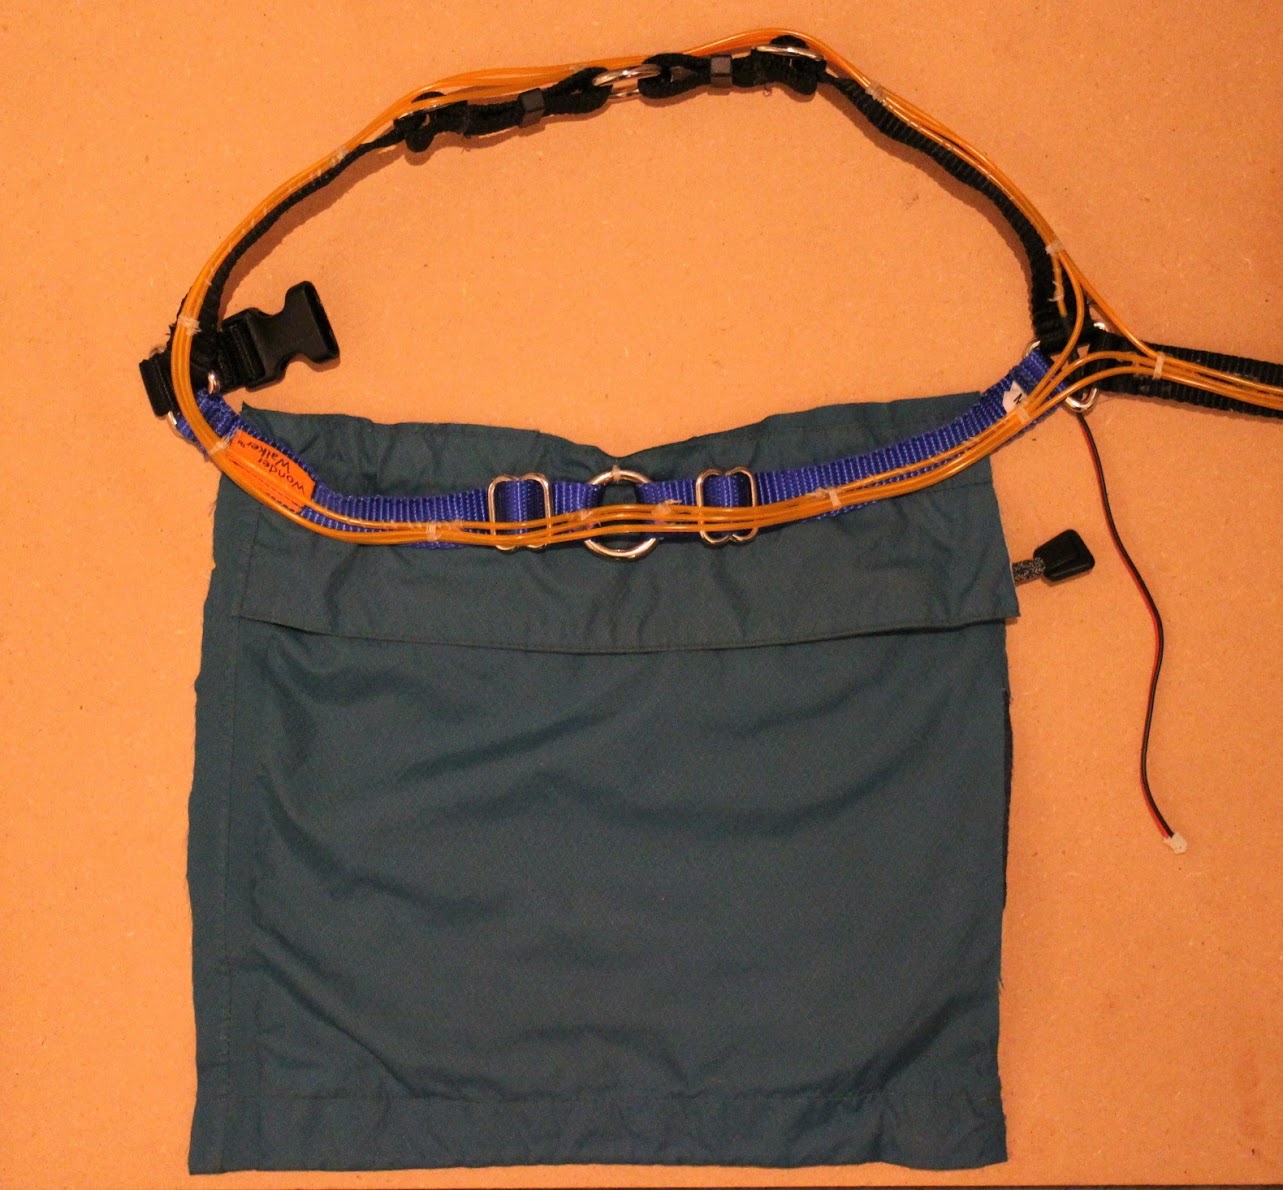
Attach electronics pouch to harness.
Sew pouch onto top side of harness, or wherever is comfortable and practical for your pup. Recommended to put harness on dog to find a suitable location for the pouch.

Cut small holes on underside of pouch for the EL wire JST connector and the light sensor wires.
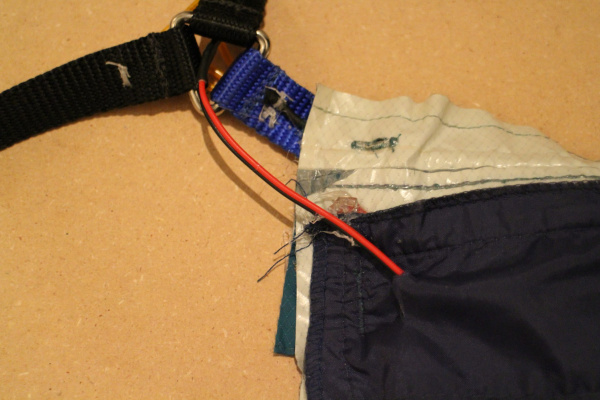
Attach and secure light sensor to harness. Recommended to put harness on pooch and mark location for light sensor so that it faces upward.
There was an ideal flap in the rainjacket pocket for me to cut a hole, push the sensor through, and epoxy the other side. You can also use velcro or sew the light sensor onto the pocket or harness, just be sure that it stays stationary and won't get covered when the dog is moving.

If using tuperware, cut or drill holes in tuperware for EL wire JST connector and light sensor wires.
If you are not using tuperware, it is recommended to cushion the electronics and/or epoxy all connections (except the JST connectors) to protect them from your dog's antics.
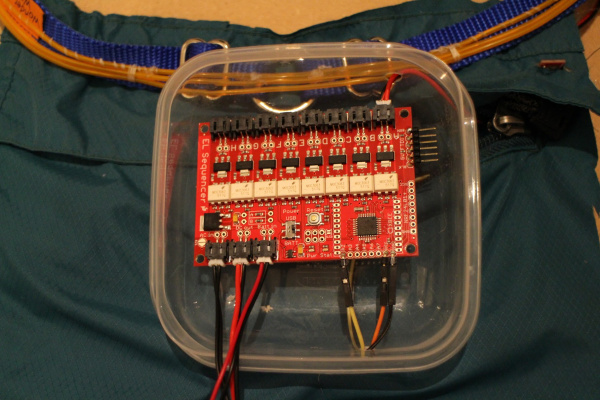
Connect EL wire and light sensor to EL Sequencer (through holes in the tuperware), then epoxy the holes to keep wires in place and maintain a waterproof seal.


