E-Textile Art Pin
This Tutorial is Retired!
For an updated E-Textile Art Pin tutorial, try checking out the "Glowing Pin" tutorial.
View the updated tutorial: Glowing Pin
 Gella
Gella 
Introduction
Let's create a quick and easy piece of e-textile art using a LilyPad LED, battery holder, conductive thread, and coin cell battery. This beginner project introduces sewing with conductive thread to create a simple circuit pin.
This is also one of our most popular activities for large 'make and take' events, so we’ve included downloadable templates for use with inkjet printable fabric if you want to save time. The attached PDFs are available in full color or black and white coloring book style designs.

Suggested Reading
If you've never worked with e-textiles before, you may want to have a look at these other tutorials.
Materials and Tools
Let's go over all of the things you'll need to sew your project together:
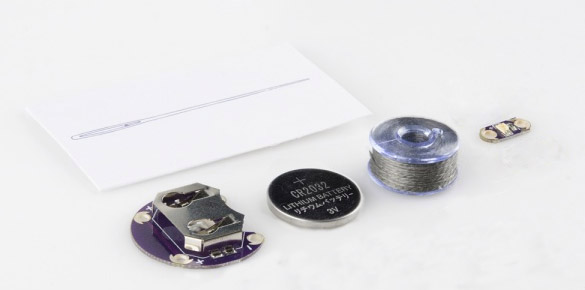
You will also need:
- Fabric - to draw your design on (or printable fabric if you are downloading our designs). Canvas or muslin work well.
- Felt - cut into a 2.5" circle
- Scissors
- Hot glue gun
- Fabric Markers
- Pin Back - Rectangular adhesive ones work well.
- Optional - printer if you are using our designs.
Step 1: Prepare Fabric
Cut a 2.5" circle of felt for the backing of your pin and a slightly larger circle out of thin fabric for the front/top of your pin. If your fabric is fraying along the edges, use fray check or clear nail polish to seal after you finish your project.
Designs
Here are some designs we've created. There are 12 to a sheet, but you'll only need one for this project. Right-click the image below and choose “Save Link As” to download the design to your computer.

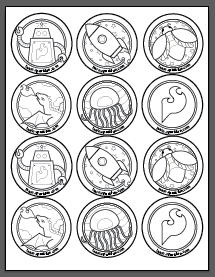
After downloading a design, follow the directions on the package of your printable fabric to print them out. Feel free to create a larger pin by scaling the downloadable designs if you'd like more room to work with or for a real statement piece.
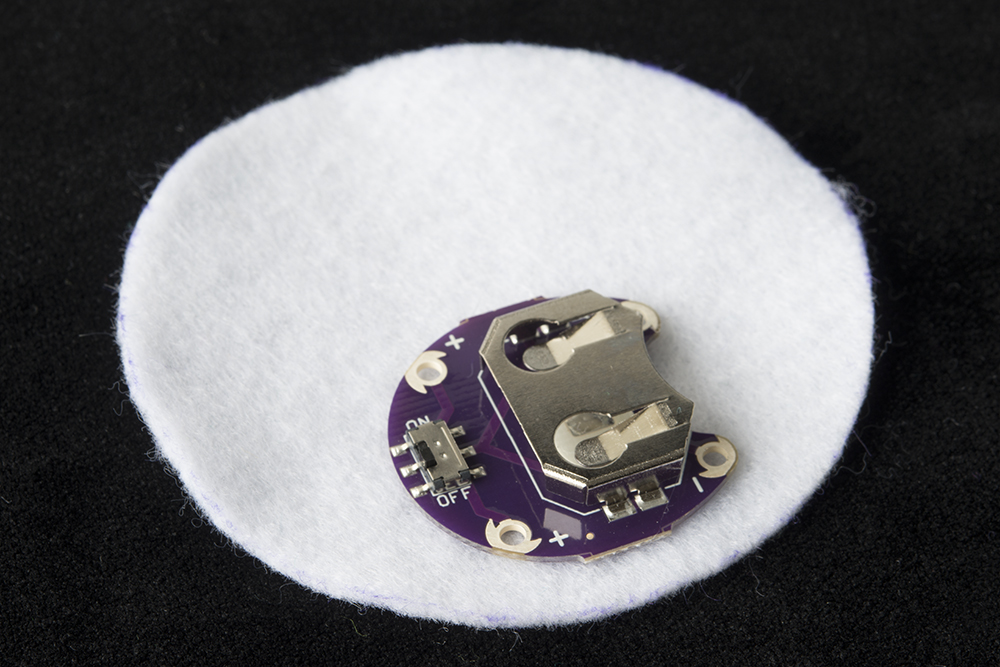
Step 2: Attach Components
Take a look at your LED and battery holder, and notice that the silver sewing holes are labeled either positive or negative. Orient the battery holder with the ON/OFF switch to the left side and the bottom of the holder as close to the edge as you can. Use a a small dot of hot glue in the center of the holder to attach it to the felt, as shown. Gluing the battery holder on this way leaves room for the LilyPad LED.
Placing LED
Flip the circle over -- time to decide on the placement of the LED.
If you are using one of the pre-made designs, hold the design over the felt, and use a fabric marker to mark where the LED should be placed to shine through. Be careful not to put the LED directly behind the battery holder or else you won't be able to sew through it.
If you are designing your own artwork, decide where on the fabric the LED should shine through, and mark it. Draw your design now, or wait until the finishing touches step.

While designing, keep in mind that the LED will need to be slightly above the center or towards the top half of the fabric so it doesn't interfere with the battery holder.
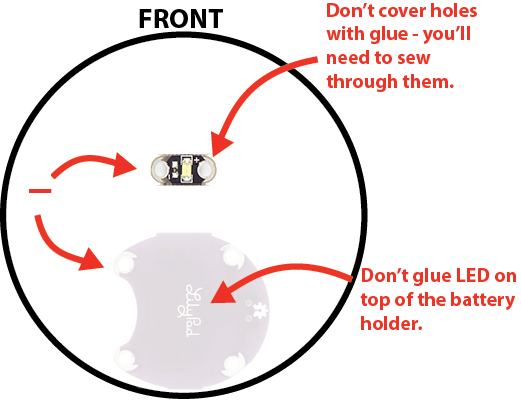
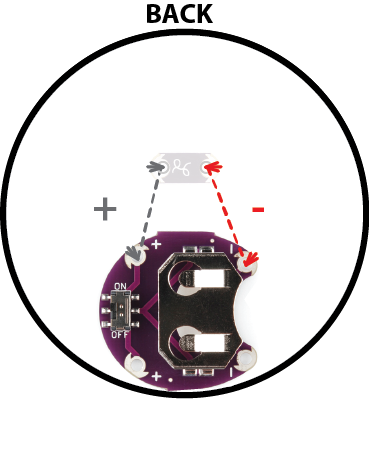
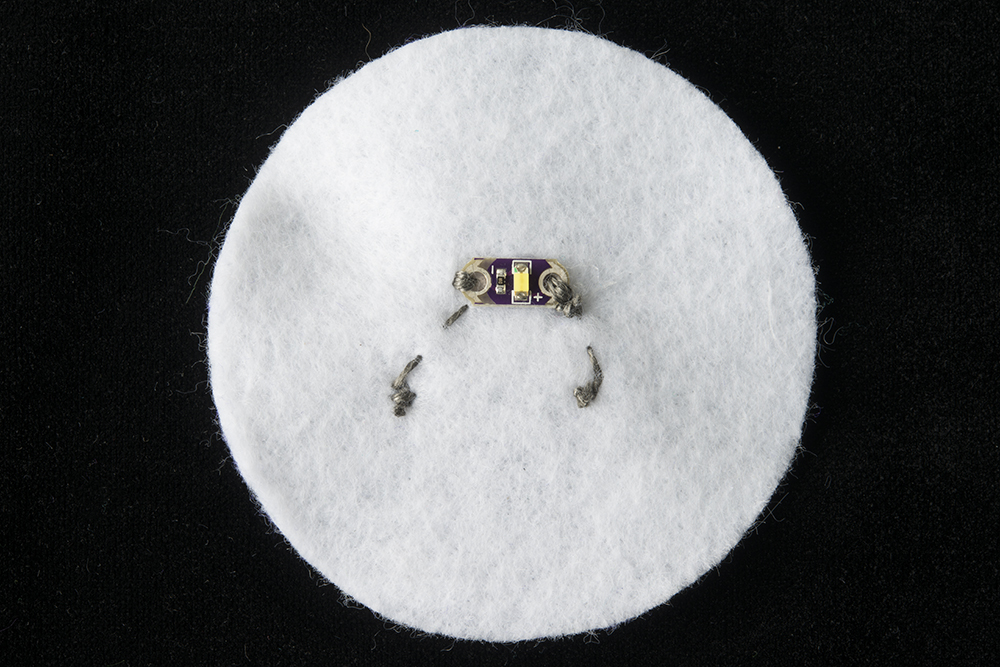
Grab an LED, and line up the (+) and (-) symbols with the symbols on the battery holder. Remember, we are working on the opposite side of the felt, so the symbols will be reversed.
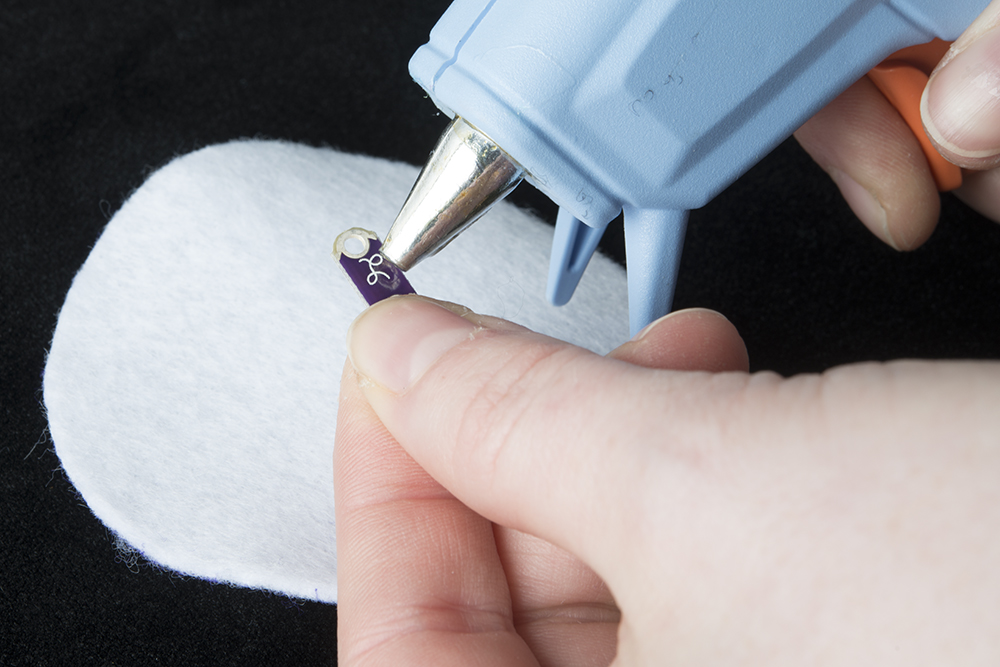
Use a small dab of hot glue in the middle of the board to secure to the felt. Be careful not to cover the holes with glue -– we'll need those to sew through later. Do not put your battery in yet.
Step 3: Sew Positive Trace
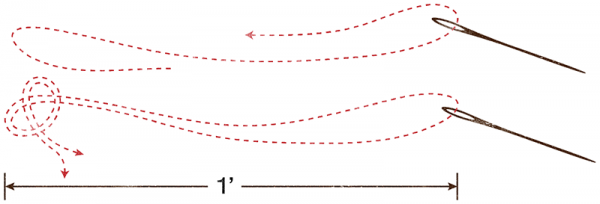
After you've arranged your components, it's time to sew them together! We'll be sewing paths for the electricity, called traces, with conductive thread, connecting the positive (+) sides of the components together, and then the same for the negative (-) sides. Unwind about 1 foot of conductive thread to work with, carefully thread the needle, and tie a knot at the end. A needle threader or needle with a larger eye will help, if you are having trouble getting the thread through. Just be careful not to use a needle too big for the holes in your LilyPad components.
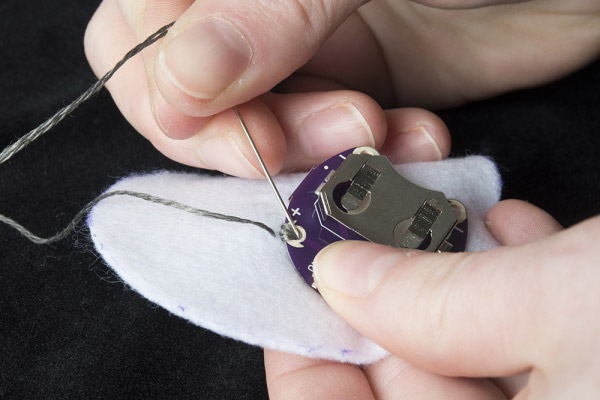
On your battery holder, find the hole marked with a positive (+) symbol closest to your LED board. Push your needle up through hole and felt, then to the outside of the hole and felt -- this creates a stitch that holds the battery holder down and makes an electrical connection with the metal around the hole. Repeat 3 more times to make a secure connection, then, using a straight stitch, follow your path to the next positive hole on your LED. Don't forget to loop 3-4 times around each hole to secure. Once you have finished at the LED, tie a knot in your thread, and trim any excess. Congratulations, you've just sewn the first half of your circuit!

Step 4: Sew Negative Trace
Tie a knot in your remaining thread (or cut a new piece if needed), then connect the negative side of your LED board to the negative holes of the battery holder using the same technique used for the positive trace. Be careful not to let your stitches touch the path you used for your positive connections. Now your circuit is complete!
Step 5: Test Your Circuit
Insert your coin cell battery with the positive side facing up (marked with a +), into your battery holder. The battery slides in the opening only one way (the side opposite of the on/off switch). Turn on the switch to see if your LED shines bright!

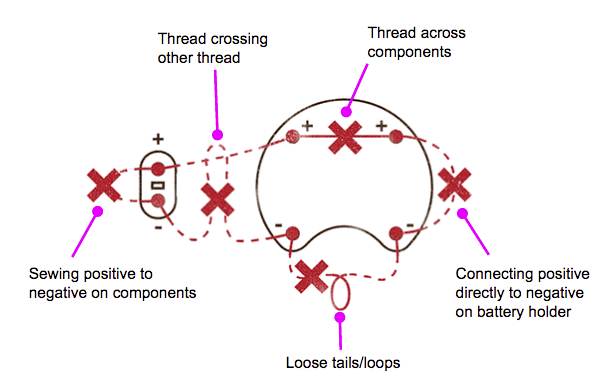
Troubleshooting
With any electronics project there are times you will have to troubleshoot if your circuit isn't working. If your circuit isn't lighting up, try a new battery or check that your switch is in the on position. Check your sewing for any loose threads or ends that may be touching other parts of your circuit and causing a short circuit. See the picture for examples of conductive thread short circuits –- practice tidy stitching to keep your thread from causing problems.
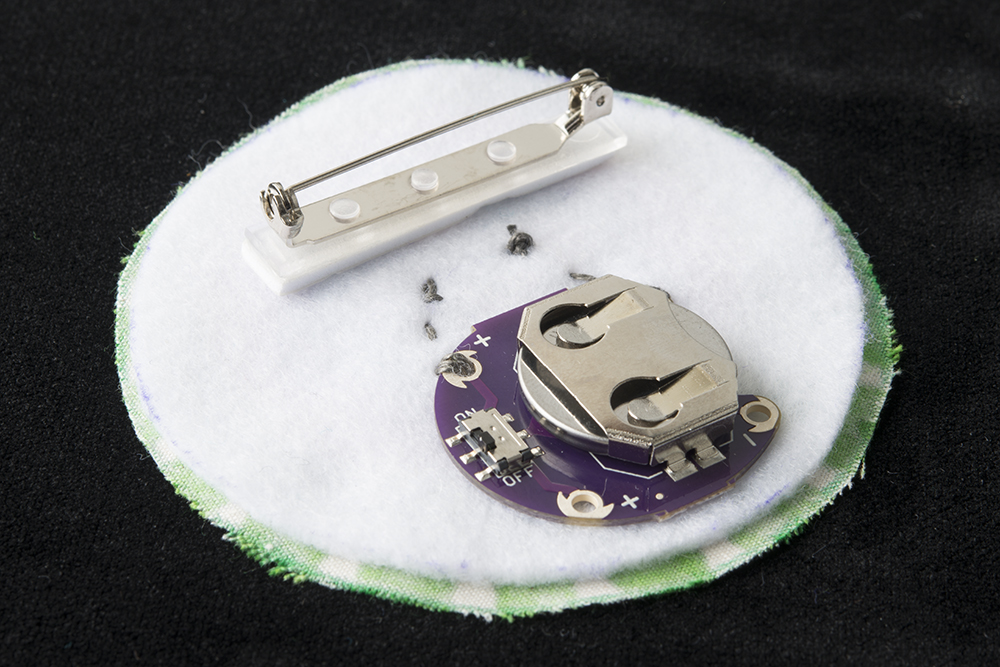
Step 6: Finishing Touches
Once your circuit is working, use a hot glue gun to attach your fabric design over your felt circle so the LED shines through. Turn the project over and attach an adhesive pin back to finish up your wearable art!
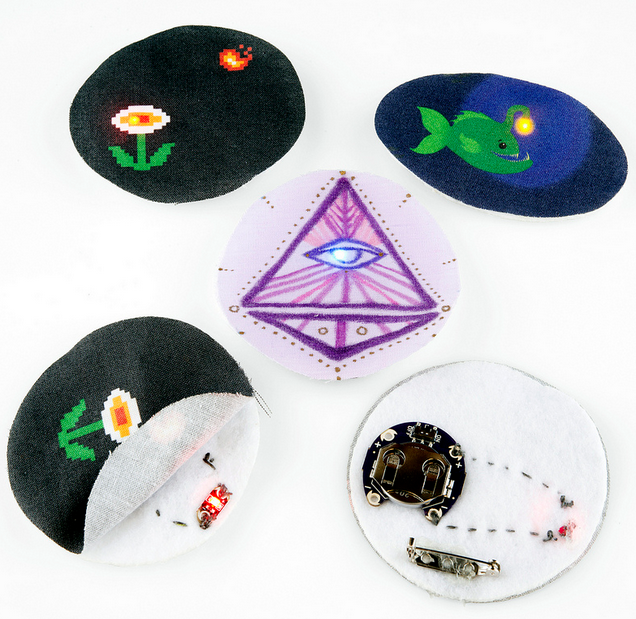
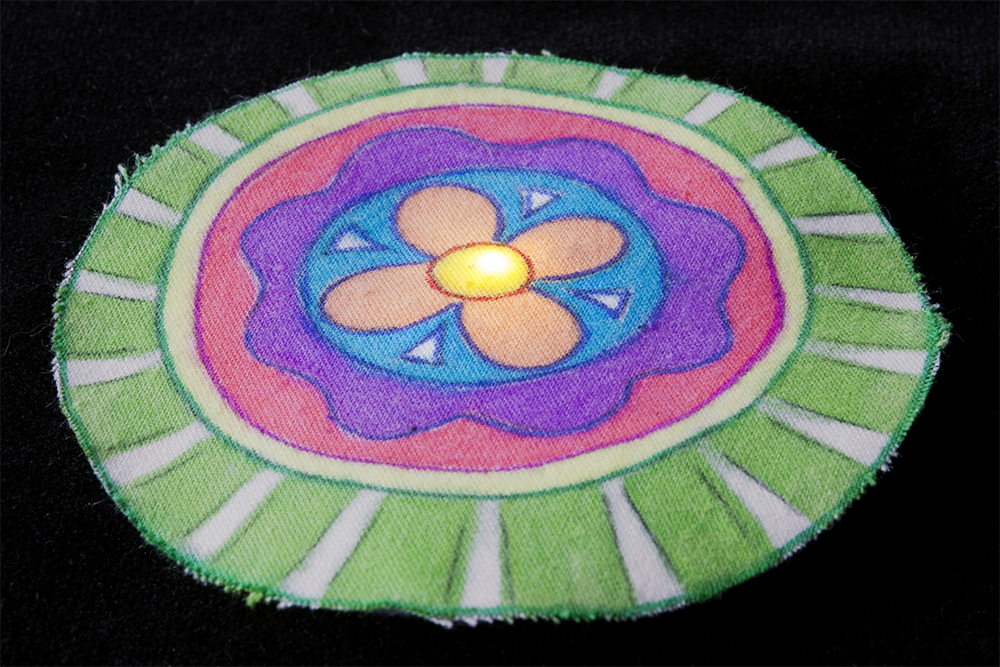
Here are some examples of finished pins:
Resources and Going Further
Thanks for reading! Practice your circuit sewing skills with one of these other projects: