Display Distance Measurements On an OLED
 Christo-boots with the-pher,
  Elias The Sparkiest
Read Measurements with a Serial Monitor
Now that we've installed the Arduino library, it's time to upload our first sketch to make sure everything is working properly and you are able to read basic measurements with your Serial Monitor in the Arduino IDE.
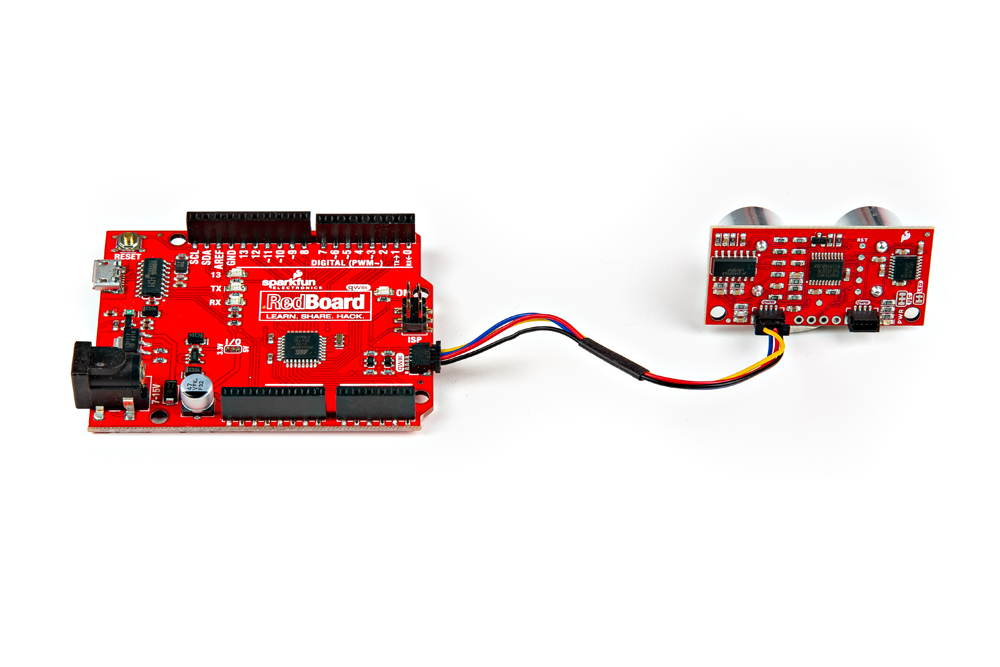
For this example you will need the SparkFun Ultrasonic Distance Sensor - TCT40 (Qwiic), a SparkFun RedBoard Qwiic, a Qwiic Cable, and a USB Micro-B Cable.
Using the Qwiic system, assembling the hardware is simple. Connect the RedBoard to one of the Ultrasonic Distance Sensor Qwiic ports using your Qwiic cables (please remember to insert this cable in the correct orientation). Then connect the RedBoard to your computer via the MicroUSB cable and voila! You're ready to rock!
To find Example 1, go to File > Examples > SparkFun Qwiic Ultrasonic Arduino Library > Example1_BasicReadings:

Alternatively, you can copy and paste the code below into a shiny new Arduino sketch:
/* SparkFun Ulrasonic Distance Sensor - Example 1 Basic Distance Sensing
     *
     * Product:
     *  *  SparkFun Qwiic Ultrasonic Distance Sensor - HC-SR04 (SEN-1XXXX)
     *  *  https://www.sparkfun.com/1XXXX
     *
     * Written By: Elias Santistevan
     * Date: 06/2024
     *
     * SPDX-License-Identifier: MIT
     *
     * Copyright (c) 2024 SparkFun Electronics
     */

    #include "SparkFun_Qwiic_Ultrasonic_Arduino_Library.h"

    // Create an ultrasonic sensor object
    QwiicUltrasonic myUltrasonic;

    // Here we set the device address. Note that an older version of the Qwiic
    // Ultrasonic firmware used a default address of 0x00. If yours uses 0x00,
    // you'll need to change the address below. It is also recommended to run
    // Example 2 to change the address to the new default.
    uint8_t deviceAddress = kQwiicUltrasonicDefaultAddress; // 0x2F
    // uint8_t deviceAddress = 0x00;

    void setup()
    {
      // Start serial
      Serial.begin(115200);
      Serial.println("Ultrasonic Distance Sensor Example 1 - Basic Readings");

      Wire.begin();

      // Attempt to begin the sensor
      while (myUltrasonic.begin(deviceAddress) == false)
      {
        Serial.println("Ultrasonic sensor not connected, check your wiring and I2C address!");
        delay(2000);
      }

      Serial.println("Ultrasonic sensor connected!");
    }

    void loop()
    {
      uint16_t distance = 0;
      myUltrasonic.triggerAndRead(distance);

      // Print measurement
      Serial.print("Distance (mm): ");
      Serial.println(distance);

      //Serial.println("Distance (cm): ");
      //Serial.print((distance / 10.0), 2);

      //Serial.println("Distace (in): ");
      //Serial.print((distance / 25.4), 2);

      // Wait a bit
      delay(250);
    }
Make sure you've selected the correct board and port in the Tools menu and then hit the upload button. Once the code has finished uploading, go ahead and open a Serial Monitor. You should see something similar to the following.
