Display Distance Measurements On an OLED
 Christo-boots with the-pher,
  Elias The Sparkiest
 Introduction
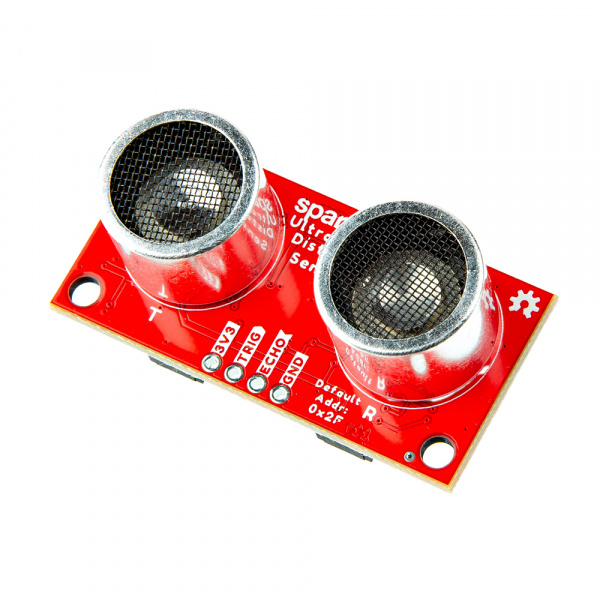
This tutorial will take your SparkFun Qwiic Ultrasonic Distance Sensor to the next level by adding a cool little OLED display. With this upgrade, your robot (or you!) won't just be able to measure distances, you'll be able to see them in real time on the screen!
If you are looking for the full Hookup Guide for the SparkFun Ultrasonic Distance Sensor - TCT40 (Qwiic), click the button bellow. This guide only covers a simple project to get you started quickly, while the full Hookup Guide goes over every detail of the sensor.
Hardware Needed
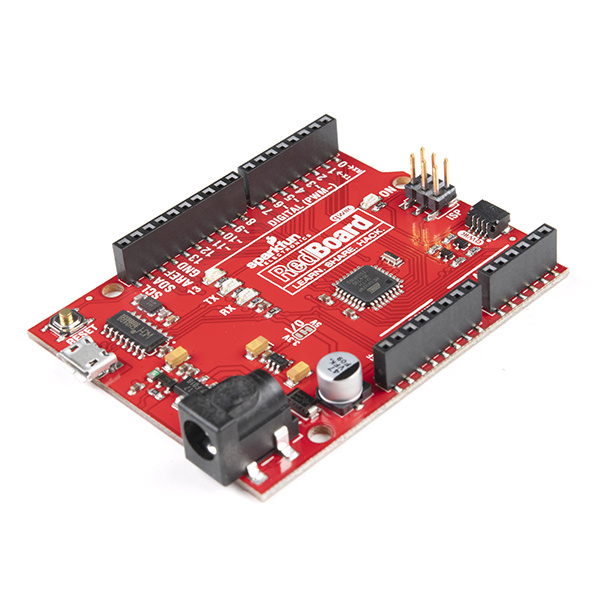
To follow this experiment, you will need the following materials. While this is a simple project we wanted to make sure that you have everything you need to get started before we get to the code. For this simple project we chose the RedBoard Qwiic but you could choose from many of our development boards such as the Qwiic Pro Micro as well.
Software Setup
SparkFun has written a library to work with the SparkFun Ultrasonic Distance Sensor Qwiic Board. You can obtain this library by clicking on the button below, or by downloading it from the GitHub Repository.
Read Measurements with a Serial Monitor
Now that we've installed the Arduino library, it's time to upload our first sketch to make sure everything is working properly and you are able to read basic measurements with your Serial Monitor in the Arduino IDE.
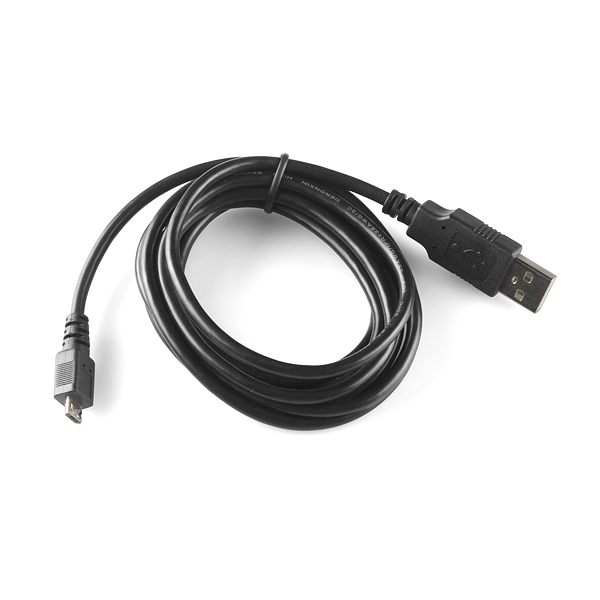
For this example you will need the SparkFun Ultrasonic Distance Sensor - TCT40 (Qwiic), a SparkFun RedBoard Qwiic, a Qwiic Cable, and a USB Micro-B Cable.
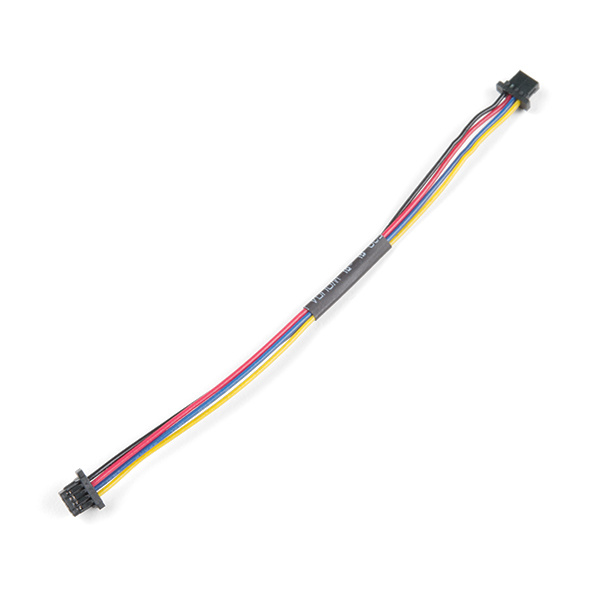
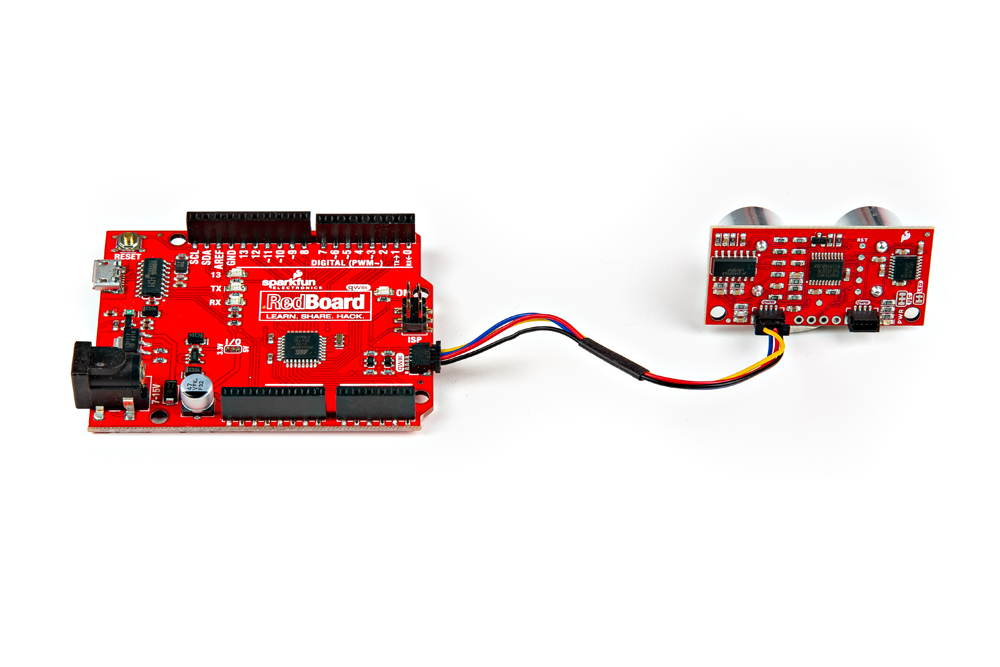
Using the Qwiic system, assembling the hardware is simple. Connect the RedBoard to one of the Ultrasonic Distance Sensor Qwiic ports using your Qwiic cables (please remember to insert this cable in the correct orientation). Then connect the RedBoard to your computer via the MicroUSB cable and voila! You're ready to rock!
To find Example 1, go to File > Examples > SparkFun Qwiic Ultrasonic Arduino Library > Example1_BasicReadings:

Alternatively, you can copy and paste the code below into a shiny new Arduino sketch:
/* SparkFun Ulrasonic Distance Sensor - Example 1 Basic Distance Sensing
     *
     * Product:
     *  *  SparkFun Qwiic Ultrasonic Distance Sensor - HC-SR04 (SEN-1XXXX)
     *  *  https://www.sparkfun.com/1XXXX
     *
     * Written By: Elias Santistevan
     * Date: 06/2024
     *
     * SPDX-License-Identifier: MIT
     *
     * Copyright (c) 2024 SparkFun Electronics
     */

    #include "SparkFun_Qwiic_Ultrasonic_Arduino_Library.h"

    // Create an ultrasonic sensor object
    QwiicUltrasonic myUltrasonic;

    // Here we set the device address. Note that an older version of the Qwiic
    // Ultrasonic firmware used a default address of 0x00. If yours uses 0x00,
    // you'll need to change the address below. It is also recommended to run
    // Example 2 to change the address to the new default.
    uint8_t deviceAddress = kQwiicUltrasonicDefaultAddress; // 0x2F
    // uint8_t deviceAddress = 0x00;

    void setup()
    {
      // Start serial
      Serial.begin(115200);
      Serial.println("Ultrasonic Distance Sensor Example 1 - Basic Readings");

      Wire.begin();

      // Attempt to begin the sensor
      while (myUltrasonic.begin(deviceAddress) == false)
      {
        Serial.println("Ultrasonic sensor not connected, check your wiring and I2C address!");
        delay(2000);
      }

      Serial.println("Ultrasonic sensor connected!");
    }

    void loop()
    {
      uint16_t distance = 0;
      myUltrasonic.triggerAndRead(distance);

      // Print measurement
      Serial.print("Distance (mm): ");
      Serial.println(distance);

      //Serial.println("Distance (cm): ");
      //Serial.print((distance / 10.0), 2);

      //Serial.println("Distace (in): ");
      //Serial.print((distance / 25.4), 2);

      // Wait a bit
      delay(250);
    }
Make sure you've selected the correct board and port in the Tools menu and then hit the upload button. Once the code has finished uploading, go ahead and open a Serial Monitor. You should see something similar to the following.

Display Measurements On an OLED
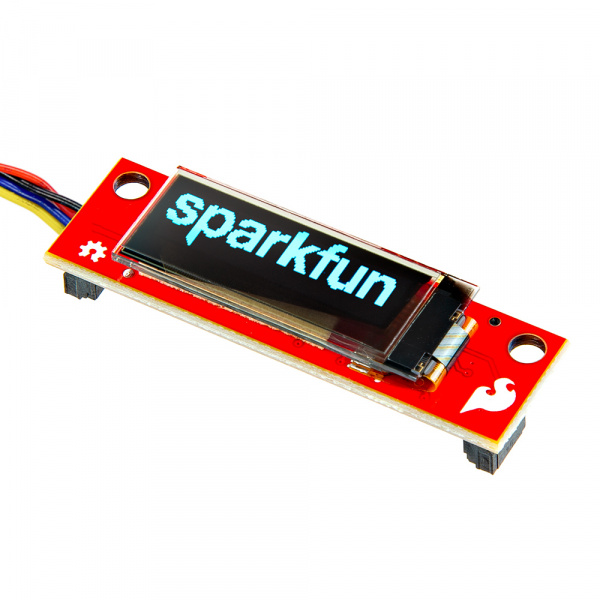
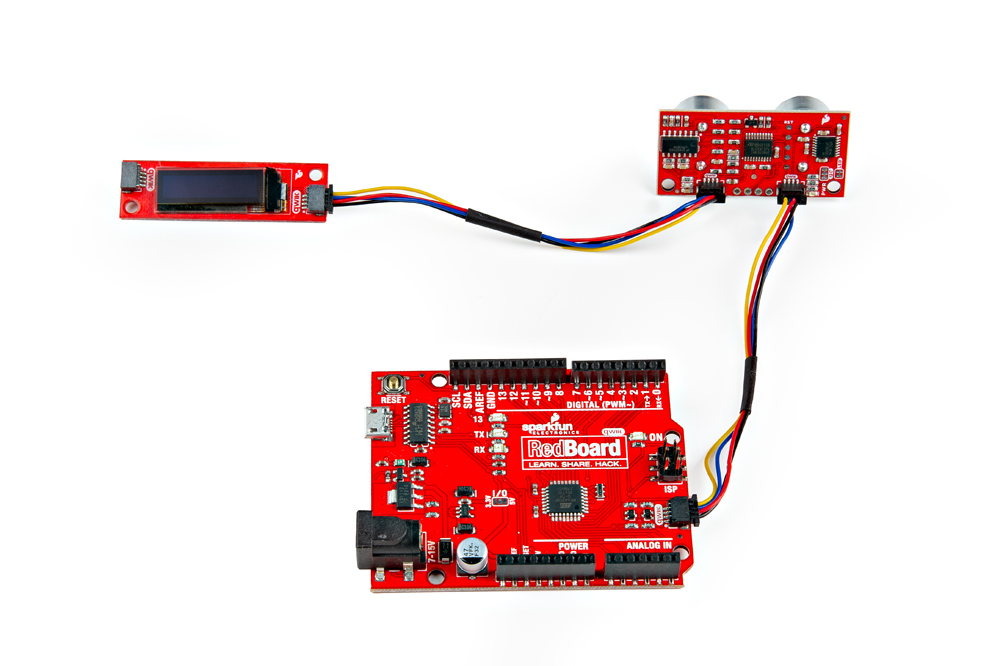
Let's add in an LCD screen to display our measurements. For this example you will need another Qwiic Cable and the SparkFun Qwiic OLED Display (0.91 in., 128x32). Again, the Qwiic system makes this example quite literally plug and play. Use Qwiic cables to make your hardware setup look like this:
To display the sensor readings on the connected Qwiic OLED, we will need to install the SparkFun Qwiic OLED library. You can install this library to automatically in the Arduino IDE's Library Manager by searching for "SparkFun Qwiic OLED". Or you can manually download it from the GitHub repository.
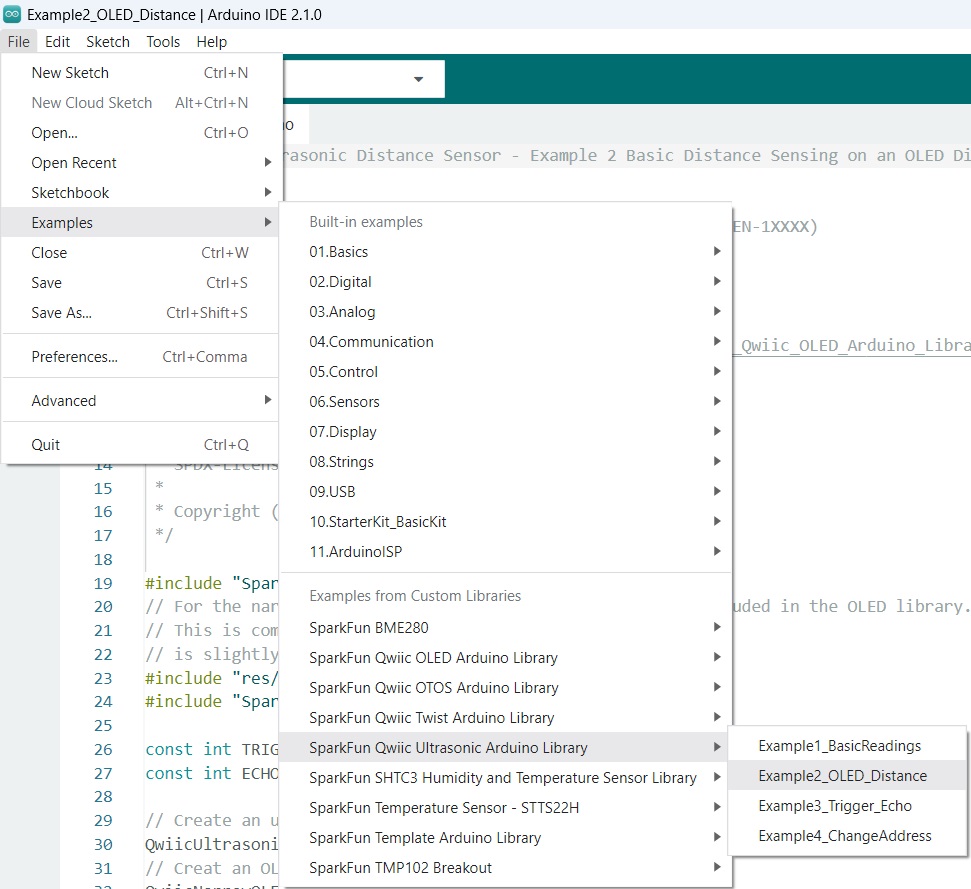
To find Example 2, go to File > Examples > SparkFun Qwiic Ultrasonic Arduino Library > Example2_OLED_Distance:
Alternatively, you can copy and paste the code below into a shiny new Arduino sketch:
/* SparkFun Ulrasonic Distance Sensor - Example 2 Basic Distance Sensing on an OLED Display
  *
   * Products:
   *  *  SparkFun Qwiic Ultrasonic Distance Sensor - HC-SR04 (SEN-1XXXX)
   *  *  https://www.sparkfun.com/1XXXX
   *  *  SparkFun Qwiic Narrow OLED Display (LCD-1XXXX)
   *  *  https://www.sparkfun.com/1XXXX
   *
   * Link to OLED library: https://github.com/sparkfun/SparkFun_Qwiic_OLED_Arduino_Library
   *
   * Written By: Elias Santistevan
   * Date: 06/2024
   *
   * SPDX-License-Identifier: MIT
   *
   * Copyright (c) 2024 SparkFun Electronics
   */

  #include "SparkFun_Qwiic_OLED.h"
  // For the narrow LED, I prefer the slightly larger font included in the OLED library.
  // This is completely optional and can be deleted or commented out. By default the font
  // is slightly smaller.
  #include "res/qw_fnt_8x16.h"
  #include "SparkFun_Qwiic_Ultrasonic_Arduino_Library.h"

  // Create an ultrasonic sensor object
  QwiicUltrasonic myUltrasonic;
  // Creat an OLED object
  QwiicNarrowOLED myOLED;

  char distanceBuff[4] = {};
  String distanceStr = "";
  int centerX;
  int centerY;

  // Here we set the device address. Note that an older version of the Qwiic
  // Ultrasonic firmware used a default address of 0x00. If yours uses 0x00,
  // you'll need to change the address below. It is also recommended to run
  // Example 2 to change the address to the new default.
  uint8_t deviceAddress = kQwiicUltrasonicDefaultAddress; // 0x2F
  // uint8_t deviceAddress = 0x00;

  void setup()
  {

    Serial.begin(115200); // Default config settings
    Serial.println("Ultrasonic Distance Sensor - Example 4 - Distance on an OLED Display");
    Wire.begin();

    while (myOLED.begin() == false) {
      Serial.println("OLED sensor not connected, check your wiring and I2C address!");
      delay(1000);
    }
    while(myUltrasonic.begin(deviceAddress) == false)
    {
      Serial.println("Ultrasonic sensor not connected, check your wiring and I2C address!");
      delay(1000);
    }

    String hello = "Hello, Ultrasonic!";

    // This is good for the narrow OLED screen. You can also just remove this
    // and it will default to a slightly smaller font.
    myOLED.setFont(QW_FONT_8X16);

    // This will center the text onto the screen.
    int x0 = (myOLED.getWidth() - myOLED.getStringWidth(hello)) / 2;
    int y0 = (myOLED.getHeight() - myOLED.getStringHeight(hello)) / 2;

    myOLED.text(x0, y0, hello);

    // There's nothing on the screen yet - Now send the graphics to the device
    myOLED.display();
    delay(2000);
  }

  void loop()
  {
    uint16_t distance = 0;
    myUltrasonic.triggerAndRead(distance);

    // Convert distance, which is an integer, to char so that we can print it.
    snprintf(distanceBuff, 6, "%d", distance);

    // Put the distance in a string so that we can also print "mm".
    distanceStr = distanceBuff;
    distanceStr += "mm";

    myOLED.erase();
    centerX = (myOLED.getWidth() - myOLED.getStringWidth(distanceStr)) / 2;
    centerY = (myOLED.getHeight() - myOLED.getStringHeight(distanceStr)) / 2;
    myOLED.text(centerX, centerY, distanceStr);
    myOLED.display();

    delay(250);
  }
Make sure you've selected the correct board and port in the Tools menu and then hit the upload button. Once the code has finished uploading, you should see something similar to the following.
Try moving an object (like your hand or a dinosaur) closer to the sensor - notice the output of the OLED shows you how close the object is! Grr. Rawr!
Resources and Going Further
There are more examples in the Arduino Library that allow you to change the I2C address or use the Trigger and Echo Pins. Feel free to check them out!
Suggested Reading
If you aren’t familiar with the the preceding concepts, we recommend checking out these tutorials to gain a little background knowledge.