Customizing LilyPad LED Colors
 Dia
Dia 
Feeling Limited?
Are you tired of the same old seven colors? We hear you.
Is your creativity outpacing current LED technology? Of course it is!
Are you ready to throw convention to the wind and invent your own LilyPad flavors? WE HOPE SO!
Sometimes a project demands a really specific shade of light, and if you want that special color, but don't need the colors of the project to change or cycle, using RGB LEDs means paying extra money for features you don't need! Here, I'll show you how to easily and inexpensively open up your color options with standard LilyPad LEDs.
Suggested Reading
If you haven't worked with wearable technology before, we suggest you visit these other tutorials first.
Materials
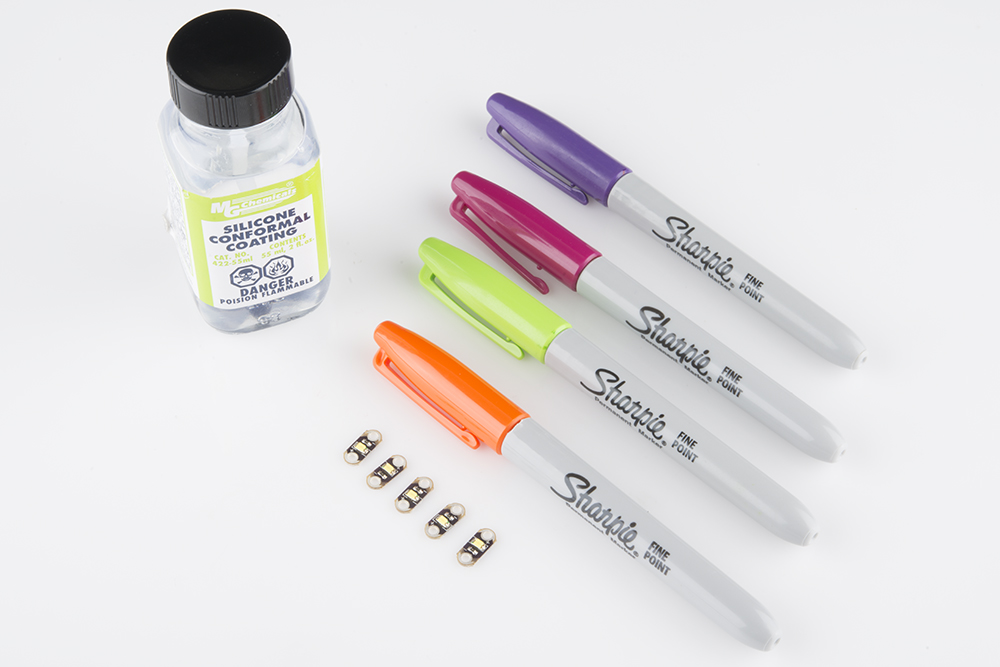
You'll only need a few things to get started.
The first is Silicon Conformal Coating. Mine came from the local hardware store, but I threw an Amazon link up there in case you can't find it!
Second is Sharpies. I'm using the 80's Glam Collection, and I've never been happier.
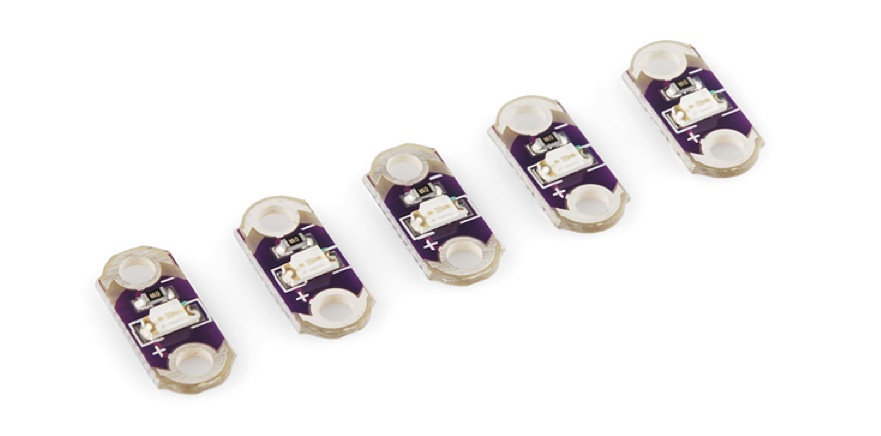
Obviously, you're going to want some LilyPad LEDs. I used white, because I wanted a really reliable match for my Sharpie colors, but if you want to try coloring over other base colors, have at it! Who am I to stand in the way of true love?
Coat Your LEDs
Let's get started!
But first, let's spend a moment with this very informative label. "Danger", it says. "Poison Flammable", it continues. The skull and crossbones figure is displayed prominently, though there are no indications that this product is intended for acts of piracy.
Please treat this product carefully, read all warning labels before starting, and don't let kids participate in this part of the activity. If you must, try clear nail polish as an alternative. I prefer the silicon coating, because, when dried, it's heat resistant. So, if I want to solder the LEDs later, I won't have to worry them discoloring. The consistency is also just right for getting the coverage I want. But use whichever product is best and safest for your application!
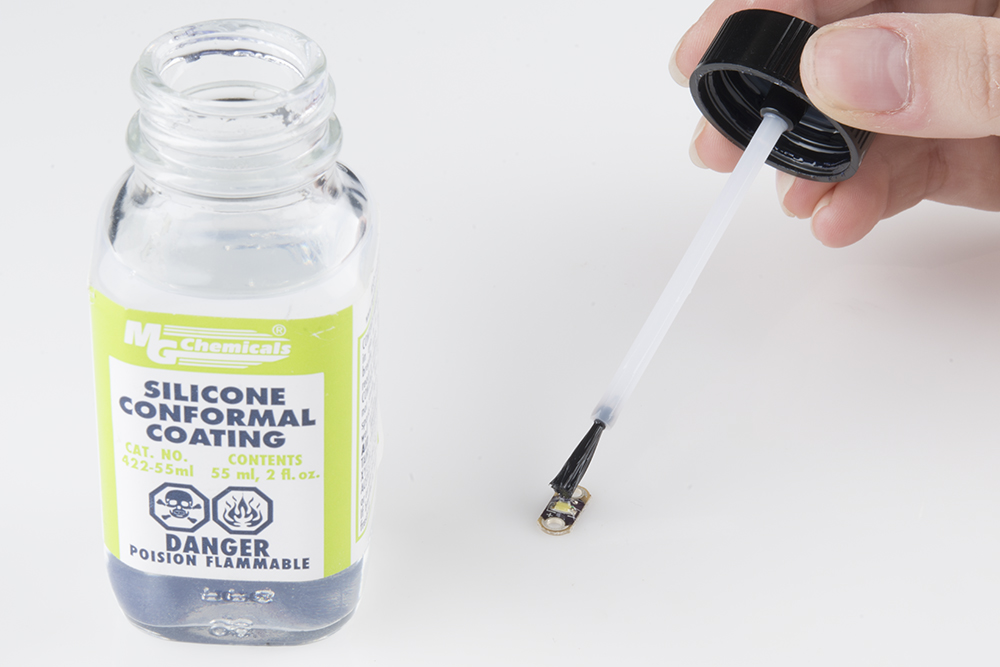
The conformal coating has a built-in brush, which makes it easy to apply. You don't want so much coating on the brush that it's going to drip everywhere and make a mess, but you DO want it to flow easily from the brush to the LED.
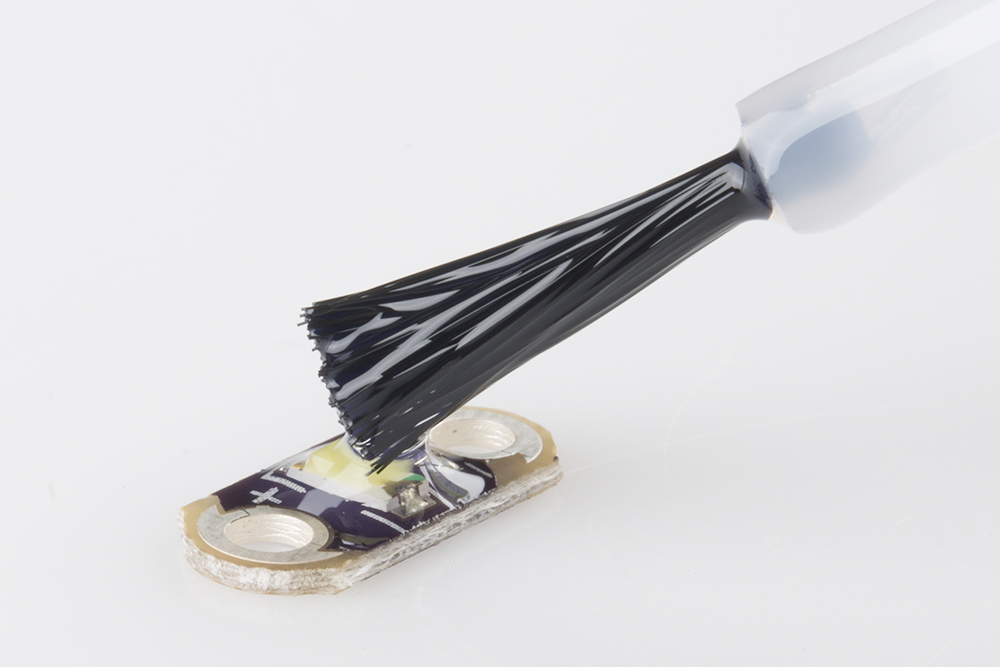
You should be leaving a nice blob of coating on top of the LED that covers both the LED and the surrounding area, but not the silver tabs on the sides. It might take a couple of tries to get this just right, but the surface tension of the coating is your friend here. Err on the side of caution, since you can always add more, but it's going to be a lot harder to take some away.
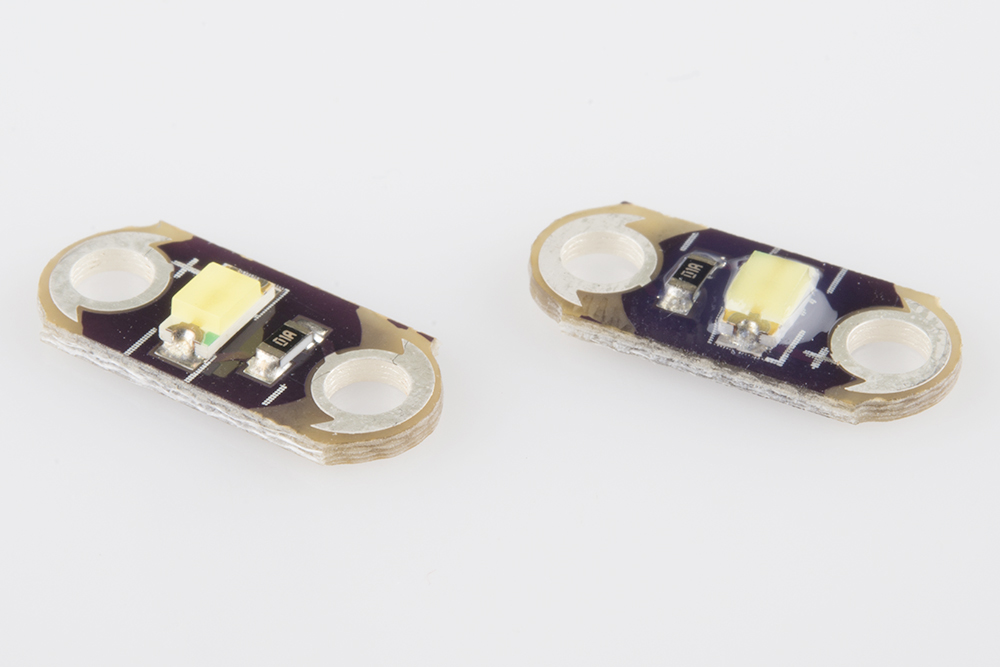
Here's a properly coated LED next to an uncoated one, so you can see the difference. Let these dry completely before continuing to the next step.
Create Your Colors
The Fun Part!
It's time to paint with all the colors of the wind!

Color over the conformal coating with your markers. You want to tint a wide area, surrounding the LED completely, and not just covering the top of the LED. You can't get too much coverage here, so really go to town. Try blending and layering colors, ombre effects, and different shades! Color fidelity is surprisingly high, so expect a very subtle effect with light colors, and strong results from your brightest colors.
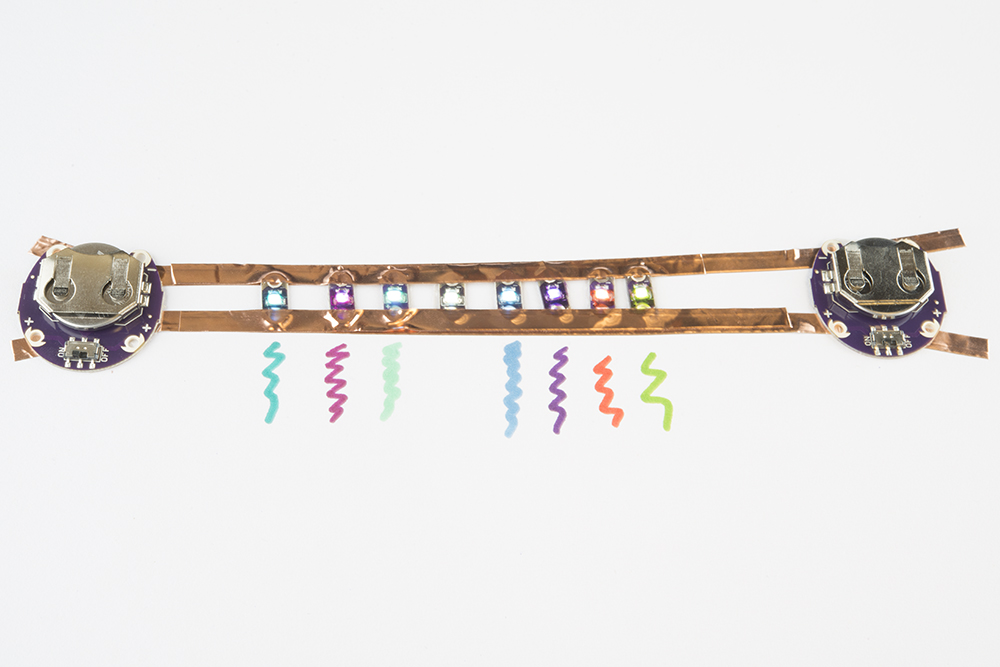
Here are a few of my favorites. You can see that pastels, like my mint green and baby blue, are understated. Here, they're side-by-side with a white LED, so you can see the difference, but when they aren't, the change is almost unnoticeable. Bolder colors, like teal, purple, hot pink, lime green, and orange, gave me very vibrant results!
I hope that, if you've had a project, costume, or design that's just been waiting for the right LED color to come your way, this helps you to finally make it a reality! Share your results in the comments!
Resources and Going Further
For more E-textile, wearable fun, check out these other SparkFun tutorials: