BadgerHack
 Shawn Hymel
Introduction

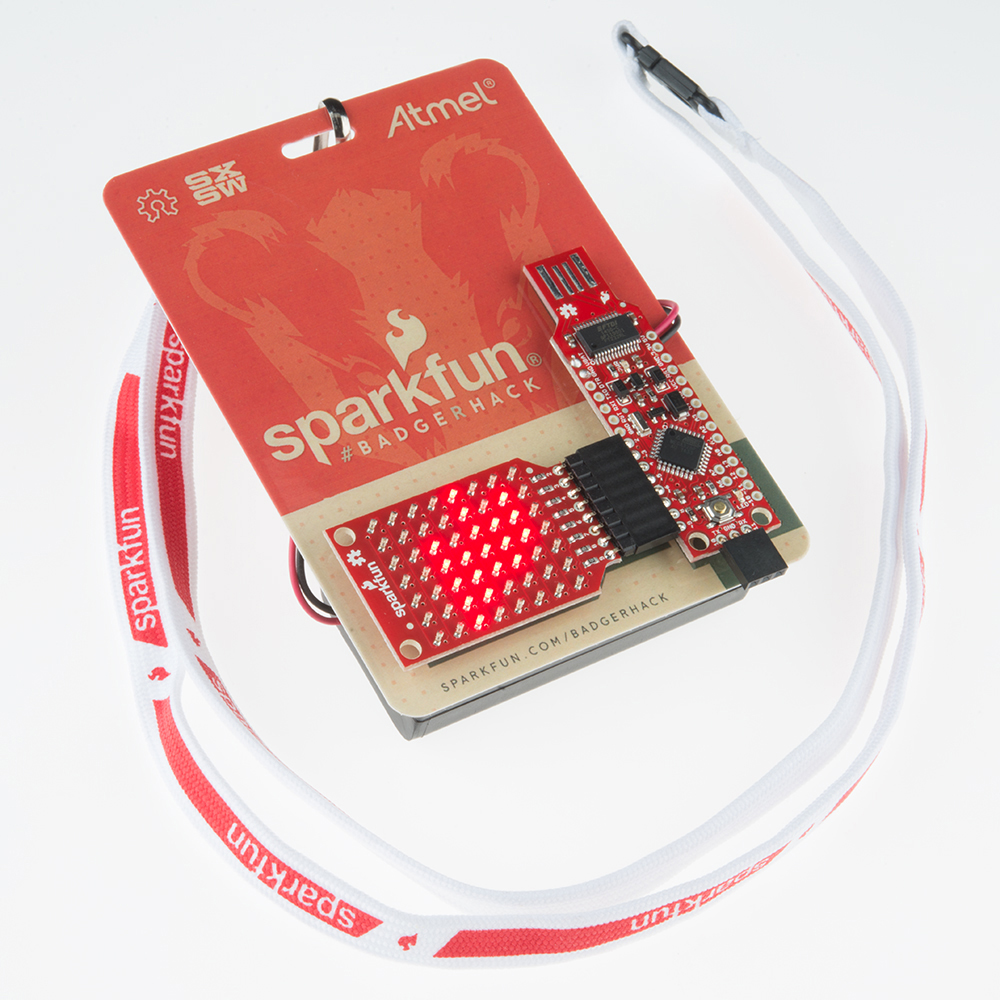
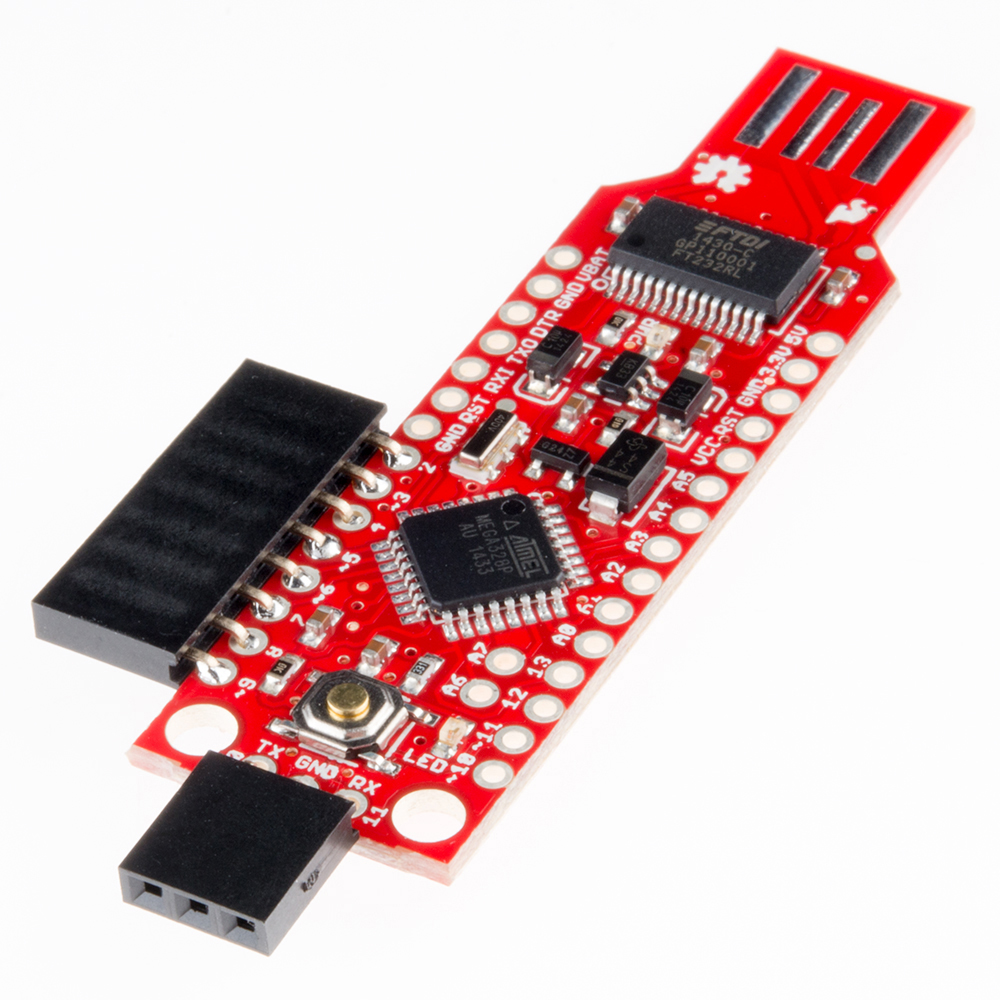
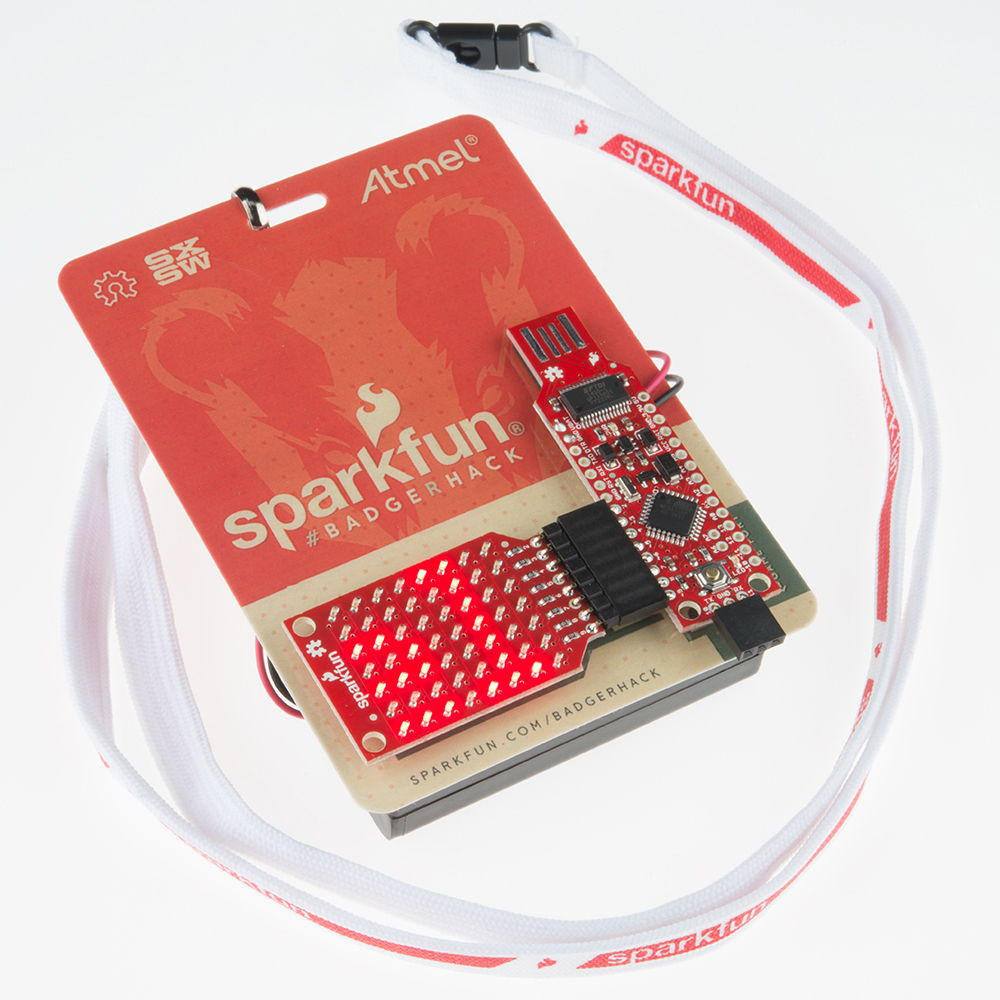
What you hold in your hands is a powerful piece of technology. OK, it's no tricorder, but it can do some pretty cool stuff. You can program the BadgerStick (the thin board) to control a myriad of electronics, like buttons, lights, and LCDs. The LED board can be used to display patterns or show text.
In the first section of this guide, we will show you how to solder headers on to your BadgerStick and LED board to make a complete badge.
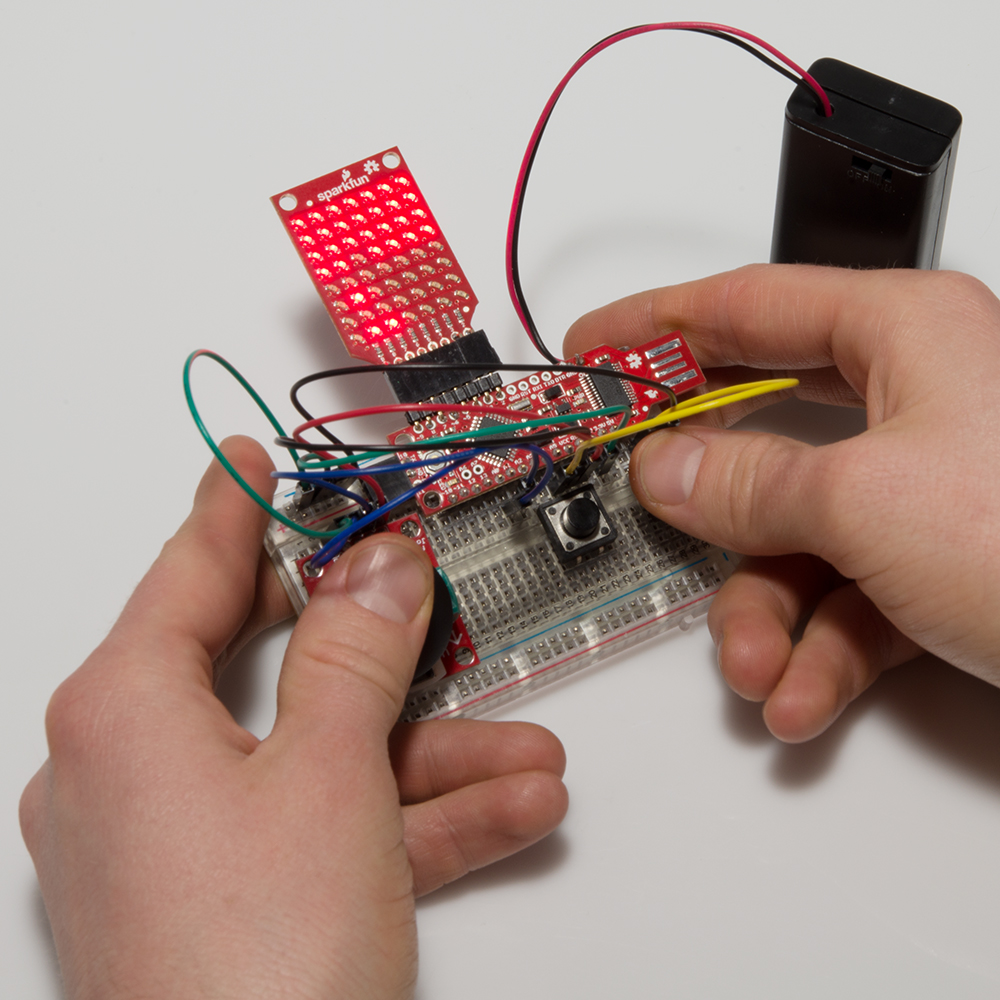
On top of a sweet badge, you also get a development platform that you can use in lots of other projects. Once you have put your badge together, worn it with pride, and shown if off to everyone, you can remix it and make your own project!
The rest of the guide will focus on hacking your badge: how you can create your own graphics or add other electronics to make it do cool stuff.
Suggested Reading
If you are new to soldering or electronics, we highly recommend you check out the following:
When you are ready to start hacking your badge, we definitely recommend reading:
Make Your Badge
Now that you have the Badger kit, let's make a badge! When we ask you to solder a pin, you will want to keep a few tips in mind (click for larger image):
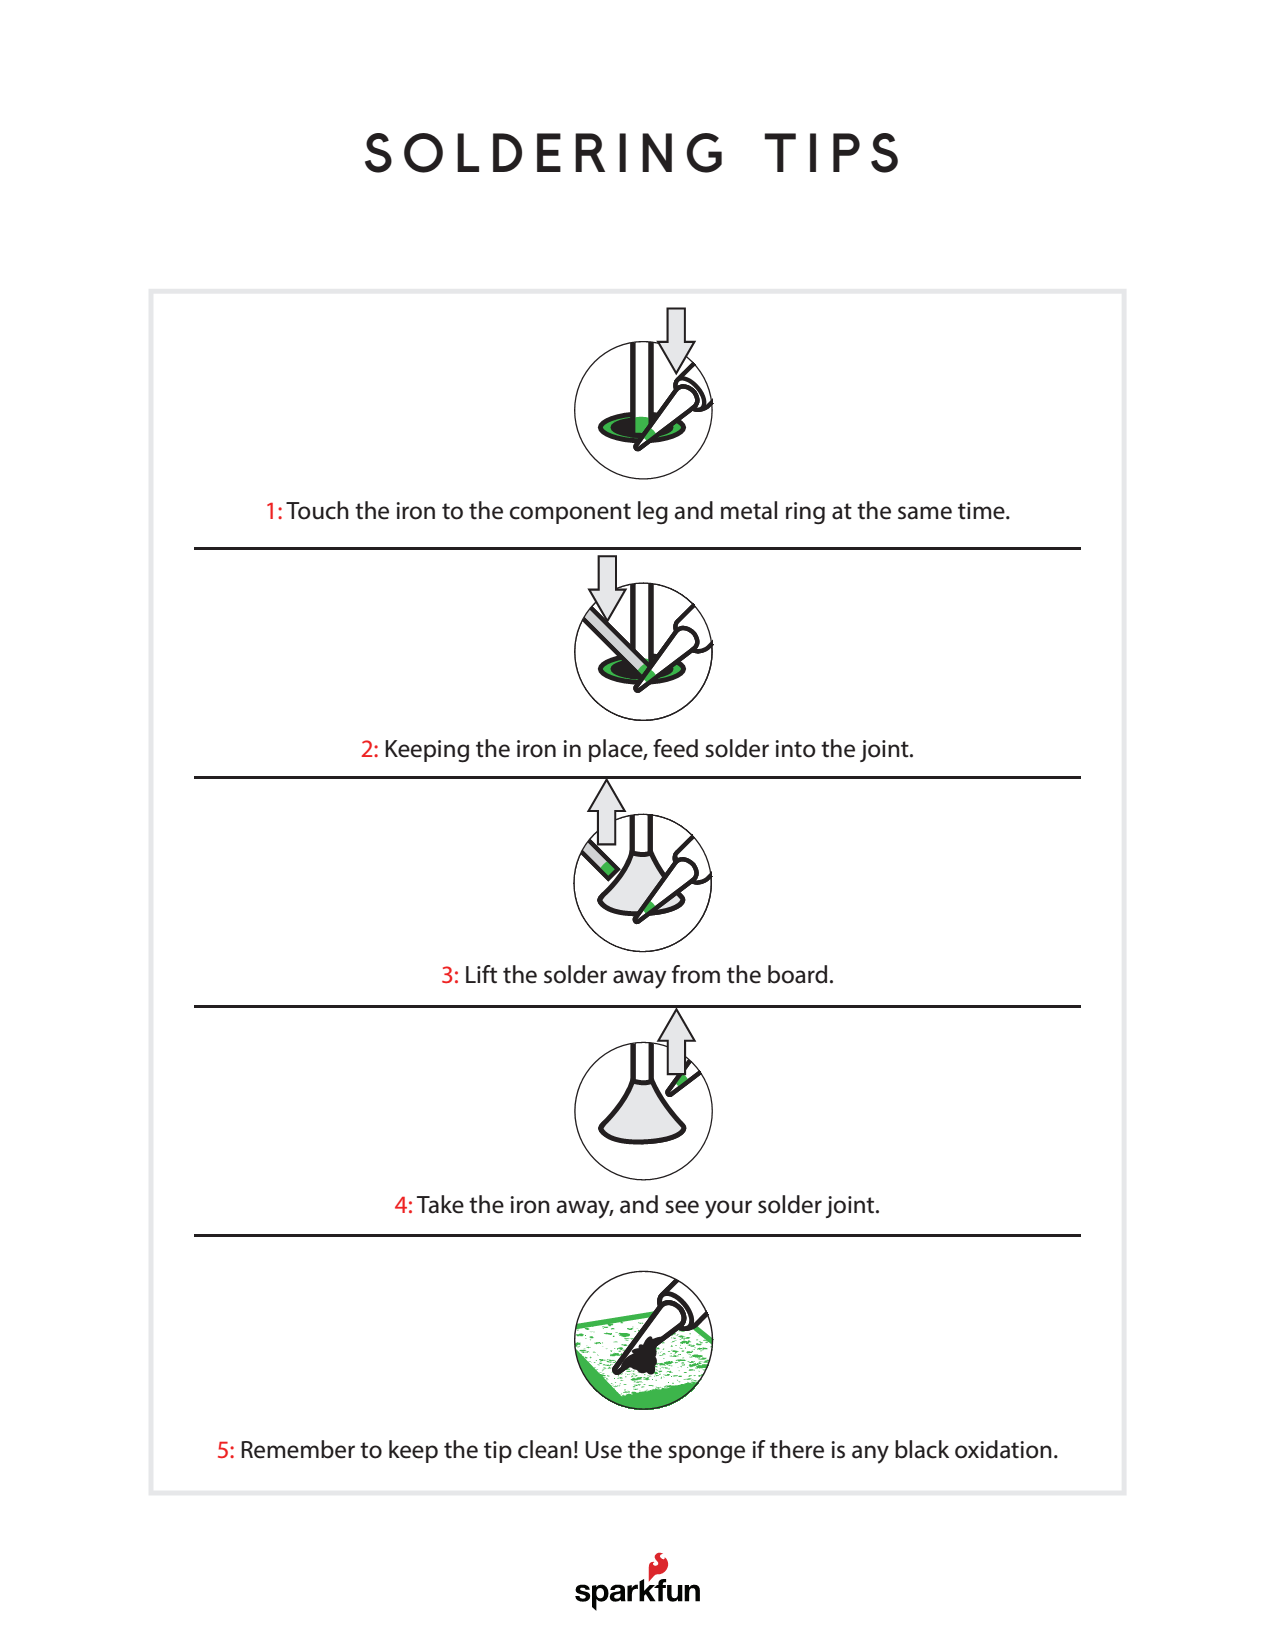
If you need a refresher on how to solder, we recommend the How to Solder guide.
1. Solder the 8-pin male header to the LED board
Insert the 8-pin male header into the LED board with the pin ends facing out. Note that the pins are coming out of the top of the board (the side with the LEDs).

Flip the board over and solder all the pins.

2. Solder the 8-pin female header to pins 2-9 on the BadgerStick
Insert the 8-pin female header into the holes labeled 2, 3, 4, 5, 6, 7, 8, 9 on the BadgerStick. Make sure that the pins are coming out of the top of the board (the side with all the electronics).

Flip the board over, and ensure that only the holes in the white box labeled "LED Array" are used. Solder all 8 pins.

3. Solder the 3-pin female header to the game port on the BadgerStick
Insert the 3-pin female header into the holes labeled TX, GND, RX on the bottom of the board. The header should be coming out of the top of the board.
Flip the board over, and solder all 3 pins.

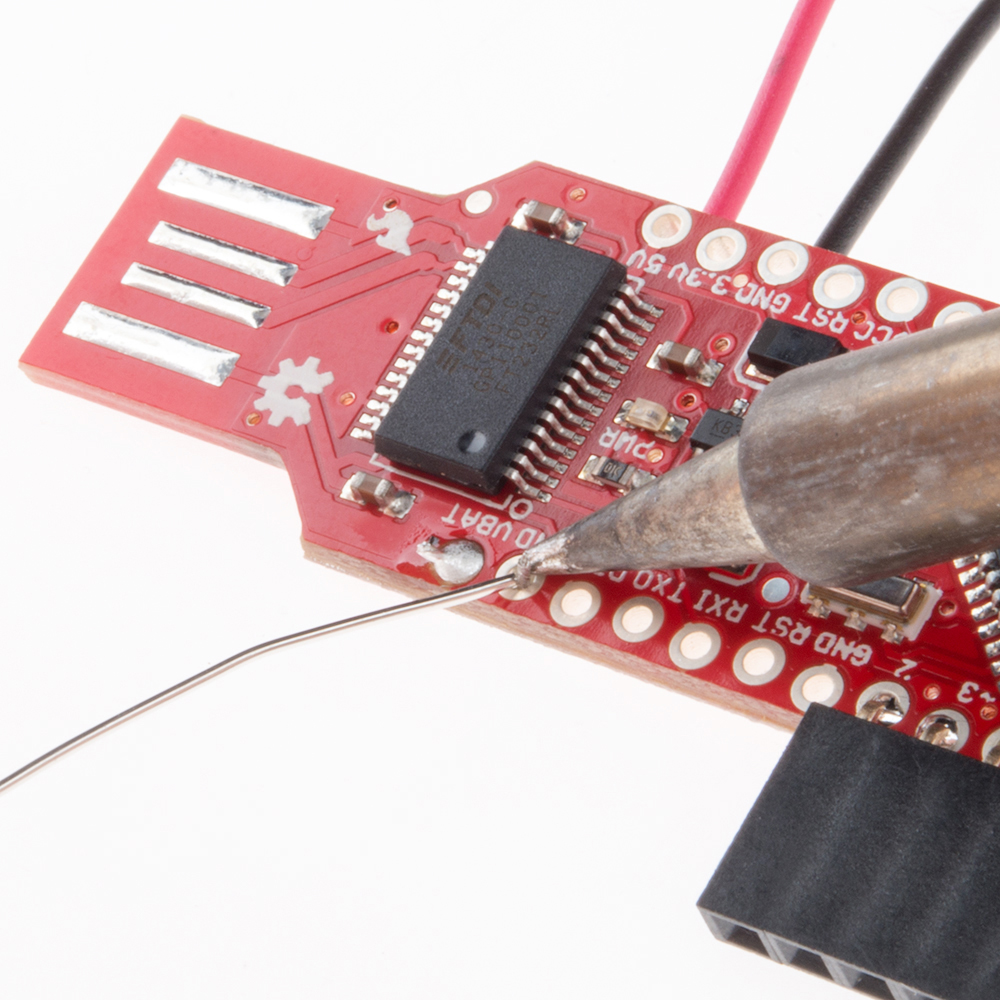
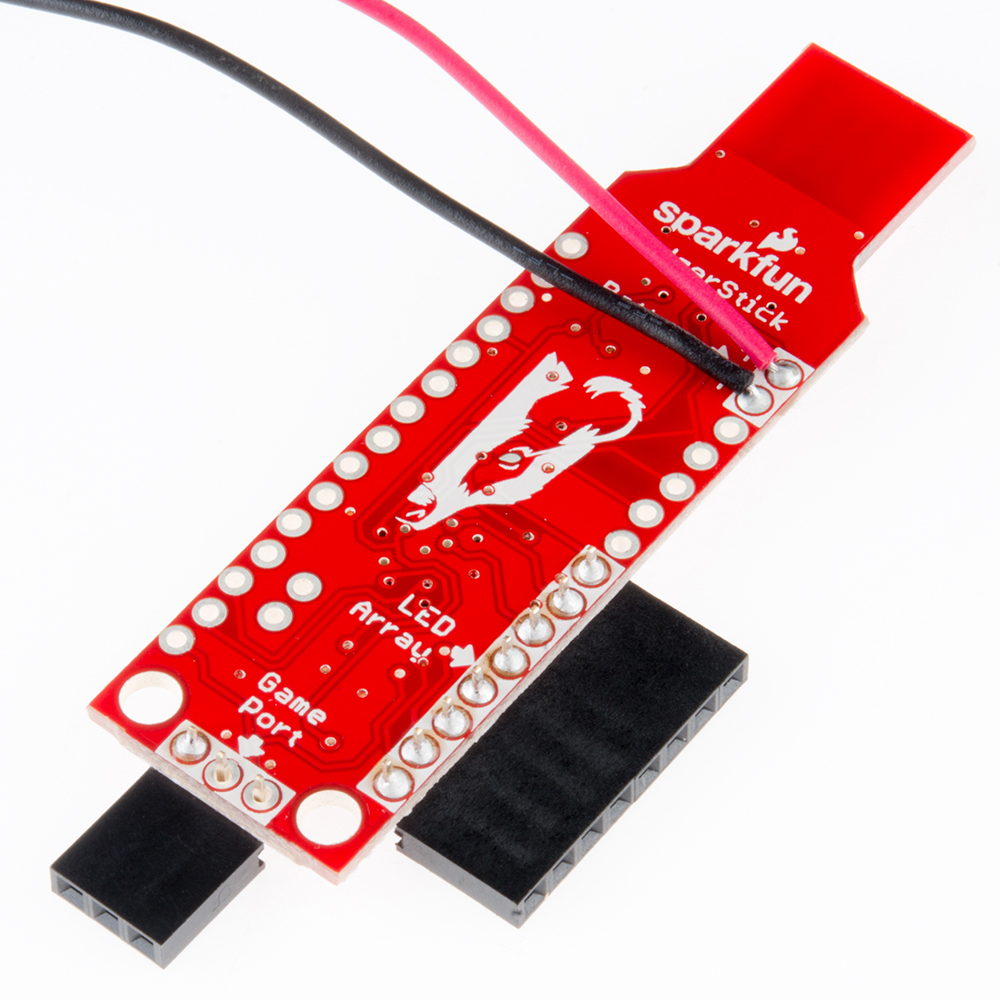
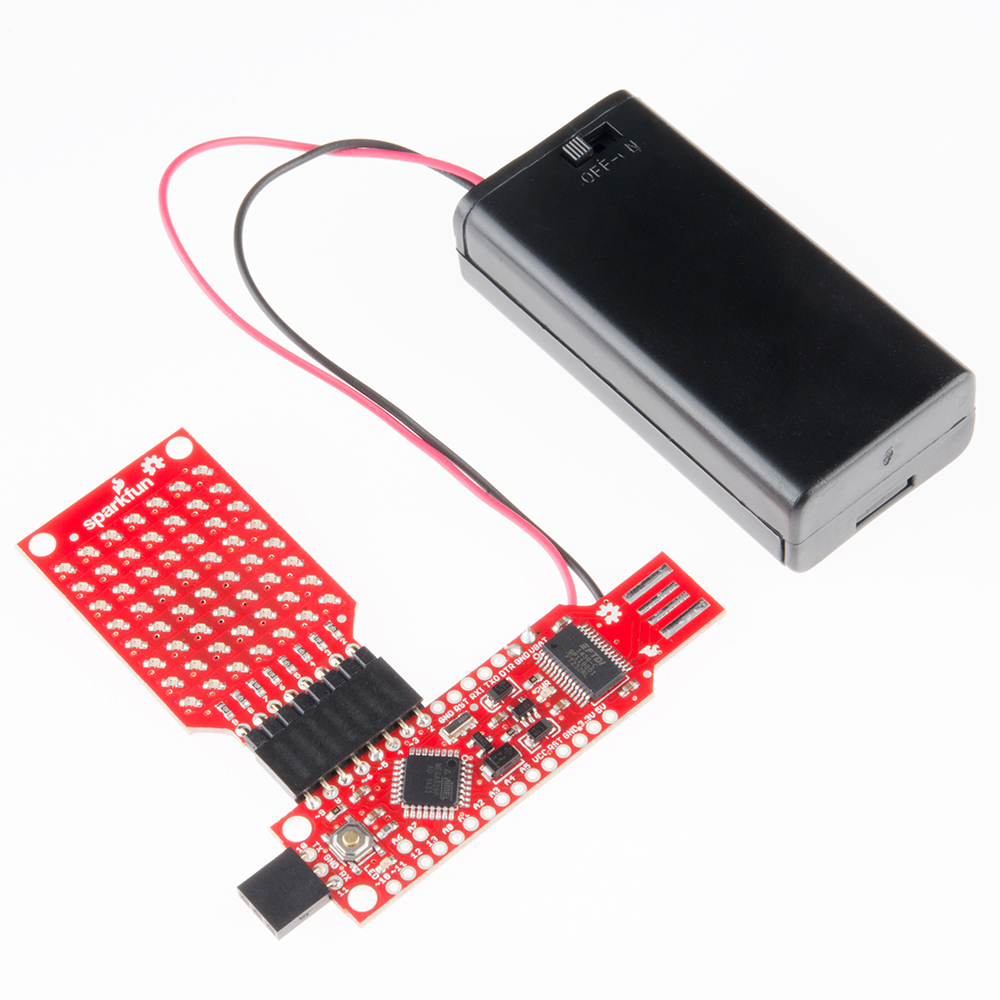
4. Solder the the red battery wire to the + battery pin (VBAT)
Poke the red battery wire through the backside of the BadgerStick on the pin labeled VBAT ("+" on the backside).
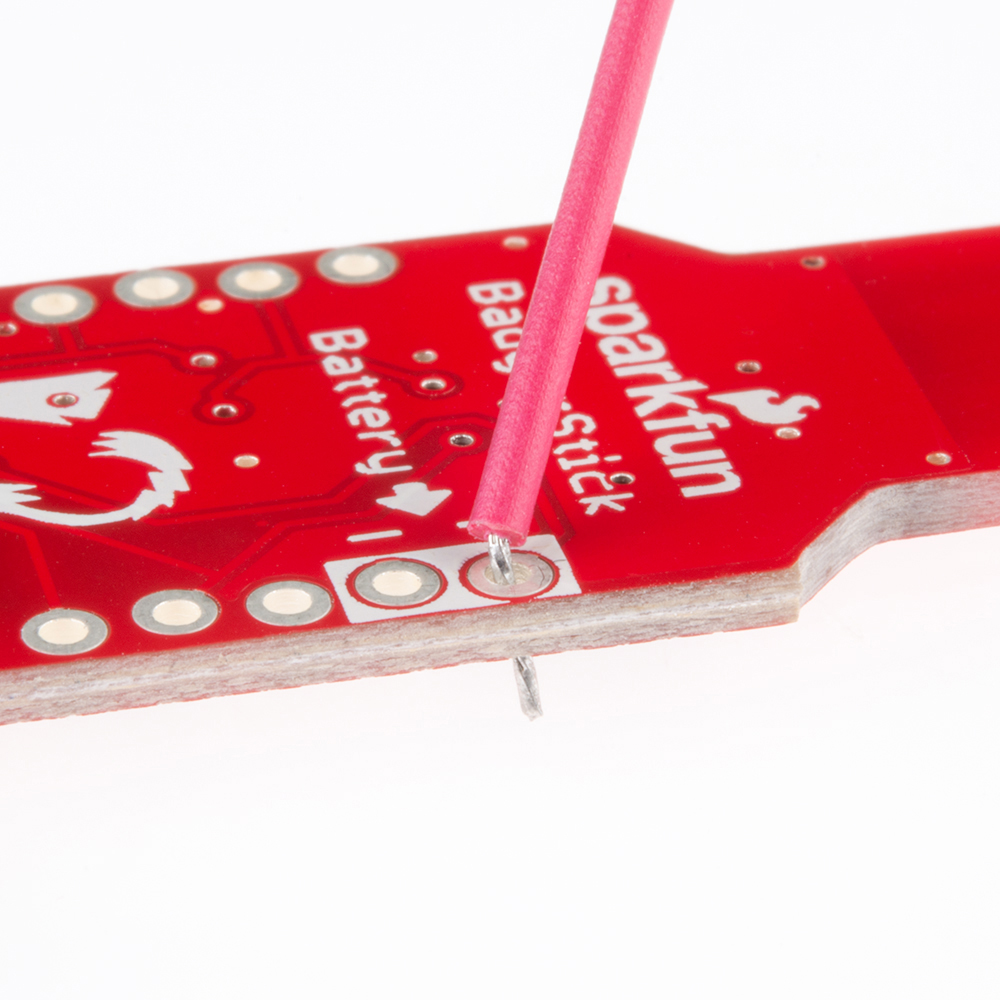
Solder the red wire to the hole.

5. Solder the black battery wire to the - battery pin (GND)
Poke the black battery wire through the backside of the BadgerStick on the pin labeled GND ("-" on the backside).
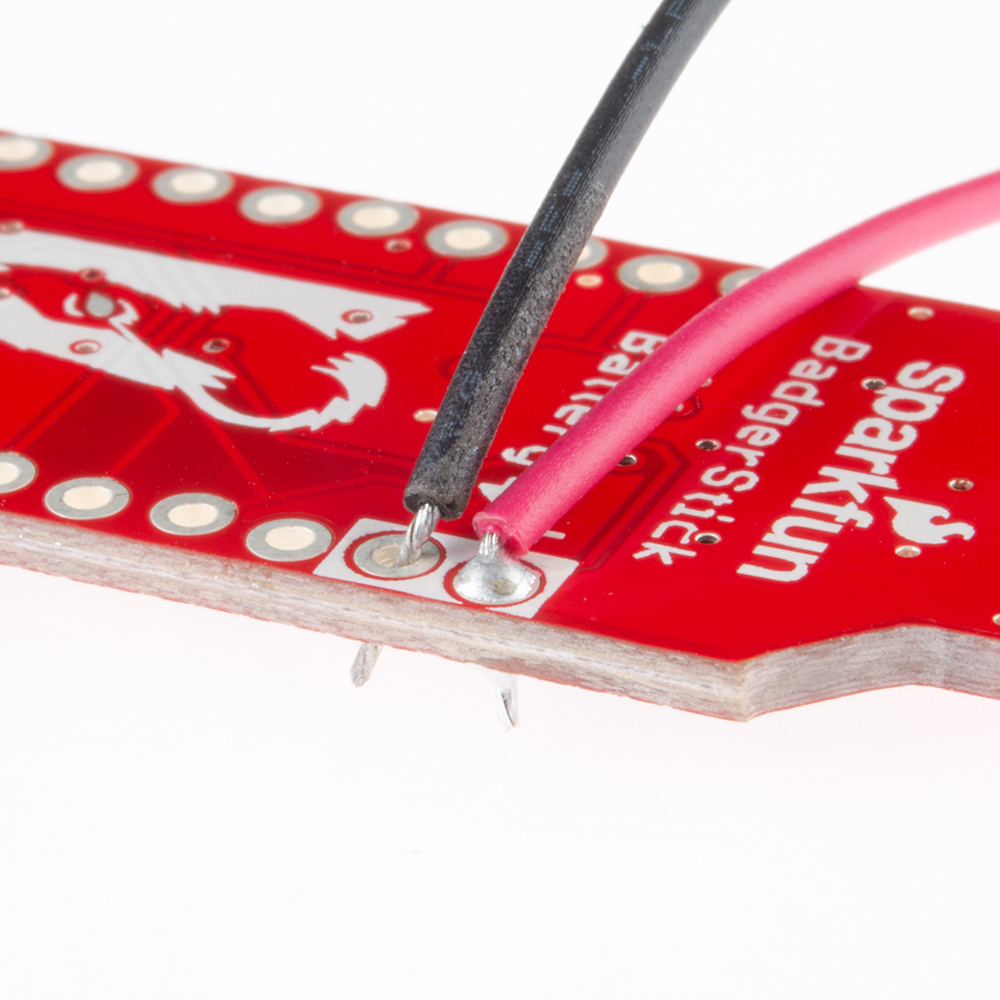
Solder the black wire to the hole.
Flip the BadgerStick over, and verify that the red wire is going to the hole labeled '+' on the underside and that the black wire is going to the hole labeled '-'.
6. Add batteries
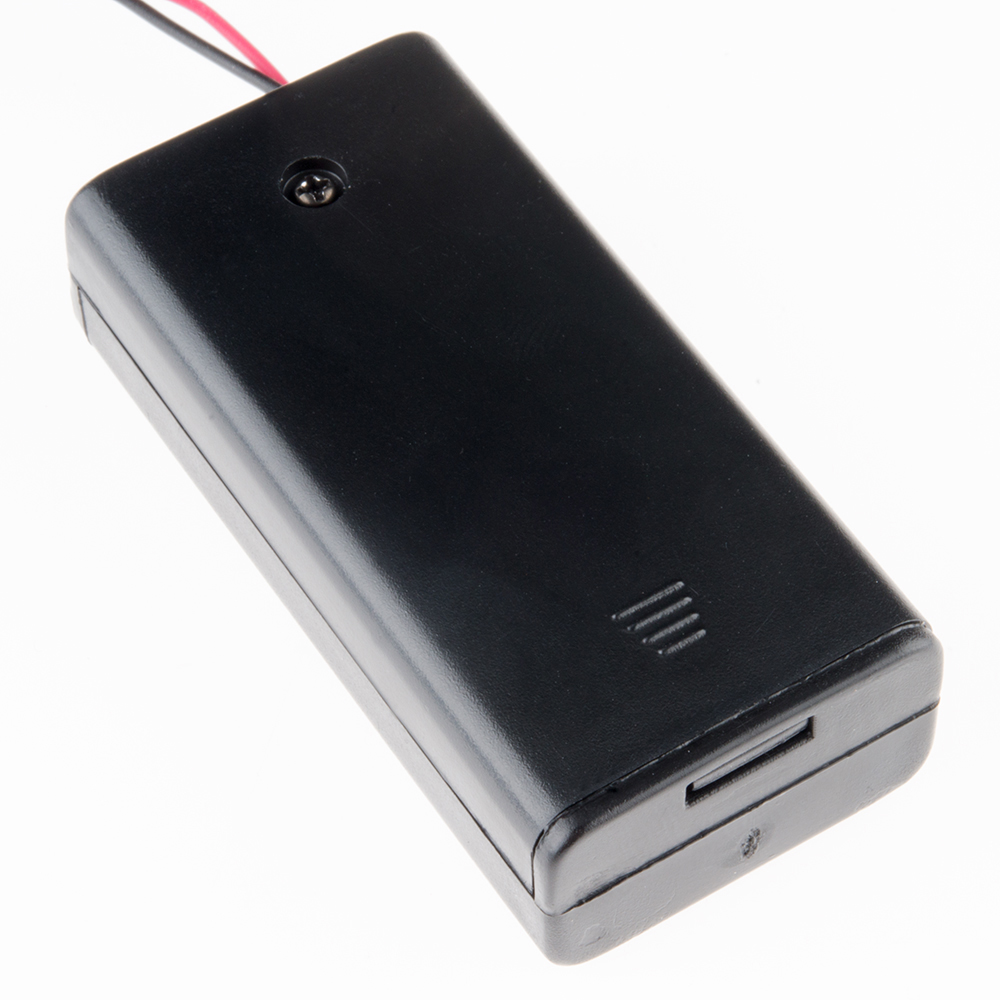
Using a Phillips screwdriver, remove the screw from the battery pack.

Open the battery pack cover, and take note of the battery markings in the pack.
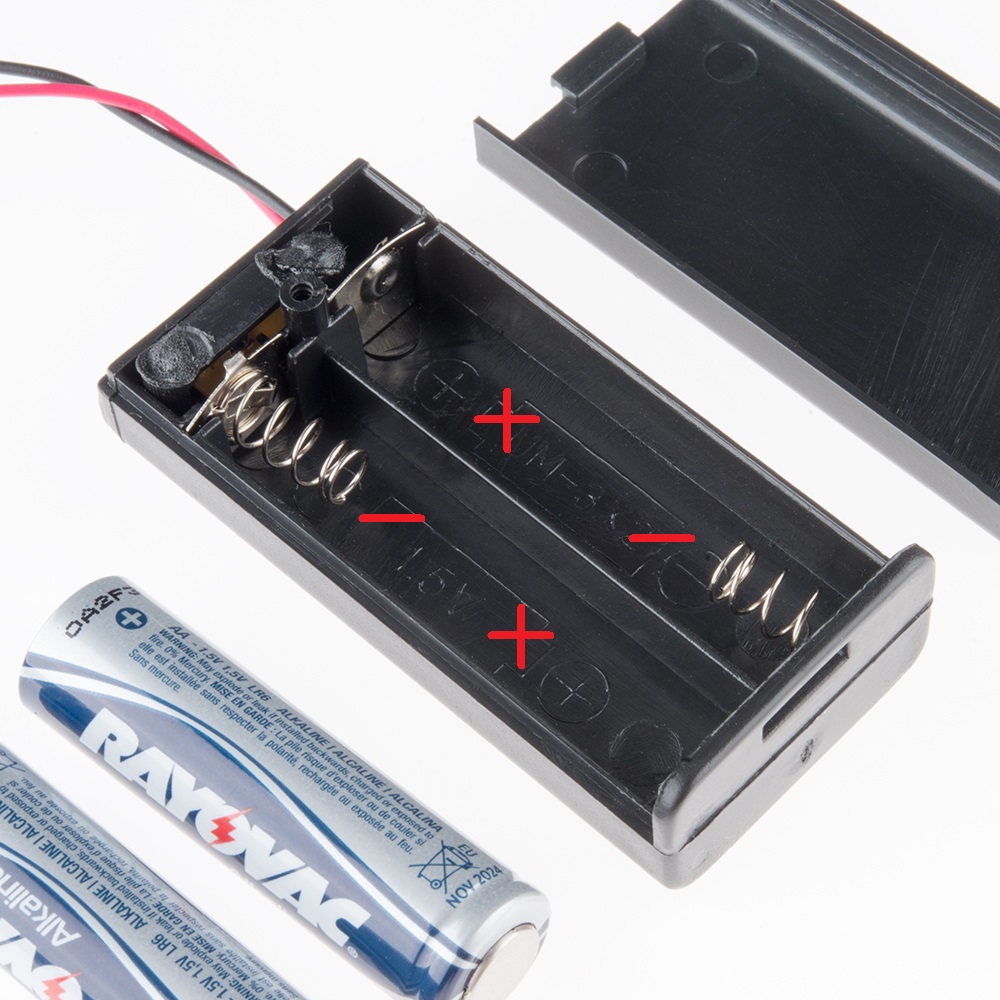
Put the batteries in the pack as noted by the markings. The bumped end of the battery is + and the flat end is -.
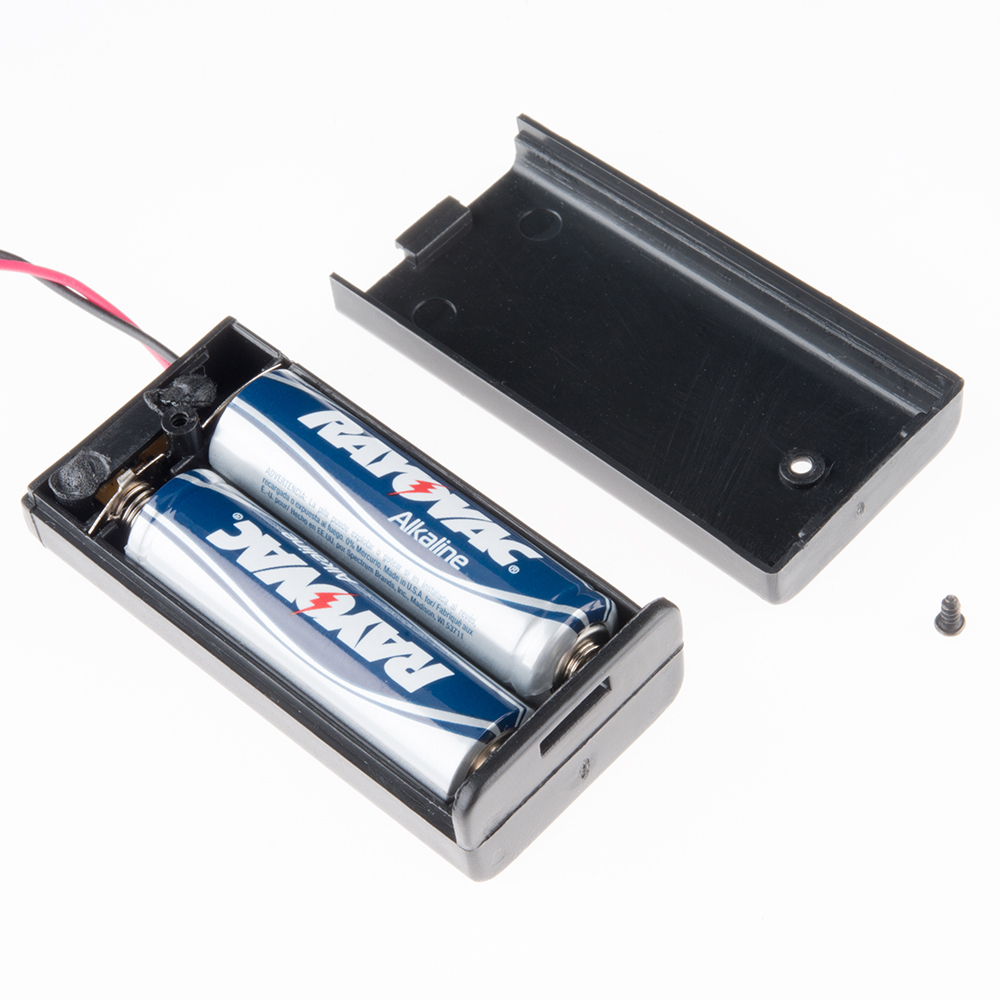
Put the battery pack cover back on, and secure it with the screw.
7. Connect the LED board to the BadgerStick
Connect the LED board and BadgerStick, by sliding the headers together. Ensure the LEDs and electronics on the BadgerStick are facing the same direction.
Flip the boards over, and double-check your solder connections:
- 8-pin male header soldered to the pins in the white box on the LED board
- 8-pin female header soldered to the pins in the white box on the BadgerStick labeled "LED Array"
- 3-pin female header soldered to the pins in the white box on the BadgerStick labeled "Game Port"
- Red battery wire soldered to + Battery pin
- Black battery wire soldered to the - Battery pin

Before you stick your electronics to the badge, turn on the battery pack to make sure everything is working. Troubleshooting your board will be a lot easier if it's not adhered to the badge.
8. Affix the components to the badge
Add one piece of double-sided foam tape to the LED board and another piece to the BadgerStick.
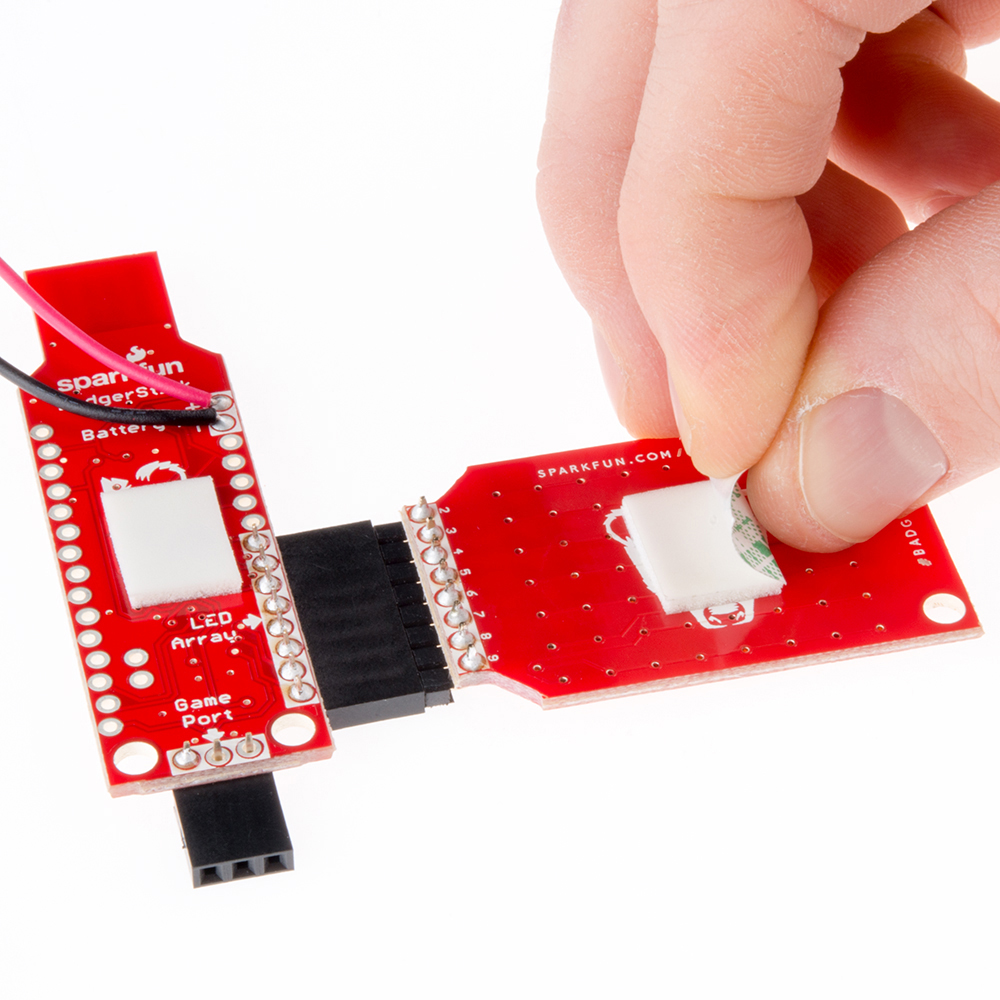
Add another two pieces of foam tape on top of the existing foam tape.
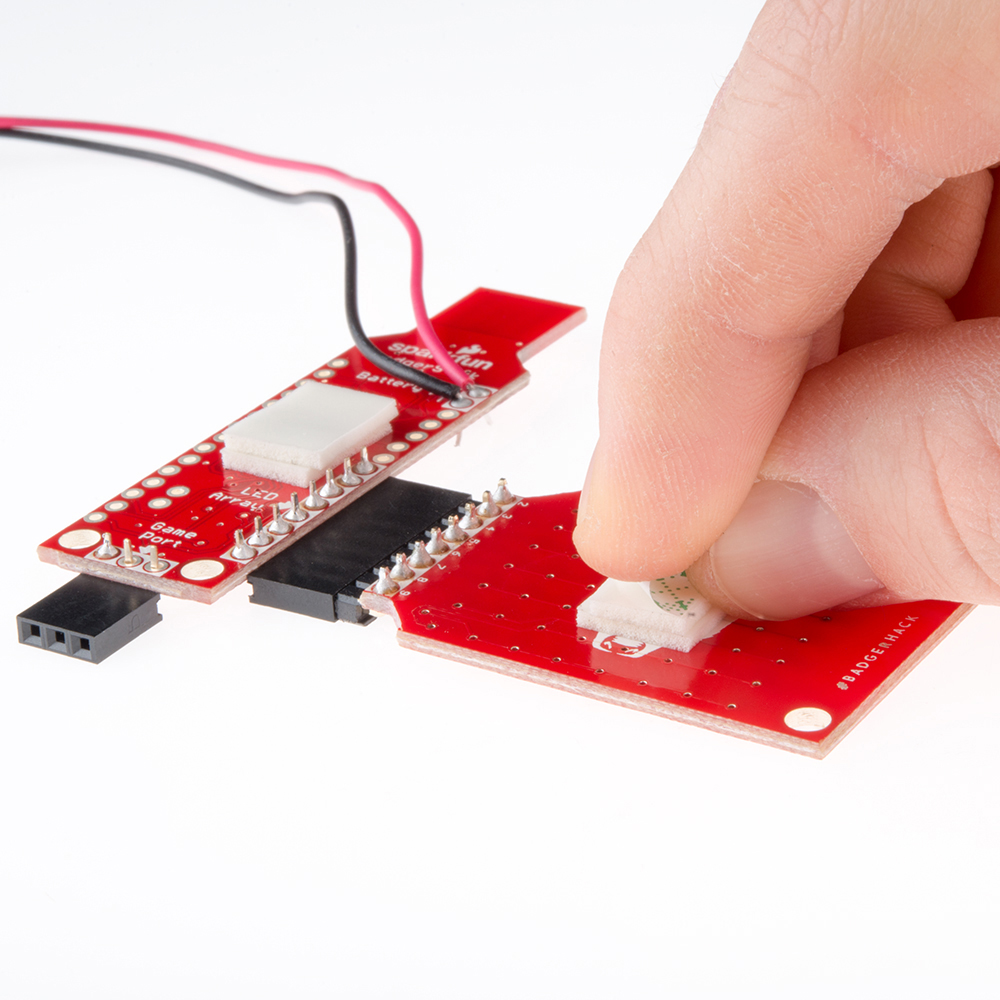
Stick the LED board and BadgerStick to the front of the plastic badge.
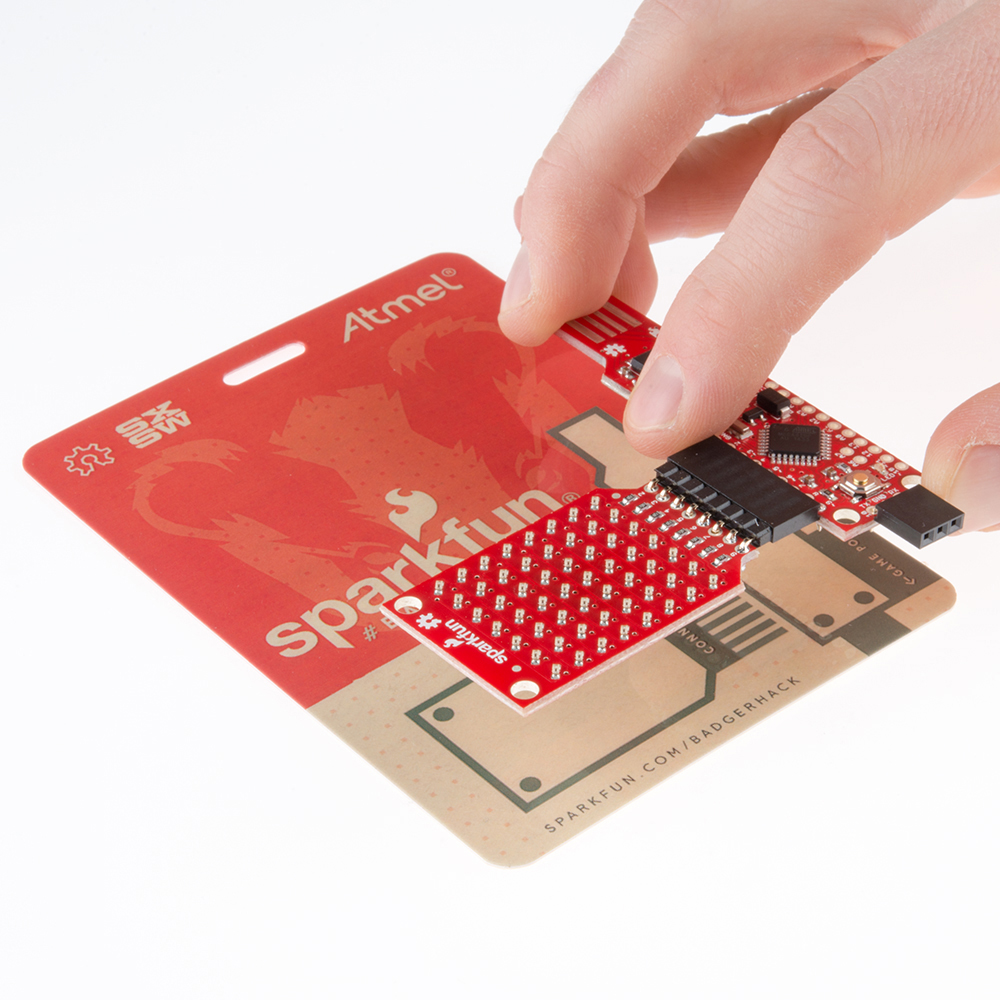
Put one more piece of foam tape on the battery pack on the side with the screw.
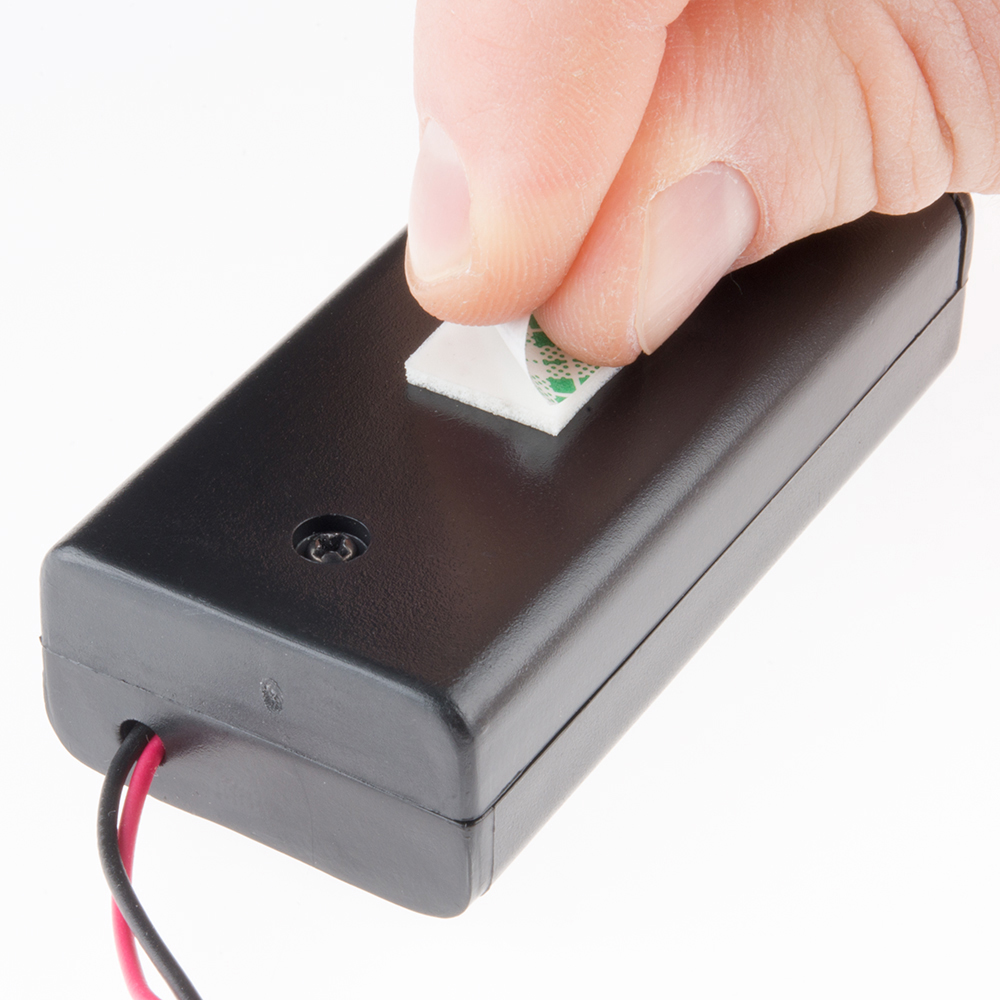
Stick the battery pack to the back of the plastic badge. To prevent the wires from hanging out, wrap them around the side of the badge as in the picture.
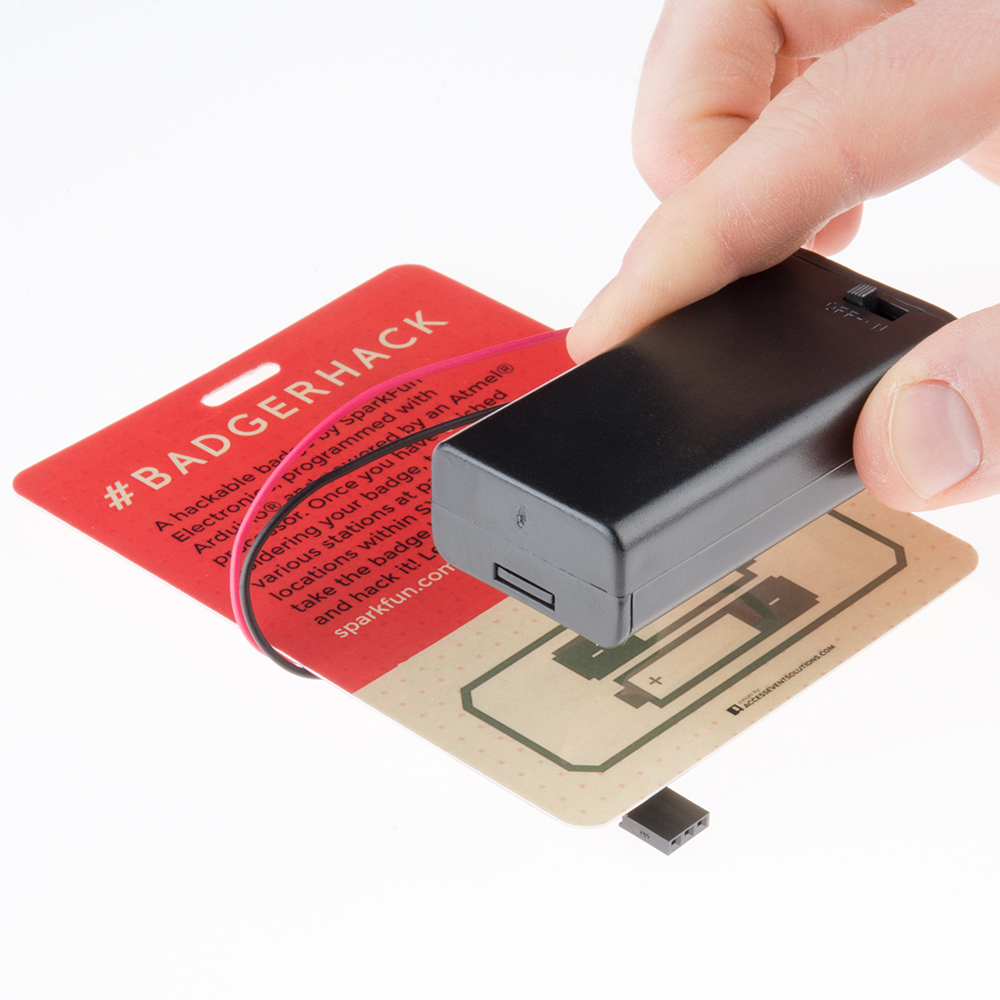
9. Turn it on
Turn your badge over, and find the little switch on the battery pack. Flip it to "ON."

Flip your badge back over. Wait about 3 seconds, and you should see the LED matrix activate!
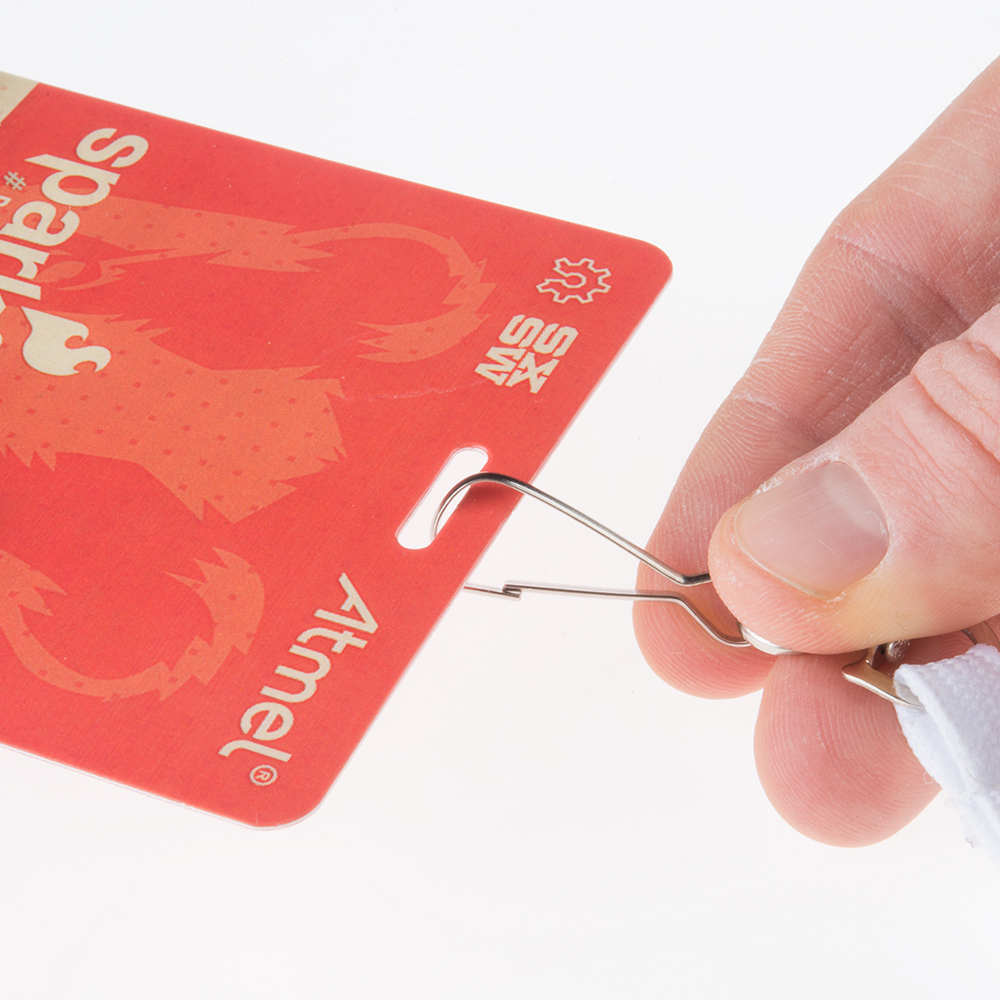
10. Badger it up!
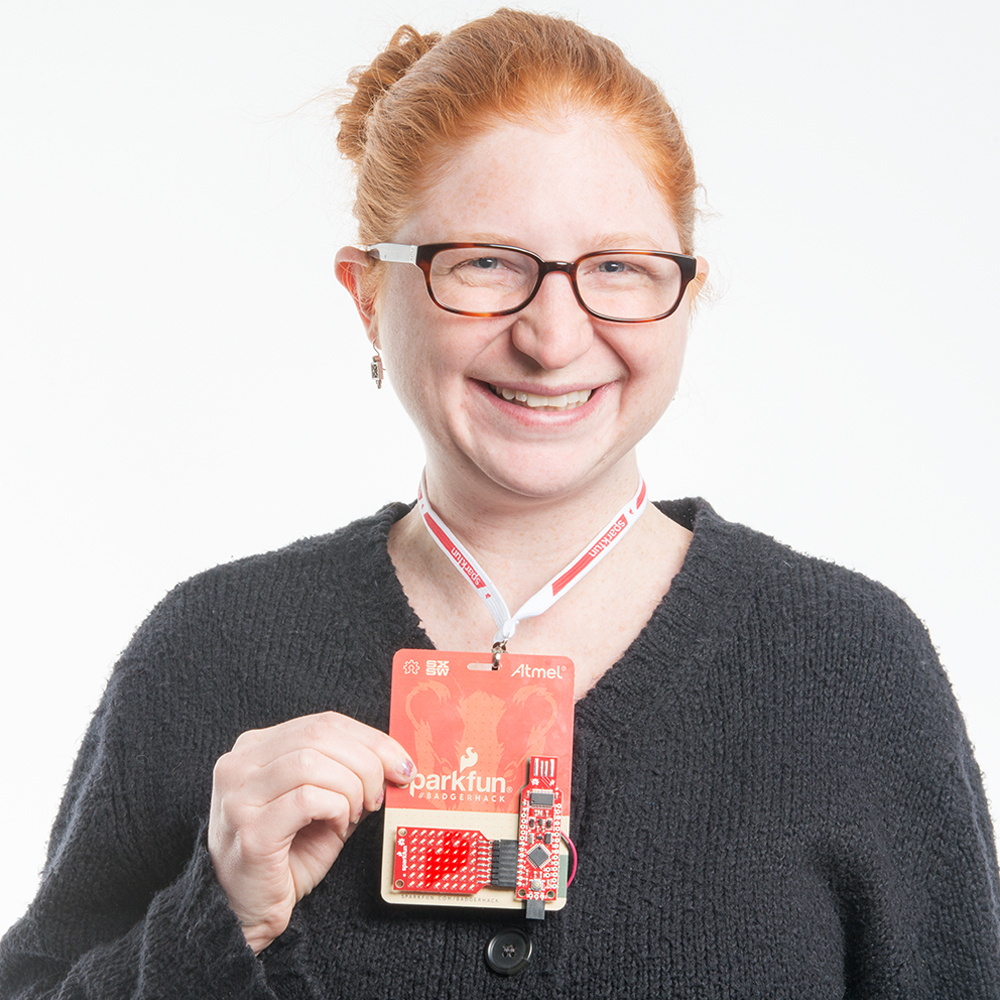
You are now the proud owner of a SparkFun Badger badge! Attach a lanyard...
...and wear it with pride.
Hack Your Badge
What do you do with your badge after the event? Well, you can hack it!
Install the BadgerStick Drivers into the Arduino IDE
Install the Arduino IDE, and download the BadgerStick Repository.
Unzip the files, and copy the "badgerstick" directory into $Arduino Installation Directory/hardware. Restart Arduino, and you should see "BadgerStick" as an available board under "Tools -> Board".
Example 1: Hello World
You will need to install the LED Array 8x7 Arduino Library into your IDE in order to use the following examples.
Note: This example assumes you are using the latest version of the Arduino IDE on your desktop. If this is your first time using Arduino, please review our tutorial on installing the Arduino IDE.
If you have not previously installed an Arduino library, please check out our installation guide.Plug your BadgerStick into an available USB port. Make sure "BadgerStick" and the associated COM port are selected in the Arduino IDE. Upload the following ScrollText.ino sketch to your BadgerStick.
language:c
    /****************************************************************
ScrollText.ino
LED Array 8x7 Charlieplex
Shawn Hymel @ SparkFun Electronics
February 3, 2015
https://github.com/sparkfun/LED_Array_8x7_Charlieplex

Scrolls text across the LED array for 10 seconds.

Hardware Connections:

IMPORTANT:  The Charlieplex LED board is designed for 2.0 - 5.2V!
            Higher voltages can damage the LEDs.

 Arduino Pin | Charlieplex Board
 ------------|------------------
      2      |         A
      3      |         B
      4      |         C
      5      |         D
      6      |         E
      7      |         F
      8      |         G
      9      |         H

Resources:
Include Chaplex.h, SparkFun_LED_8x7.h
The Chaplex library can be found at:
http://playground.arduino.cc/Code/Chaplex

Development environment specifics:
Written in Arduino 1.6.7
Tested with SparkFun RedBoard and BadgerStick (Interactive Badge)

This code is released under the [MIT License](http://opensource.org/licenses/MIT).

Please review the LICENSE.md file included with this example. If you have any questions
or concerns with licensing, please contact techsupport@sparkfun.com.

Distributed as-is; no warranty is given.
****************************************************************/

#include <SparkFun_LED_8x7.h>
#include <Chaplex.h>

// Global variables
static byte led_pins[] = {2, 3, 4, 5, 6, 7, 8, 9}; // Pins for LEDs

void setup() {

  // Initialize LED array
  Plex.init(led_pins);

  // Clear display
  Plex.clear();
  Plex.display();
}

void loop() {

  // Scroll text 2 times (blocking)
  Plex.scrollText("Hello. :)", 2, true);

  // Scroll text until we stop it
  Plex.scrollText("Let's scroll!");
  delay(10000);
  Plex.stopScrolling();
  delay(1000);
}
Your badge should scroll "Hello: Let's Scroll!."
Now the fun begins! Edit the string "Let's Scroll!" on line 65 to say your name (don't forget the quotes!). Run it on the BadgerStick and watch your name scroll across the LEDs.
Example 2: Shapes
Once you have had enough scrolling text, try making some shapes. Upload the `DrawShapes.ino' sketch to the BadgerStick.
language:c
    /****************************************************************
DrawShapes.ino
LED Array 8x7 Charlieplex
Shawn Hymel @ SparkFun Electronics
February 9, 2015
https://github.com/sparkfun/LED_Array_8x7_Charlieplex

Draws lines, rectangles, and circles on the LEDs.

Hardware Connections:

IMPORTANT:  The Charlieplex LED board is designed for 2.0 - 5.2V!
            Higher voltages can damage the LEDs.

 Arduino Pin | Charlieplex Board
 ------------|------------------
      2      |         A
      3      |         B
      4      |         C
      5      |         D
      6      |         E
      7      |         F
      8      |         G
      9      |         H

Resources:
Include Chaplex.h, SparkFun_LED_8x7.h
The Chaplex library can be found at:
http://playground.arduino.cc/Code/Chaplex

Development environment specifics:
Written in Arduino 1.6.7
Tested with SparkFun RedBoard and BadgerStick (Interactive Badge)

This code is released under the [MIT License](http://opensource.org/licenses/MIT).

Please review the LICENSE.md file included with this example. If you have any questions
or concerns with licensing, please contact techsupport@sparkfun.com.

Distributed as-is; no warranty is given.
****************************************************************/

#include <SparkFun_LED_8x7.h>
#include <Chaplex.h>

// Global variables
byte led_pins[] = {2, 3, 4, 5, 6, 7, 8, 9}; // Pins for LEDs
byte i;

void setup() {

  // Initialize and clear display
  Plex.init(led_pins);
  Plex.clear();
  Plex.display();
}

void loop() {

  // Draw a dot (x, y)
  Plex.clear();
  Plex.pixel(1, 2);
  Plex.display();
  delay(1000);

  // Draw a line (x0, y0, y1, y1)
  Plex.clear();
  Plex.line(1, 2, 5, 5);
  Plex.display();
  delay(1000);

  // Draw a rectangle (x, y, width, height)
  Plex.clear();
  Plex.rect(1, 2, 5, 4);
  Plex.display();
  delay(1000);

  // Draw a filled rectangle (x, y, width, height)
  Plex.clear();
  Plex.rectFill(1, 2, 5, 4);
  Plex.display();
  delay(1000);

  // Draw a circle (x, y, radius)
  Plex.clear();
  Plex.circle(3, 3, 3);
  Plex.display();
  delay(1000);

  // Draw a filled circle (x, y, radius)
  Plex.clear();
  Plex.circleFill(3, 3, 3);
  Plex.display();
  delay(1000);
}
You should see a basic square, line, and filled circle appear on the LED array. What other fun shapes and pictures can you make?
Resources and Going Further
You've built the badge and programmed it with some new graphics. Now what? The BadgerHack adventure continues, that's what.
You can turn your Badger into other projects if you have some extra electronics or picked up one of the add-on kits:
BadgerHack: Gaming Add-On Kit
BadgerHack: Sensor Add-On Kit
BadgerHack: Synth Add-On Kit
If you want to take it even further, here are some other suggestions:
- Looking for ideas? See learn.sparkfun.com for tutorials.
- Want more sensors? Take a look at the sensors we offer.
- Need even more LEDs? We have some of that, too.
- Want to see what other people are making? Check out our tagged page on hackster.io.
Hack on, fellow creators.
If you make something cool with your badge, share it with #BadgerHack, or create a tutorial on hackster.io.
Resources
You made it all the way to the end! Congratulations. Have a badger.