BadgerHack: Gaming Add-On Kit
 Shawn Hymel
Introduction
The BadgerStick that you received by visiting a SparkFun booth at one of the various events we've attended can be hacked to perform a wide variety of tasks. The display may be small (don't get your hopes up of running Doom on an 8x7 monochrome display). However, we can use it to display information and even play some basic games.

This tutorial will guide you through turning your BadgerStick into a micro gaming system. Remember the game Breakout? Let's make a Breakout clone on our BadgerStick by adding a joystick and some buttons!
Required Materials
We will need a few other components to make a simple controller for the BadgerStick.
Suggested Reading
Before starting this tutorial, we highly recommend you work through the main BadgerHack guide first.
BadgerHack
Additionally, if you are new to soldering or electronics, we recommend you check out the following:
When you are ready to start hacking your badge, we definitely recommend reading:
Hardware Hookup
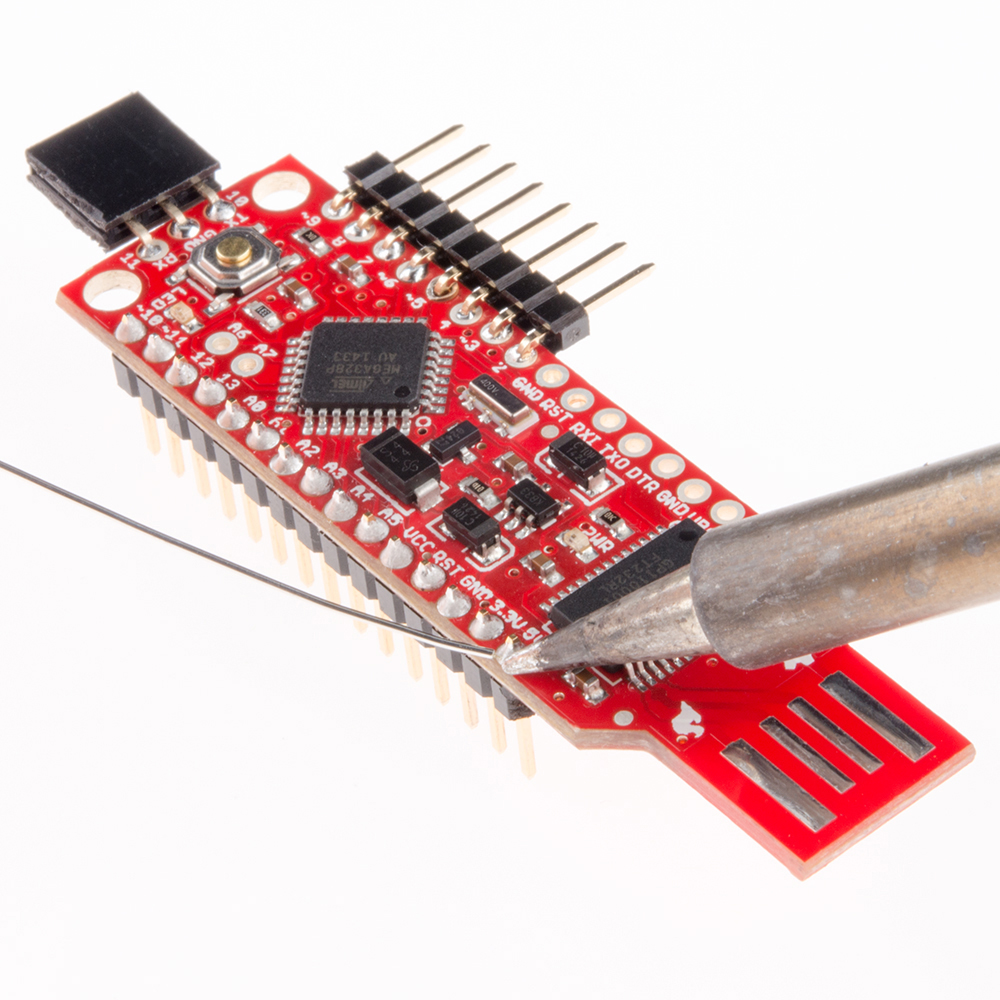
To begin, snap off 15 pins from the break-away headers, and solder them to the through-holes on the side opposite the LED array of the BadgerStick.
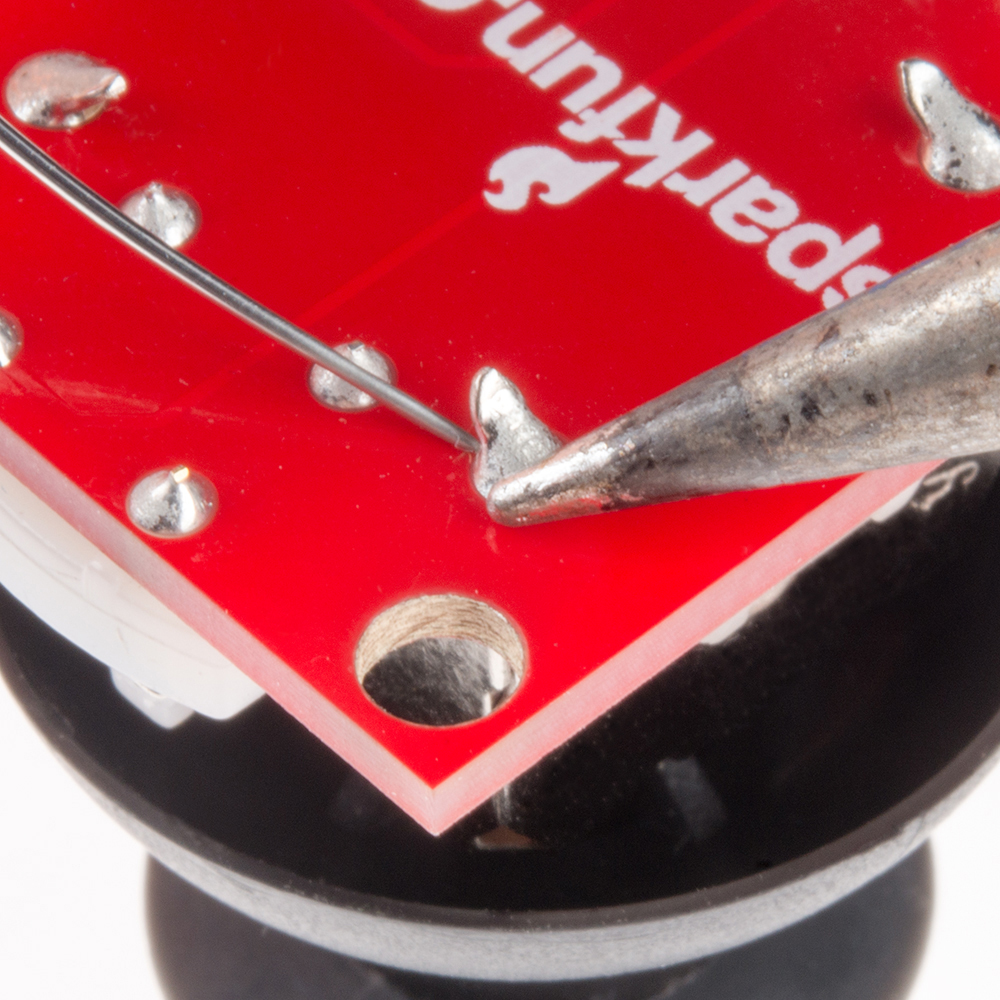
Solder the Thumb Joystick to the Thumb Joystick Breakout board.
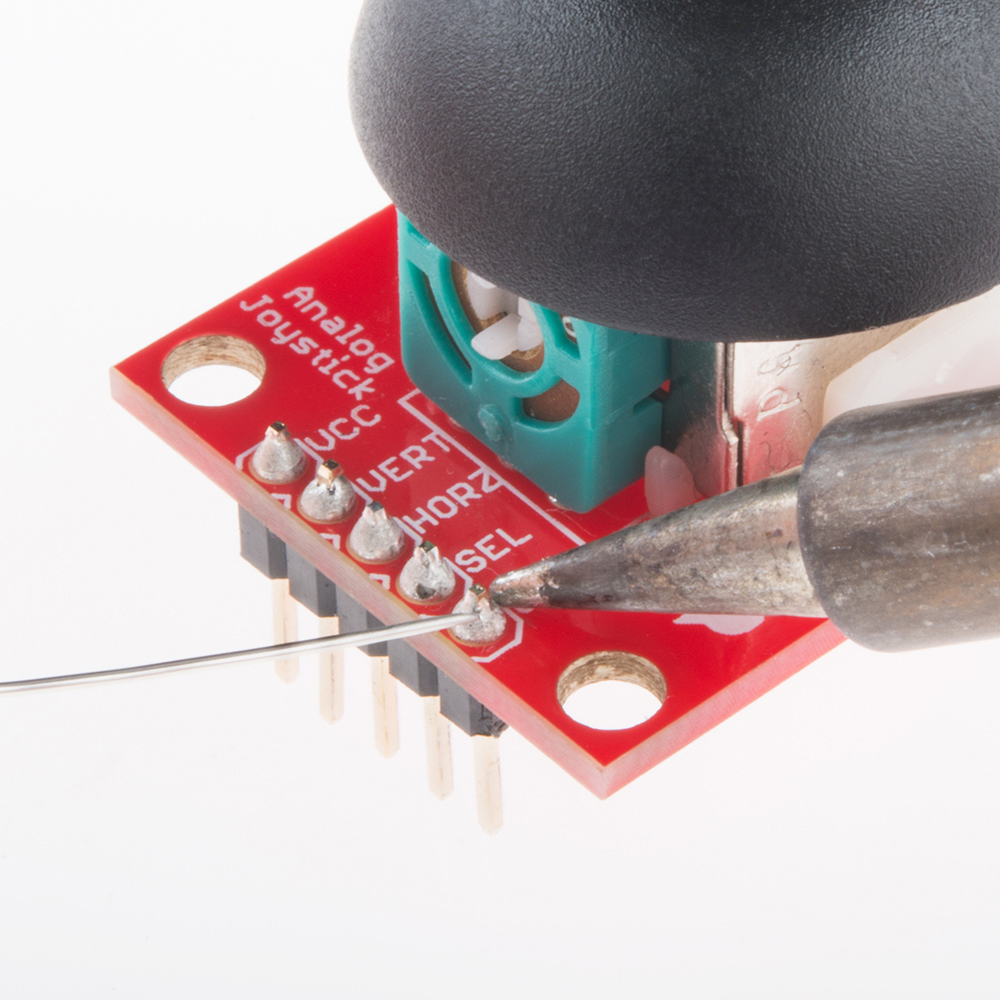
Snap off 5 pins from the break-away headers, and solder them to the through-holes on the Joystick Breakout Board.
Connections
Place the BadgerStick in the breadboard with pin 10 in position i13 and pin 5V in position i27.
Connect the rest of the components as follows:
| Component | Breadboard | |||
|---|---|---|---|---|
| Thumb Joystick Breakout* | i7 (VCC) | i6 (VERT) | i5 (HOR) | i3 (GND) |
| Pushbutton | c20 | c22 | f20 | f22 |
| Pushbutton | c28 | c30 | f28 | f30 |
| Jumper Wire | ( - ) | g30 | ||
| Jumper Wire | ( - ) | g25 | ||
| Jumper Wire | ( - ) | g22 | ||
| Jumper Wire | ( - ) | j3 | ||
| Jumper Wire | j7 | g23 | ||
| Jumper Wire | j6 | g18 | ||
| Jumper Wire | j5 | g17 | ||
| Jumper Wire | g21 | g28 | ||
* Pins not listed are not used.
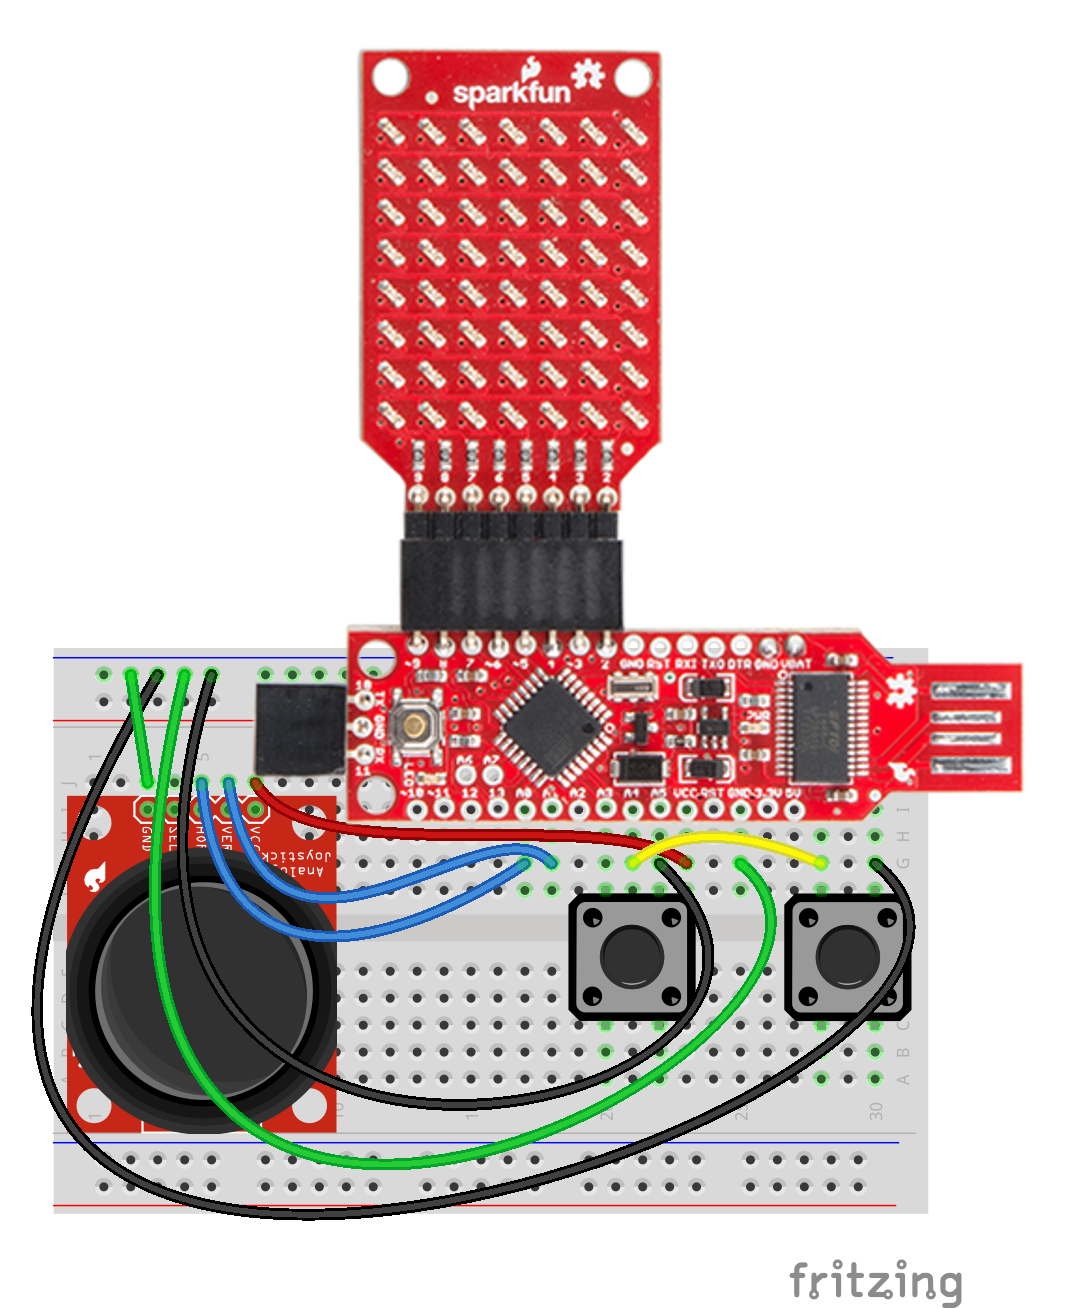
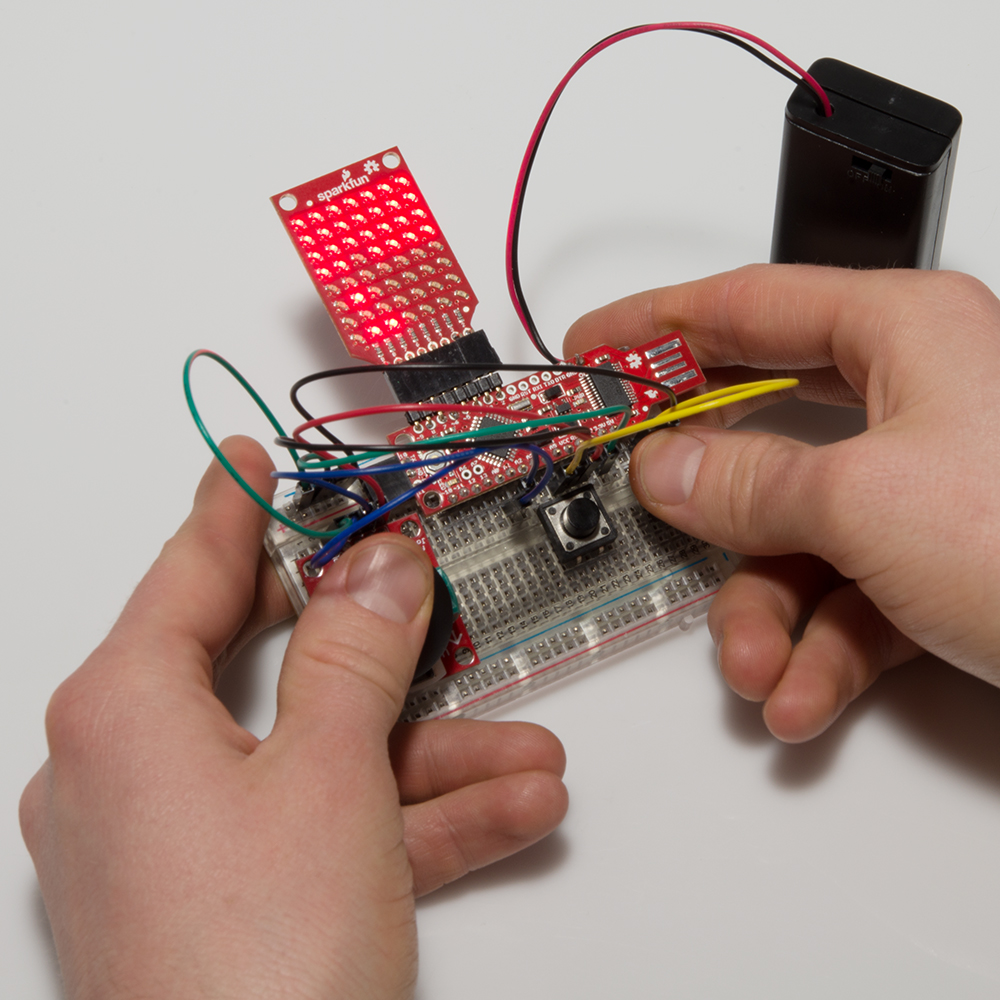
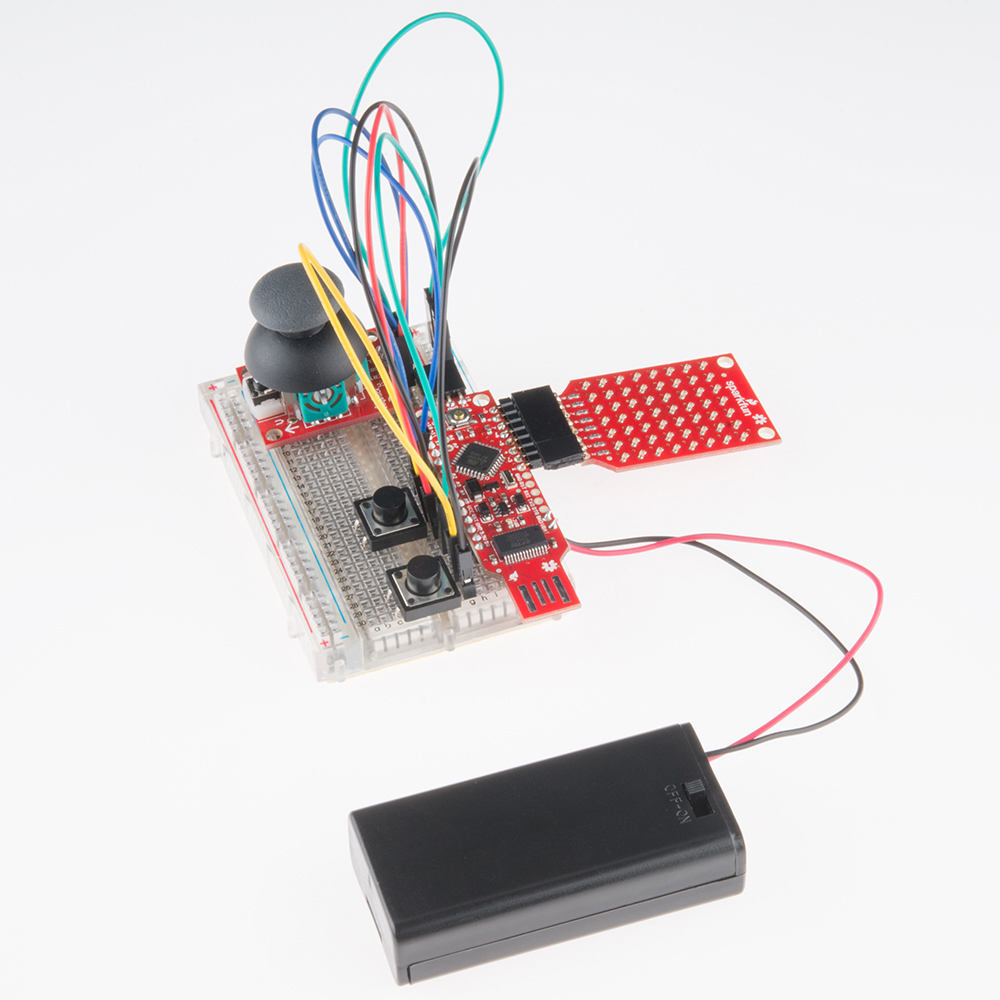
You should now have a makeshift game controller with a tiny LED screen!
The Code
Plug the USB side of your BadgerStick into your computer. Make sure "BadgerStick" and the associated COM port are selected in the Arduino IDE, and click upload.
language:c
/**
 * BadgerHack Breakout
 * Shawn Hymel @ SparkFun Electronics
 * September 23, 2015
 *
 * A clone of the famous "Breakout" game on the BadgerHack platform. Use the
 * joystick to move the paddle and try to knock out the upper pixels with the
 * ball.
 *
 * License: http://opensource.org/licenses/MIT
 *
 * THE SOFTWARE IS PROVIDED "AS IS", WITHOUT WARRANTY OF ANY KIND, EXPRESS OR
 * IMPLIED, INCLUDING BUT NOT LIMITED TO THE WARRANTIES OF MERCHANTABILITY,
 * FITNESS FOR A PARTICULAR PURPOSE AND NONINFRINGEMENT. IN NO EVENT SHALL THE
 * AUTHORS OR COPYRIGHT HOLDERS BE LIABLE FOR ANY CLAIM, DAMAGES OR OTHER
 * LIABILITY, WHETHER IN AN ACTION OF CONTRACT, TORT OR OTHERWISE, ARISING FROM,
 * OUT OF OR IN CONNECTION WITH THE SOFTWARE OR THE USE OR OTHER DEALINGS IN
 * THE SOFTWARE.
 */

#include <SparkFun_LED_8x7.h>
#include <Chaplex.h>

// Constants
#define DEBUG                1
#define FPS                  60
#define SENSITIVITY          100
#define MAX_X_SPAN           127
#define PADDLE_SIZE          2
#define INITIAL_BALL_SPEED   0.1
#define BALL_SPEED_INC       0.004
#define PAUSE_BEFORE_SHOOT   1000    // ms
#define ROW_SIZE             7
#define COL_SIZE             8
#define FIELD_SIZE           ROW_SIZE * COL_SIZE

// Pin definitions
#define RNG_SEED_PIN  2
#define X_PIN         0
#define Y_PIN         1
#define BUTTON_1_PIN  3
#define BUTTON_2_PIN  4

// Global variables
byte led_pins[] = {2, 3, 4, 5, 6, 7, 8, 9}; // Pins for LEDs
uint16_t horz_zero;
uint16_t vert_zero;
uint8_t paddle_size;

// Setup
void setup() {

#if DEBUG
  Serial.begin(9600);
  Serial.println(F("Breakout demo for BadgerHack"));
#endif

  // Initialize and clear display
  Plex.init(led_pins);
  Plex.clear();
  Plex.display();

  // Seed our random number generator
  randomSeed(analogRead(2));

  // Calibrate our joystick by finding the center
  horz_zero = analogRead(X_PIN);
  vert_zero = analogRead(Y_PIN);
}

// Loop - play the game forever
void loop() {

  // Play the game inifinity times
  playGame();
}

/****************************************************************
 * Functions
 ***************************************************************/

// Play the game
void playGame() {

  // Calculate the new x max based on paddle size
  paddle_size = PADDLE_SIZE;
  uint16_t field_max = MAX_X_SPAN -
                        (paddle_size - 1) * (MAX_X_SPAN / 7);

  // Create new game variables
  boolean playing;
  boolean win;
  unsigned long frame_start;
  uint8_t millis_per_frame = 1000/FPS;
  unsigned long game_start;
  boolean ball_moving;
  int16_t paddle_move;
  int16_t paddle_field = field_max / 2;
  uint8_t paddle_x;
  float ball_x = 3;
  float ball_y = 5;
  float inc_x;
  float inc_y;
  float ball_speed;
  uint8_t ball_round_x;
  uint8_t ball_round_y;
  uint16_t ball_theta;
  boolean can_deflect = true;
  int i;
  uint8_t x;
  uint8_t y;
  byte the_wall[] = { 1,1,1,1,1,1,1,
                      1,1,1,1,1,1,1,
                      1,1,1,1,1,1,1,
                      1,1,1,1,1,1,1,
                      0,0,0,0,0,0,0,
                      0,0,0,0,0,0,0,
                      0,0,0,0,0,0,0,
                      0,0,0,0,0,0,0 };
#if DEBUG
  Serial.println("New game!");
  Serial.print("Field span: ");
  Serial.println(field_max);
#endif

  // Note when we start the game (so we can shoot the ball)
  game_start = millis();
  ball_moving = false;

  // Assign an initial direction and speed to the ball
  ball_theta = initBallTheta();
  ball_speed = INITIAL_BALL_SPEED;

  // Play the game until we win or lose
  playing = true;
  while ( playing ) {

    // For each frame, aim for refresh rate
    frame_start = millis();

    // Check for a win condition
    win = true;
    for ( i = 0; i < FIELD_SIZE; i++ ) {
      if ( the_wall[i] > 0 ) {
        win = false;
        break;
      }
    }
    if ( win ) {
      Plex.clear();
      Plex.scrollText("You win!", 1);
      delay(5000);
      Plex.stopScrolling();
      playing = false;
    }

    // Read the value of the joystick and map to a movement
    paddle_move = analogRead(X_PIN) - horz_zero;
    paddle_move = paddle_move / SENSITIVITY;
#if 0
    Serial.print("Moving: ");
    Serial.println(paddle_move);
#endif

    // Move the paddle and calculate its real x position
    paddle_field = paddle_field + paddle_move;
    if ( paddle_field <= 0 ) {
      paddle_field = 0;
    }
    if ( paddle_field >= field_max ) {
      paddle_field = field_max;
    }
    paddle_x = map(paddle_field, 0, field_max,
                   0, 6 - (paddle_size - 1));

    // If the ball has been shot, move it
    if ( ball_moving ) {

      // Calculate the ball's new position
      ball_x += ball_speed * cos(ball_theta * (M_PI / 180));
      ball_y += ball_speed * sin(ball_theta * (M_PI / 180));

      // Check the ball against the paddle
      if ( (ball_y > 6) &&
            (ball_x >= paddle_x) &&
            (ball_x <= (paddle_x + (paddle_size - 1))) &&
            can_deflect ) {
        ball_y = 6 - abs(6 - ball_y);
        ball_theta = 360 - ball_theta;
        can_deflect = false;
      }

      // Allow ball to be deflected once it leaves paddle range
      if ( ball_y <= 6 ) {
        can_deflect = true;
      }

      // Check if the ball moved past the paddle (lose)
      if ( ball_y > 7 ) {
#if DEBUG
        Serial.print("LOSE! x=");
        Serial.print(ball_x);
        Serial.print(" y=");
        Serial.print(ball_y);
        Serial.print(" Paddle:");
        Serial.print(paddle_x);
        Serial.print("-");
        Serial.println(paddle_x + paddle_size - 1);
#endif
        playing = false;
      }

      // Check the ball against the walls (and bounce!)
      if ( ball_y < 0 ) {
        ball_y = abs(ball_y);
        ball_theta = 360 - ball_theta;
      }
      if ( ball_x < 0 ) {
        ball_x = abs(ball_x);
        ball_theta = (540 - ball_theta) % 360;
      }
      if ( ball_x > 6 ) {
        ball_x = 6 - abs(6 - ball_x);
        ball_theta = (540 - ball_theta) % 360;
      }

      // Bounce if we hit a block above the ball
      i = (floor(ball_y) * ROW_SIZE) + roundFloat(ball_x);
      if ( the_wall[i] > 0 ) {
        the_wall[i]--;
        ball_y = (i / ROW_SIZE) + abs((i / ROW_SIZE) - ball_y);
        ball_theta = 360 - ball_theta;
        ball_speed += BALL_SPEED_INC;
      }

      // Bounce if we hit a block below the ball
      i = (ceil(ball_y) * ROW_SIZE) + roundFloat(ball_x);
      if ( the_wall[i] > 0 ) {
        the_wall[i]--;
        ball_y = (i / ROW_SIZE) - abs((i / ROW_SIZE) - ball_y);
        ball_theta = 360 - ball_theta;
        ball_speed += BALL_SPEED_INC;
      }

      // Bounce if we hit a block to the left the ball
      i = (roundFloat(ball_y) * ROW_SIZE) + floor(ball_x);
      if ( the_wall[i] > 0 ) {
        the_wall[i]--;
        ball_y = (i / ROW_SIZE) + abs((i / ROW_SIZE) - ball_y);
        ball_theta = (540 - ball_theta) % 360;
        ball_speed += BALL_SPEED_INC;
      }

      // Bounce if we hit a block to the right the ball
      i = (roundFloat(ball_y) * ROW_SIZE) + ceil(ball_x);
      if ( the_wall[i] > 0 ) {
        the_wall[i]--;
        ball_y = (i / ROW_SIZE) - abs((i / ROW_SIZE) - ball_y);
        ball_theta = (540 - ball_theta) % 360;
        ball_speed += BALL_SPEED_INC;
      }

    } else {

      // See if we need to start moving the ball
      if ( millis() >= game_start + PAUSE_BEFORE_SHOOT ) {
        ball_moving = true;
      }
    }

    // Round the ball's position to the nearest pixel
    ball_round_x = roundFloat(ball_x);
    ball_round_y = roundFloat(ball_y);

    // Draw tbe wall, the paddle, and the ball
    Plex.clear();


    for ( y = 0; y < COL_SIZE; y++ ) {
      for ( x = 0; x < ROW_SIZE; x++ ) {
        if ( the_wall[(x * ROW_SIZE) + (ROW_SIZE - 1 - y)] > 0 ) {
          Plex.pixel(x, y);
        }
      }
    }
    for ( i = 0; i < paddle_size; i++ ) {
      Plex.pixel(7, map(paddle_x + i, 0, 6, 6, 0));
    }
    Plex.pixel(ball_round_y, map(ball_round_x, 0, 6, 6, 0));
    Plex.display();

    // Wait until we reach our target end of frame
    while ( millis() < frame_start + millis_per_frame ) {
      delay(1);
    }
 #if 0
   Serial.print("FPS: ");
   Serial.println( 1000 / (millis() - frame_start) );
 #endif

  }
}

// Create a randomized ball launch angle
unsigned int initBallTheta() {

  unsigned int theta;

  // Choose an angle  in the range of 210-239 deg or 301-330 deg
  theta = random(0, 60);
#if DEBUG
  Serial.print("RNG:");
  Serial.print(theta);
#endif
  if ( theta < 30 ) {
    theta = 210 + theta;
  } else {
    theta = 271 + theta;
  }

#if DEBUG
  Serial.print(" Theta:");
  Serial.println(theta);
#endif

  return theta;
}

// Rounds a floating value to an integer
int roundFloat(float x) {
  if ( x >= 0 ) {
    return (int) (x + 0.5);
  }
  return (int) (x - 0.5);
}
Play
Once the sketch has been uploaded, prepare to play!
Use the joystick to move the paddle back and forth to bounce the ball. You win when you "break" all the lights on the top part of the screen. You lose if you let the ball go past your paddle.
Resources and Going Further
You might notice that we do not use the 2 buttons in the game. Breakout only requires a joystick. However, you now have a basic platform that is perfect for creating games!
What other games would you want to make? Here are some ideas:
Resources
Other BadgerHack Projects
Check out some of the other things you can make with the Badger: