Arduino Comparison Guide
This Tutorial is Retired!
We have updated this tutorial in "Choosing an Arduino for Your Project." If you are looking to compare specs of different Arduino boards you can view our Arduino Comparison Guide.
View the updated tutorial: Choosing an Arduino for Your Project
 jimblom
ATmega328 Boards
The ATmega328 (and the ATmega168 before that, and ATmega8 before that,...) is a staple of the Arduino platform. 32kB of flash (program space), up to 23 I/Os -- eight of which can be analog inputs -- operating frequencies of up to 20 MHz. None of it's specifications are flashy, but this is still a solid 8-bit microcontroller. For many electronics projects, what the 328 provides is still more than enough.
The Arduino boards on this page all feature the ATmega328 as their main MCU brain. The microcontroller alone makes every board on this page nearly identical in terms of I/O count and memory. Their differences stem from things like programming interfaces, form factors, and operating voltages.
The Main Event: Arduino Uno
The Arduino Uno is the "stock" Arduino. It's what we compare every, other, Arduino-compatible board to. If you're just getting into Arduino, this is the board to start with.
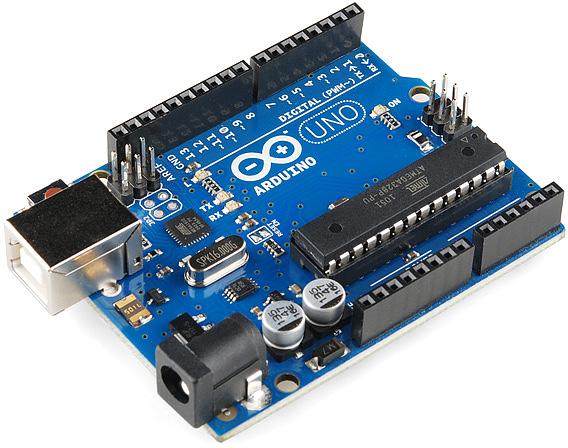
The Uno comes in two flavors, through-hole and SMD, which use either a through-hole or surface-mount ATmega328. The through-hole version (pictured above) is nice because you can take the chip out and swap in a new one (in case the magic, blue smoke is released), but the SMD version has the potential to be more readily available (PTH chips are increasingly being phased out of existence).
The Arduino Uno can be powered through either the USB interface, or an external barrel jack. To connect it to a computer you'll need a type-B-to-A USB cable (like the USB connector on most printers).
A Modification: RedBoard
One of the greatest things about Arduino is the fact that the entire project is open-source. The schematics, hardware design files, and source code are all freely available for viewing and modification. Released under a Creative Commons Share Alike license, anyone is free to riff on the hardware design and produce their own version. That's how a product like the RedBoard comes to be. It still looks and acts just like an Arduino Uno, but is slightly modified to make the board better-suited to certain purposes.
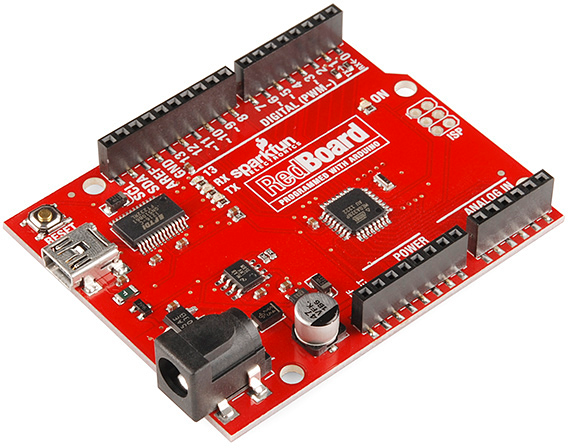
The RedBoard is nearly identical to the Uno, but there are a few key differences:
- USB connector: The Redboard uses the smaller mini-B connector, so you'll need a mini-B-to-A USB cable to connect it to your computer.
- USB-to-Serial Transciever: The Arduino Uno uses an ATmega16U4 loaded with custom firmware to convert between USB and serial. The RedBoard uses the FTDI FT232RL. This difference is only really prevalent when installing drivers because each requires a different driver file.
- SMD vs PTH: The RedBoard is only offered in a SMD version, and it takes SMD a step further by making every component surface-mount. No sharp edges on the bottom of the board!
- Color: True to it's name, the RedBoard comes in
FerarriSparkFun red. It won't have any real influence on the operation of the Arduino, but it certainly affects the board's swag-factor. - Price: Because we manufacture the board in-house, here in Boulder, CO, we can afford to keep the price-tag a tad lower.
Like the Uno, the RedBoard is great for beginners. On the whole, it should offer the same Arduino experience as an Uno might. For a deeper comparison between the RedBoard and Uno, check out our RedBoard vs. Uno tutorial.
For the Pros
Arduino Pros are a scaled-down version of the Uno. There's still an ATmega328 on there, but removed are the connectors and USB-to-serial-converting circuitry. Basically, this is the bare-minimum an Arduino needs to still be an Arduino. As the name would imply, these boards are intended for use by more experienced Arduino-ers.
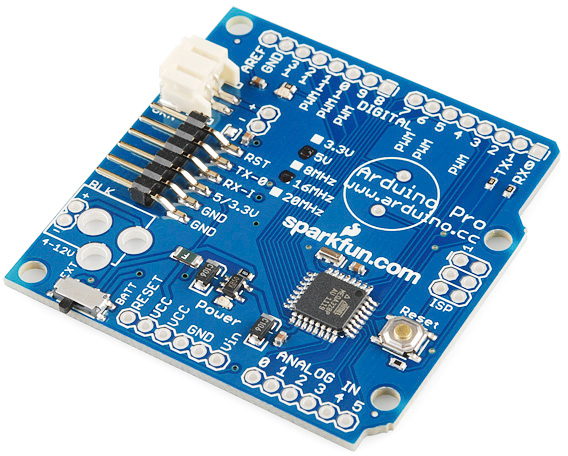
You'll need more than just a USB cable to program an Arduino Pro; an external board is required to convert USB from your computer to serial that the Arduino understands. There are various boards and cables that can accomplish this task, we recommend the FTDI Basic Breakout.

This board mates up to the 6-pin, right-angle connector on the edge of the board. When you're done programming and ready to stick the board into a project, just unplug the FTDI Basic.
The smaller form factor and absence of connectors means this board can be more custom-tailored to fit into a project. You can solder wires or connectors directly onto the pins you need. Then again, it has the same pin footprint as the Uno, so it's still shield compatible.
The Pros come in two varieties: 5V/16MHz and 3.3V/8MHz. The 5V/16MHz board runs at the same voltage and speed as the Arduino Uno. The 3.3V/8MHz board is unique, though, because it can operate at a lower voltage. A lower operating voltage makes the board easier to power with batteries (LiPos specifically), but it also means the clock speed has to be turned down. The 3.3V/8MHz board runs at half the speed a regular Arduino Uno...but 8MHz is still pretty darn fast for many applications. You can still turn an LED on and off more than a million times per second!
Of course, if this board is still to big, you can shrink it down even further...
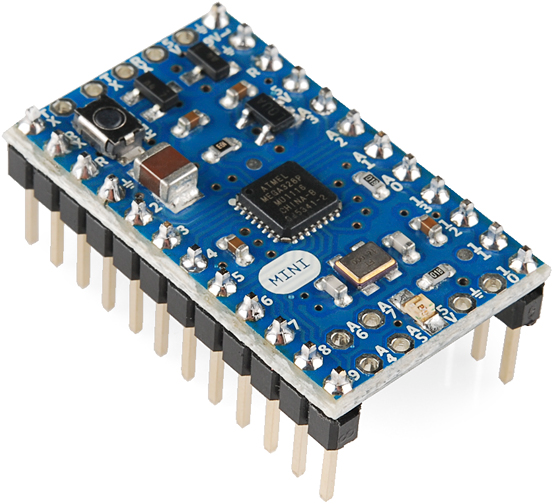
Pro Mini's
The Mini boards pack all of the remaining punch of the Arduino Pro into a much smaller footprint. Every pin is still broken out (actually, more pins are broken out), they're just in a very different footprint.
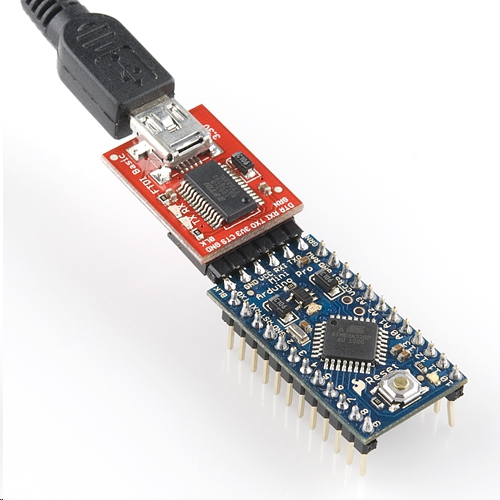
Obviously, these boards aren't shield-compatible, but they are breadboard-compatible. You can solder male headers into the Pros, and straddle it across the breadboard's middle strip. The small form-factor also makes them very conducive to embedding into projects (like in the H2O pH Probe).
Like the regular Pro boards, these are offered in 5V/16MHz and 3.3V/8MHz varieties. And you still have to program them with an FTDI Basic.
The Arduino Mini 05 could also be lumped into this category. It shares a lot in common with the Pro Minis, except it comes with male headers pre-soldered in.
Etcetera
There are innumerable Arduino-compatible boards out there which make use of the ATmega328. Many, like the Arduino Pros, require an FTDI Basic to receive code, but they add on extra hardware to make them unique. The Arduino Ethernet, where the Arduino Uno and an Ethernet Shield are smashed onto a single board, is a good example of this.

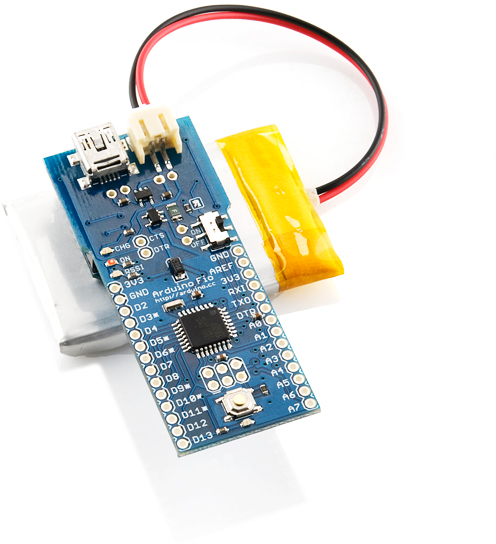
And, the Arduino Fio too. This board wires up the ATmega328 to an XBee (or XBee-compatible) wireless transceiver, so your Arduino can communicate wirelessly with other devices.
The list could go on and on. If you see a board with that recurring, six-pin, serial header, and an ATmega328 doing all of the processing, its specifications probably aren't all that different from an Arduino Pro.