Air Velocity Sensor Breakout - FS3000 Hookup Guide
Contributors:
 QCPete, Ell C
QCPete, Ell C 
Example Code
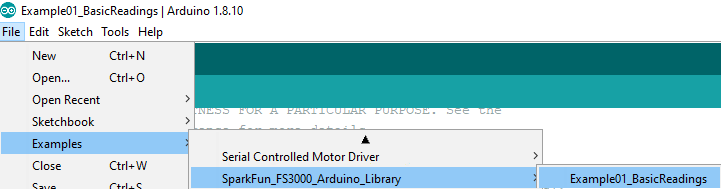
Once you've installed the FS3000 library, you should see File > Examples > SparkFun_FS3000_Arduino_Library > Example01_BasicReadings to open the example sketch.
Alternatively, you can copy and paste the code below into a fresh Arduino sketch.
language:c
/******************************************************************************
  Example_01_BasicReadings.ino

  Read values of air velocity from the FS3000 sensor, print them to terminal.
  Prints raw data, m/s and mph.
  Note, the response time on the sensor is 125ms.

  SparkFun FS3000 Arduino Library
  Pete Lewis @ SparkFun Electronics
  Original Creation Date: August 5th, 2021
  https://github.com/sparkfun/SparkFun_FS3000_Arduino_Library

  Development environment specifics:

  IDE: Arduino 1.8.15
  Hardware Platform: SparkFun RedBoard Qwiic
  SparkFun Air Velocity Sensor Breakout - FS3000 (Qwiic) Version: 1.0

  Artemis RedBoard @ 400KHz (Core v2.1.0)
  (note, v2.1.1 has a known issue with clock stretching at 100KHz)

  Do you like this library? Help support SparkFun. Buy a board!

    SparkFun Air Velocity Sensor Breakout - FS3000-1005 (Qwiic)
    https://www.sparkfun.com/products/18377

    SparkFun Air Velocity Sensor Breakout - FS3000-1015 (Qwiic)
    https://www.sparkfun.com/products/18768

  Hardware Connections:
  Use a Qwiic cable to connect from the RedBoard Qwiic to the FS3000 breakout (QWIIC).
  You can also choose to wire up the connections using the header pins like so:

  ARDUINO --> FS3000
  SDA (A4) --> SDA
  SCL (A5) --> SCL
  3.3V --> 3.3V
  GND --> GND

  This program is distributed in the hope that it will be useful,
  but WITHOUT ANY WARRANTY; without even the implied warranty of
  MERCHANTABILITY or FITNESS FOR A PARTICULAR PURPOSE. See the
  GNU General Public License for more details.

  You should have received a copy of the GNU General Public License
  along with this program.  If not, see <http://www.gnu.org/licenses/>.
******************************************************************************/

#include <Wire.h>
#include <SparkFun_FS3000_Arduino_Library.h> //Click here to get the library: http://librarymanager/All#SparkFun_FS3000

FS3000 fs;

void setup()
{
  Serial.begin(115200);
  Serial.println("Example 1 - Reading values from the FS3000");

  Wire.begin();

  if (fs.begin() == false) //Begin communication over I2C
  {
    Serial.println("The sensor did not respond. Please check wiring.");
    while(1); //Freeze
  }

  // Set the range to match which version of the sensor you are using.
  // FS3000-1005 (0-7.23 m/sec) --->>>  AIRFLOW_RANGE_7_MPS
  // FS3000-1015 (0-15 m/sec)   --->>>  AIRFLOW_RANGE_15_MPS
  fs.setRange(AIRFLOW_RANGE_7_MPS);
  //fs.setRange(AIRFLOW_RANGE_15_MPS);

  Serial.println("Sensor is connected properly.");
}

void loop()
{
    Serial.print("FS3000 Readings \tRaw: ");
    Serial.print(fs.readRaw()); // note, this returns an int from 0-3686

    Serial.print("\tm/s: ");
    Serial.print(fs.readMetersPerSecond()); // note, this returns a float from 0-7.23 for the FS3000-1005, and 0-15 for the FS3000-1015

    Serial.print("\tmph: ");
    Serial.println(fs.readMilesPerHour()); // note, this returns a float from 0-16.17 for the FS3000-1005, and 0-33.55 for the FS3000-1015


    delay(1000); // note, reponse time on the sensor is 125ms
}
Set your Board and Serial Port, and then upload the sketch to your Arduino. Then open the serial monitor. Make sure your baud rate is set to 115200. You'll begin to see output, including raw data and translated miles per second and miles per hour.
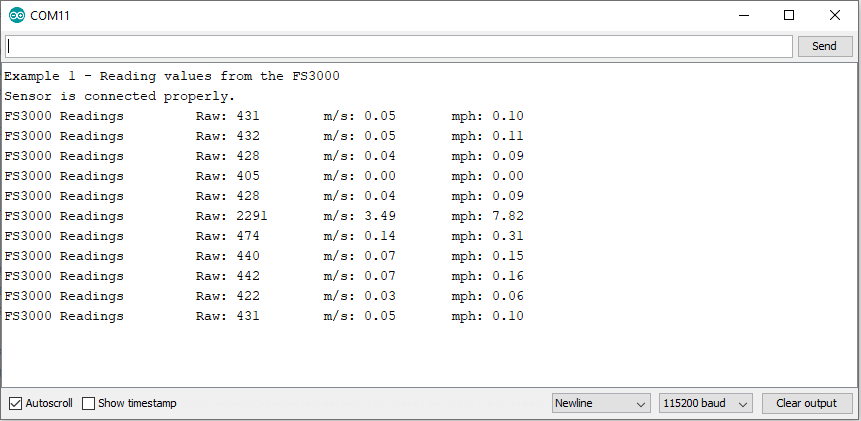
Note that peak in the middle of the readings? That's where I pointed the sensor at the fan!