Adapting LilyPad Development Board Projects to the LilyPad ProtoSnap Plus
 Gella
Gella Adapting and Uploading Code to the ProtoSnap Plus
Code written for the LilyPad Development Board can be adapted for use with the ProtoSnap Plus with a few simple changes.
First, identify if the parts are pre-wired and included on the LilyPad ProtoSnap Plus using the Board Comparison Chart. Simply update the pin number assigned in your Development Board code to the coordinating connection on the ProtoSnap Plus.
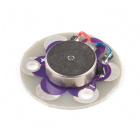
LilyPad Vibe Board
Connect the positive (+) tab of the LilyPad Vibe Board to one of the Expansion Ports and reassign the pin number in your code. We recommend using Expansion Port 10 if you wish to use PWM with the vibe board.
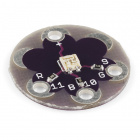
LilyPad Tri-Color LED
The LilyPad USB Plus at the center of the ProtoSnap Plus has a built-in RGB LED that can be used in place of the LilyPad Tri-Color LED. Note that the Tri-Color LED included on the LilyPad Development Board was a common anode while the RGB on the USB Plus is a common cathode, so your code may have to be adapted slightly to function the same.
LilyPad Tri-Color LED
DEV-08467Note on Common Anode vs Common Cathode
The color channels on the Tri-Color LED LED are all connected through a common anode (positive) pin. Unlike some other RGB LEDs, this configuration means that to light up the LED you need to ground the individual red, green, and blue LEDs instead of sending them power. For simple circuit hookups, this means you need to connect the R, G, or B sew tabs to ground (-) and set them to LOW (for digital output) or 0 (for analog output) in your code to turn them on.

External Tri-Color LED
You may also connect a Tri-Color LED to the three Expansion Ports. Only Expansion Port 10 has PWM functionality, so fading the LEDs can only happen on one of the RGB channels in this hookup method.
LilyPad Temperature Sensor
Connect the S tab of an external LilyPad Temperature Sensor to Expansion Port A9 and reassign the pin number associated with the temperature sensor in your code to A9.

Uploading Code
Note that whereas the LilyPad Development Board required an FTDI breakout board to upload code, the LilyPad ProtoSnap Plus board can be programmed via the microUSB connector.
Before uploading your code to the ProtoSnap Plus, you will need to select a new board from the Board menu. The LilyPad Development Board uses a LilyPad Arduino while the LilyPad ProtoSnap Board uses a LilyPad USB Plus. If you keep LilyPad Arduino selected, it will display an error upon upload. Refer to the LilyPad ProtoSnap Plus Hookup Guide for full instructions on how to add support for the board and upload code to the USB Plus.
LilyPad Development Board: LilyPad Arduino
LilyPad ProtoSnap Plus: LilyPad USB Plus
