Vibe-O-Matic 3000
 Nate
Nate 
The Build
To build the Vibe-O-Matic, I needed three things:
- Vibration
- Sound
- Light
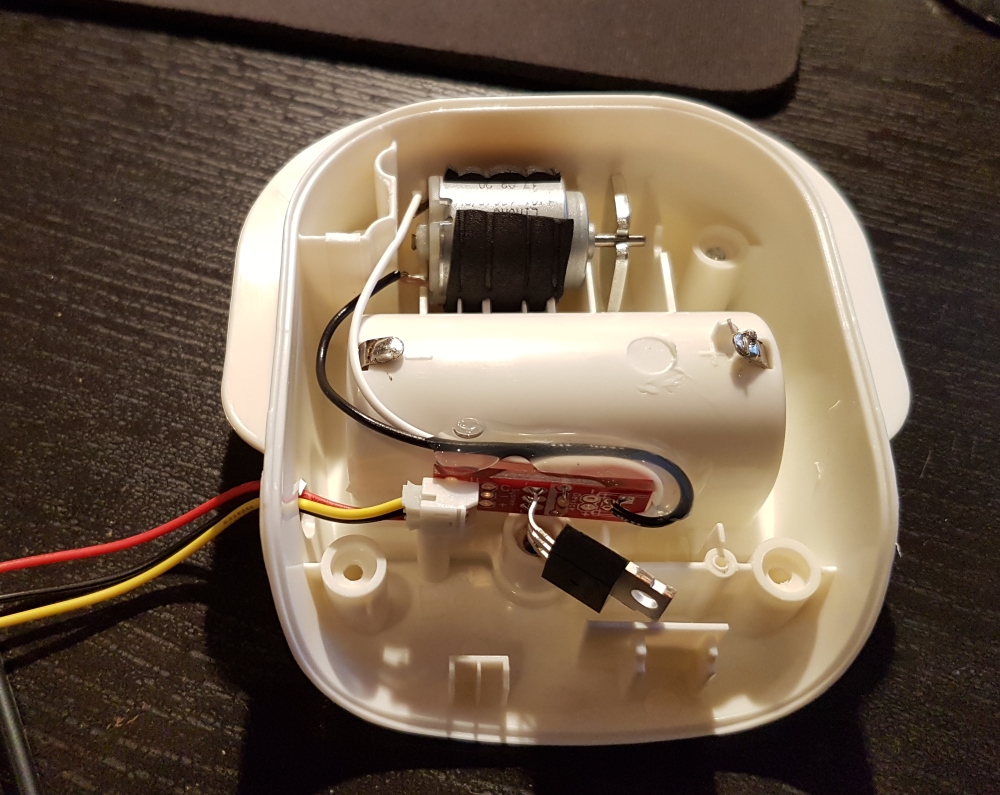
Luckily, the bouncy seat that friends gave us (thank you Victoria!) had a small vibration motor attached.

The original vibration design used a single C cell battery (approximately 1.5V) with a simple ON/OFF slide switch. I removed the power switch and battery and used the MOSFET power control kit to control the motor via the Arduino at 5V. Since the DC motor was used to vibrate the seat, it did not matter what pin was used when connecting it to the "Device" side of the n-channel MOSFET's breakout board.
What does the motor do when run at 5V instead of the designed 1.5V? It runs a lot faster and a lot louder. Thankfully, the Arduino has PWM on a handful of pins so we are able to run the motor from 0 to 100% throttle. Therefore, if the vibration is too great (or the motor gets too warm), we can ramp down the power to an acceptable level. I ended up running the motor from about 40% to 80% power. Any higher and the boy gets even more weirded out.
Next, I soldered an Arduino Pro to the MP3 Player Shield. Note that the Arduino is mounted above the shield. It’s not mandatory that an Arduino go below a shield. I knew I was going to need to solder a variety of additional things like switches and buttons to the Arduino. It was easier for me to mount the MP3 shield below so I could see the pins I needed to access on the Arduino. After stacking, the following wired connections were made as shown in the following table.
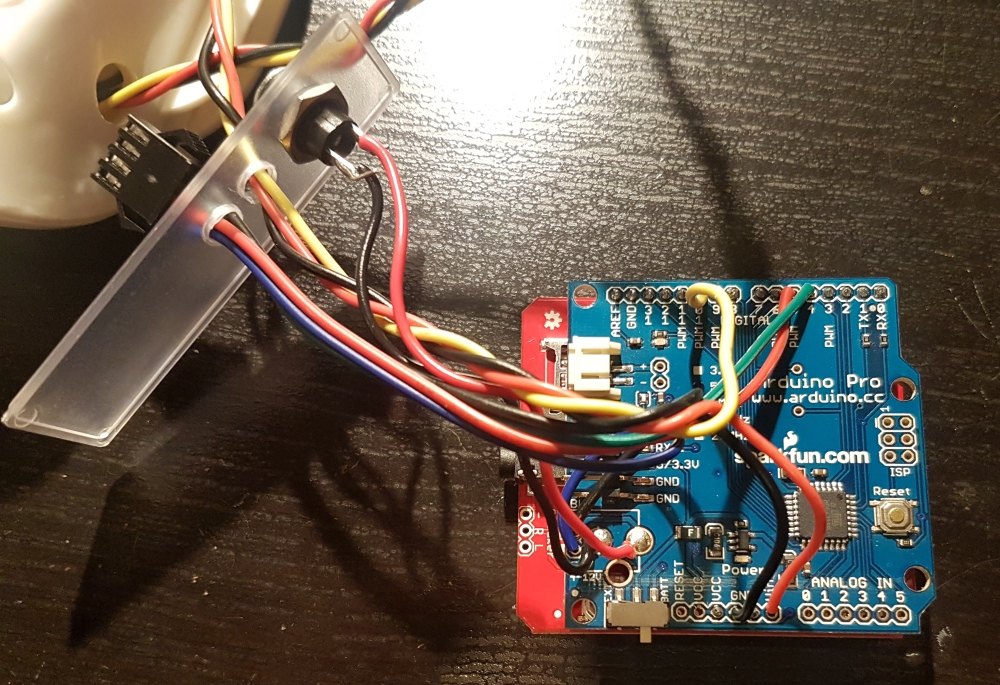
| Component | Arduino Pro 5V/16MHz |
|---|---|
| Panel Mount Barrel Jack's Center Pin | Barrel Jack VIN pin |
| Panel Mount Barrel Jack's Sleeve Pin | Barrel Jack GND pin |
| N-Channel MOSFET Breakout Board: "C" Pin | Pin 10 |
| N-Channel MOSFET Breakout Board: "-" Pin | GND Pin |
| N-Channel MOSFET Breakout Board: "+" Pin | VIN Pin |
| APA102 Ground: GND | "-" Pin Next to Barrel Jack Footprint |
| APA102 Data: D1 Pin | Pin 5 |
| APA102 Clock: C0 Pin | Pin 4 |
| APA102 Vcc: 5V | "+" Pin Next to Barrel Jack Footprint |
| Go!: Momentary Push Button Pin | Pin A0 |
| Go!: Momentary Push Button Pin | Pin A1 |
| Vibe Mode: Rocker Switch Normally Closed Pin | Pin A1 |
| Car Mode: Rocker Switch Normally Open Pin | Pin A2 |
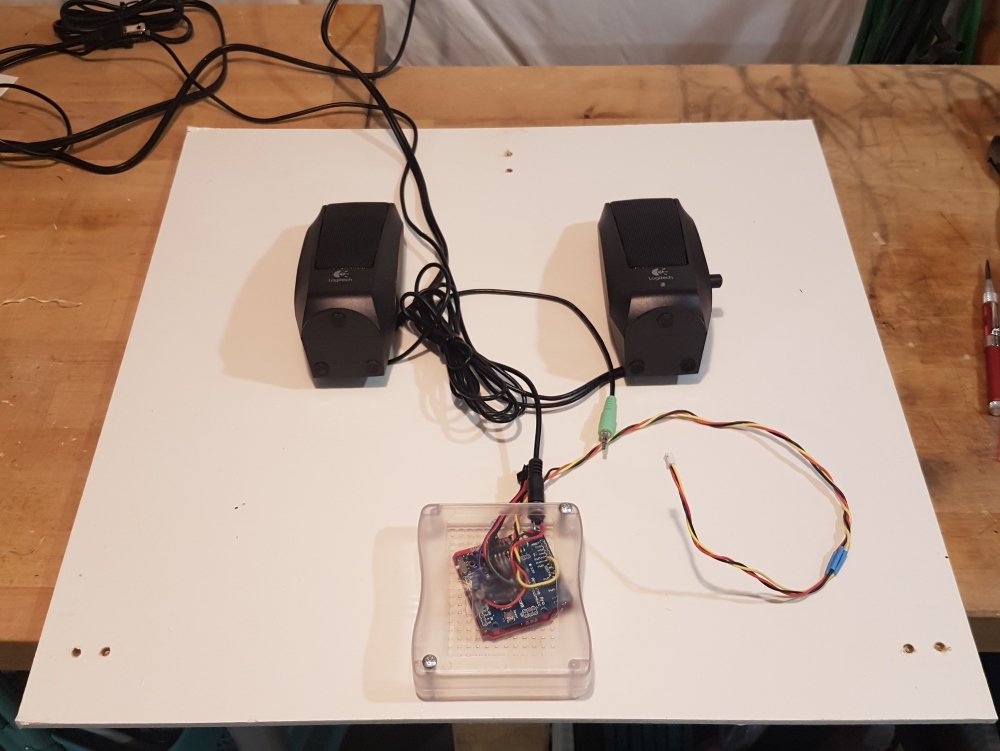
I made a base board out of MDF to mount everything to. I had some extra paint around so I painted it (thinking a coat of paint would have a positive impact on my wife’s feelings about this whole endeavor). The speakers are attached with a couple of screws through the MDF into the plastic speaker housing. The enclosure and electronics were similarly secured with a couple screws.
The chair was then zip tied to the MDF. The individually addressable APA102 warm white LEDs had an adhesive backing like most strips do. But like most LED strips, this backing tends to wear out after a few days so I added hot-glue to various points on the LED strip to secure it.
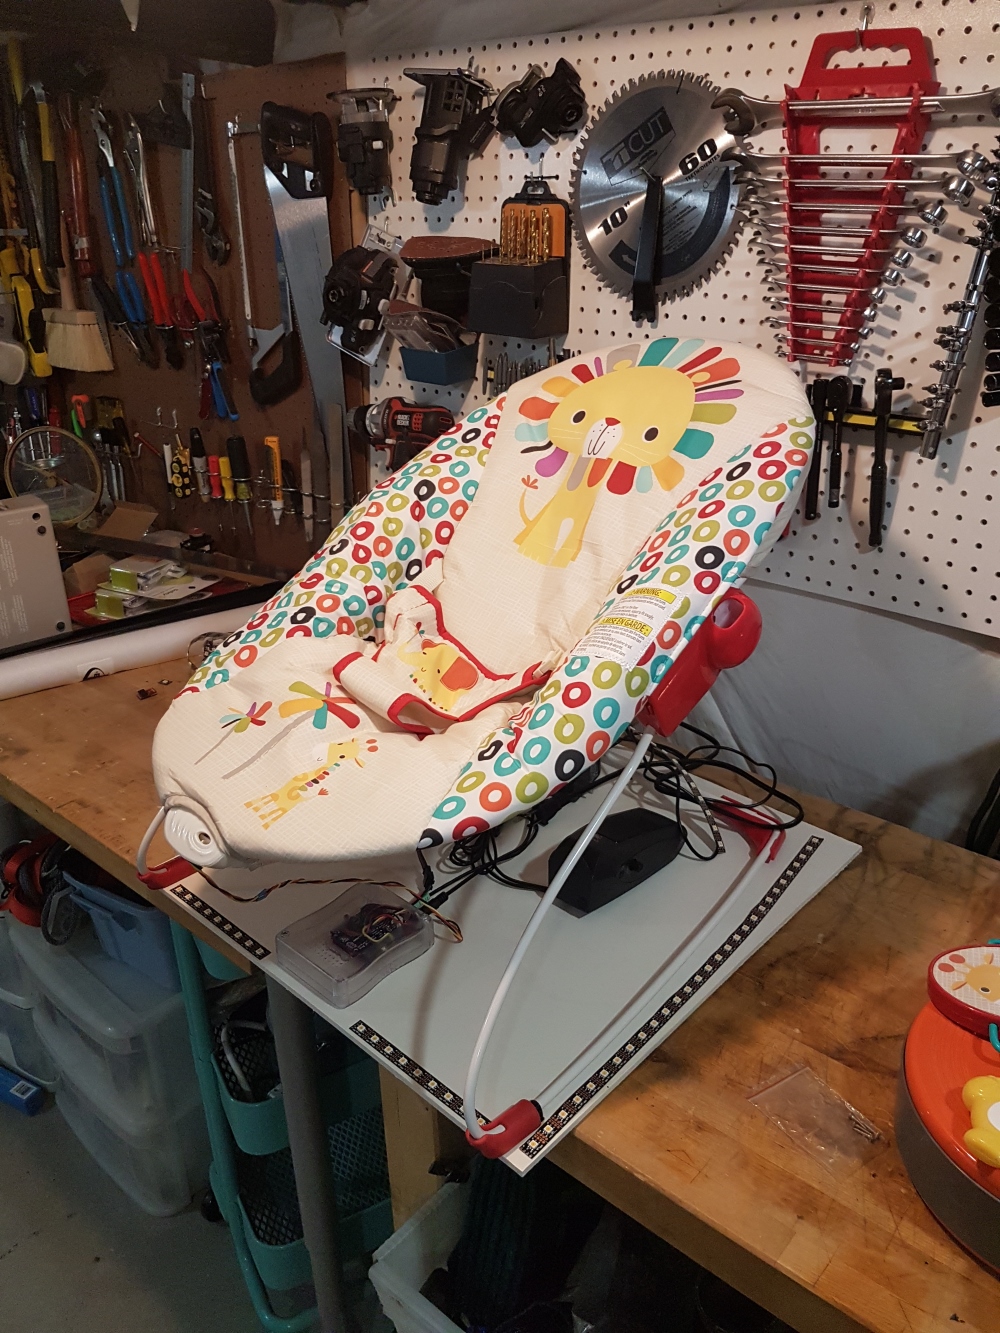
The APA102 LEDs are controlled with the excellent FastLED library. The ‘Cylon’ example was modified to mimic car’s headlights illuminating the cabin as they pass on the left, right, and front.
Next, I recorded a 12 minute drive through my city with the windows down. If you listen to the track you can hear where a couple large diesel trucks pass by. It’s a pretty good track although it’s hard to pick up good road noises. At one point I envisioned using a light sensor, GPS, and accelerometer to properly record the light and vibration through the drive. At that same moment my son started to scream and I decided it was better to take the SISI (screw it, ship it) approach: the LEDs trigger every 30 seconds with a random right/front/left decision and the vibration motor changes to a new, random, vibration level (40 to 80% throttle) every 60 seconds.