Tsunami Hookup Guide
 Byron J.
Tsunami Demonstration
To show how easy it is to use Tsunami, let's hook it up and play some sounds.
For this demo, we'll be using the firmware that comes preloaded when you purchase the board. This is the stereo version, which plays stereo WAV files and treats the adjacent outputs as pairs, numbered 1 through 4. Mono file playback is supported by a different firmware image.
Prepare the SD Card
- The 1GB SparkX SD Card, from our catalog, since it isn't a Class 10 card and can lead to reliability issues.
- SD Cards with a capacity larger than 32GB, since it can be difficult to convert them to the FAT16 or FAT32 file system format with a 32kB file allocation size.
For more information on compatible SD cards, please check out the Robertsonics website:
The contents of the microSD card are the key to Tsunami. To start this demonstration, we'll prepare a card with some prerecorded files.
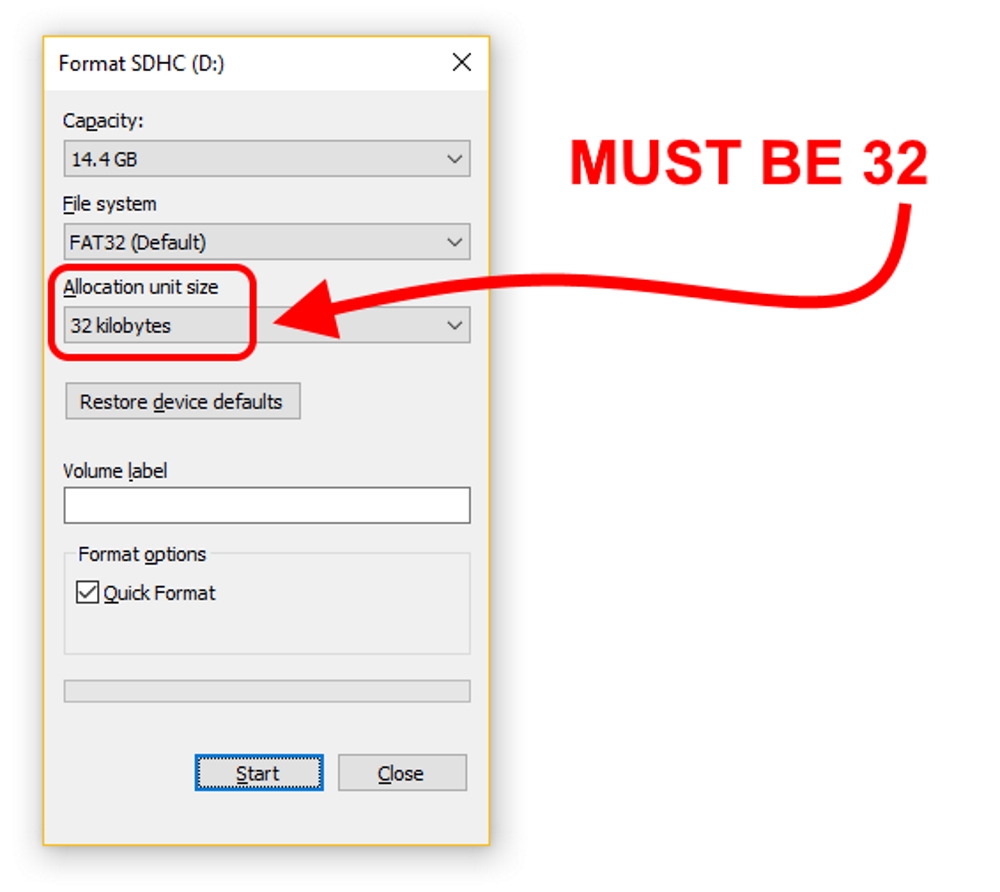
First, a quick warning about formatting your uSD card. If you need to format your card, it is very important that you use the correct settings:
- File system must be FAT16 or FAT32
- File Allocation Size must be 32 kilobytes
- "Quick format" is usually okay
- Note, if you are using a "brand new card", then formatting may not be necessary. If you notice that your Tsunami is missing commands, making occasional strange buzzing sounds, and sometimes crashing, then your file allocation size may be incorrect.
Next, download the demo files. Unzip the folder and put the files on the root directory of the card.
Before we put the card in Tsunami, let's quickly examine the files.
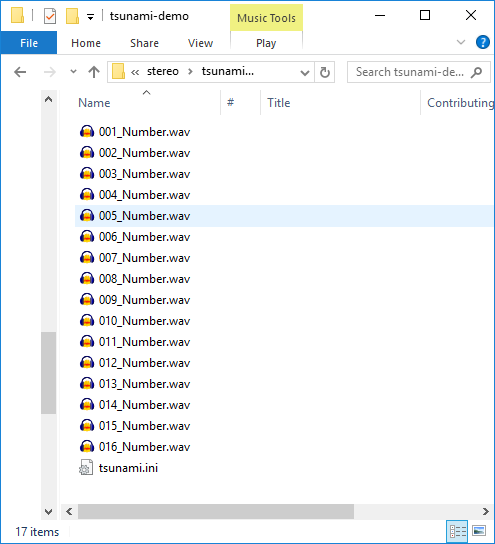
Notice that there are two types of file: 16 WAV files, and one INI file.
WAV Files
The WAV files are the audio content Tsunami will be playing back. These are 16 stereo WAV files, configured to play from the 16 trigger inputs.
Naming
The file names contain the trigger input mapping for the files. Each one starts with a three-digit number, which assigns it to the corresponding trigger input.
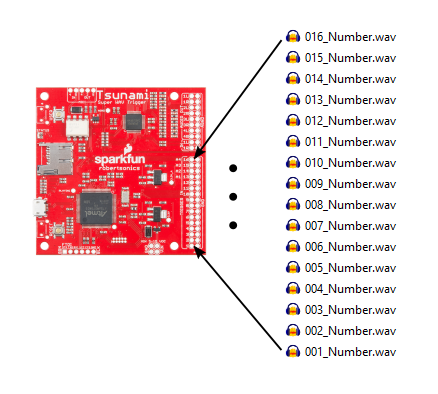
With 16 files, numbered 001 to 016, we'll be assigning a file to each of the trigger inputs.
WAV File Format
We should also take a moment to examine the file format. Tsunami plays WAV files recorded at 16-bit resolution, with a 44.1kHz sampling rate. Different firmware images allow for the playback of stereo or mono files.
Tsunami also requires that the file not contain any additional header information. Some audio recording programs, such as Pro Tools, write additional information at the start of the file. One easy way to remove unnecessary header information is by opening the file in Audacity and exporting it as "WAV (Microsoft) signed 16-bit PCM." As part of the export process, be sure to clear out any entries in the metadata dialog (title, artist, genre, etc.). The following video gives a brief demonstration of the Audacity export process.
If you're curious about the header contents, Rail John Rogut has written the Header Investigator application, which can display Pro Tools region information and BWF time stamps. This extra data might be meaningful to DAW applications, but Tsunami doesn't use the information.
.INI File
There is also an initialization file, tsunami.ini. Tsunami reads this file when it starts, to gather more details about how it should handle the trigger inputs. In this case, the triggers are constrained so that a file plays completely and can't be retriggered until it is done playing. This prevents stuttering when the trigger inputs aren't clean.
INI files are generated and edited using the Tsunami Configurator application. They are human readable ASCII text files. If you're curious about what's inside, you can open them in a text editor.
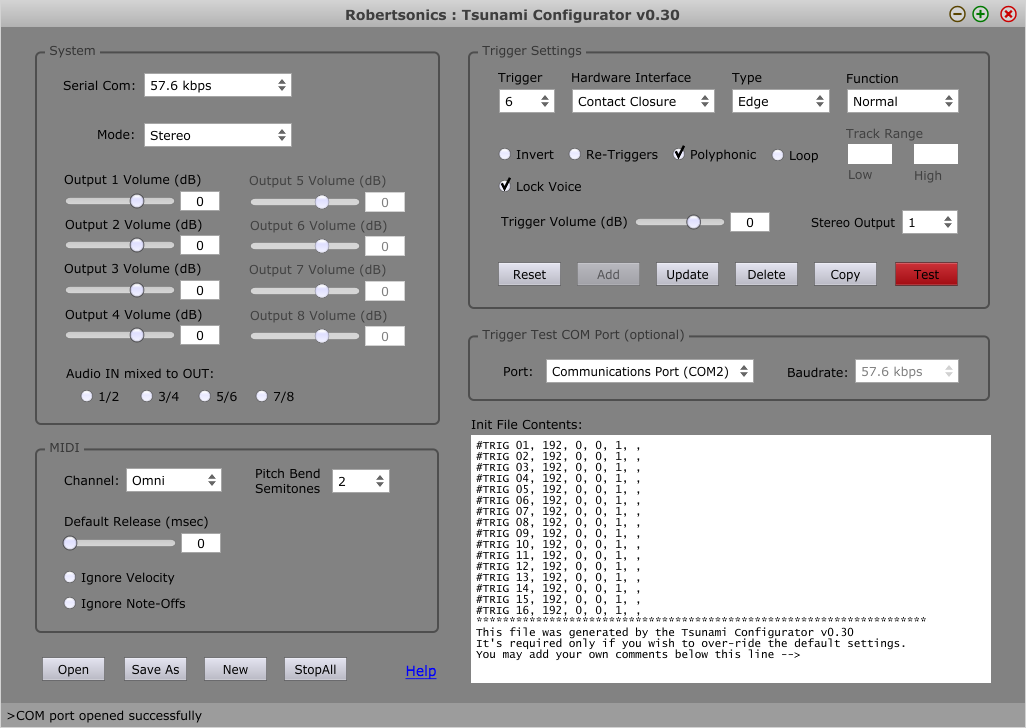
If you want to map the triggered sounds to other outputs, you can select the output number in the "Trigger Settings" portion of the app.
You can find more information about the configurator utility in the Tsunami user guide.
Install the Card
Now that we've looked at the contents of the card, eject the card from your computer and put it in the slot on Tsunami.
Connect Outputs
For this demo, we'll only be using the first stereo output, Output 1L and 1R.
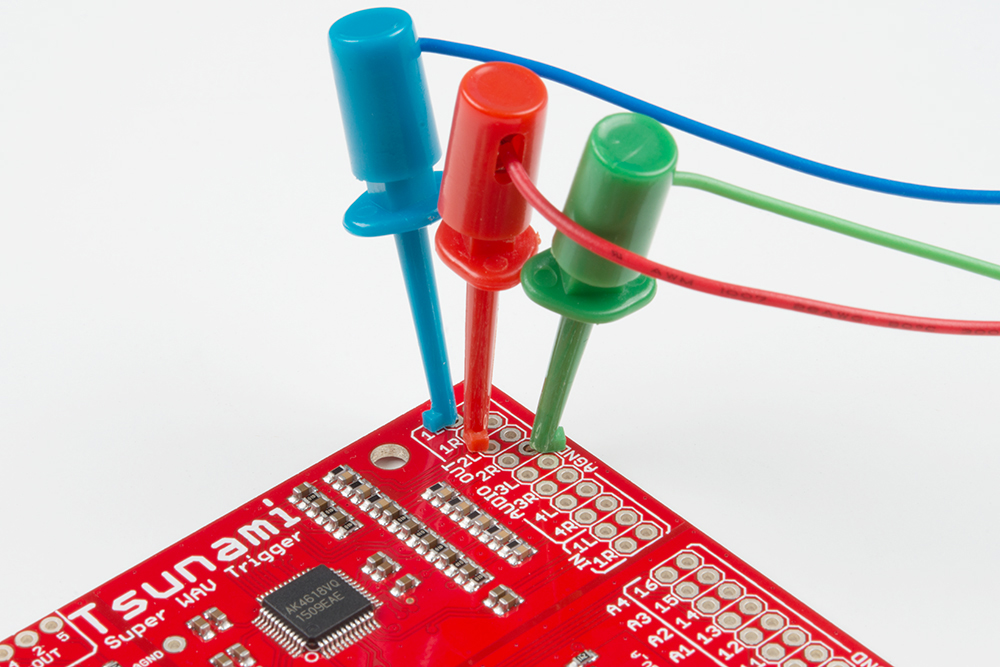
To listen to that output, we'll make a temporary adapter using a 3.5mm TRRS breakout board and some IC Hook test leads. We're using the IC Hooks so we don't have to solder them to the board, making a temporary connection for the sake of the example.
We cut three of the leads in half and soldered them to the TIP, RING1 and SLEEVE pads of the breakout, using the following connection scheme. We didn't make any connection to the RING2 pad.
| Jumper Color | Breakout Connection | Tsunami Connection |
|---|---|---|
| Blue | TIP | Output 1L |
| Red | RING1 | Output 1R |
| Green | SLEEVE | GND |
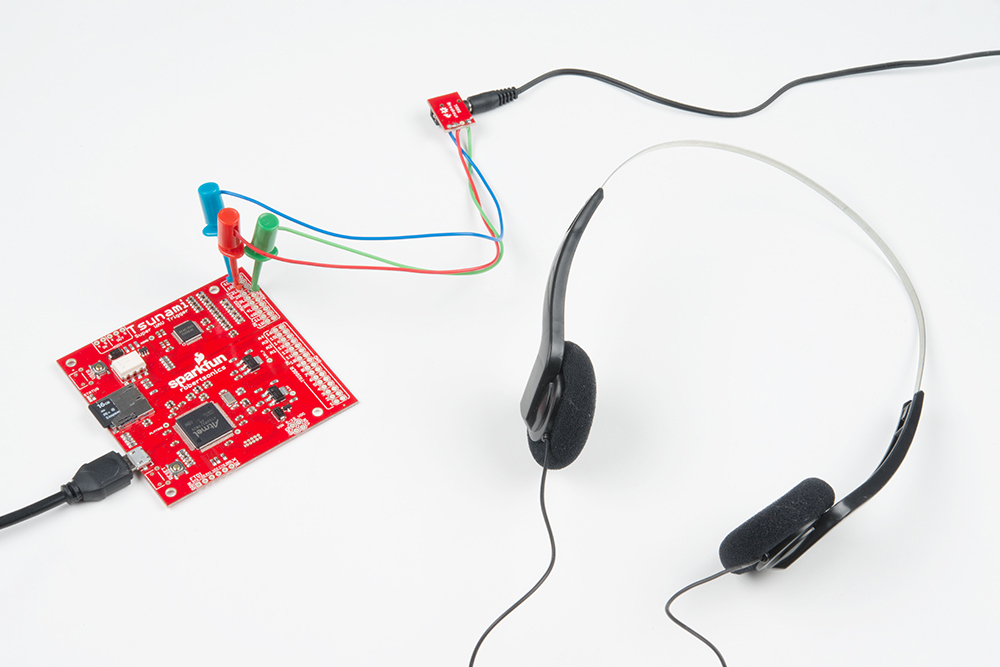
The adapter cable looks like this.

With care, you can put the ends of the IC hooks through the 0.1" pads on the PCB, connected as described in the table above.
Finally, connect your headphones, multimedia speakers, or other output device.
Connect Power
For this demo, we're simply powering Tsunami from the USB port on our computer.
When you apply power, the board will initialize, and indicate readiness by blinking the status LED three times. From then on, the LED pulse every few seconds, indicating that the board is alive, and waiting to be triggered.
Trigger Sounds
The simplest way to drive Tsunami is by shorting the trigger inputs to ground. By default, the trigger inputs use an internal pullup resistor, and recognize when they are grounded.
For this demo, we're going to use a short piece of wire to bridge trigger inputs to their corresponding ground pads. A more permanent application might use momentary switches, such as cherry switches, tactile switches or microswitches.
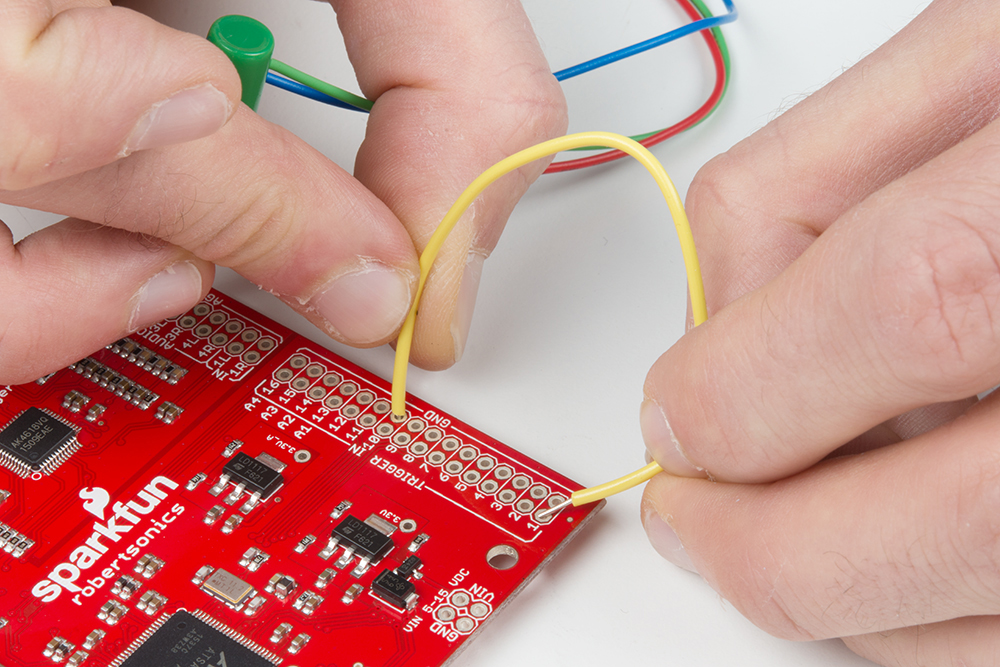
We've bent the wire into a 0.1" wide U-shape. We insert one end into a ground pad, and use the other to tap the trigger inputs.
Eureka!
When the wire makes contact, you should hear a sound on the output. The files on the card simply recite the number of the trigger input.
The status LED also illuminates while files are playing.