TMP006 Hookup Guide
This Tutorial is Retired!
This tutorial covers concepts or technologies that are no longer current. It's still here for you to read and enjoy, but may not be as useful as our newest tutorials.
 JordanDee
TMP006 Overview
The TMP006 is a temperature sensor that can detect the temperature of an object without having to make direct contact with it. The sensor has a thermopile which absorbs infrared energy from the object. The thermopile is composed of several thermocouples in series which each produce a voltage when heated. The total voltage is read and stored within the sensor as a number in a register. This number can then be used to calculate the object temperature.
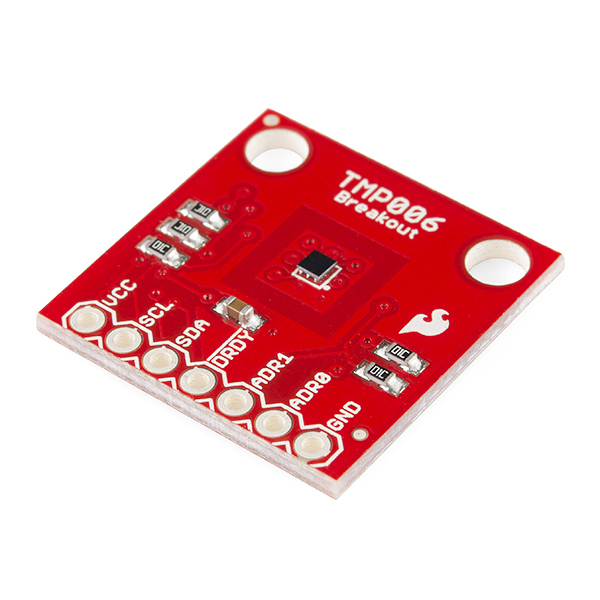
The sensor can measure temperatures between -40°C and 125°C. It can be powered with 3.3V or 5V or anything in between. It can be used with battery powered applications as it is low power and has a typical idle (quiescent) current of 240 µA. It sports a very tiny form factor. You can interface with the chip using I2C and can have up to eight of them on the same I2C bus.
Suggested Reading
These boards aren't too hard to use. If you've done anything with Arduino before, you'll be prepared to work with the TMP006. If you're not exactly sure what this "Arduino" thing is, or if you're not familiar with the topics below, consider reading these tutorials:
How to Solder: Through-Hole Soldering
Light
How to Use a Breadboard
What is an Arduino?
I2C
Hardware Hookup
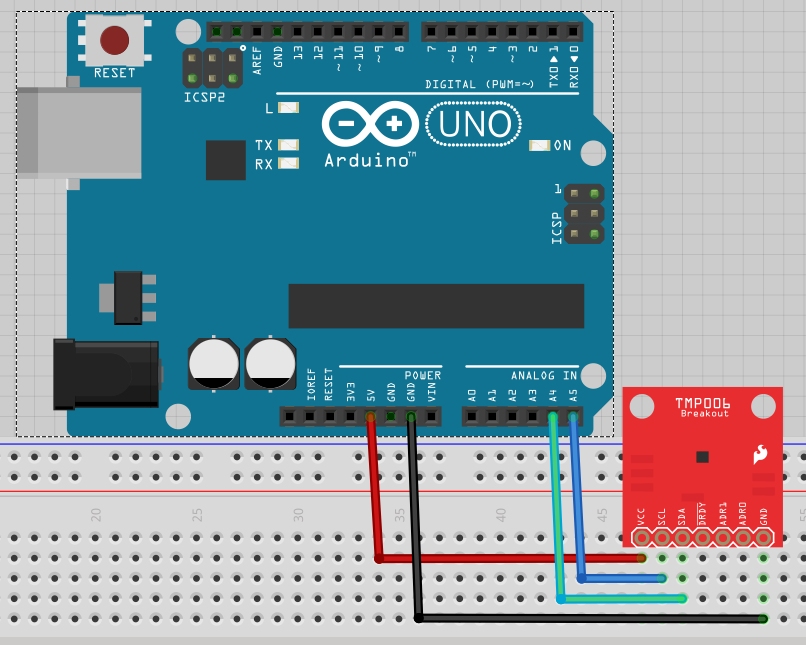
This temperature sensor is easy to hookup and only requires a minimum of four connections. Two for power, VCC and GND, and two for I2C communication, SCL and SDA.
We're going to use the Arduino Uno as an example of how to hook up and talk to this sensor, however, feel free to choose any Arduino or a favorite microcontroller of your choice.
Connections:
- VCC → 5V (or 3.3V)
- GND → GND
- SCL → A5 (or SCL for R3)
- SDA → A4 (or SDA for R3)
Here's a Fritzing diagram showing the physical connections:
Multiple Sensors
If you want to communicate with more than one sensor using the same microcontroller's I2C lines, you will have to give them different addresses by using the address pins, ADR0 and ADR1. By default, both pins are grounded, and the sensor's address is 0x40. Here is a table showing what the address pins should be connected to to establish a different address.
| ADR1 | ADR0 | I2C Address |
|---|---|---|
| GND | GND | 0x40 |
| GND | VCC | 0x41 |
| GND | SDA | 0x42 |
| GND | SCL | 0x43 |
| VCC | GND | 0x44 |
| VCC | VCC | 0x45 |
| VCC | SDA | 0x46 |
| VCC | SCL | 0x47 |
As an example, if you wanted to use two sensors, you could leave one of them as the default address 0x40 and connect the second sensor's ADR0 pin to VCC to change its I2C address to 0x41. This will allow you to talk to both sensors using just one microcontroller.
Data Ready?
The DRDY pin is unnecessary for most applications, however, if you really need to know exactly when a sensor measurement is complete and ready for reading, you can monitor this pin to see when it goes LOW. You can then immediately acquire the temperature measurement data afterward.
Talking to the Sensor
Now that the hardware is set up, how do we actually receive temperature data from the sensor? Well, we've got to do some coding. Luckily for you, there isn't much you have to modify if you want to get up and running immediately, however we'll explain the overall gist of how the code works in this section.
Here is the download of the example code we'll be using. You can also find the most up-to-date code on GitHub. Feel free to dive right in and try to use it or follow along for an overview.
In the beginning, we have two global variables. One stores the I2C address of the sensor, and the other stores how many times we'd like the sensor to sample per temperature reading/calculation. Feel free to try the defaults right away with the hardware setup described in the last section, no changes necessary. Here they are:
language:c
uint8_t sensor1 = 0x40; // I2C address of TMP006, can be 0x40-0x47
uint16_t samples = TMP006_CFG_8SAMPLE; // # of samples per reading, can be 1/2/4/8/16
If you'd like to use multiple sensors, you'll need to declare another sensor variable and give it the appropriate address. Feel free to change the sample rate regardless. Just keep in mind, the more samples it takes, the longer you have to wait for a reading. It's about a 1 second wait per 4 samples.
Next, let's examine the setup loop. Here we initialize serial output so we can display our readings. We also call a configuration function for our TMP006 sensor. It sets up some defaults for us to get going and also tells the sensor how many samples per reading we want. If you're using more than one sensor, you'll have to call this function for each one with the appropriate I2C address.
language:c
void setup()
{
  Serial.begin(9600);
  Serial.println("TMP006 Example");

  config_TMP006(sensor1, samples);
}
Within the loop function, we call two main functions. The first gives us the temperature of the object in front of the sensor, and the second gives us the temperature of the sensor itself. Both are then sent via serial to your computer and can be viewed using the Serial Monitor. Again, you'll need to add duplicates of these functions if you're talking to multiple temperature sensors.
language:c
void loop()
{
  float object_temp = readObjTempC(sensor1);
  Serial.print("Object Temperature: ");
  Serial.print(object_temp); Serial.println("*C");

  float sensor_temp = readDieTempC(sensor1);
  Serial.print("Sensor Temperature: ");
  Serial.print(sensor_temp); Serial.println("*C");

  delay(2000); // delay 1 second for every 4 samples per reading
}
Running this code with the default configuration and the basic hardware hookup, you will see both the object and sensor temperatures displayed on the serial monitor every two seconds.
Exploring the Gorier Details...
So you want to learn more about the details of what's going on in the background? Read on!
There are two tabs in this example that implement the I2C functionality, I2C_16.h and I2C_functions.ino. These allow the reading and writing of data to the sensor. Take some time to learn about I2C via our tutorial mentioned in the beginning. Also learn some about Arduino's Wire library, as it is what's used to make this communication possible. Of course it is possible to write your own I2C communication from scratch, but the Wire library makes it much easier.
When it comes to acquiring the object temperature, we must make some calculations because the sensor only gives us the thermopile voltage and a raw temperature reading of the actual sensor itself. The equations necessary for calculating object temperature can be found in section 5.1 of the user guide. The TMP006_functions.ino tab includes the various implementations necessary to get temperature readings. The calculations based on the user guide can be found there. Within TMP006.h, you'll find various constants for the calculations, configuration settings, and the sensor's register addresses.
Feel free to explore this code as much as you want, and don't be afraid to modify it to better suit your needs.
Resources and Going Further
Now it's time for you to go out and explore the real world applications where you can use this sensor to measure the temperatures of the various things you find. You have also gained enough knowledge that will allow you to use other types of sensors that utilize I2C communication more easily. See what you can build, and feel free to show it to us or give us feedback regarding this tutorial. Enjoy!
Resources
- [Schematic (PDF)](http://cdn.sparkfun.com/datasheets/Sensors/Temp/TMP006 Breakout.pdf)
- [Eagle Files (ZIP)](http://cdn.sparkfun.com/datasheets/Sensors/Temp/TMP006 Breakout.zip)
- TMP006 Datasheet
- TMP006 User Guide
- Example Code (ZIP)
- TMP006 Sensor Library
- GitHub
Other I2C Projects and Products
Both of these tutorials have I2C communication. They can also both be used in conjunction with this sensor to act as a display for the temperature.