T5403 Barometric Pressure Sensor Hookup Guide
 CaseyTheRobot
Tips and Tricks
Things to Watch Out For
Give it the right voltage: The T5403 will operate on voltages from 1.7v to 3.6v. We recommend operating it at 3.3V. Never connect the "+" header to voltages higher than 3.6V!. Note that it is safe to connect the SCA and SDL pins to an I2C port on a 5V Arduino, as the pullup resistors on the T5403 board will keep the voltage below 3.6V.
Give it air: Remember that the T5403 needs access to ambient air to measure its pressure, so don't put it in a sealed case. Providing a small vent hole should be adequate.
But not too much air: On the other hand, exposure to fast-moving air or wind can cause momentary pressure variations that will affect your readings. Shield the device from strong air currents.
Keep it cool: Because an accurate temperature reading is needed to measure the pressure, try not to expose the device to rapid temperature changes, and keep it away from nearby hot parts and other heat sources.
Keep it dry: The T5403 is sensitive to moisture. Don't submerge it or allow it to contact liquid water.
Changing the Solder Jumper
Solder jumpers are closely-spaced pads on a printed circuit board that are covered by blobs of solder to create an electrical connection. The T5403 breakout board has one such jumper; you can remove the solder from these pads to break the connection and alter the function of the board.
To remove the solder from a solder jumper, cover it with solder wick, and carefully heat it with a soldering iron. When the solder melts, it will be absorbed by the wick. Remove the wick before the solder cools so it doesn't stick to the pads. If you didn't get all of the solder on the first pass, give it another try with a clean section of solder wick. When you're done you should be able to see a broken connection between the pads. While doing this be careful not to overheat the board (let it cool off if you're having problems), or the copper pads may lift from the board.
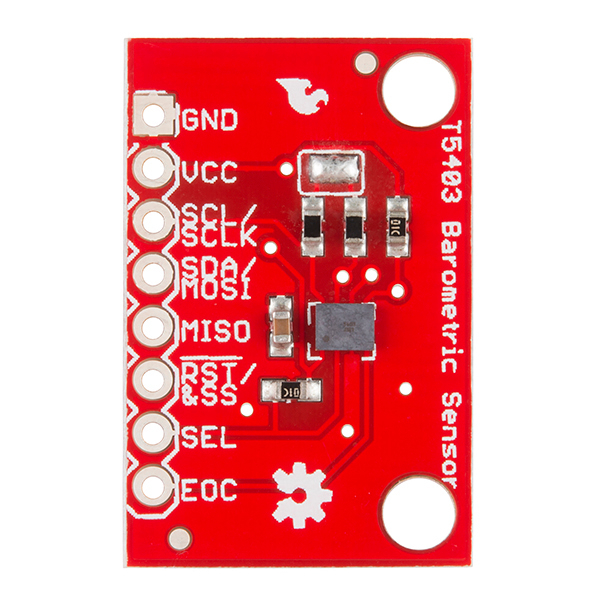
Disabling the I2C pullup resistors (SJ1)
The T5403 communicates with a host microcontroller via a communications standard called "I2C" (for Inter Integrated Circut). I2C uses two wires, usually labeled SCL (Serial Clock) and SDA (Serial Data). To function properly, I2C requires a pullup resistor on each of those lines. The T5403 board includes these resistors. They're enabled by default, but you can disable them by clearing solder jumper.
I2C allows you to have multiple devices connected to the same two lines (collectively called a bus). The pullup resistors allow the bus to function, but you should only have one set of pullup resistors per bus.
If you have just one I2C device (such as the T5403 breakout board) connected to your microcontroller, the board is already set up properly. You don't need to change anything.
However, if you wish to connect more than one device to the bus, you should ensure that there is only one set of pullup resistors enabled on the bus. You do this by disabling every set of pullup resistors except one. (It doesn't matter where the enabled resistors live; they can be anywhere on the bus.)
To disable the I2C pullup resistors, remove all of the solder from the jumper. This jumper has three pads; be sure to separate all of the pads from each other. Remember that you'll need to ensure that another set of pullup resistors are enabled somewhere on the I2C bus.
Note that you should not operate an I2C bus without pullup resistors, as the internal weak pull-up resistors in the Arduino will pull the bus to 5V, which may damage the T5403.
Using the EOC pin
The End of Conversion (EOC) pin is used to signal when the T5403 is finished taking a measurement. There is a waiting period to read a measurement from the device. This time varies with the measurement type and accuracy desired. The example code uses preset delays as stated in the data sheet.