Spectrum Shield Hookup Guide
This Tutorial is Retired!
This tutorial covers concepts or technologies that are no longer current. It's still here for you to read and enjoy, but may not be as useful as our newest tutorials.
View the updated tutorial: Spectrum Shield Hookup Guide (v2)
 Toni_K
Hardware Hookup
Solder Headers
As with any shield, the first step is to choose a connection method. We recommend stackable headers, but you can choose any connection method you prefer. Remeber that his shield uses the Arduino Uno R3 footprint. You will need to solder, so make sure you have all the appropriate supplies before you begin. Please check our tutorial on Arduino Shield Assembly, if you aren't sure how to do this.
Connect LEDs
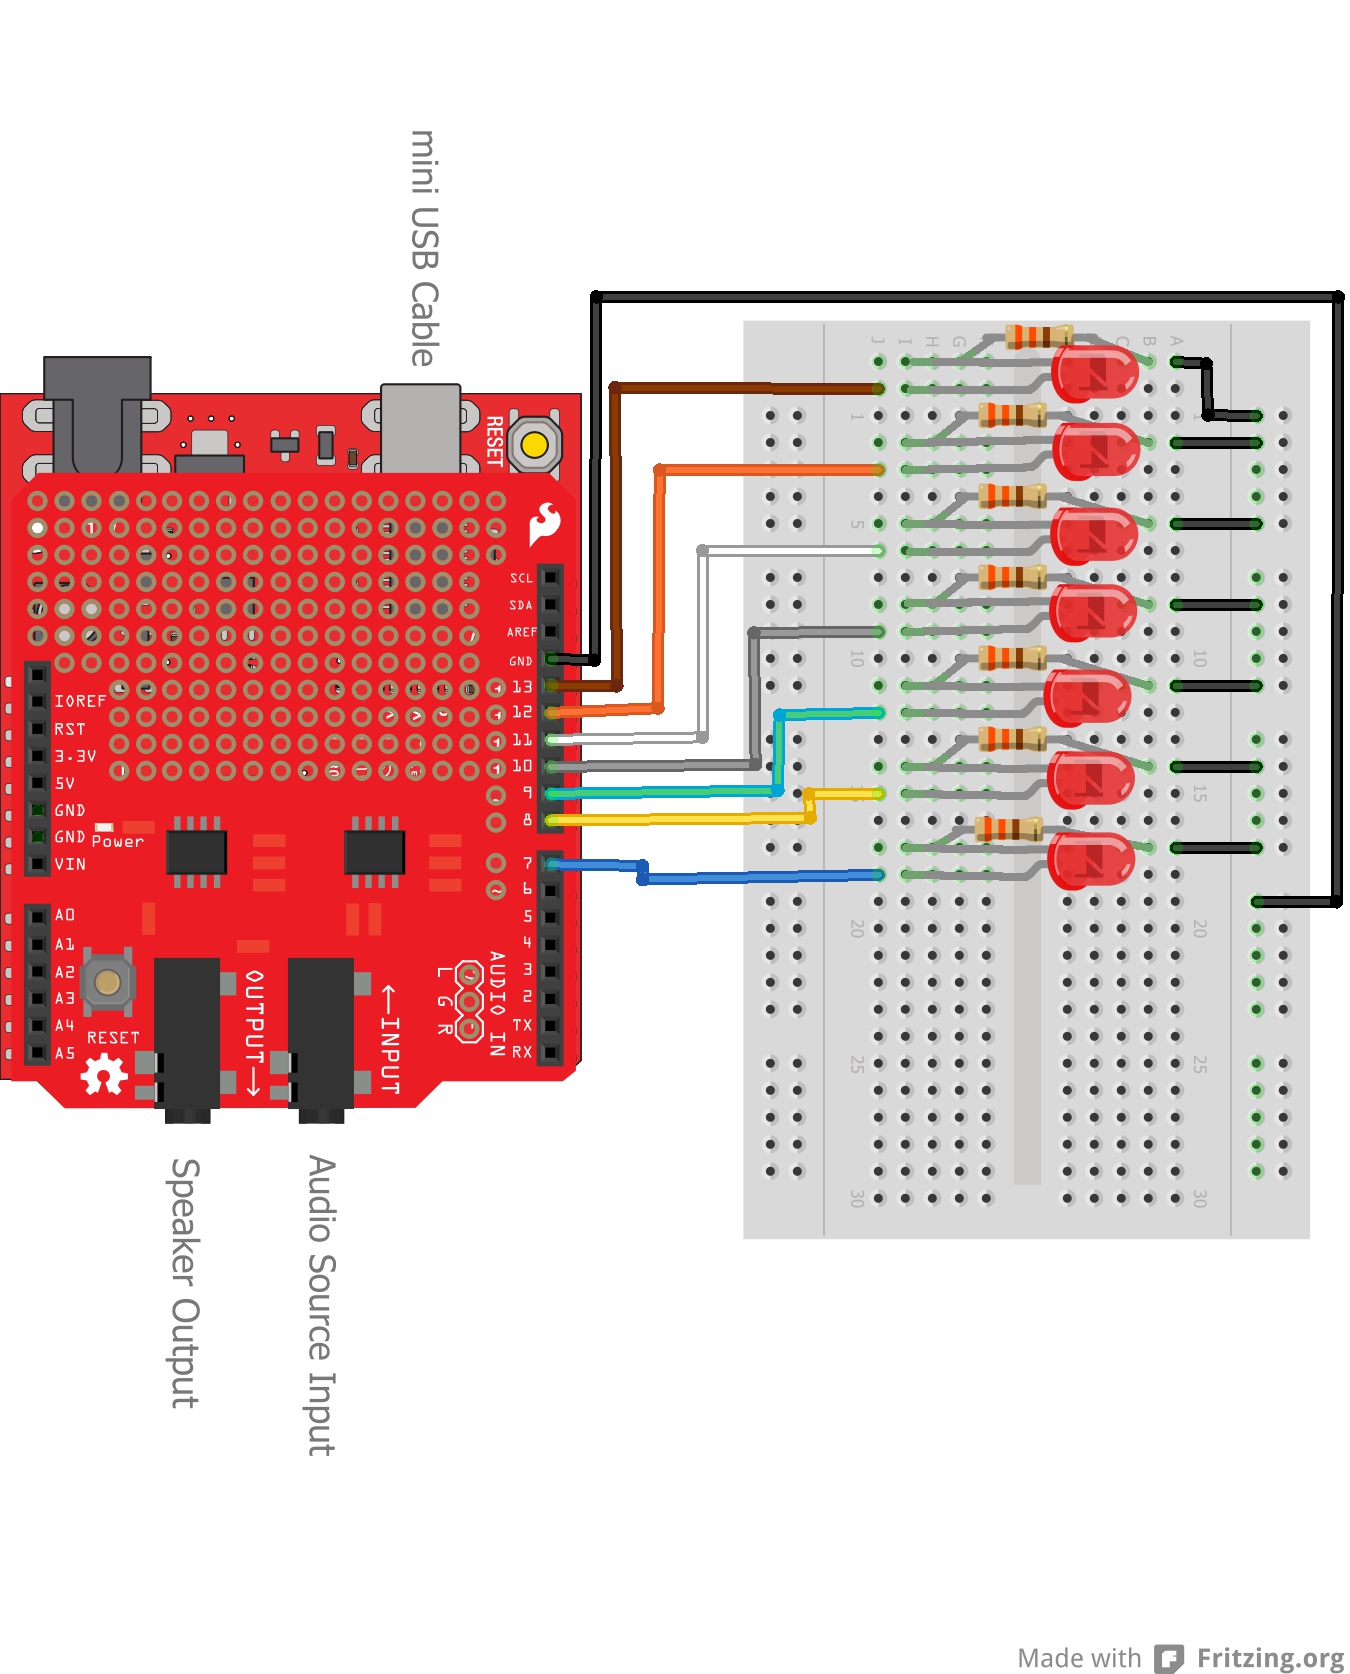
For this project, we will use one LED to represent each frequency band. For each LED, run a jumper wire from the RedBoard pin to the positive, anode leg (longer leg) of the LED. From the negative, cathode leg (the shorter leg), run a 330 Ohm resistor to GND. The connections should look like the following:
Spectrum Shield → LED → Resistor → GND
- D7 → LED1 → 330 Ohm → GND
- D8 → LED2 → 330 Ohm → GND
- D9 → LED3 → 330 Ohm → GND
- D10 → LED4 → 330 Ohm → GND
- D11 → LED5 → 330 Ohm → GND
- D12 → LED6 → 330 Ohm → GND
- D13 → LED7 → 330 Ohm → GND
The circuit below shows LEDs of the same color, but feel free to use a different color for each band.
Connect Audio System
At this point, it's time to connect your audio sources. For this example, we are going to hook up a basic MP3 player. Plug one end of an audio cable into the MP3 player, and plug the other end into the "Audio In" jack on the Spectrum Shield.
The second audio cable then provides the audio output to a speaker system. Plug one end into the "Audio Out" jack on the Spectrum shield, and plug the other end into a speaker.
Power the System
You can use an external power supply (such as a wall adapter or 9V battery) if you so desire. For this basic example however, the system will function fine if you power it off of the miniUSB connection on the RedBoard.
Keep in mind if you end up switching out the LEDs for LED strips or an LED matrix, you will most likely need an external power supply. Check the datasheet or hookup guide for any larger displays used.
Final Circuit
Once complete, your circuit should look like the following diagram: