Simon Says Assembly Guide
Contributors:
 Joel_E_B,
  QCPete,
  bboyho
Final Assembly
| Polarized Component | Pay special attention to the component’s markings indicating how to place it on the PCB. Polarized components can only be connected to a circuit in one direction. |
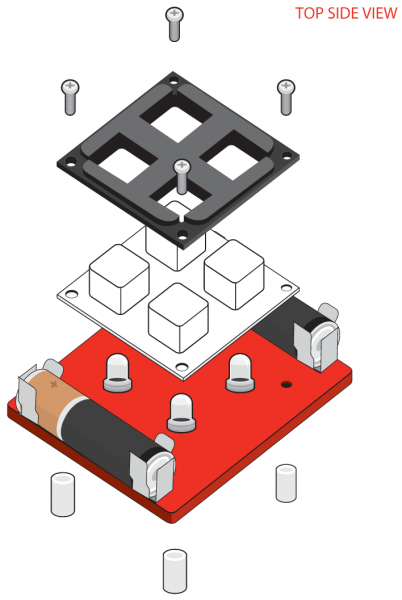
Locate the button pad, bezel, screws, standoffs, and AA batteries. You will need to:
- Attach the button pad to the top of the board. Make sure to lay the rubber button over the LEDs.
- Attach the bezel over the button pad with notches for the screws pointing up.
- Insert the screws through the bezel and button pad. Then twist standoffs onto the protruding screw. No screwdriver is necessary. Hand tighten.
- Insert the batteries , following "+" and "-" indicators on the board.
Insert the components as shown in the image below.
Note: Squishy buttons are fun! The bezel helps hold the buttons in place. The standoffs hold the board up off a surface, helping to protect the electronics. They also hold the pad and bezel onto the board.
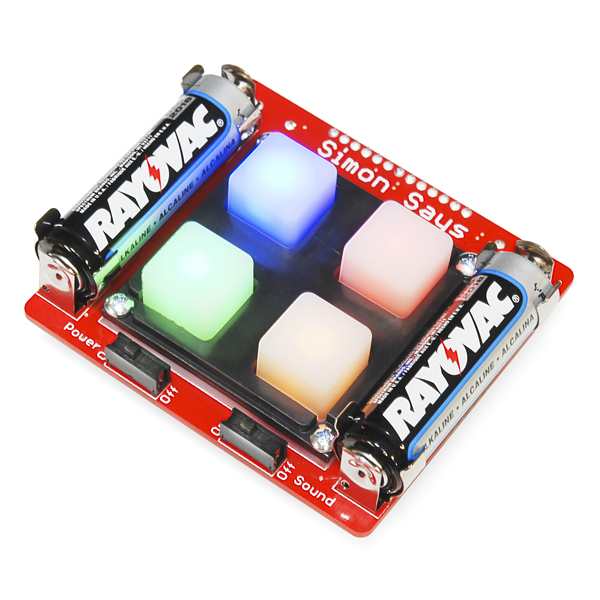
With that, you should have a fully functional Simon Says that you built yourself! Turn it on by flipping the "Power" and "Sound" switch to the "On" position to see if it works.
If something is not working (i.e. an LED won't light up), please check out our troubleshooting section.

