RETIRED - BadgerHack
This Tutorial is Retired!
This tutorial covers concepts or technologies that are no longer current. It's still here for you to read and enjoy, but may not be as useful as our newest tutorials.
 Shawn Hymel
Introduction

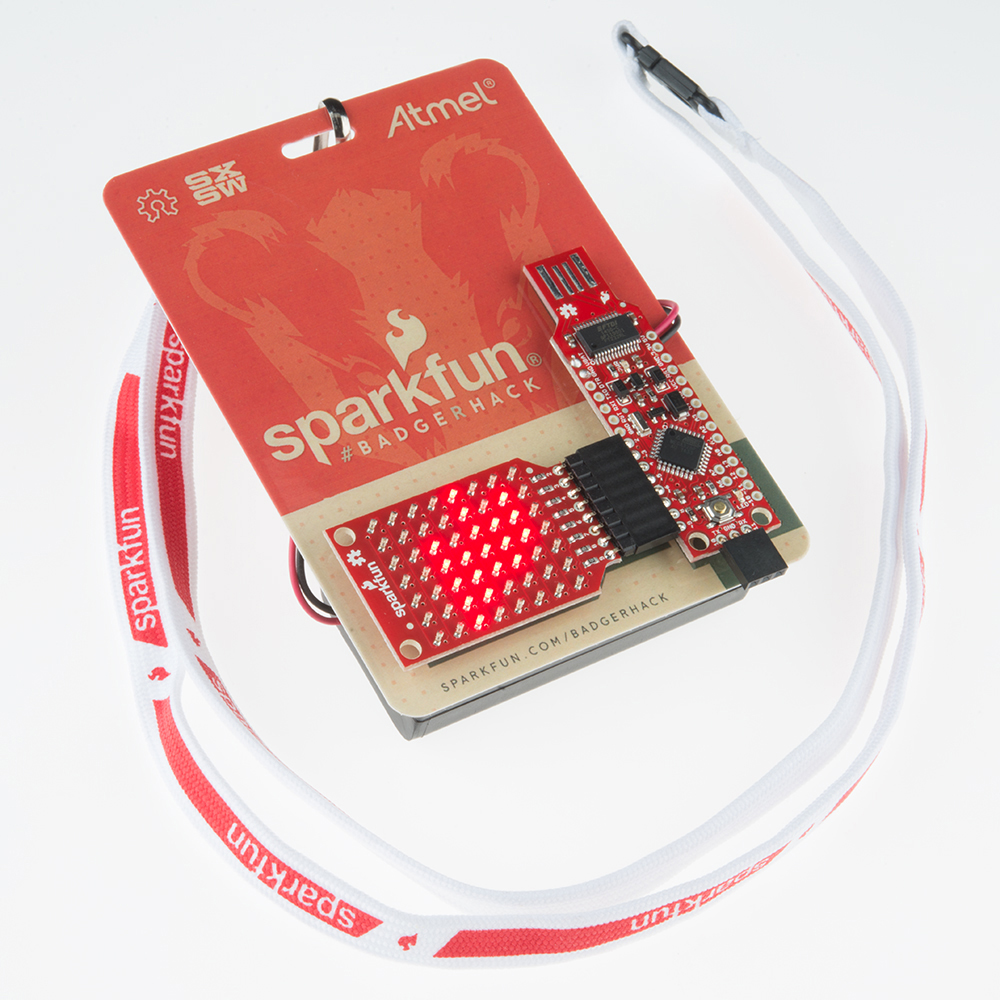
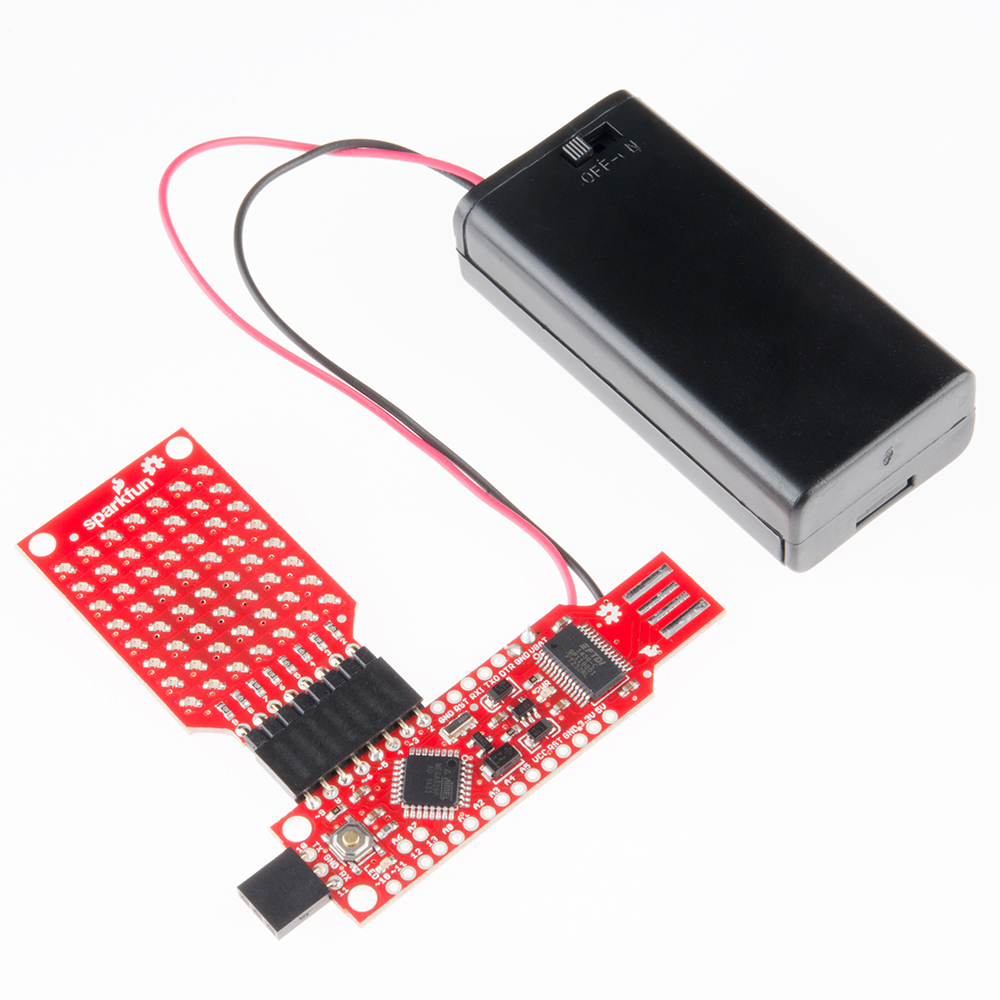
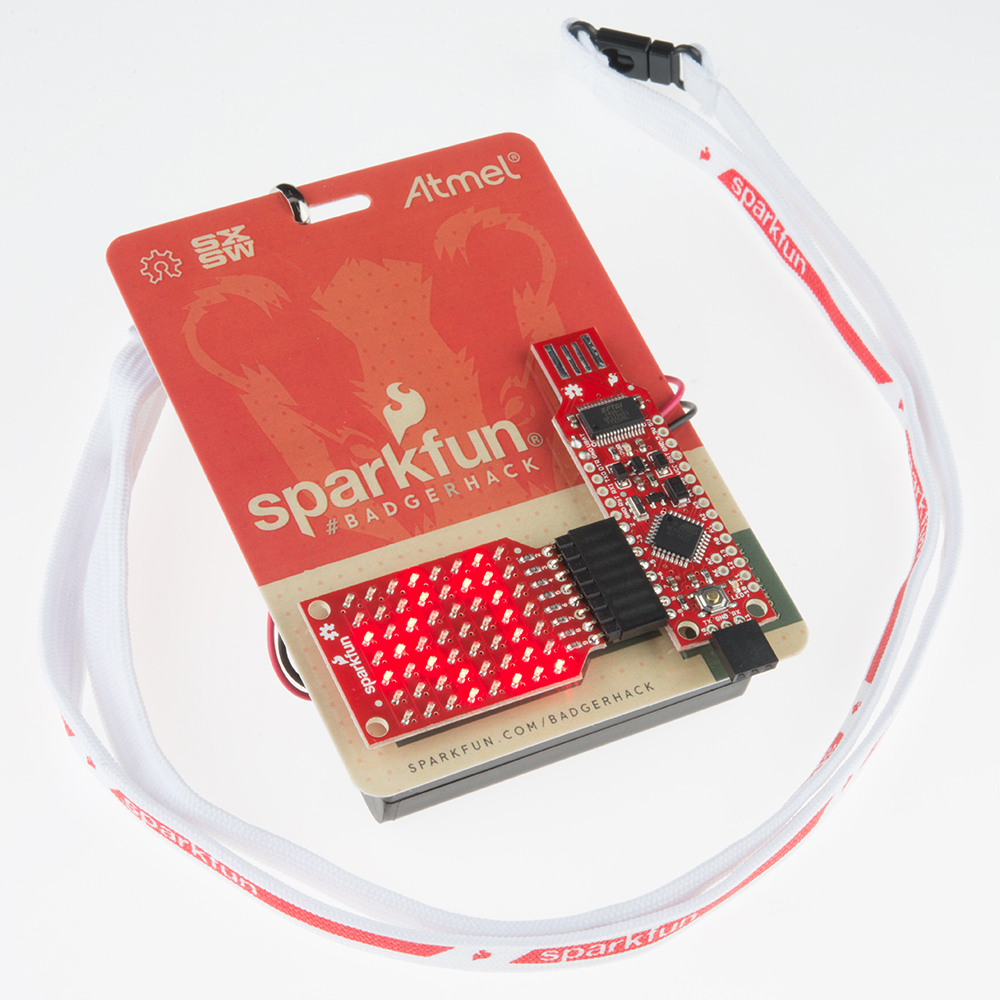
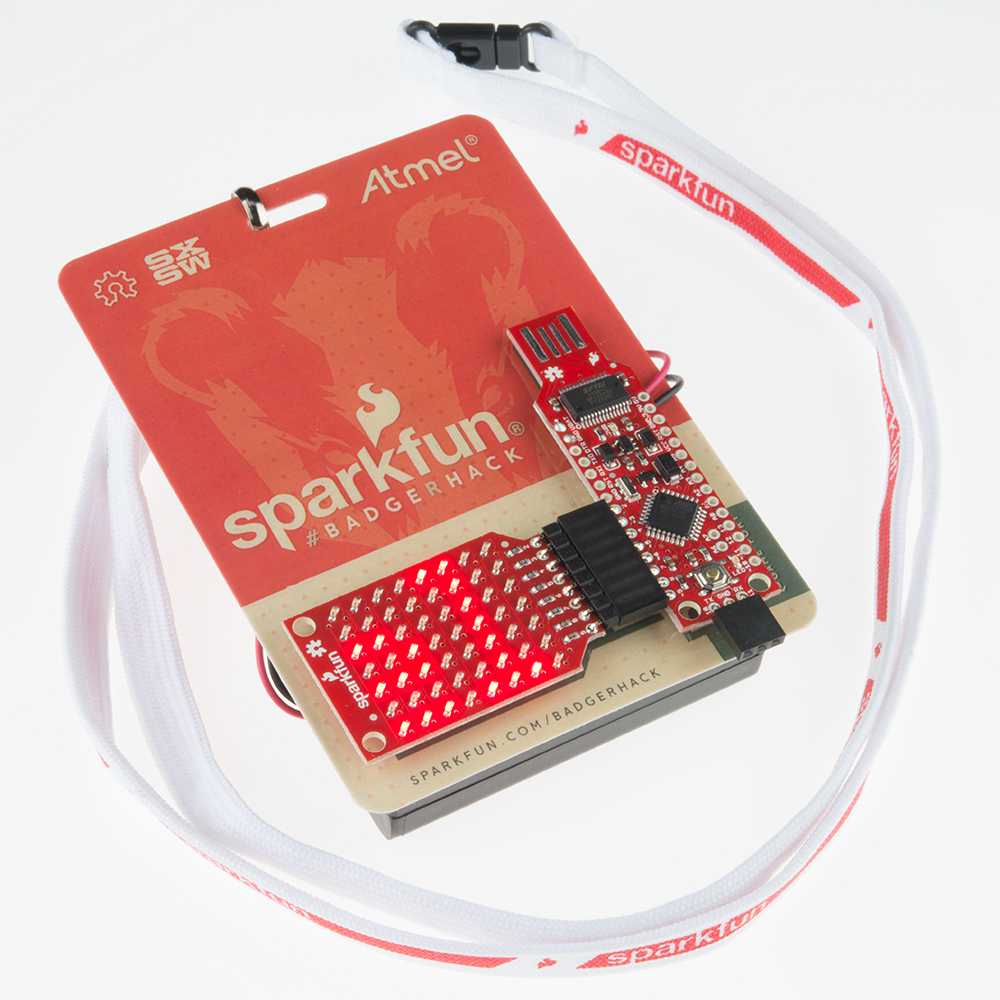
What you hold in your hands is a powerful piece of technology. OK, it's no tricorder, but it can do some pretty cool stuff. You can program the BadgerStick (the thin board) to control a myriad of electronics, like buttons, lights, and LCDs. The LED board can be used to display patterns or show text.
In the first section of this guide, we will show you how to solder headers on to your BadgerStick and LED board to make a complete badge.
On top of a sweet badge, you also get a development platform that you can use in lots of other projects. Once you have put your badge together, worn it with pride, and shown if off to everyone, you can remix it and make your own project!
The rest of the guide will focus on hacking your badge: how you can create your own graphics or add other electronics to make it do cool stuff.
Suggested Reading
If you are new to soldering or electronics, we highly recommend you check out the following:
When you are ready to start hacking your badge, we definitely recommend reading:
Make Your Badge
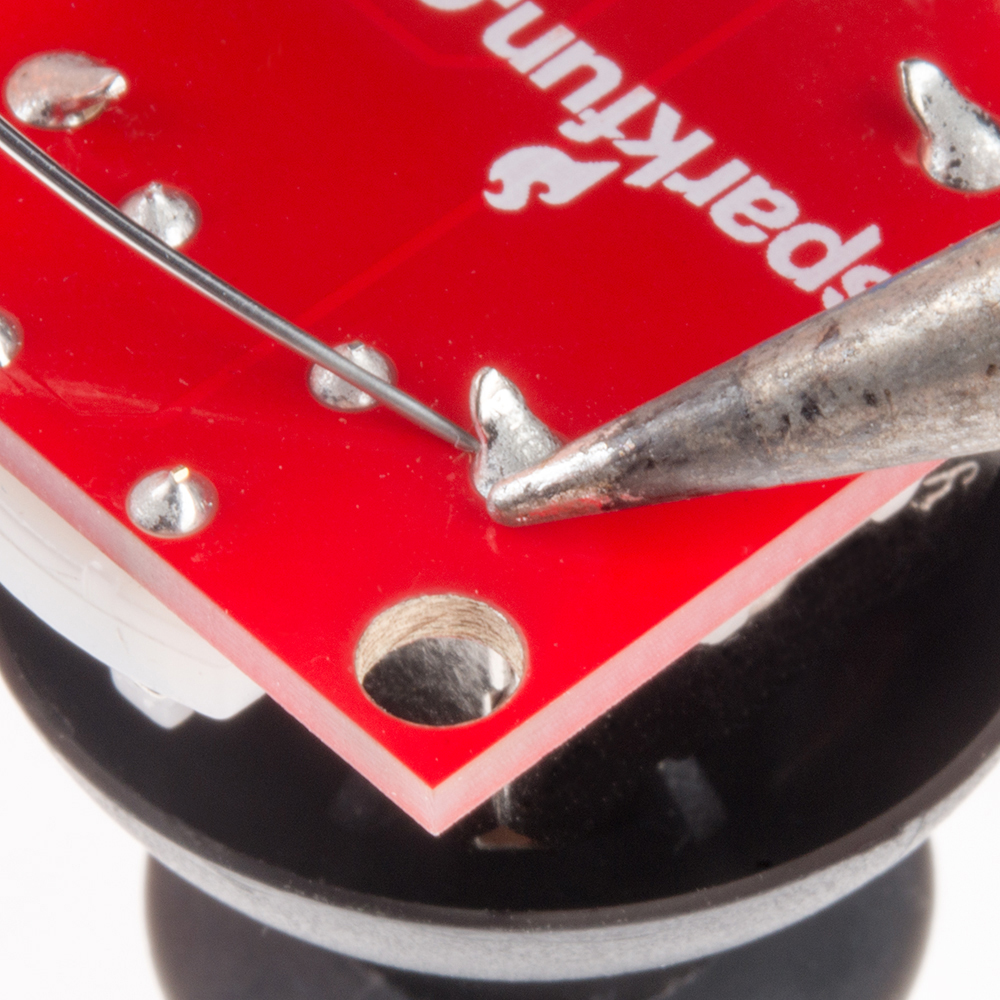
Now that you have the Badger kit, let's make a badge! When we ask you to solder a pin, you will want to keep a few tips in mind (click for larger image):
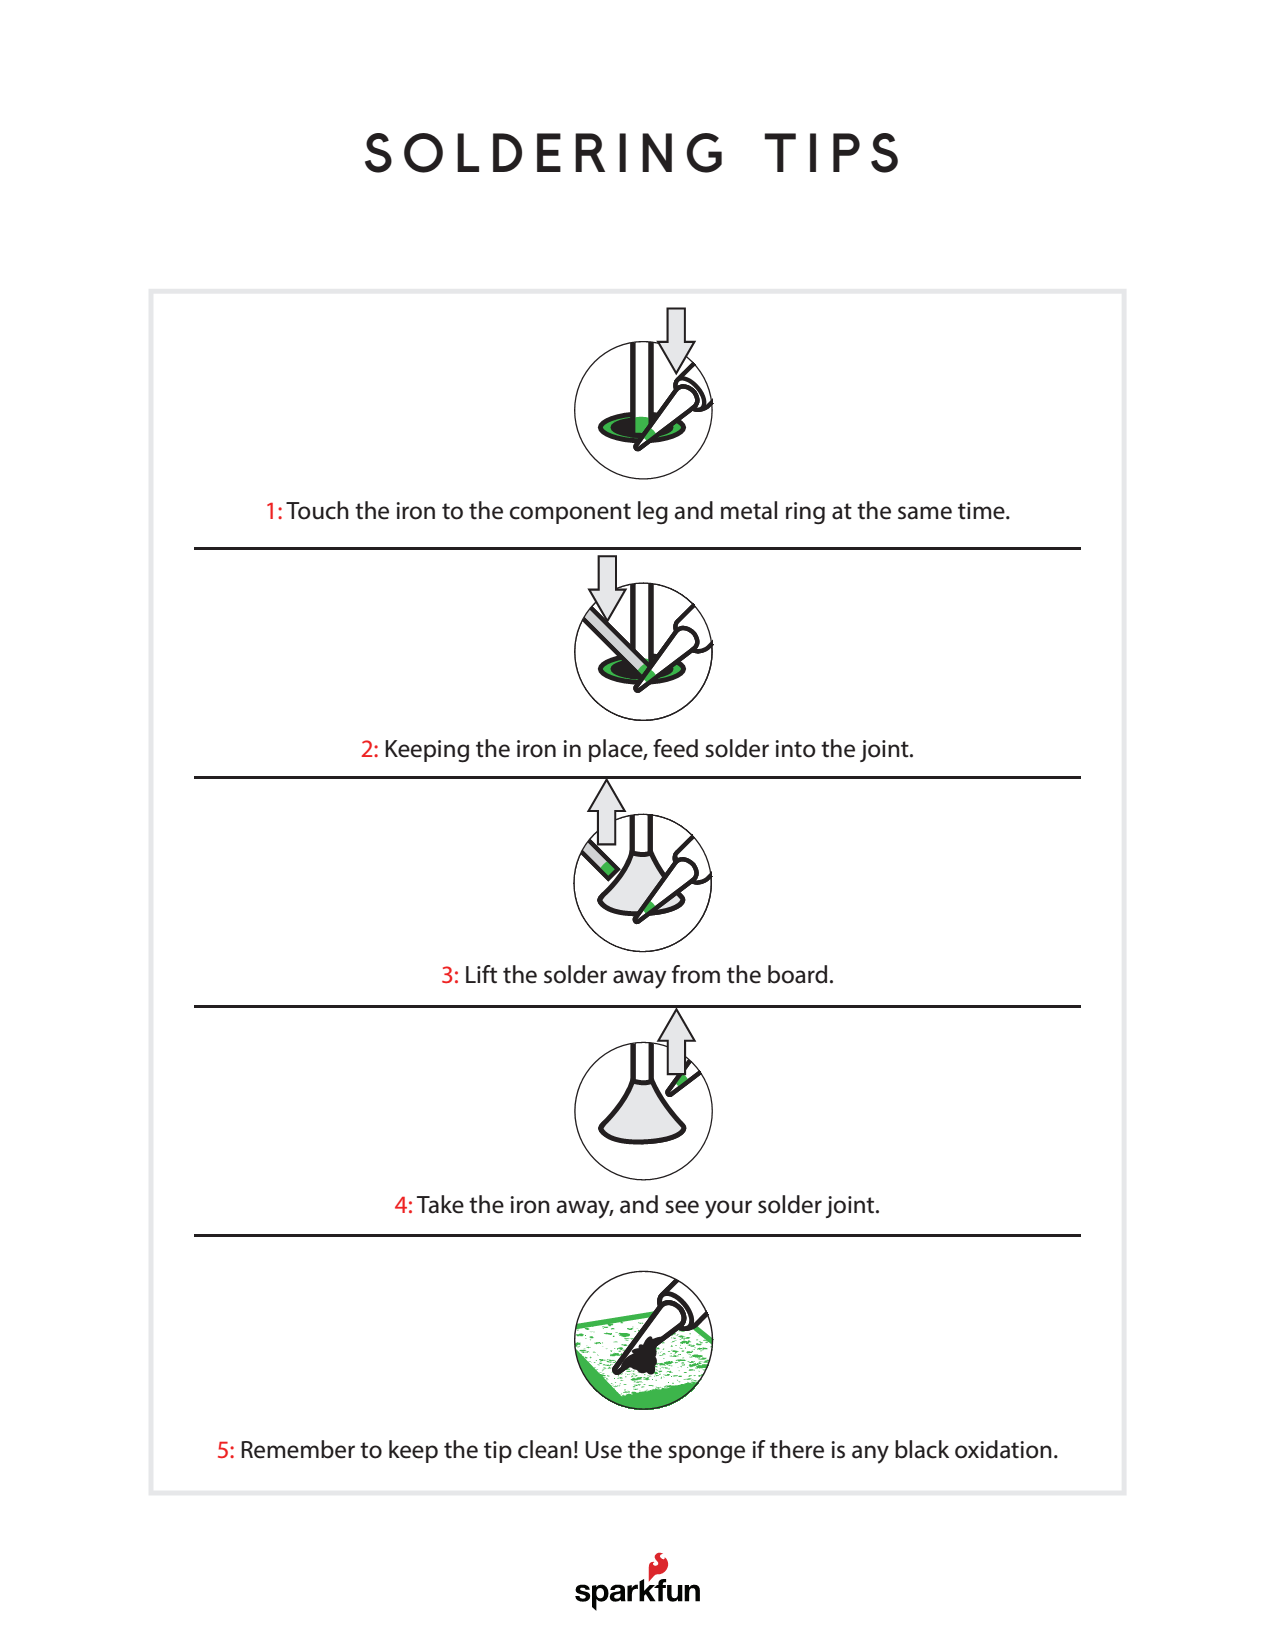
If you need a refresher on how to solder, we recommend the How to Solder guide.
1. Solder the 8-pin male header to the LED board
Insert the 8-pin male header into the LED board with the pin ends facing out. Note that the pins are coming out of the top of the board (the side with the LEDs).

Flip the board over and solder all the pins.

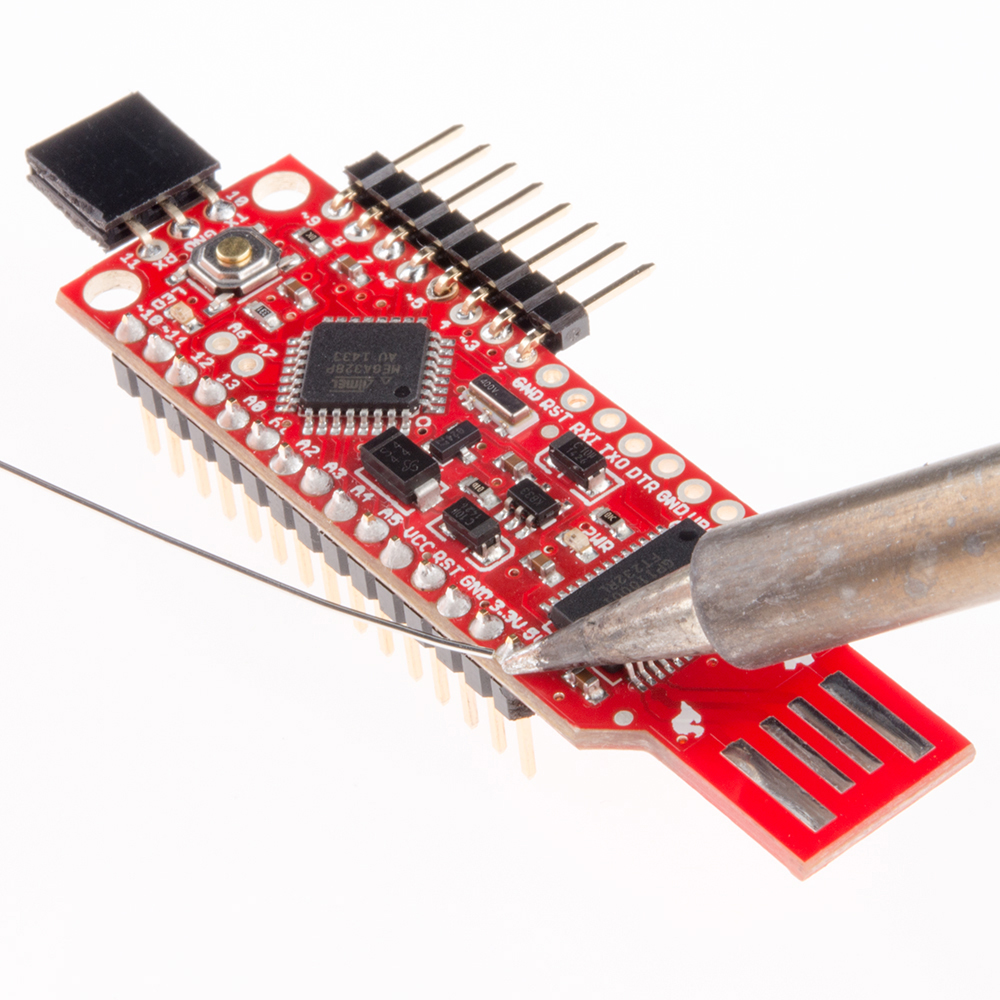
2. Solder the 8-pin female header to pins 2-9 on the BadgerStick
Insert the 8-pin female header into the holes labeled 2, 3, 4, 5, 6, 7, 8, 9 on the BadgerStick. Make sure that the pins are coming out of the top of the board (the side with all the electronics).

Flip the board over, and ensure that only the holes in the white box labeled "LED Array" are used. Solder all 8 pins.

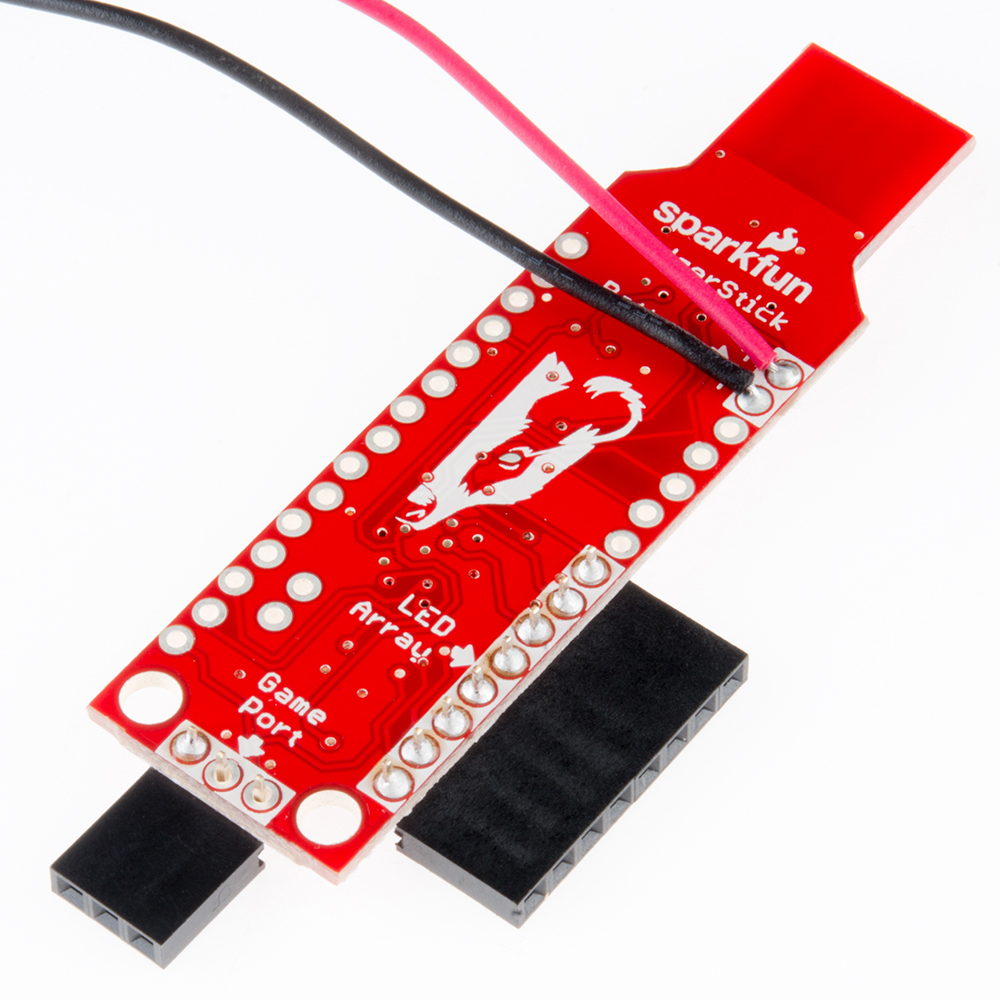
3. Solder the 3-pin female header to the game port on the BadgerStick
Insert the 3-pin female header into the holes labeled TX, GND, RX on the bottom of the board. The header should be coming out of the top of the board.
Flip the board over, and solder all 3 pins.

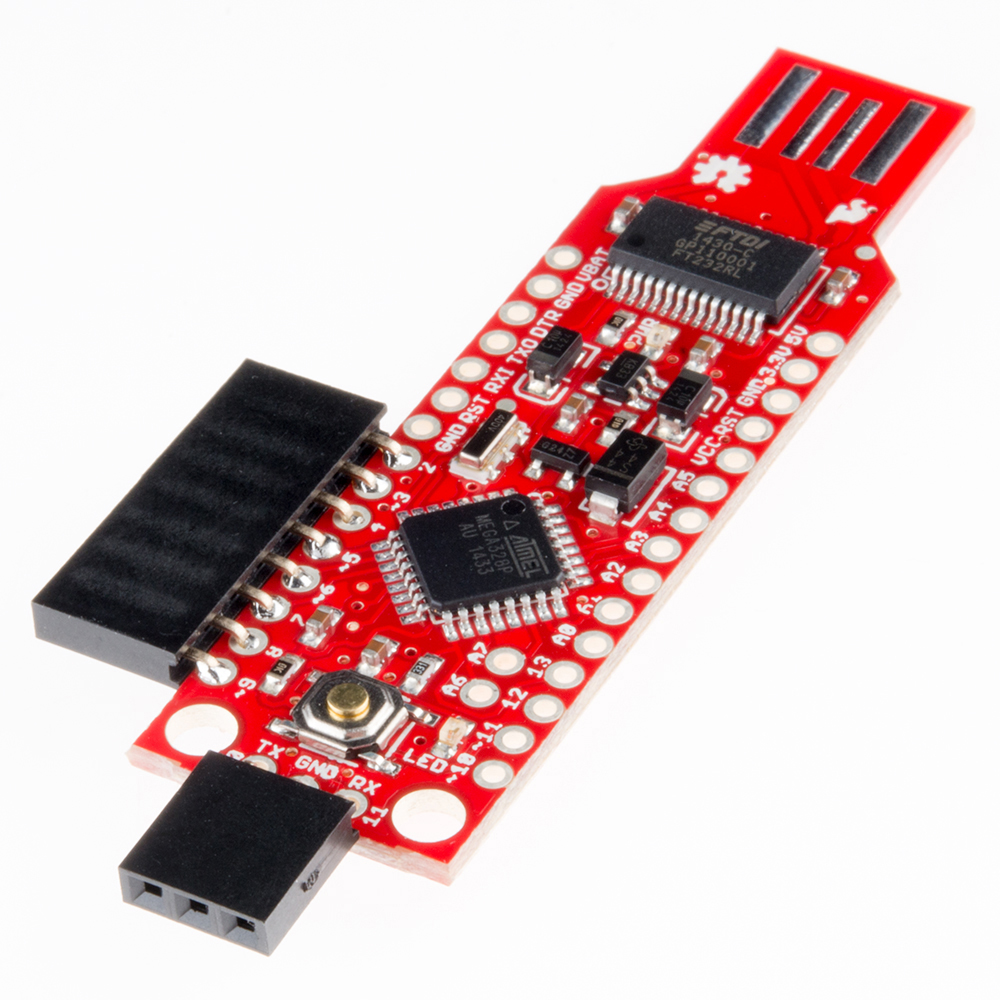
4. Solder the the red battery wire to the + battery pin (VBAT)
Poke the red battery wire through the backside of the BadgerStick on the pin labeled VBAT ("+" on the backside).
Solder the red wire to the hole.

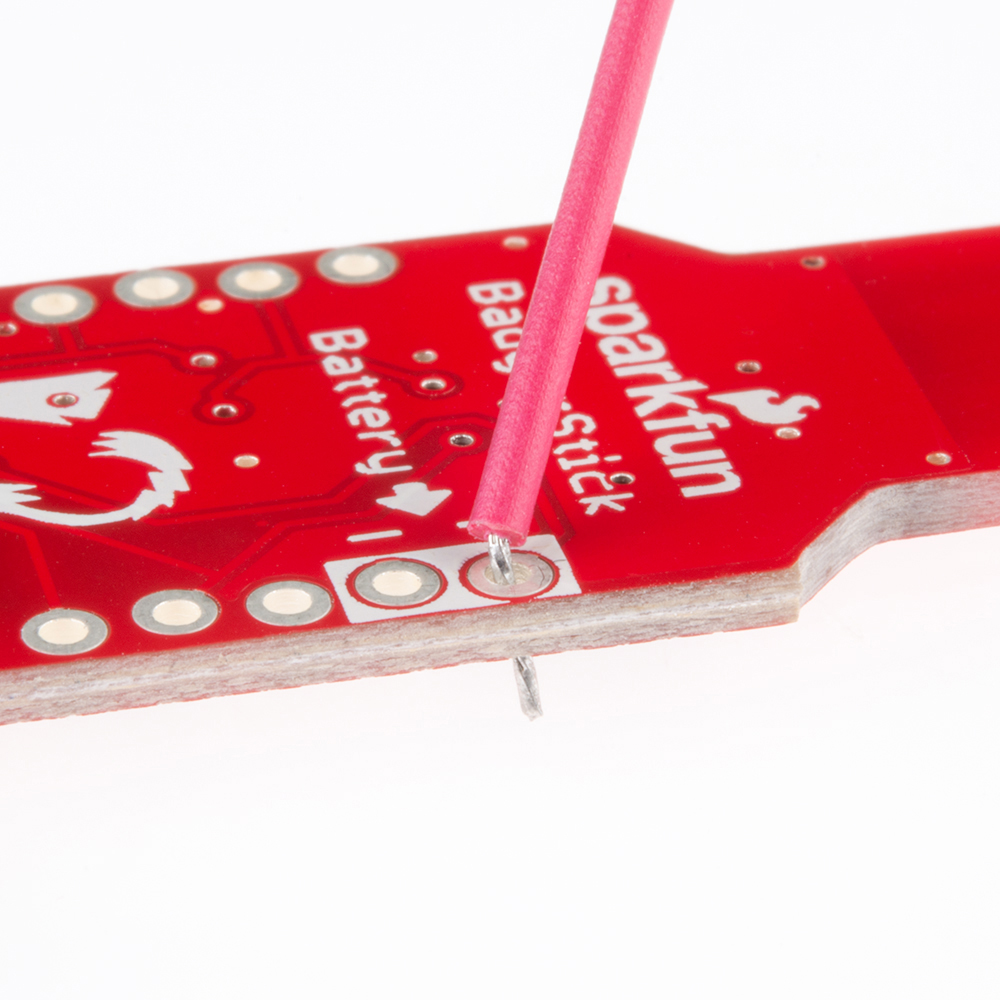
5. Solder the black battery wire to the - battery pin (GND)
Poke the black battery wire through the backside of the BadgerStick on the pin labeled GND ("-" on the backside).
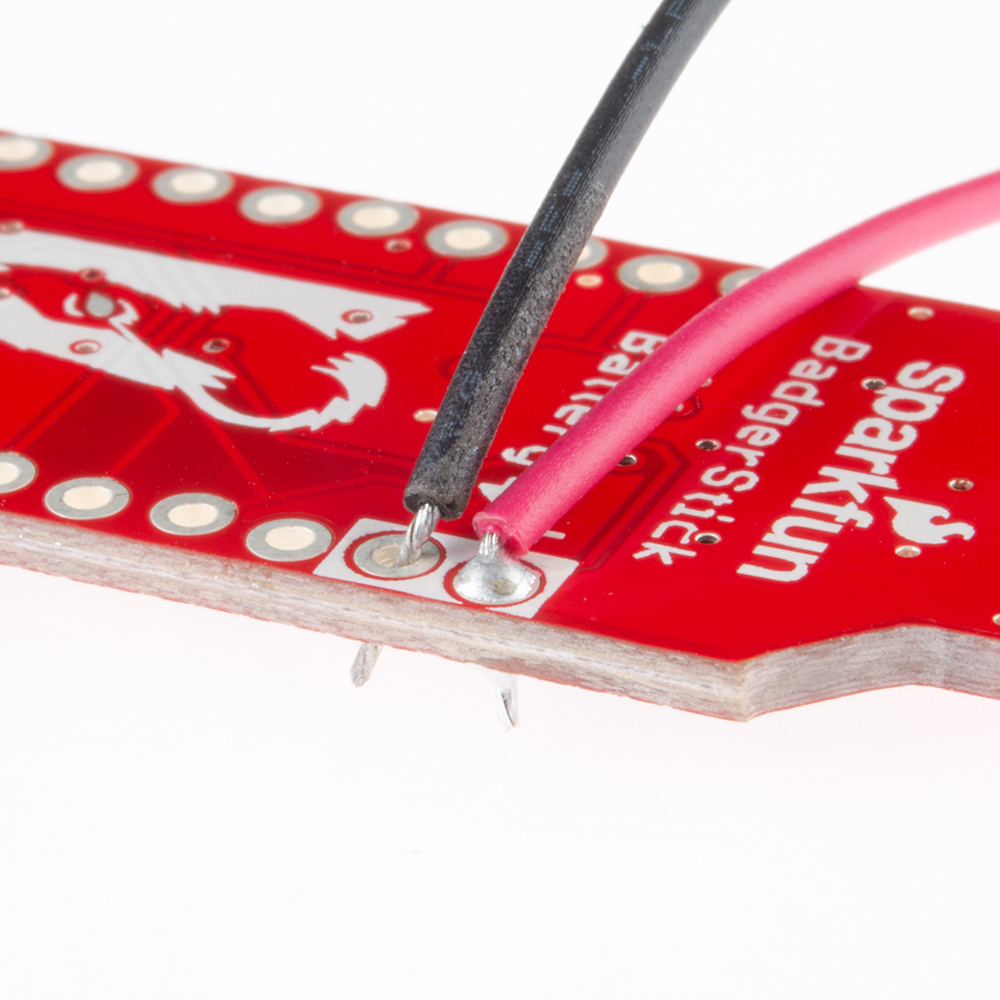
Solder the black wire to the hole.
Flip the BadgerStick over, and verify that the red wire is going to the hole labeled '+' on the underside and that the black wire is going to the hole labeled '-'.
6. Add batteries
Using a Phillips screwdriver, remove the screw from the battery pack.

Open the battery pack cover, and take note of the battery markings in the pack.
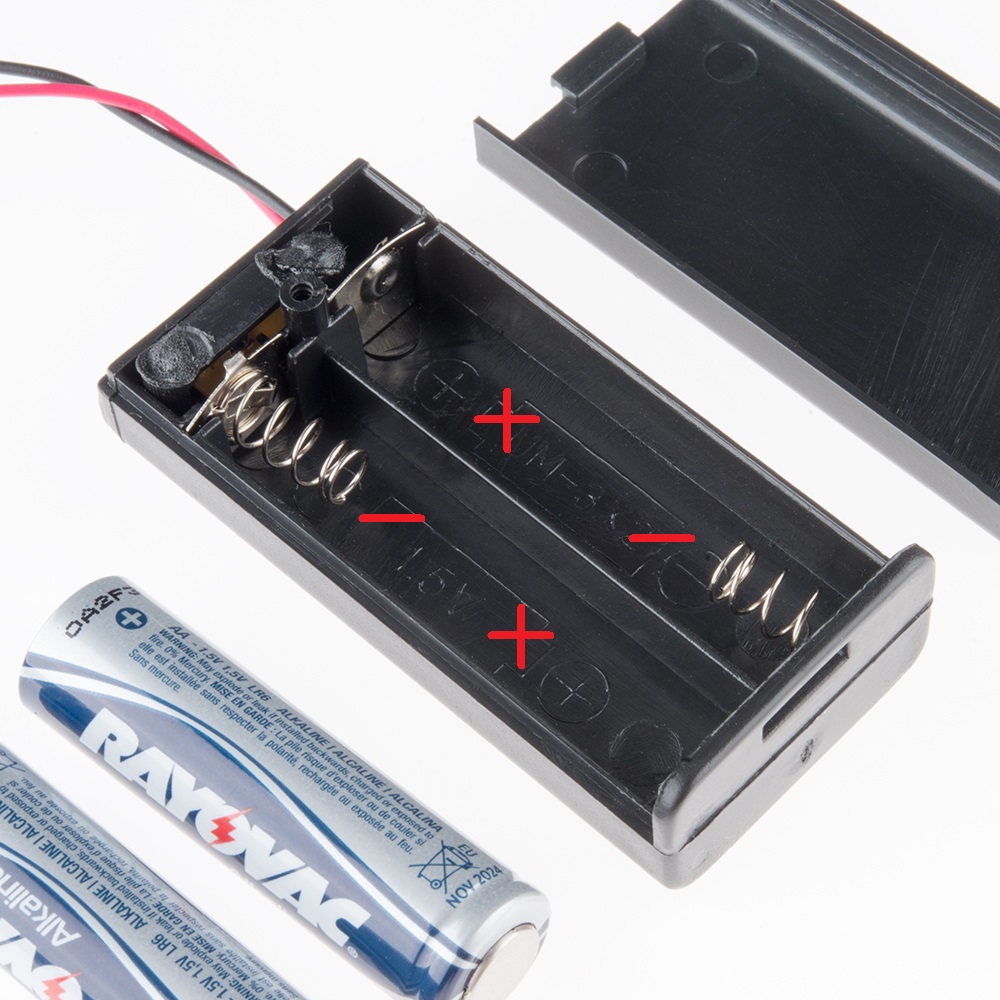
Put the batteries in the pack as noted by the markings. The bumped end of the battery is + and the flat end is -.
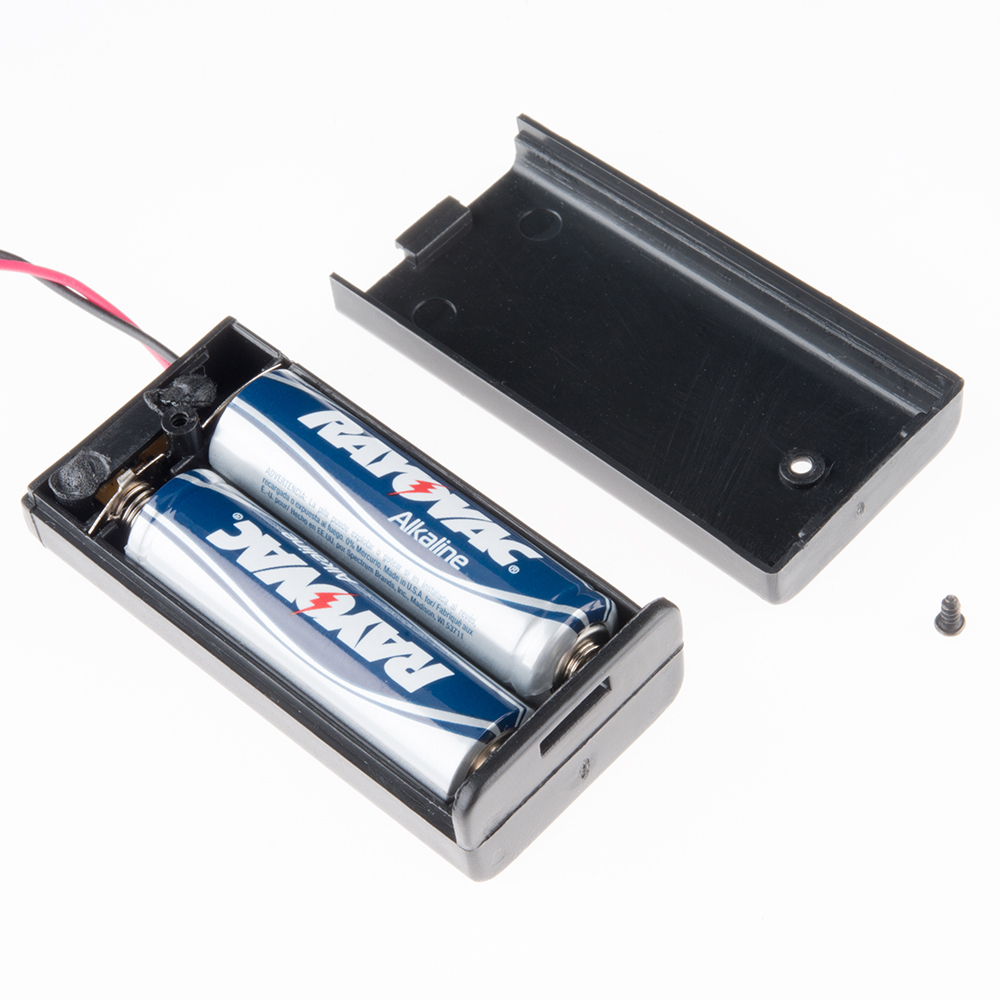
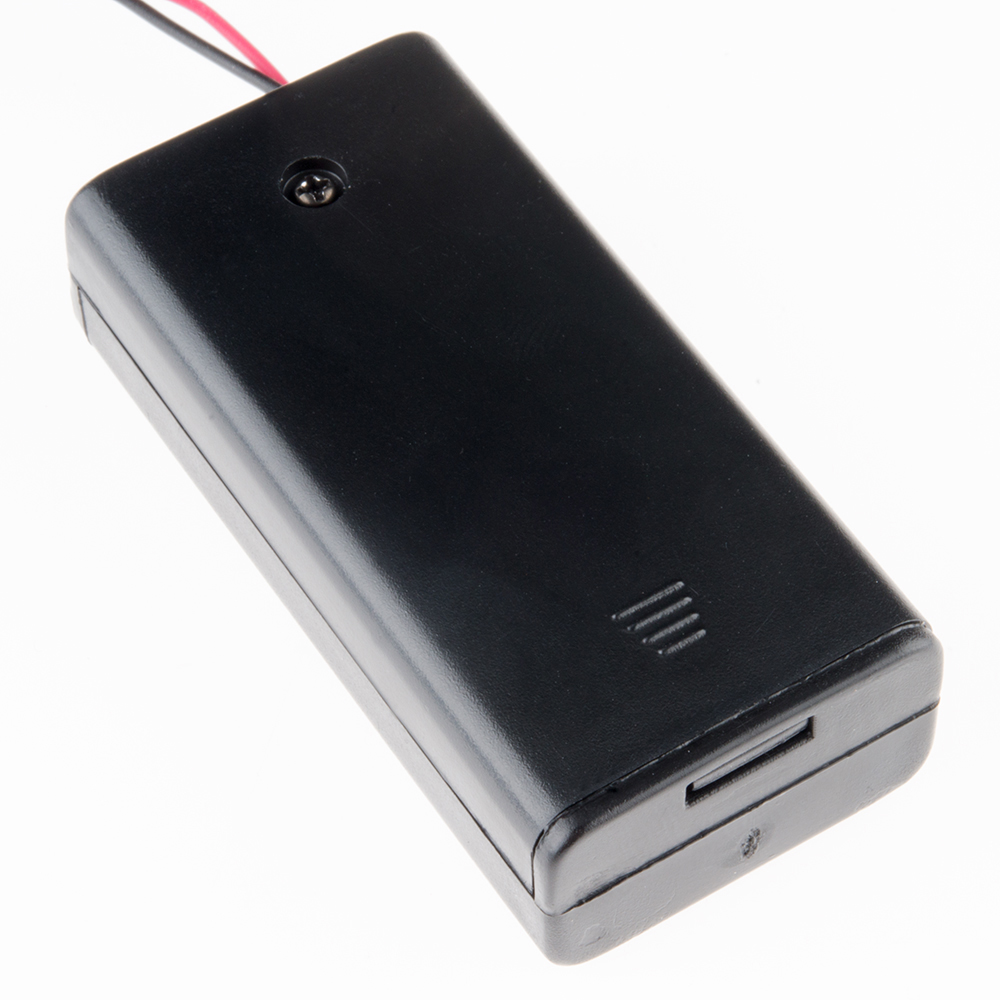
Put the battery pack cover back on, and secure it with the screw.
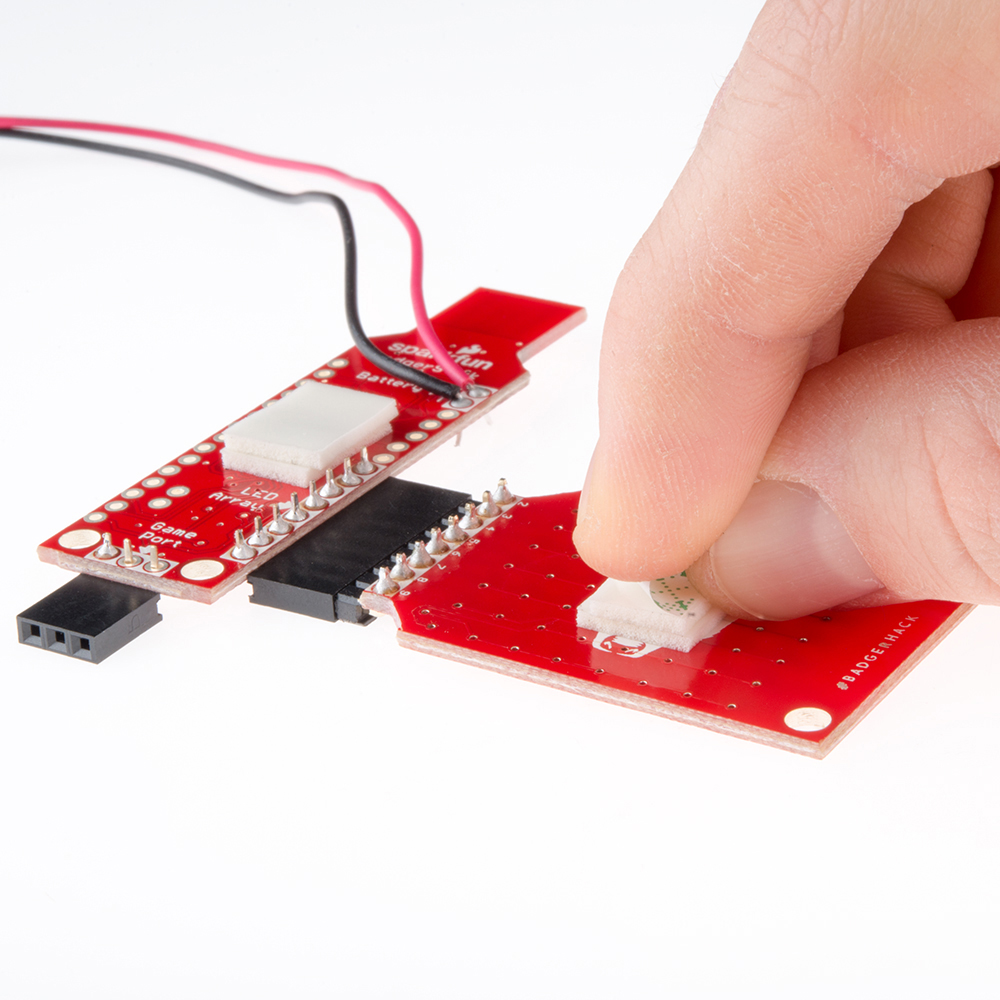
7. Connect the LED board to the BadgerStick
Connect the LED board and BadgerStick, by sliding the headers together. Ensure the LEDs and electronics on the BadgerStick are facing the same direction.
Flip the boards over, and double-check your solder connections:
- 8-pin male header soldered to the pins in the white box on the LED board
- 8-pin female header soldered to the pins in the white box on the BadgerStick labeled "LED Array"
- 3-pin female header soldered to the pins in the white box on the BadgerStick labeled "Game Port"
- Red battery wire soldered to + Battery pin
- Black battery wire soldered to the - Battery pin

Before you stick your electronics to the badge, turn on the battery pack to make sure everything is working. Troubleshooting your board will be a lot easier if it's not adhered to the badge.
8. Affix the components to the badge
Add one piece of double-sided foam tape to the LED board and another piece to the BadgerStick.
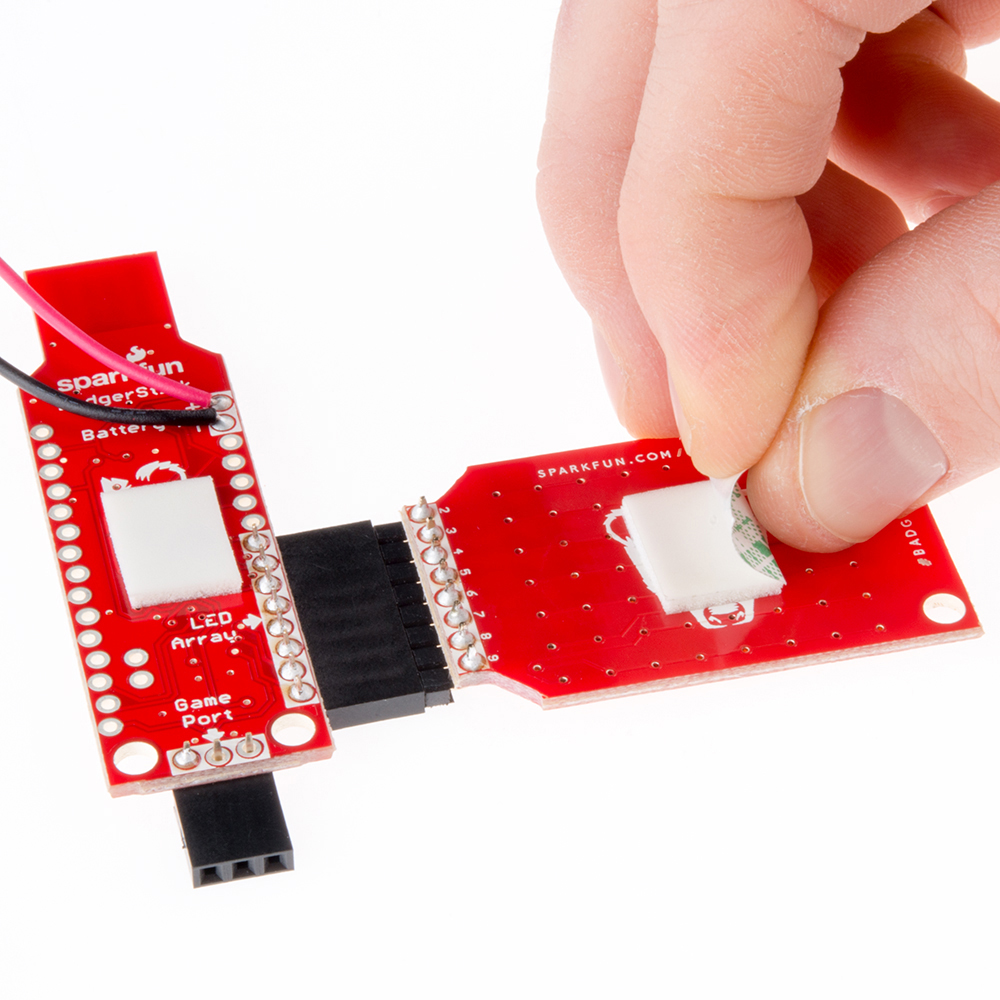
Add another two pieces of foam tape on top of the existing foam tape.
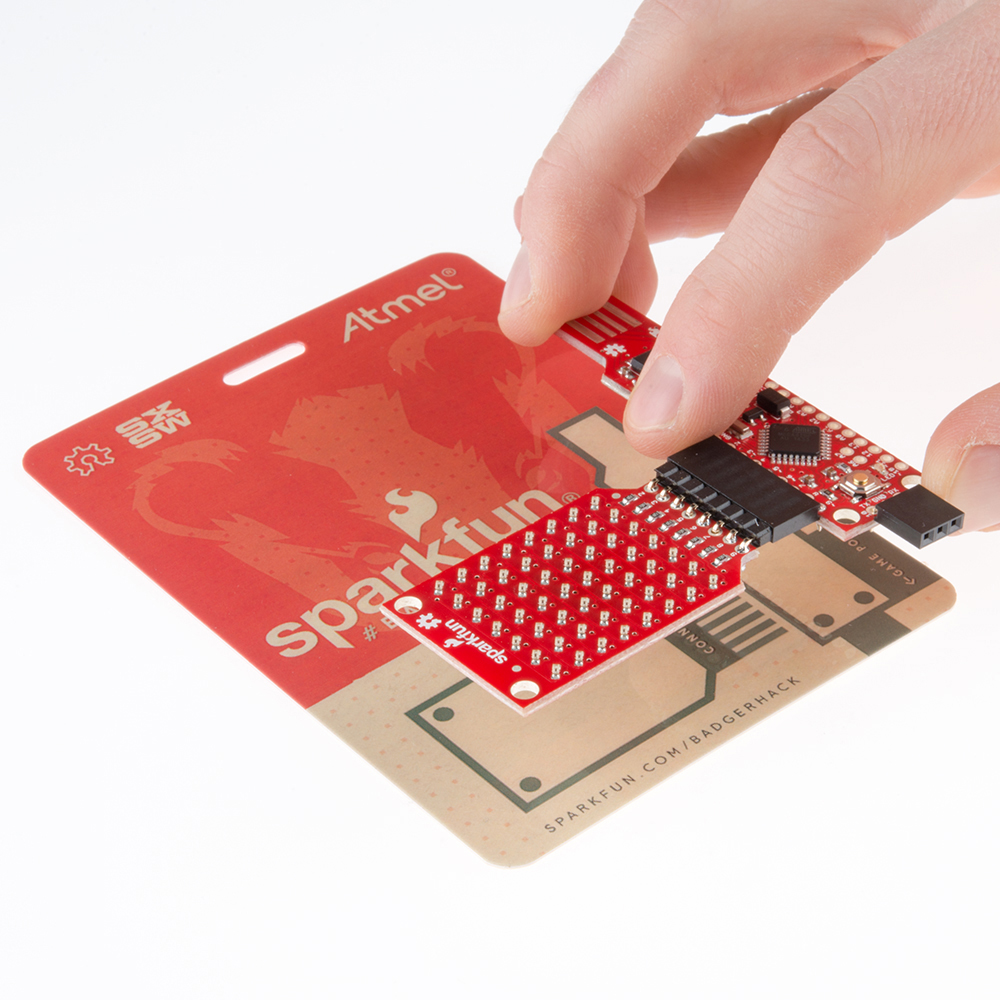
Stick the LED board and BadgerStick to the front of the plastic badge.
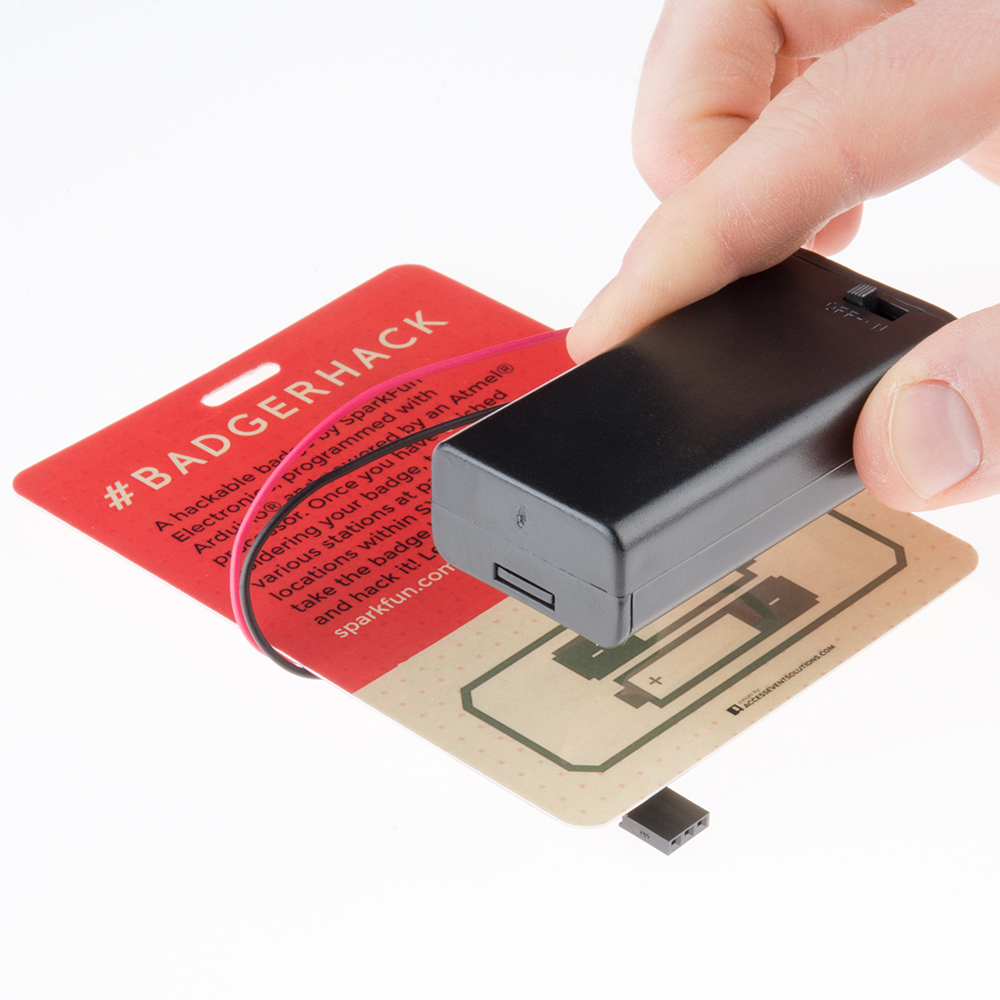
Put one more piece of foam tape on the battery pack on the side with the screw.
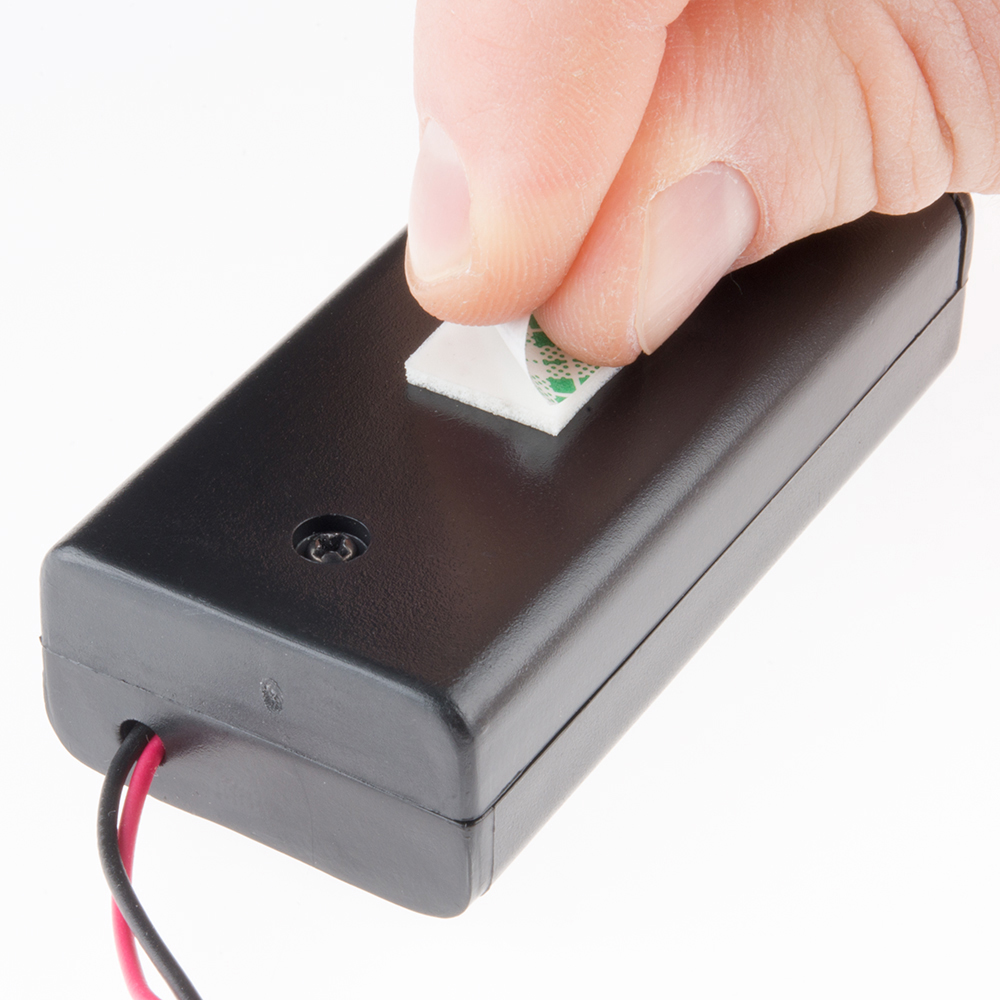
Stick the battery pack to the back of the plastic badge. To prevent the wires from hanging out, wrap them around the side of the badge as in the picture.
9. Turn it on
Turn your badge over, and find the little switch on the battery pack. Flip it to "ON."

Flip your badge back over. Wait about 3 seconds, and you should see the LED matrix activate!
10. Badger it up!
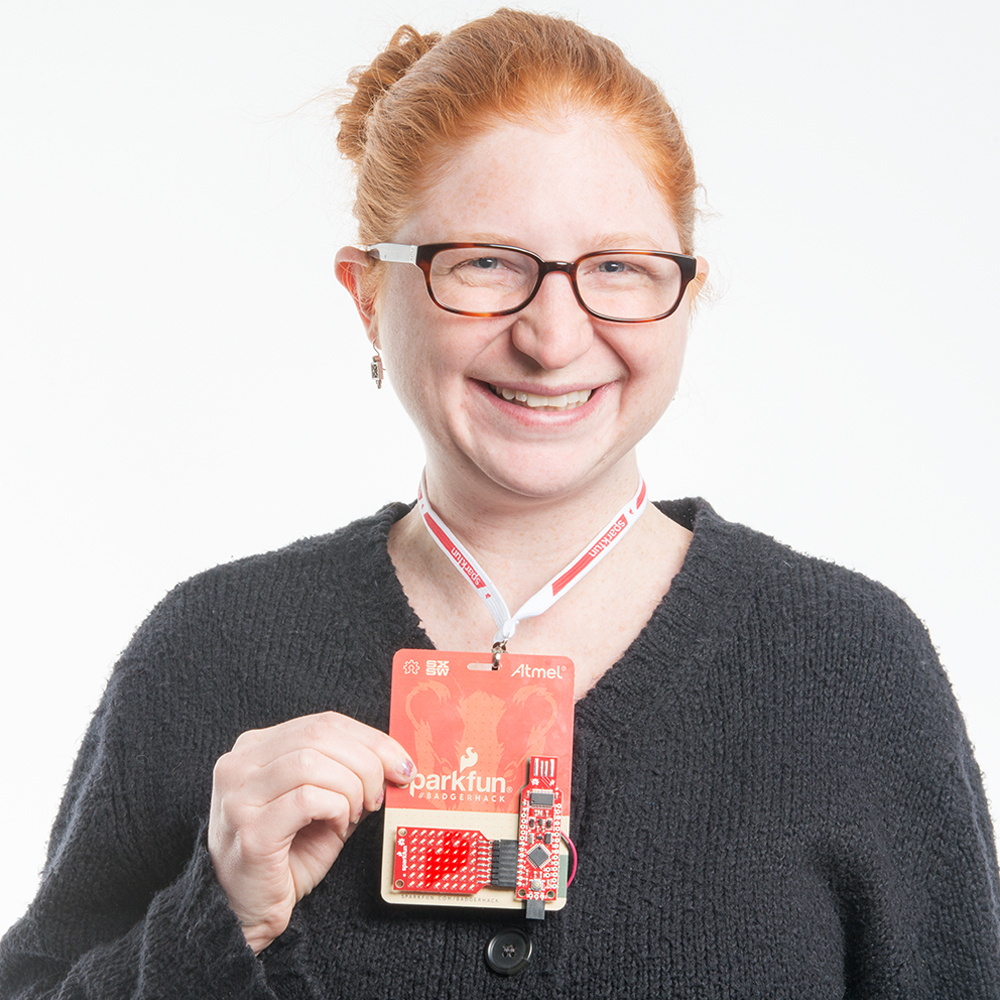
You are now the proud owner of a SparkFun Badger badge! Attach a lanyard...
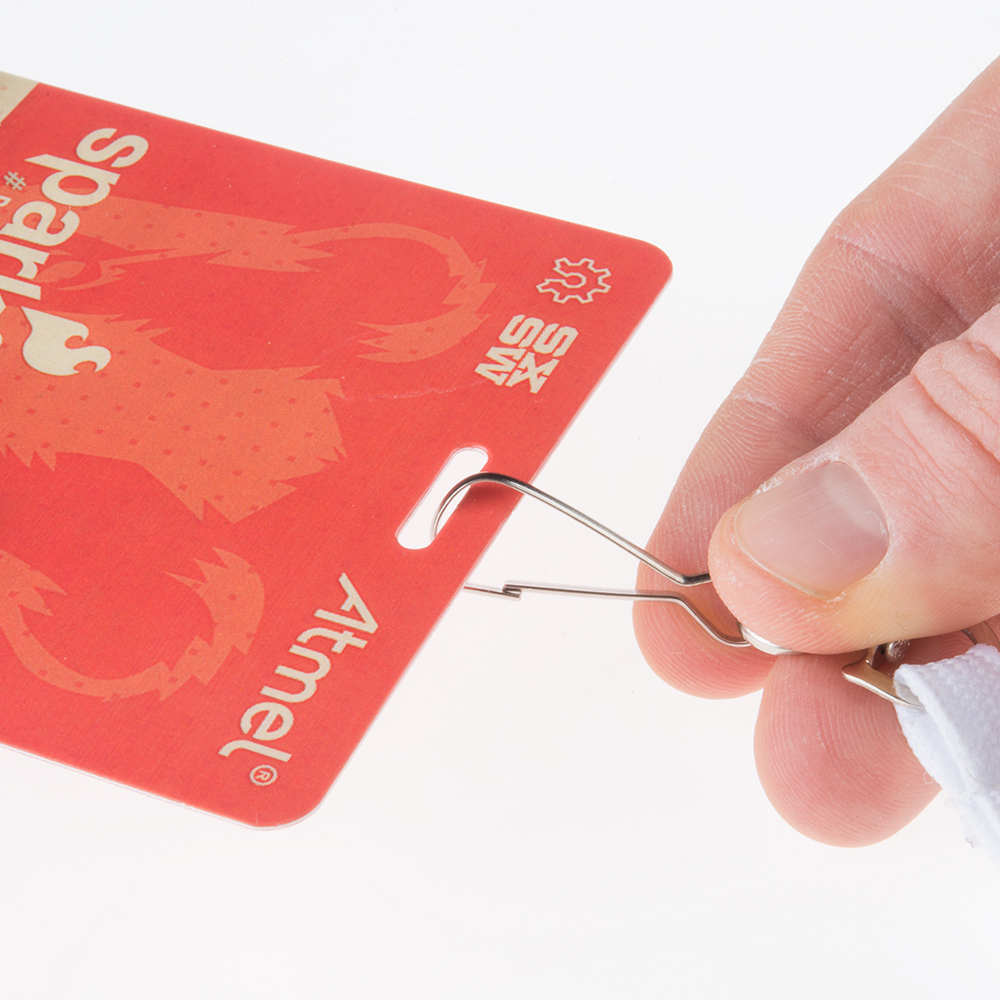
...and wear it with pride.
But that's not all. The badge comes pre-loaded with a fun scavenger hunt. Read on, to learn how to play!
Play the Game
We have strategically placed 8 crystalline game stations in our partners' booths throughout SX Create and one "Alpha Station" in the LulzBot booth. Your job is to find them.
Good news! You only have to find 4 of them. However, one of them must be the Alpha Station.
How to Play
Once you have finished soldering your badge and turned it on, it's time to play. First, visit the Alpha Station inside the LulzBot booth. Find the 3-pin game port on the station, and connect your badge's game port (make sure your badge is facing up!).
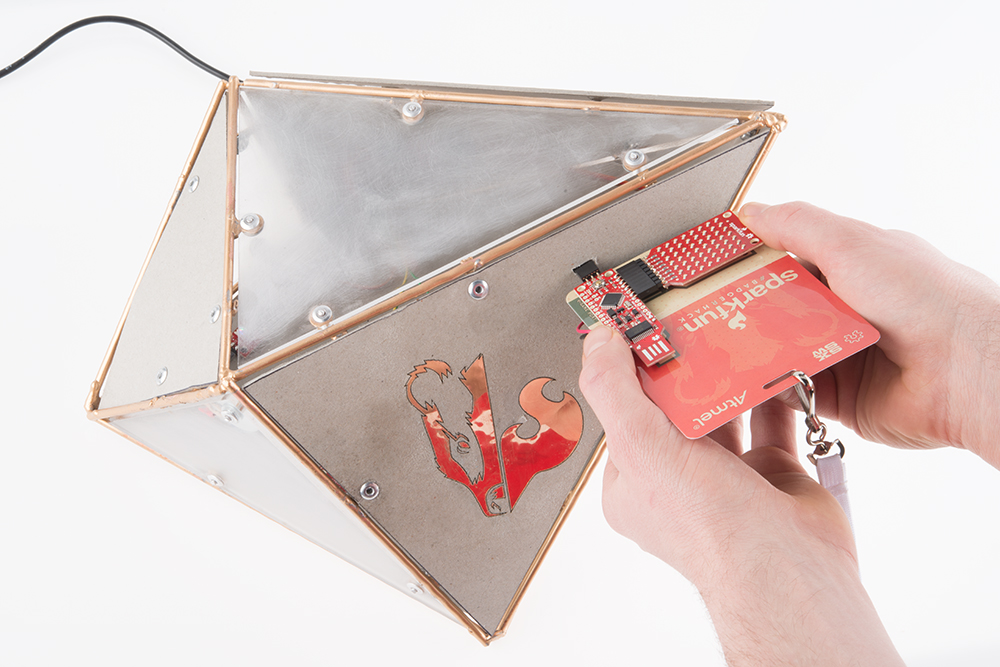
Now, you must hunt down 3 other stations. Visit any 3 of the booths with a station, and connect your badge to the game port to receive a point.
How to Win
You win when you have connected your badge to 4 unique Badger game stations (1 of them must be the Alpha Station). You receive no additional points or benefits for visiting more than 4 stations.
When you win, you will see an animation on your LED display. A coupon code will scroll across your screen 3 times. You can then use that coupon code at sparkfun.com (you can only use the code once, so use it wisely!). Make sure the code is 8 characters long.
If you missed writing down the code, don't worry! You can simply turn off your badge, and turn it back on again. If your badge has visited the 4 stations, it will scroll the code another 3 times. Every time you reset the badge, it will scroll the code 3 times.
Hack Your Badge
What do you do with your badge after the event? Well, you can hack it!
To program the BadgerStick, you will need the Arduino Integrated Development Environment (IDE). Find the section below about installing and configuring Arduino for your particular operating system (Windows, OS X, or Linux), and then move on to "Install Libraries."
Install and Configure Arduino (Windows)
Download and Install Arduino
Download the latest Arduino IDE from arduino.cc or by clicking the button for Arduino 1.6.1.
Double-click the downloaded executable, and follow the instructions to install Arduino.
Install COM Port Drivers
Navigate to FTDI's Virtual COM Port drivers page, and click to download the "setup executable."
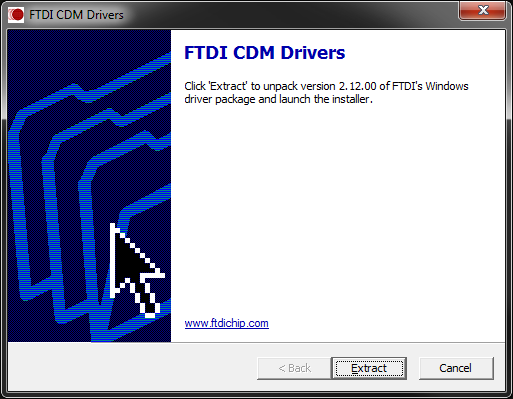
Double-click on the executable to run it, and follow the prompts to install the Virtual COM Port drivers.
Update boards.txt
We need to modify a file in the Arduino installation in order to work with the BadgerStick. Download the hardware files for BadgerStick support:
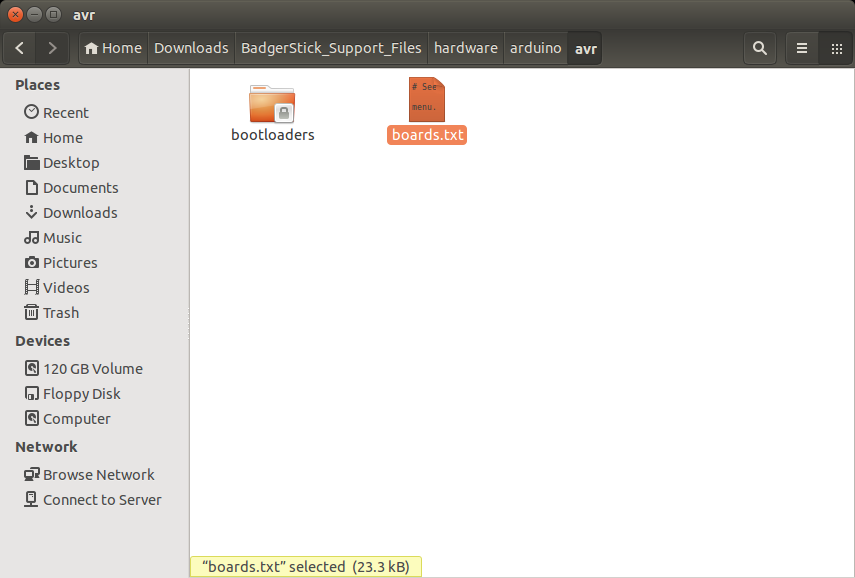
Unzip and navigate to the folder BadgerStick_Support_Files/hardware/arduino/avr. Copy the boards.txt file.
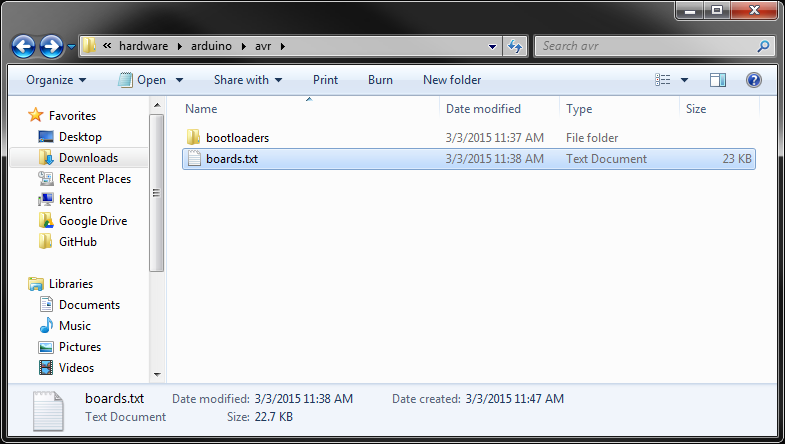
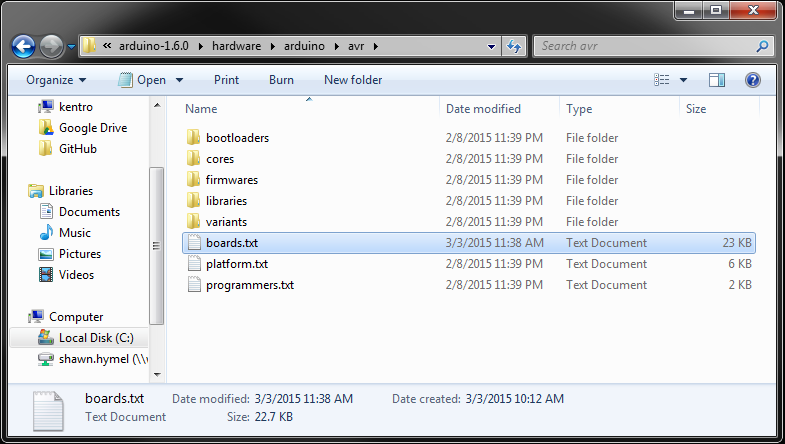
Paste them in \
That's it! Move on to the "Install Libraries" section.
Install and Configure Arduino (OS X)
Install Java
If you do not have Java already installed, you will need it for Arduino. Go to Java for OS X 2014-001, and click the Download button.
Use Finder to navigate to your Downloads folder, and double-click the downloaded file to mount the image.
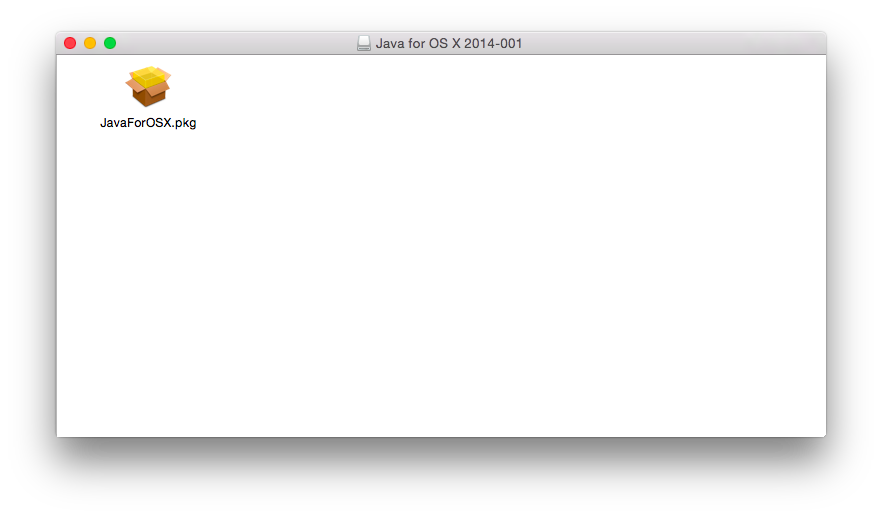
Double-click the JavaForOSX.pkg file to run the installer.
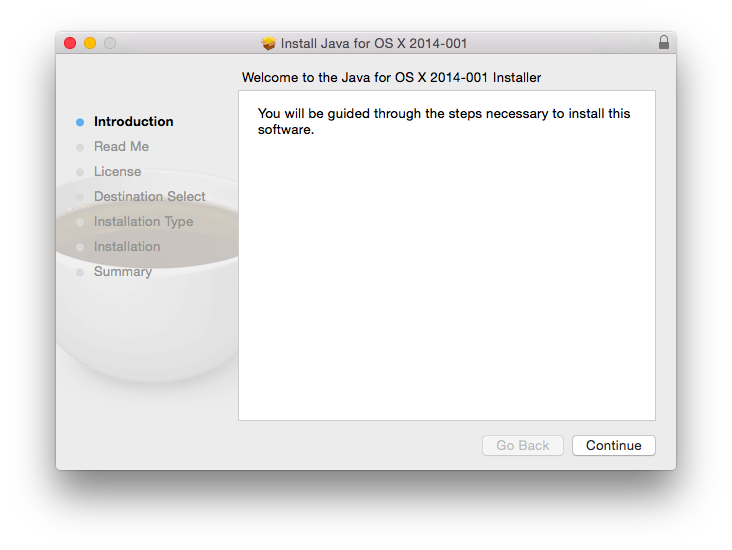
Follow the instructions to install Java 6.
Download and Install Arduino
Download the latest Arduino IDE from arduino.cc or by clicking the button for Arduino 1.6.1 (for Java 6).
Locate the downloaded file in Finder and double-click it to extract the .zip file.
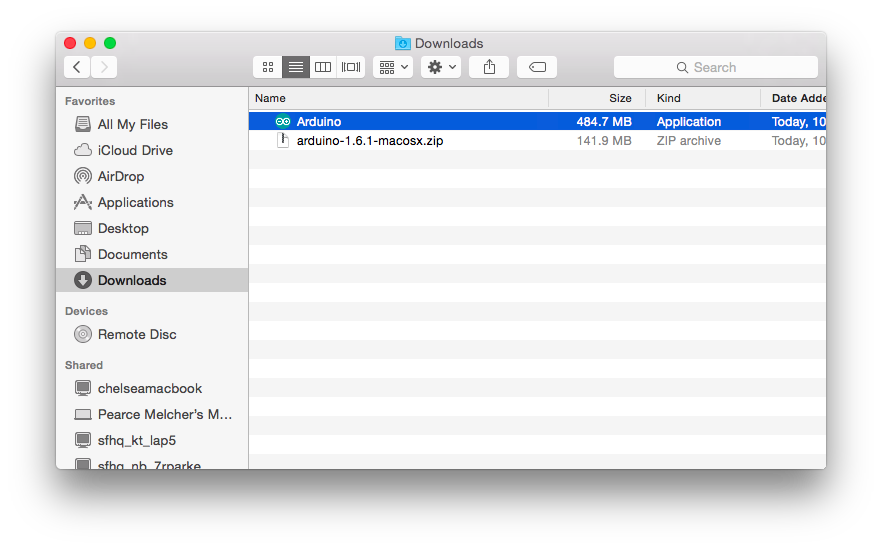
Drag the newly unzipped Arduino application to the Applications folder.

Install COM Port Drivers
Navigate to FTDI's Virtual COM Port drivers page and click to download the latest version of the VCP drivers for Mac OS X x64 (64-bit).
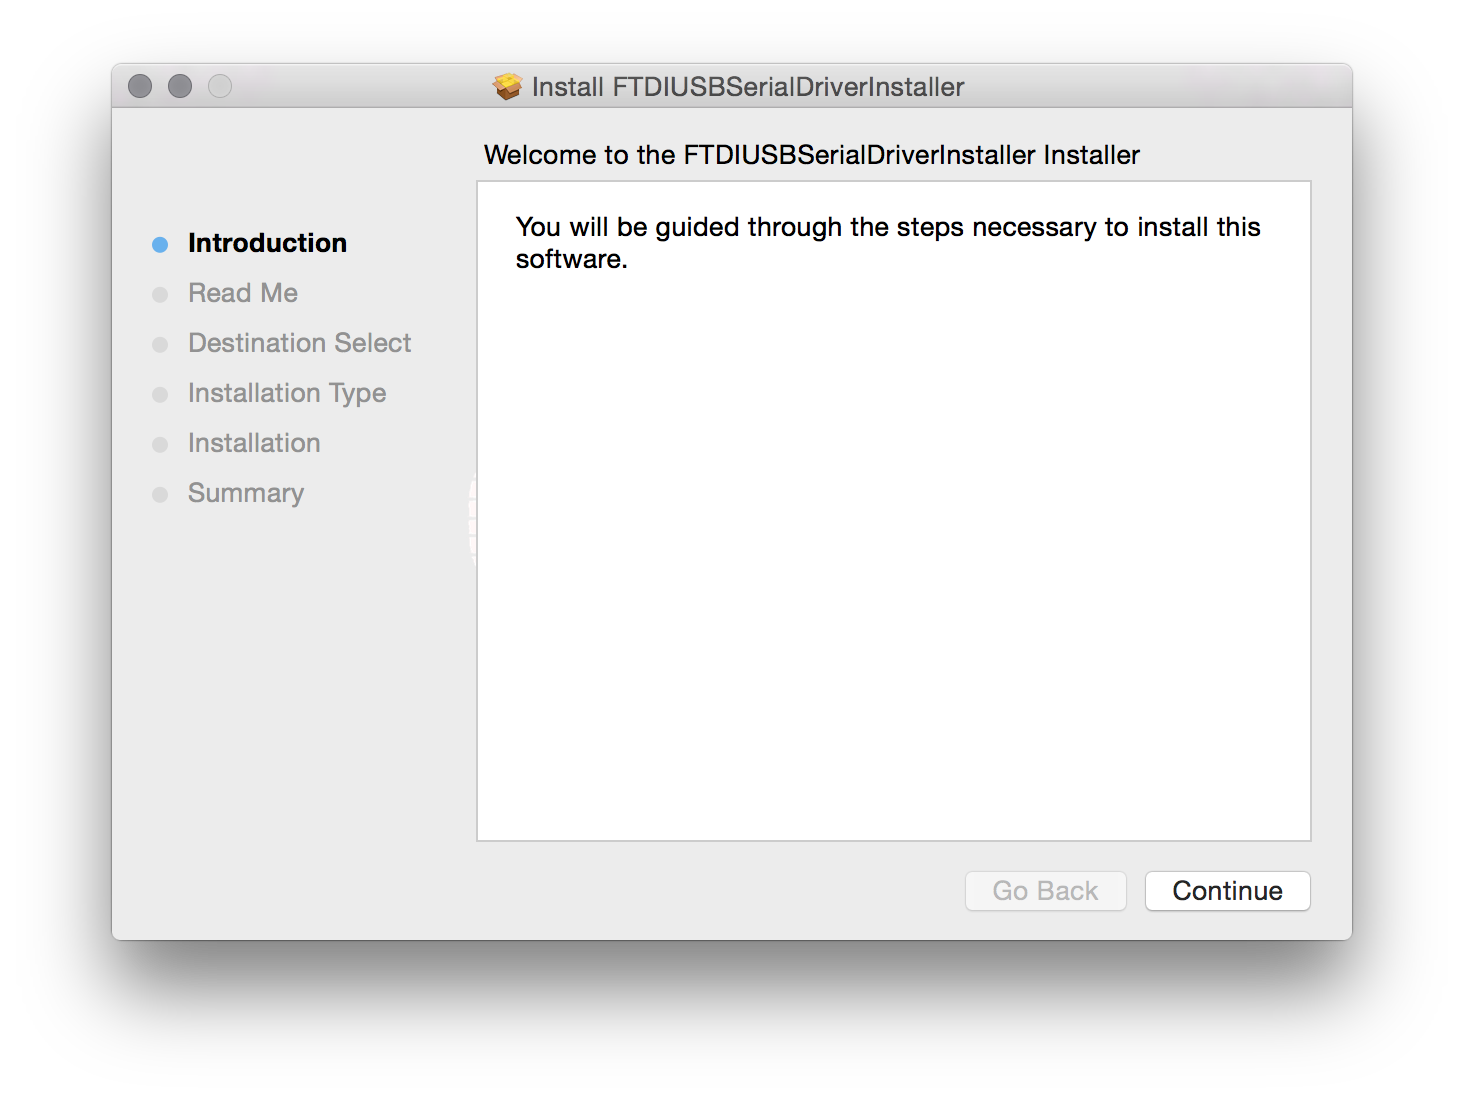
Locate the downloaded driver file in Finder, and double-click it to mount the drivers as a disk image.
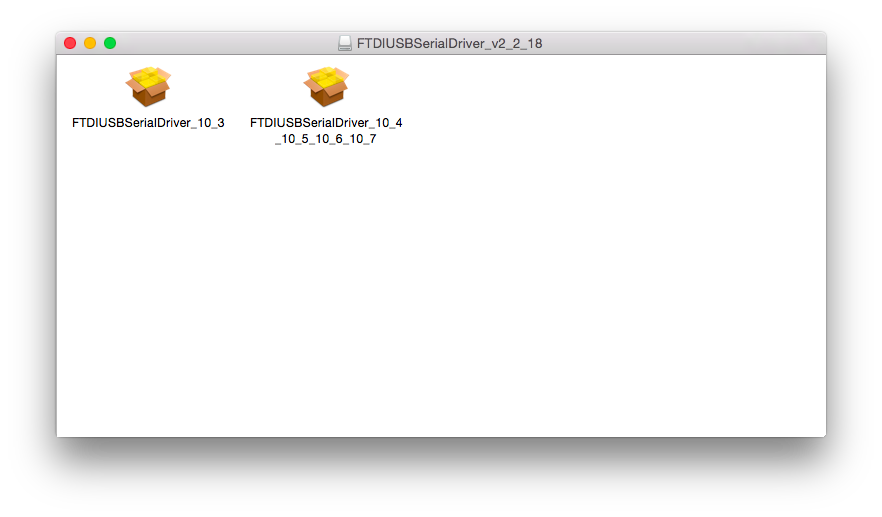
If you are on OS X 10.3, double-click the FTDIUSBSerialDriver_10_3. If you have a newer version of OS X, double-click the other installer. Follow the on-screen instructions to install the Virtual COM Port drivers.
If you run into an error like "can't be opened because it is from an unidentified developer," you will need to change your application security settings. See this post on how to do that.
Update boards.txt
We need to modify a file in the Arduino installation in order to work with the BadgerStick. Download the hardware files for BadgerStick support:
Double-click the downloaded zip file to unzip it. Navigate to \
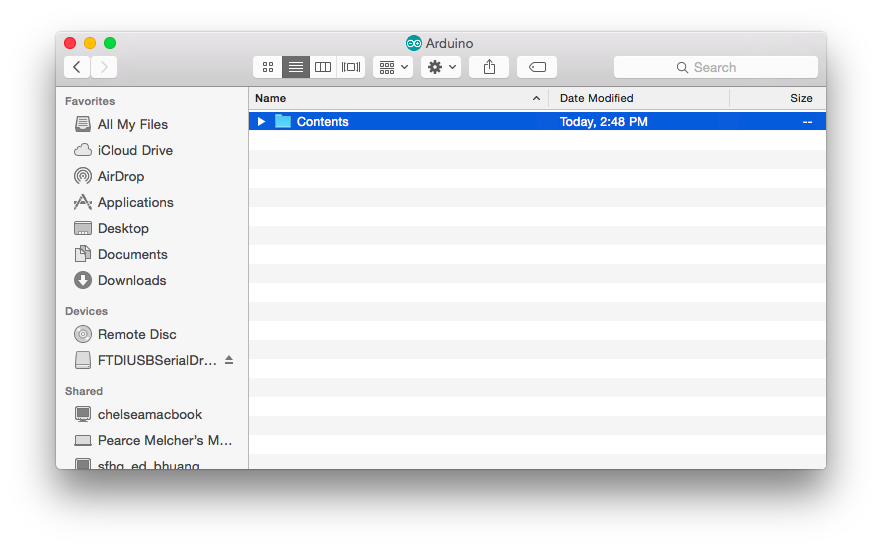
Right-click (or ctrl+click) on the Arduino application (in Applications), and select "Show Package Contents." This will allow you to browse the files within the Arduino application.
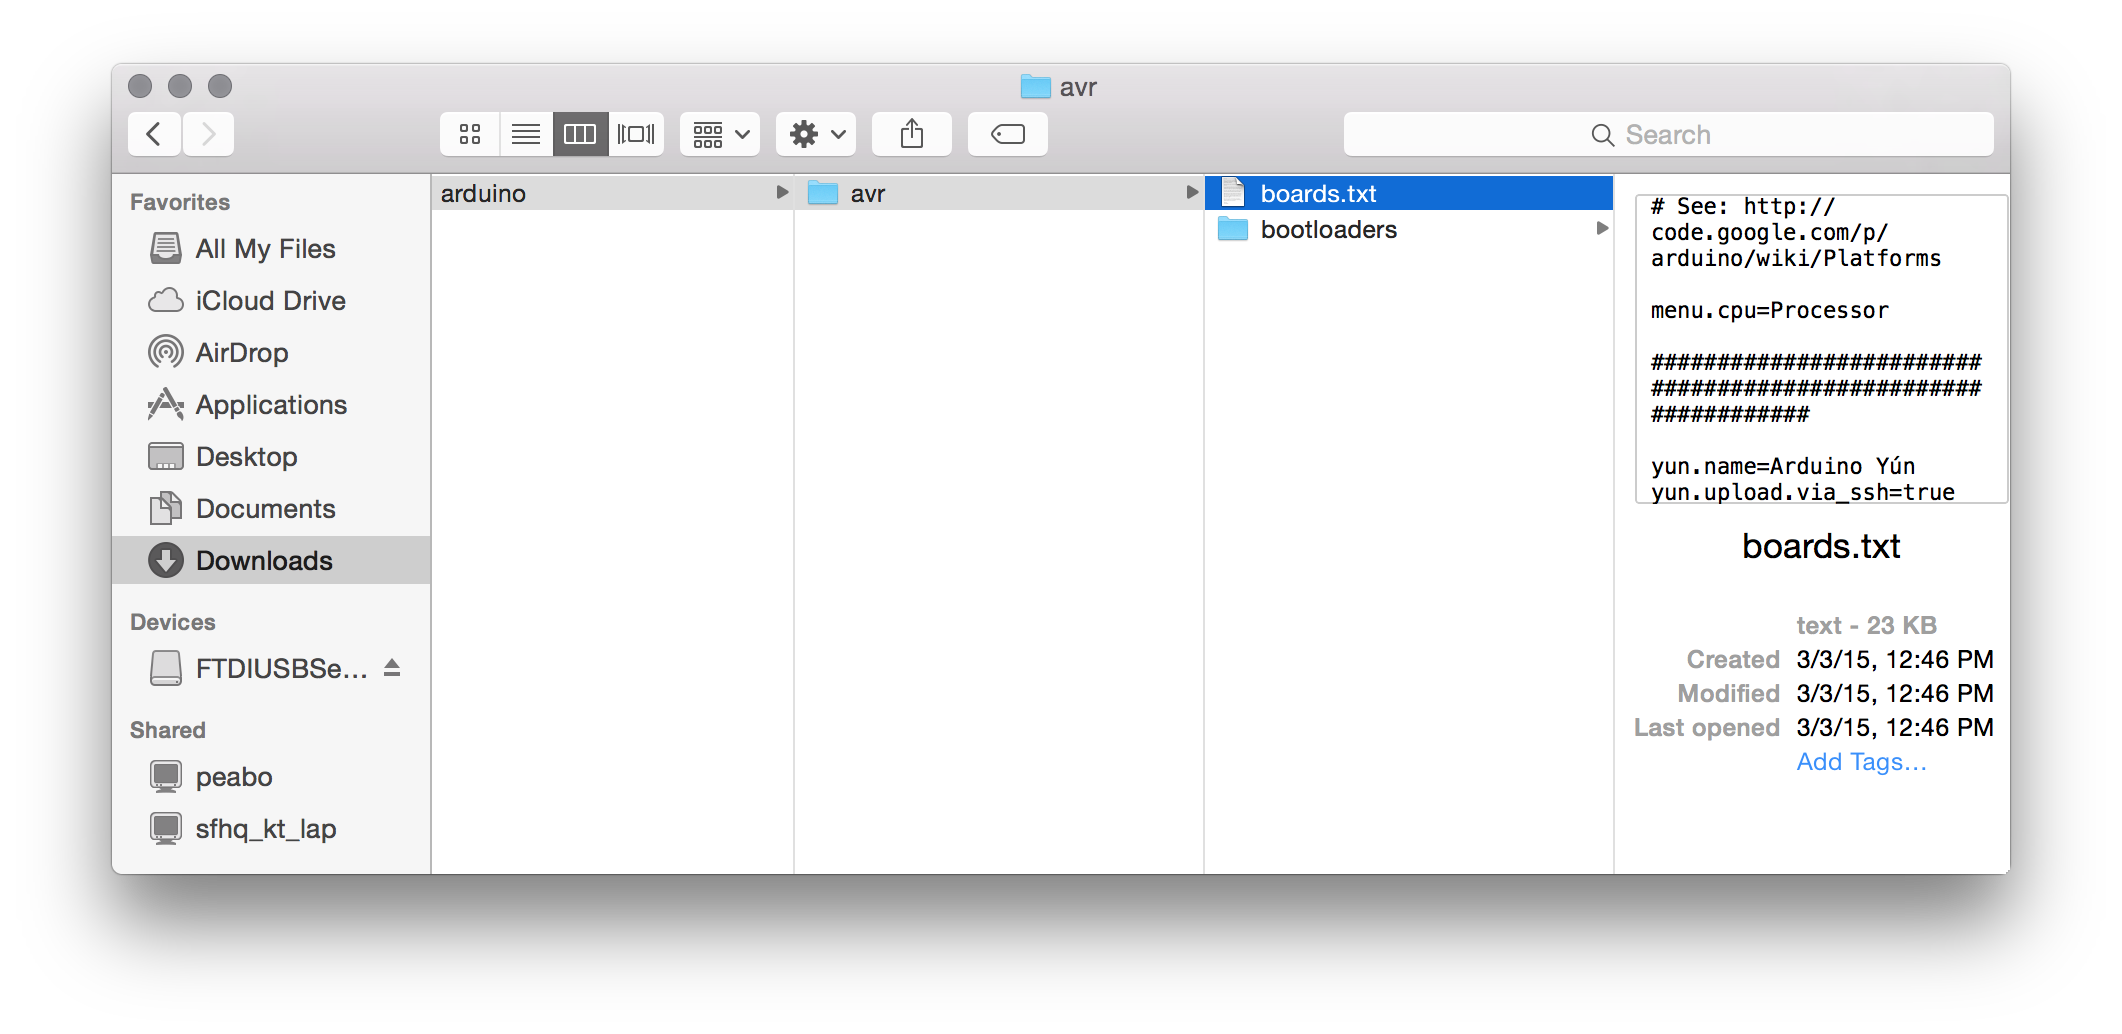
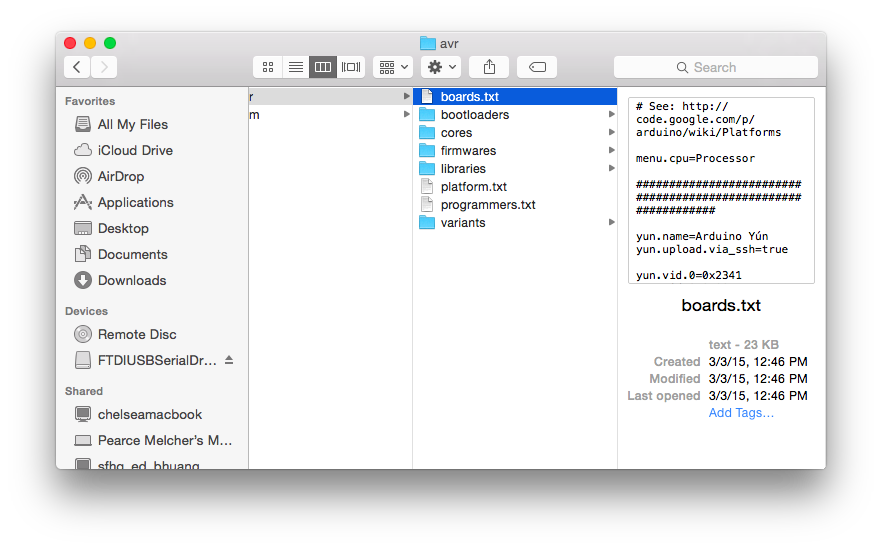
Navigate to Contents/Resources/Java/hardware/arduino/avr, and paste boards.txt. Agree to replace (overwrite) the existing boards.txt.
That's it! Move on to the "Install Libraries" section.
Install and Configure Arduino (Linux)
Download and Install Arduino
Note that these steps were performed on Ubuntu 14.04. They might differ depending on your particular flavor of Linux.
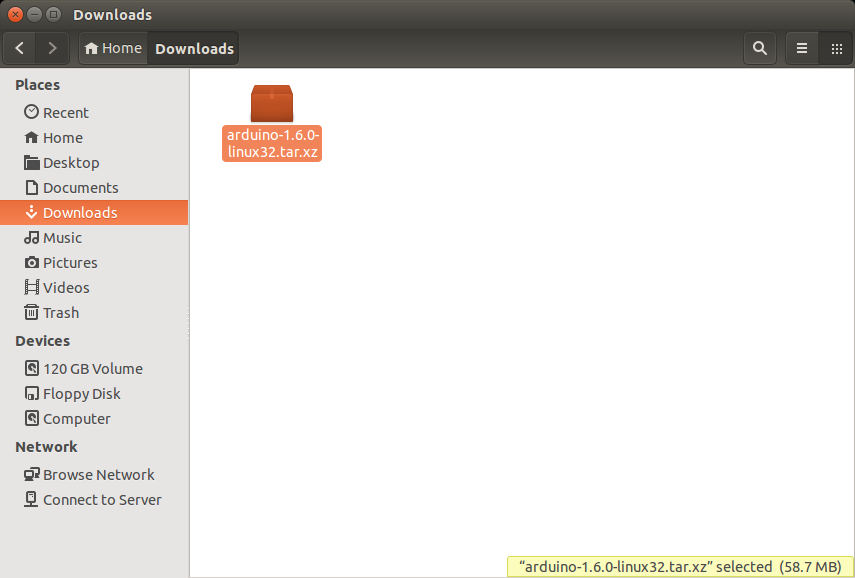
Download the latest Arduino IDE from arduino.cc or by clicking the button for Arduino 1.6.0 (64-bit).
Navigate to your Downloads directory, right click on the downloaded tar file, and select "Extract Here."
If you try and run the Arduino application, you might get an error like "java: not found." Additionally, you may not have avr-gcc installed. So, open a command window, and enter the following:
sudo apt-get install openjdk-6-jre avr-libc gcc-avr
Enter 'y' when asked to install the additional packages.
Update boards.txt
We need to modify a file in the Arduino installation in order to work with the BadgerStick. Download the hardware files for BadgerStick support:
Unzip and navigate to the folder BadgerStick_Support_Files/hardware/arduino/avr. Copy the boards.txt file.
Paste them in \

Enable Double-Click to Run Application
To run the Arduino program, you can simply navigate to the downloaded (and extracted) directory, and run the arduino script:
cd ~/Downloads/arduino-1.6.0/
./arduino
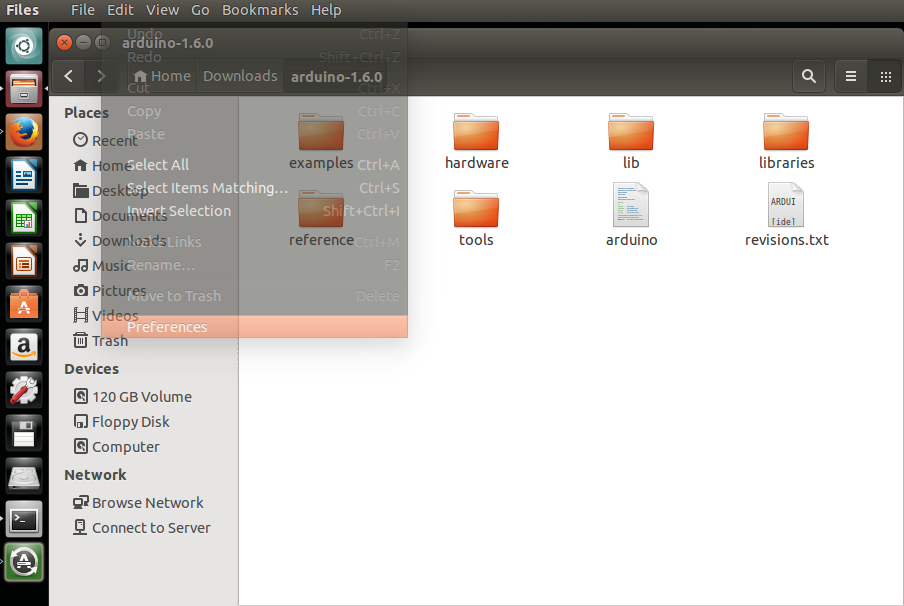
To make the script run when you double-click it in a Files window, open up Files, go to Edit → Preferences.
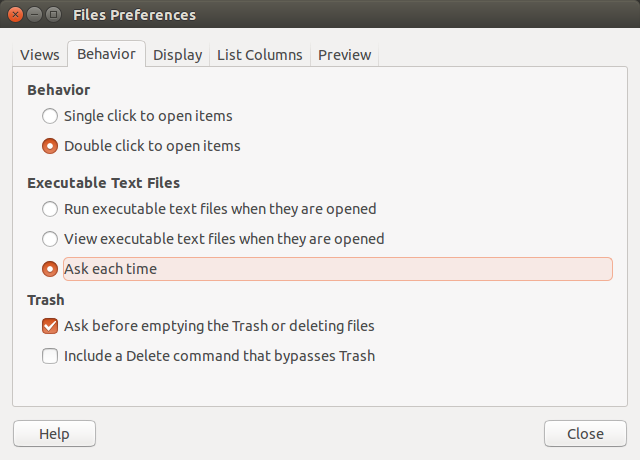
Go to the "Behavior" tab, and select "Ask each time."
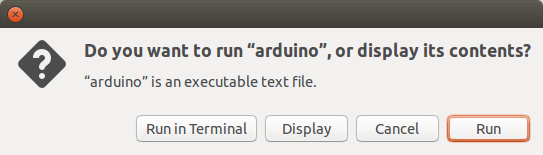
Close the Preferences window, and double-click the arduino script. You will be asked what to do. Select "Run" to start the Arduino application.
That's it! Move on to the "Install Libraries" section.
Install Libraries
Now that the Arduino IDE is installed and configured, we need 2 important libraries for controlling the LED array. The following steps use screenshots from Windows, but the steps are the same for all operating systems.
Install the Chaplex Library
Charlieplexing is a slick way to control many LEDs with only a few input/ouptut (IO) pins. We rely on the Arduino Chaplex library to do much of this for us. Download the library to get started.
Run the Arduino IDE, and select Sketch → Import Library... → Add Library...
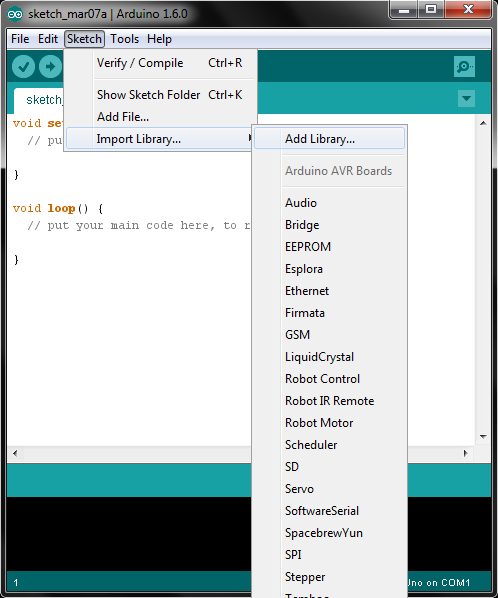
Find the Chaplex.zip file you just downloaded, select it, and click open.
Install LED Array Library
We built a library on top of the Chaplex library that will let you draw shapes and text to the LED array with ease. Download that library here:
In the Arduino IDE, select Sketch → Import Library... → Add Library... Find the SparkFun_LED_8x7.zip file you just downloaded, select it, and click open.
Your First Badger Hack
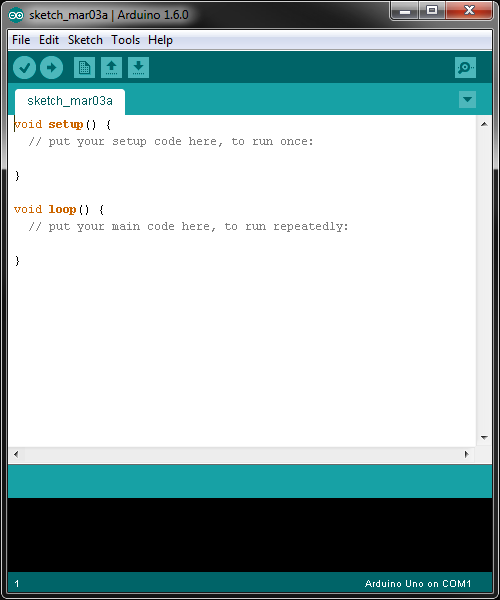
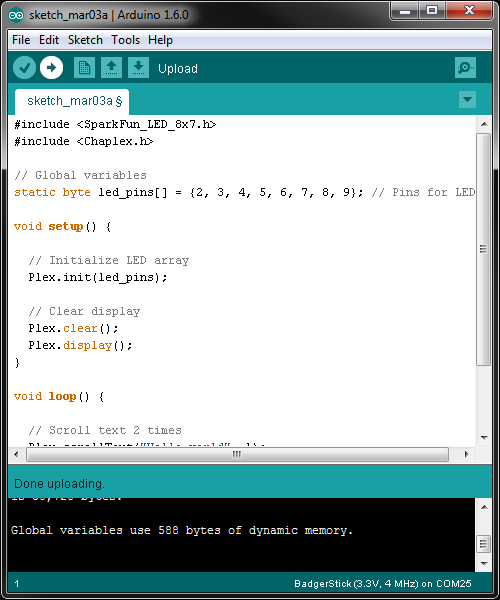
Plug your BadgerStick (with the LED array attached) into any available USB port on your computer. Open the Arduino IDE, and you will be presented with a template sketch.
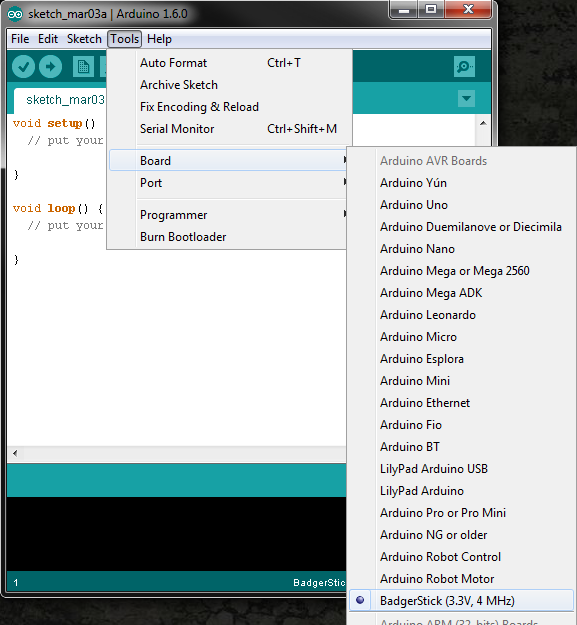
Go to Tools → Board, and select the BadgerStick (3.3V, 4 MHz).
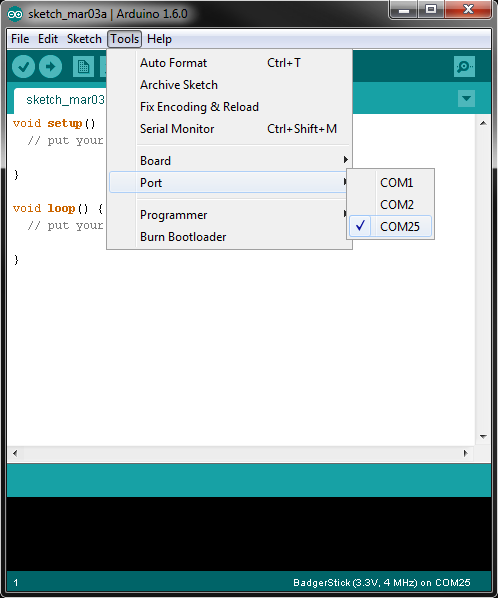
Go to Tools → Port, and select the COM port that is associated with your BadgerStick (e.g. COM25 in the example screenshot).
Now, we get to write some code! In the Arduino IDE, copy in the following code:
language:c
#include <SparkFun_LED_8x7.h>
#include <Chaplex.h>

// Global variables
static byte led_pins[] = {2, 3, 4, 5, 6, 7, 8, 9}; // Pins for LEDs

void setup() {

  // Initialize LED array
  Plex.init(led_pins);

  // Clear display
  Plex.clear();
  Plex.display();
}

void loop() {

  // Scroll text 1 time
  Plex.scrollText("Hello world", 1);

  // Wait 7 seconds to let the text finish scrolling
  delay(7000);

  // Stop scrolling the text
  Plex.stopScrolling();
  delay(2000);
}
Notice that we had to include both the SparkFun_LED_8x7 library and Chaplex library in the code. We initialized the LED display (lovingly called "Plex") and scroll the phrase "Hello world" across the screen once, wait 2 seconds, and repeat.
Press the "Upload" button in the top left of the Arduino IDE to compile and send the program to the BadgerStick. If you are asked to save the file, you can choose to save your current project, or just press "Cancel" to continue uploading (without saving).
Wait while the IDE compiles and uploads the code. Once it finishes, you should see some pretty text scrolling across your LED array!
Let's make some shapes! The SparkFun_LED_8x7 library is also capable of creating basic shapes. Delete the code you have in the current Arduino window, and copy in the following:
language:c
#include <SparkFun_LED_8x7.h>
#include <Chaplex.h>

// Global variables
byte led_pins[] = {2, 3, 4, 5, 6, 7, 8, 9}; // Pins for LEDs
byte i;

void setup() {

  // Initialize and clear display
  Plex.init(led_pins);
  Plex.clear();
  Plex.display();
}

void loop() {

  // Clear the display buffer
  Plex.clear();

  // Draw a line (x0, y0, y1, y1)
  Plex.line(1, 4, 1, 6);

  // Draw a rectangle (x, y, width, height)
  Plex.rect(0, 0, 3, 3);

  // Draw a filled circle (x, y, radius)
  Plex.circleFill(5, 4, 2);

  // Display our shapes and wait a second before repeating
  Plex.display();
  delay(1000);
}
Upload the new code, and your LED board should show some fun shapes.
Make a Game
OK, so the display might be small (don't get your hopes up of running Doom on an 8x7 monochrome display). However, we can use it to display information and even play some basic games.
Remember the game Breakout? I don't, really, but the concept was cool. Let's make a Breakout clone on our BadgerStick!
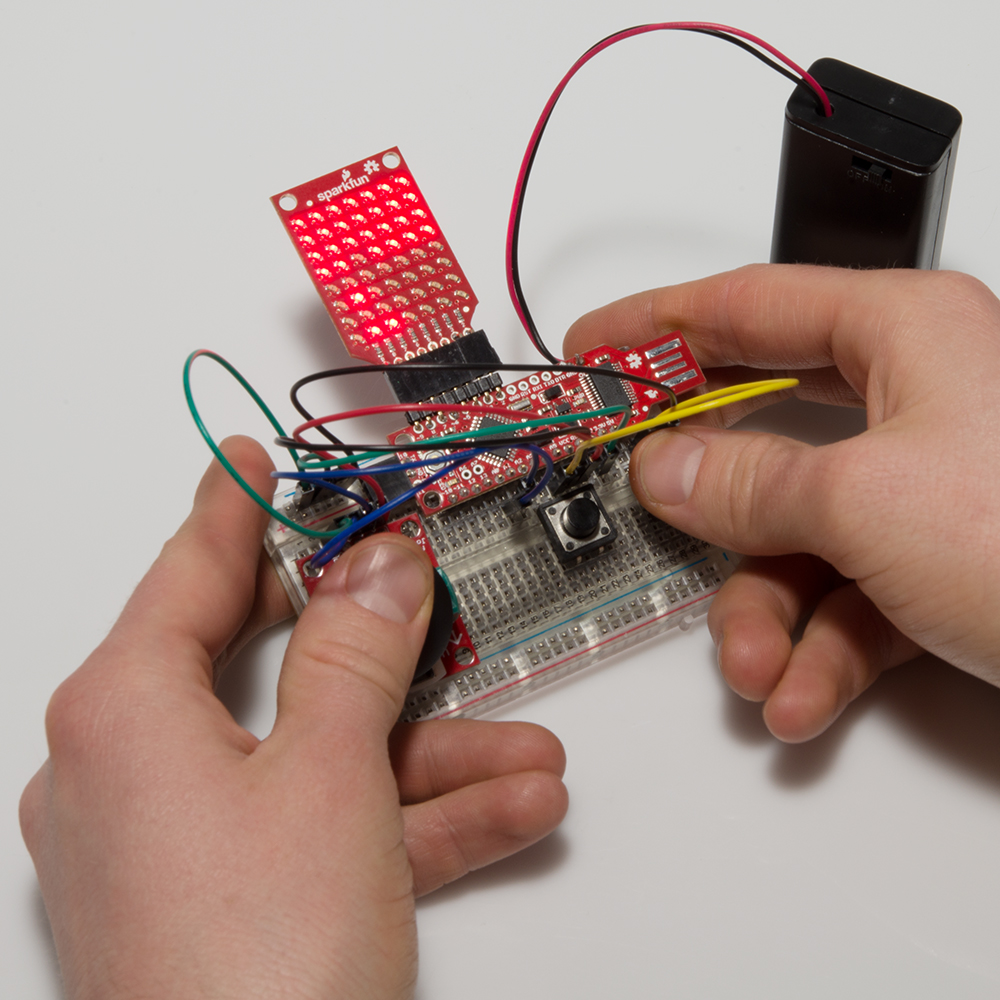
Hardware
Required Components
We will need a few other components to make a simple controller for the BadgerStick.
More Soldering
To begin, snap off 15 pins from the break-away headers, and solder them to the through-holes on the side opposite the LED array of the BadgerStick.
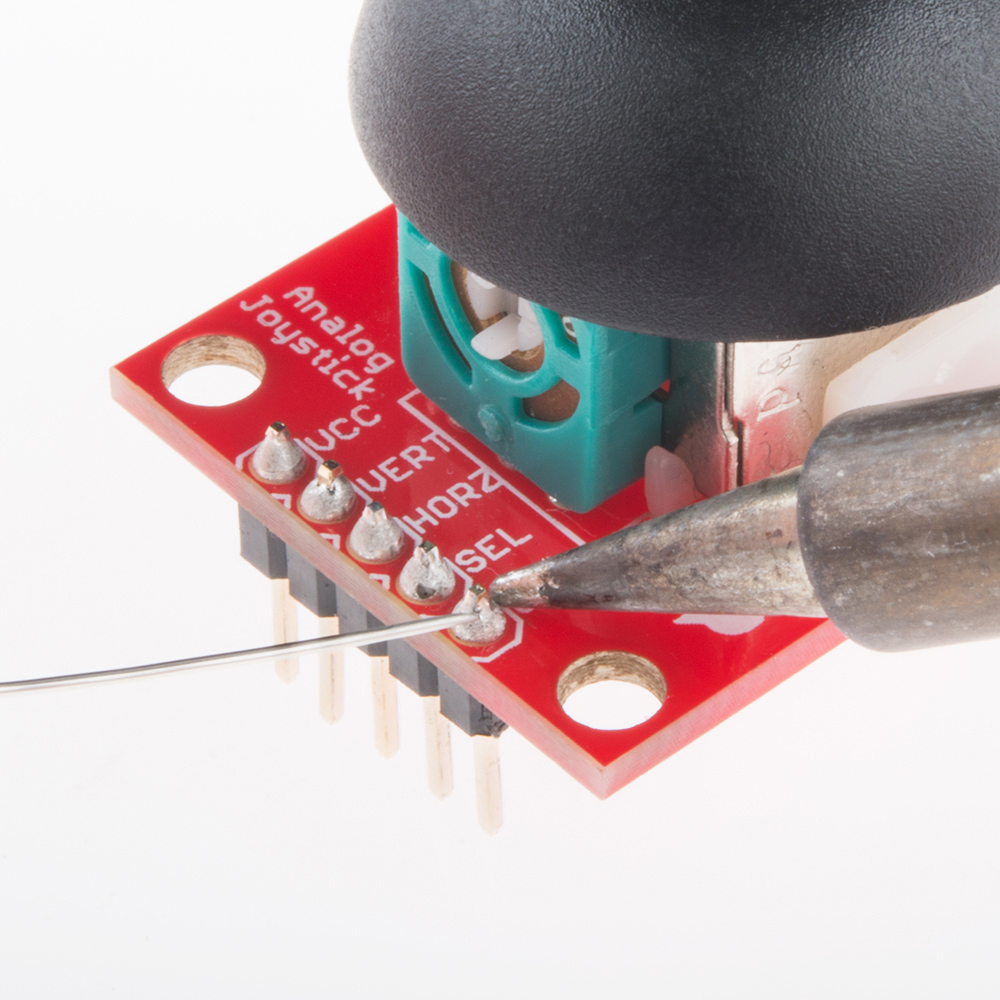
Solder the Thumb Joystick to the Thumb Joystick Breakout board.
Snap off 5 pins from the break-away headers, and solder them to the through-holes on the Joystick Breakout Board.
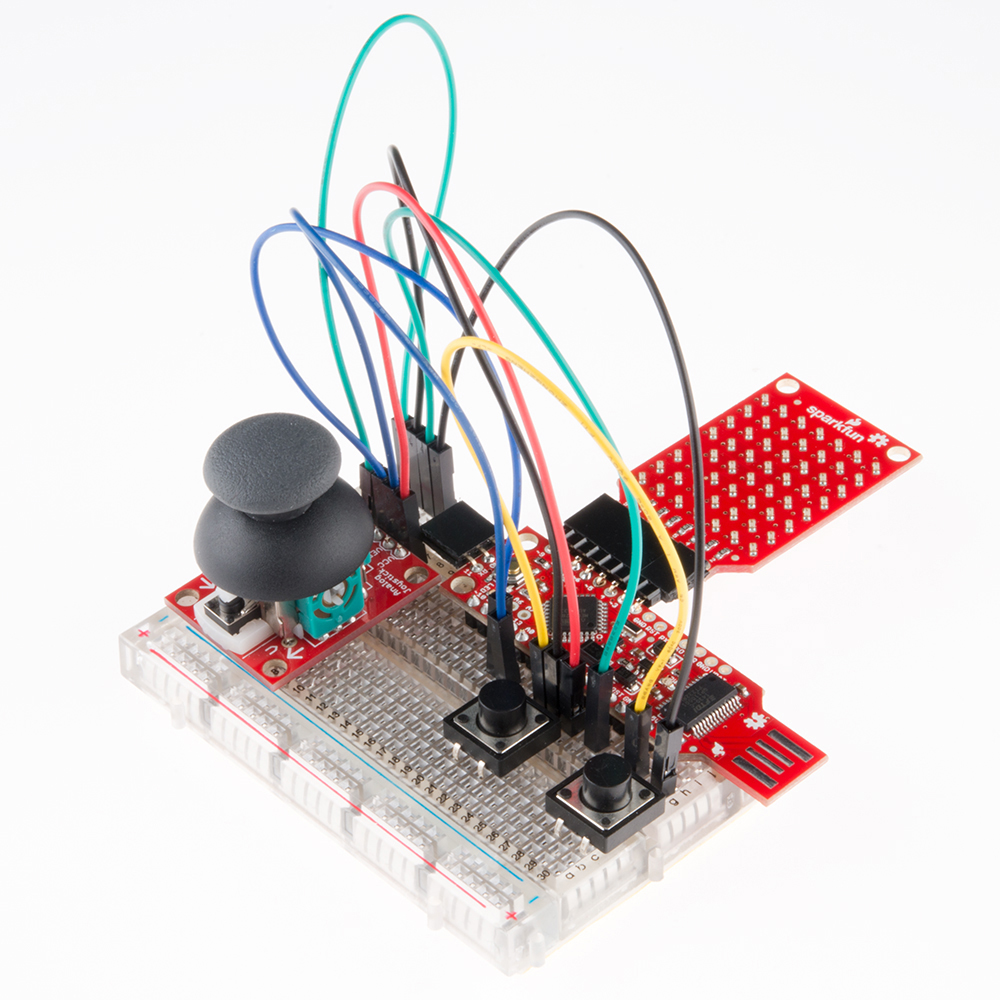
Connections
Place the BadgerStick in the breadboard with pin 10 in position i13 and pin 5V in position i27.
Connect the rest of the components as follows:
| Component | Breadboard | |||
|---|---|---|---|---|
| Thumb Joystick Breakout* | i7 (VCC) | i6 (VERT) | i5 (HOR) | i3 (GND) |
| Pushbutton | c20 | c22 | f20 | f22 |
| Pushbutton | c28 | c30 | f28 | f30 |
| Jumper Wire | ( - ) | g30 | ||
| Jumper Wire | ( - ) | g25 | ||
| Jumper Wire | ( - ) | g22 | ||
| Jumper Wire | ( - ) | j3 | ||
| Jumper Wire | j7 | g23 | ||
| Jumper Wire | j6 | g18 | ||
| Jumper Wire | j5 | g17 | ||
| Jumper Wire | g21 | g28 | ||
* Pins not listed are not used.
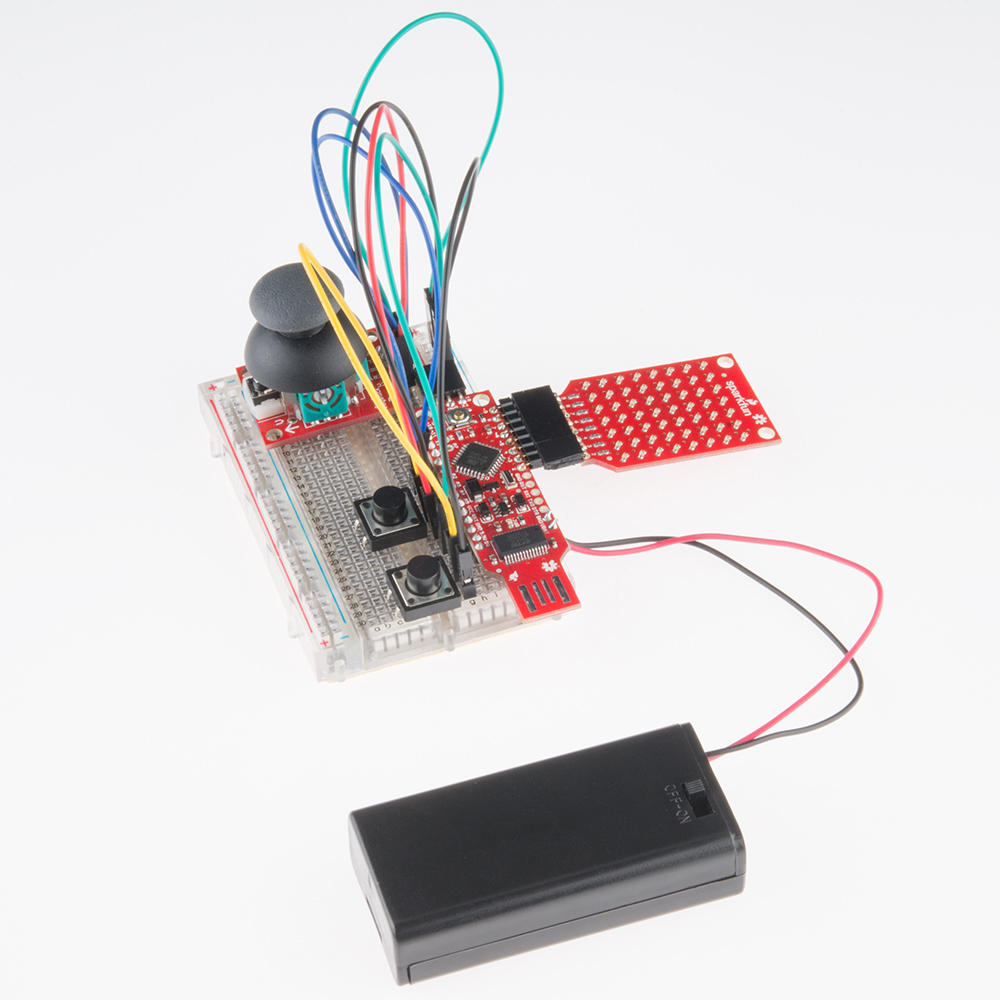
IMPORTANT: You can leave the battery pack soldered into the BadgerStick if you desire. If you remove the battery pack, you will need to supply power through another means, such as a USB port or a USB extension cable.
You should now have a makeshift game controller with a tiny LED screen!
The Code
In a new Arduino sketch window, copy in the following code:
language:c
/****************************************************************
BadgerHack_Breakout.ino

This code is beerware; if you see me (or any other SparkFun
employee) at the local, and you've found our code helpful, please
buy us a round!

Distributed as-is; no warranty is given.
****************************************************************/

#include <SparkFun_LED_8x7.h>
#include <Chaplex.h>

// Constants
#define DEBUG                1
#define FPS                  60
#define SENSITIVITY          100
#define MAX_X_SPAN           127
#define PADDLE_SIZE          2
#define INITIAL_BALL_SPEED   0.1
#define BALL_SPEED_INC       0.004
#define PAUSE_BEFORE_SHOOT   1000    // ms
#define ROW_SIZE             7
#define COL_SIZE             8
#define FIELD_SIZE           ROW_SIZE * COL_SIZE

// Pin definitions
#define RNG_SEED_PIN  2
#define X_PIN         0
#define Y_PIN         1
#define BUTTON_1_PIN  3
#define BUTTON_2_PIN  4

// Global variables
byte led_pins[] = {2, 3, 4, 5, 6, 7, 8, 9}; // Pins for LEDs
uint16_t horz_zero;
uint16_t vert_zero;
uint8_t paddle_size;

// Setup
void setup() {

#if DEBUG
  Serial.begin(9600);
  Serial.println(F("Breakout demo for BadgerHack"));
#endif

  // Initialize and clear display
  Plex.init(led_pins);
  Plex.clear();
  Plex.display();

  // Seed our random number generator
  randomSeed(analogRead(2));

  // Calibrate our joystick by finding the center
  horz_zero = analogRead(X_PIN);
  vert_zero = analogRead(Y_PIN);
}

// Loop - play the game forever
void loop() {

  // Play the game inifinity times
  playGame();
}

/****************************************************************
 * Functions
 ***************************************************************/

// Play the game
void playGame() {

  // Calculate the new x max based on paddle size
  paddle_size = PADDLE_SIZE;
  uint16_t field_max = MAX_X_SPAN -
                        (paddle_size - 1) * (MAX_X_SPAN / 7);

  // Create new game variables
  boolean playing;
  boolean win;
  unsigned long frame_start;
  uint8_t millis_per_frame = 1000/FPS;
  unsigned long game_start;
  boolean ball_moving;
  int16_t paddle_move;
  int16_t paddle_field = field_max / 2;
  uint8_t paddle_x;
  float ball_x = 3;
  float ball_y = 5;
  float inc_x;
  float inc_y;
  float ball_speed;
  uint8_t ball_round_x;
  uint8_t ball_round_y;
  uint16_t ball_theta;
  boolean can_deflect = true;
  int i;
  uint8_t x;
  uint8_t y;
  byte the_wall[] = { 1,1,1,1,1,1,1,
                      1,1,1,1,1,1,1,
                      1,1,1,1,1,1,1,
                      1,1,1,1,1,1,1,
                      0,0,0,0,0,0,0,
                      0,0,0,0,0,0,0,
                      0,0,0,0,0,0,0,
                      0,0,0,0,0,0,0 };
#if DEBUG
  Serial.println("New game!");
  Serial.print("Field span: ");
  Serial.println(field_max);
#endif

  // Note when we start the game (so we can shoot the ball)
  game_start = millis();
  ball_moving = false;

  // Assign an initial direction and speed to the ball
  ball_theta = initBallTheta();
  ball_speed = INITIAL_BALL_SPEED;

  // Play the game until we win or lose
  playing = true;
  while ( playing ) {

    // For each frame, aim for refresh rate
    frame_start = millis();

    // Check for a win condition
    win = true;
    for ( i = 0; i < FIELD_SIZE; i++ ) {
      if ( the_wall[i] > 0 ) {
        win = false;
        break;
      }
    }
    if ( win ) {
      Plex.clear();
      Plex.scrollText("You win!", 1);
      delay(5000);
      Plex.stopScrolling();
      playing = false;
    }

    // Read the value of the joystick and map to a movement
    paddle_move = analogRead(X_PIN) - horz_zero;
    paddle_move = paddle_move / SENSITIVITY;
#if 0
    Serial.print("Moving: ");
    Serial.println(paddle_move);
#endif

    // Move the paddle and calculate its real x position
    paddle_field = paddle_field + paddle_move;
    if ( paddle_field <= 0 ) {
      paddle_field = 0;
    }
    if ( paddle_field >= field_max ) {
      paddle_field = field_max;
    }
    paddle_x = map(paddle_field, 0, field_max,
                   0, 6 - (paddle_size - 1));

    // If the ball has been shot, move it
    if ( ball_moving ) {

      // Calculate the ball's new position
      ball_x += ball_speed * cos(ball_theta * (M_PI / 180));
      ball_y += ball_speed * sin(ball_theta * (M_PI / 180));

      // Check the ball against the paddle
      if ( (ball_y > 6) &&
            (ball_x >= paddle_x) &&
            (ball_x <= (paddle_x + (paddle_size - 1))) &&
            can_deflect ) {
        ball_y = 6 - abs(6 - ball_y);
        ball_theta = 360 - ball_theta;
        can_deflect = false;
      }

      // Allow ball to be deflected once it leaves paddle range
      if ( ball_y <= 6 ) {
        can_deflect = true;
      }

      // Check if the ball moved past the paddle (lose)
      if ( ball_y > 7 ) {
#if DEBUG
        Serial.print("LOSE! x=");
        Serial.print(ball_x);
        Serial.print(" y=");
        Serial.print(ball_y);
        Serial.print(" Paddle:");
        Serial.print(paddle_x);
        Serial.print("-");
        Serial.println(paddle_x + paddle_size - 1);
#endif
        playing = false;
      }

      // Check the ball against the walls (and bounce!)
      if ( ball_y < 0 ) {
        ball_y = abs(ball_y);
        ball_theta = 360 - ball_theta;
      }
      if ( ball_x < 0 ) {
        ball_x = abs(ball_x);
        ball_theta = (540 - ball_theta) % 360;
      }
      if ( ball_x > 6 ) {
        ball_x = 6 - abs(6 - ball_x);
        ball_theta = (540 - ball_theta) % 360;
      }

      // Bounce if we hit a block above the ball
      i = (floor(ball_y) * ROW_SIZE) + roundFloat(ball_x);
      if ( the_wall[i] > 0 ) {
        the_wall[i]--;
        ball_y = (i / ROW_SIZE) + abs((i / ROW_SIZE) - ball_y);
        ball_theta = 360 - ball_theta;
        ball_speed += BALL_SPEED_INC;
      }

      // Bounce if we hit a block below the ball
      i = (ceil(ball_y) * ROW_SIZE) + roundFloat(ball_x);
      if ( the_wall[i] > 0 ) {
        the_wall[i]--;
        ball_y = (i / ROW_SIZE) - abs((i / ROW_SIZE) - ball_y);
        ball_theta = 360 - ball_theta;
        ball_speed += BALL_SPEED_INC;
      }

      // Bounce if we hit a block to the left the ball
      i = (roundFloat(ball_y) * ROW_SIZE) + floor(ball_x);
      if ( the_wall[i] > 0 ) {
        the_wall[i]--;
        ball_y = (i / ROW_SIZE) + abs((i / ROW_SIZE) - ball_y);
        ball_theta = (540 - ball_theta) % 360;
        ball_speed += BALL_SPEED_INC;
      }

      // Bounce if we hit a block to the right the ball
      i = (roundFloat(ball_y) * ROW_SIZE) + ceil(ball_x);
      if ( the_wall[i] > 0 ) {
        the_wall[i]--;
        ball_y = (i / ROW_SIZE) - abs((i / ROW_SIZE) - ball_y);
        ball_theta = (540 - ball_theta) % 360;
        ball_speed += BALL_SPEED_INC;
      }

    } else {

      // See if we need to start moving the ball
      if ( millis() >= game_start + PAUSE_BEFORE_SHOOT ) {
        ball_moving = true;
      }
    }

    // Round the ball's position to the nearest pixel
    ball_round_x = roundFloat(ball_x);
    ball_round_y = roundFloat(ball_y);

    // Draw tbe wall, the paddle, and the ball
    Plex.clear();


    for ( y = 0; y < COL_SIZE; y++ ) {
      for ( x = 0; x < ROW_SIZE; x++ ) {
        if ( the_wall[(x * ROW_SIZE) + (ROW_SIZE - 1 - y)] > 0 ) {
          Plex.pixel(x, y);
        }
      }
    }
    for ( i = 0; i < paddle_size; i++ ) {
      Plex.pixel(7, map(paddle_x + i, 0, 6, 6, 0));
    }
    Plex.pixel(ball_round_y, map(ball_round_x, 0, 6, 6, 0));
    Plex.display();

    // Wait until we reach our target end of frame
    while ( millis() < frame_start + millis_per_frame ) {
      delay(1);
    }
 #if 0
   Serial.print("FPS: ");
   Serial.println( 1000 / (millis() - frame_start) );
 #endif

  }
}

// Create a randomized ball launch angle
unsigned int initBallTheta() {

  unsigned int theta;

  // Choose an angle  in the range of 210-239 deg or 301-330 deg
  theta = random(0, 60);
#if DEBUG
  Serial.print("RNG:");
  Serial.print(theta);
#endif
  if ( theta < 30 ) {
    theta = 210 + theta;
  } else {
    theta = 271 + theta;
  }

#if DEBUG
  Serial.print(" Theta:");
  Serial.println(theta);
#endif

  return theta;
}

// Rounds a floating value to an integer
int roundFloat(float x) {
  if ( x >= 0 ) {
    return (int) (x + 0.5);
  }
  return (int) (x - 0.5);
}
Play
Upload the program to the BadgerStick, and prepare to play!
Use the joystick to move the paddle back and forth to bounce the ball. You win when you "break" all the lights on the top part of the screen. You lose if you let the ball go past your paddle.
You might notice that we do not use the 2 buttons in the game. Breakout only requires a joystick. However, you now have a basic platform that is perfect for creating games!
What other games would you want to make? Here are some ideas:
Resources and Going Further
You've built the badge, programmed it with some new graphics, and created a basic game. Now what?
If this is your first time using Arduino, you have just opened up a new, wide world of embedded systems. Check out Arduino's site for more information on the various platforms and software. SparkFun also carries a large number of Arduino-compatible boards.
If you want to use your BadgerStick for other cool projects, we won't stop you. In fact, we might encourage it:
- Looking for ideas? See learn.sparkfun.com for tutorials.
- Want more sensors? Take a look at the sensors we offer.
- Need even more LEDs? We have some of that, too.
- Want to see what other people are making? Check out our tagged page on hackster.io.
Hack on, fellow creators.
If you make something cool with your badge, share it with #BadgerHack, or create a tutorial on hackster.io.
Resources
- Interactive Badges GitHub repository
- 8x7 Charlieplex LED Array GitHub repository
- BadgerHack Demos GitHub repository
You made it all the way to the end! Congratulations. Have a badger.