Qwiic Transparent OLED HUD Hookup Guide
Example Code
Now that we have our library installed and we understand the basic functions, let's run some examples for our Qwiic Transparent OLED HUD to see how it behaves.
Example 1 - All Segments
To get started with the first example, open up File > Examples > Examples from Custom Libraries > SparkFun WiseChip HUD > Example1_AllSegments. In this example, we begin by creating a WiseChipHUD object called myHUD and then initializing our sensor object in the setup() loop. The code to do this is shown below.
language:c
#include <WiseChipHUD.h>

WiseChipHUD myHUD;

void setup() {

  myHUD.begin();

}
Once we've initialized our HUD, we can start turning segments on. The main loop simply goes through and calls all of our available functions.
language:c
void loop() {

  myHUD.clearAll(); // Clears all of the segments

  /************************* Compass Group *************************/
  myHUD.compassCircle(9); // 0 = All Off; 1-8 = All Off Except Selected; 9 = All On; 10-17 = All On Except Selected
  myHUD.compassArrows(9); // 0 = All Off; 1-8 = All Off Except Selected; 9 = All On; 10-17 = All On Except Selected
  myHUD.setHeading(188);  // Max 199

  /************************* Radar Detector Group *************************/
  myHUD.radarDetector(8); // 0 = No Radar Gun Icon; 1 = Radar Gun Only; 2-8 = Distance Meter
  myHUD.setRadarDistance(888,0); // Max 999
  myHUD.radarDistanceUnits(1); // 0 = Blank; 1 = "m"

  /************************* Destination/Waypoint Group *************************/
  myHUD.flag(1); // 0 = Blank; 1 = flag icon
  myHUD.setDestinationDistance(888,2); // Max 999
  myHUD.destinationDistanceUnits(3); // 0 = Blank; 1 = "h"; 2 = "m"; 3 = "km"
  myHUD.H01(1); // 0 = Blank; 1 = "h"

  /************************* Exit Group *************************/
  myHUD.leftTunnel(1); // 0 = Blank; 1 = Tunnel; Also try leftRoad();
  myHUD.middleTunnel(1); // 0 = Blank; 1 = Tunnel; Also try middleRoad();
  myHUD.rightTunnel(1); // 0 = Blank; 1 = Tunnel; Also try rightRoad();

  /************************* Navigation Group *************************/
  myHUD.nav_Group(1); // 0 = Entire Nav Group Off; 1 = Entire Nav Group On
  myHUD.setTurnDistance(888,1); // Max 999
  myHUD.turnDistanceUnits(2); // 0 = Blank; 1 = "m"; 2 = "km"
  // Turn Groups:
  // nav_KeepLeft(1);
  // nav_TurnLeft(1);
  // nav_HardLeft(1);
  // nav_UTurnLeft(1);
  // nav_ContinueStraight(1);
  // nav_KeepRight(1);
  // nav_TurnRight(1);
  // nav_HardRight(1);
  // nav_UTurnRight(1);

  /************************* Call Group *************************/
  myHUD.setCallIcon(3); // 0 = Blank; 1 = Outline; 2 = Outline + Phone Icon; 3 = All Segments

  /************************* TPMS Group *************************/
  myHUD.tirePressureAlert(3); // 0 = Blank; 1 = "TPMS"; 2 = "TIRE"; 3 = All Segments
  myHUD.setTirePressure(88,1); // Max 99

  /************************* Speedometer Group *************************/
  myHUD.setSpeedometer(188); // Max 199
  myHUD.speedometerUnits(1); // 0 = Blank; 1 = "km/h"

  delay(5000);

  myHUD.clearAll(); // Clears all of the segments

while(1){};

}
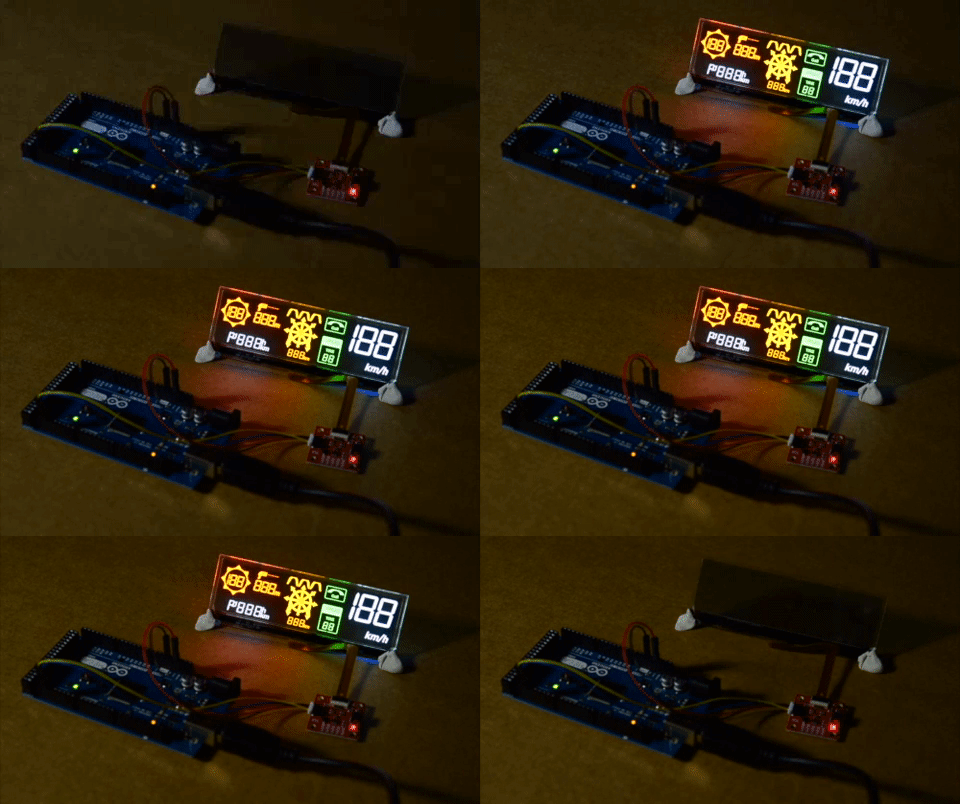
If you have not already, select the Arduino/Genuino Mega 2560 or Mega2560 as the board, COM port that it enumerated on, and hit upload! The OLED should look something like the below GIF.
Example 2 - Animated Icons
In the second example, we'll animate our display segments. To get started with the second example, open up File > Examples > Examples from Custom Libraries > SparkFun WiseChip HUD > Example2_AnimatedIcons. We initialize our HUD the exact same as we do in the first example. Then, we go ahead and use for loops to loop through each possible state of a group of segments to animate it. Each loop starts at 0 and goes to the maximum number of options for that particular group of segments. There is a small delay in each loop to allow for some time between frames.. We do this for the compass, radar, phone and TPMS icons. We clear the entire HUD in between each animation of a group of segments to ensure that we are only displaying one group at a time. The code that accomplishes this is shown below.
language:c
void loop() {

  myHUD.clearAll(); // Clears all of the segments

  for(int j = 0; j < 2; j++){
    for(int i = 1; i < 9; i++){
      myHUD.compassCircle(i);
      delay(50);
    }
  }

  for(int j = 0; j < 2; j++){
    for(int i = 10; i < 18; i++){
      myHUD.compassCircle(i);
      delay(50);
    }
  }

  myHUD.compassCircle(0);

  for(int j = 0; j < 2; j++){
    for(int i = 1; i < 9; i++){
      myHUD.compassArrows(i);
      delay(100);
    }
  }

  for(int j = 0; j < 2; j++){
    for(int i = 10; i < 18; i++){
      myHUD.compassArrows(i);
      delay(100);
    }
  }

  myHUD.compassArrows(0);

  for(int i = 0; i < 5; i++){
    myHUD.radarDetector(1);
    delay(100);
    myHUD.radarDetector(0);
    delay(100);
  }

  myHUD.radarDistanceUnits(1);

  for(int j = 800; j >= 0; j = j - 10){
    myHUD.setRadarDistance(j,0);
    myHUD.radarDetector(j/100);
  }

  myHUD.clearAll();

  for(int j = 0; j < 5; j++){
    for(int i = 0; i < 4; i++){
      myHUD.setCallIcon(i);
      delay(100);
    }
  }

  myHUD.setCallIcon(0);

  myHUD.tirePressureAlert(3);
  myHUD.setTirePressure(30,1);
  delay(2000);

  for(int j = 30; j > 14; j--){
    myHUD.setTirePressure(j,1);
    delay(random(100,1000));
  }

  for(int j = 0; j < 10; j++){
    for(int i = 1; i < 3; i++){
      myHUD.tirePressureAlert(i);
      delay(100);
    }
  }
  myHUD.tirePressureAlert(3);

  myHUD.clearAll();

while(1){};

}
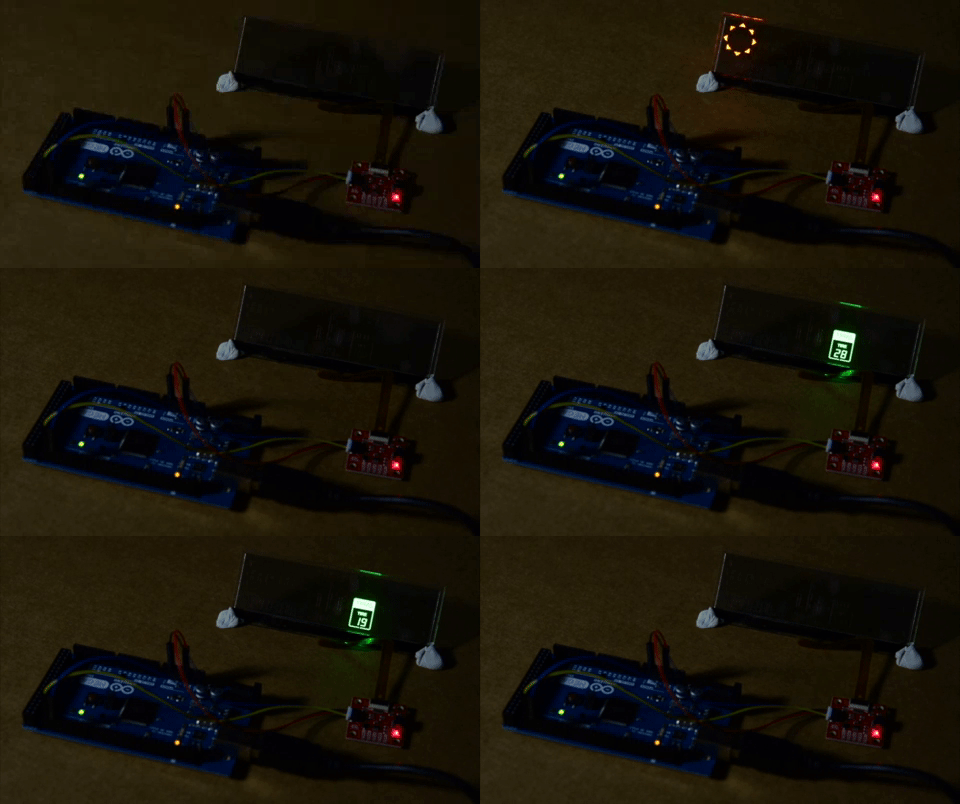
If you have not already, select the Arduino/Genuino Mega 2560 or Mega2560 as the board, COM port that it enumerated on, and hit upload! The transparent HUD should look something like the below GIF after uploading the code.
Example 3 - Counting
In the third example, we'll have each of the available number displays count up to 200. To get started with the third example, open up File > Examples > Examples from Custom Libraries > SparkFun WiseChip HUD > Example2_AnimatedIcons. In this example, we initialize the OLED the same way we have been doing in our previous two examples. Then, in our void loop(), we clear the HUD, then begin a for loop that counts by 5's. We write the value of the index variable to each of the segments. The code that accomplishes this is shown below.
language:c
void loop() {

  myHUD.clearAll(); // Clears all of the segments

  while (1) {

    for (int i = 0; i < 200; i += 5) {
      myHUD.setHeading(i);  // Max 199
      myHUD.setRadarDistance(i, 0); // Max 999
      myHUD.setDestinationDistance(i, 2); // Max 999
      myHUD.setTurnDistance(i, 1); // Max 999
      myHUD.setTirePressure(i, 1); // Max 99
      myHUD.setSpeedometer(i); // Max 199
      delay(200);
    }

    myHUD.clearAll();

  };

}
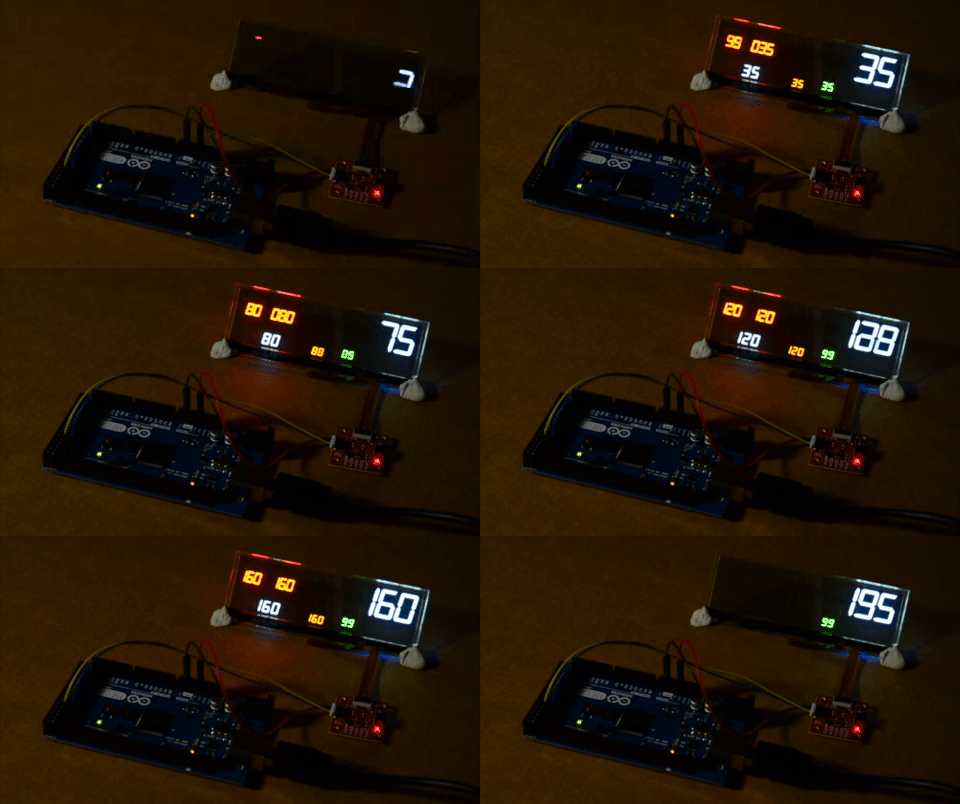
If you have not already, select the Arduino/Genuino Mega 2560 or Mega2560 as the board, COM port that it enumerated on, and hit upload! Uploading this code should make the OLED look like the below GIF. Notice how the number for the TPMS stops at 99. This is a demonstration of how these functions handle out of bounds numbers.


