Qwiic Single Relay Hookup Guide
Hardware Assembly
If you haven't yet assembled your Qwiic Shield, now would be the time to head on over to that tutorial. Depending on the microcontroller and shield you've chosen, your assembly may be different, but here's a handy link to the Qwiic Shield for Arduino and Photon Hookup Guide to get you started!
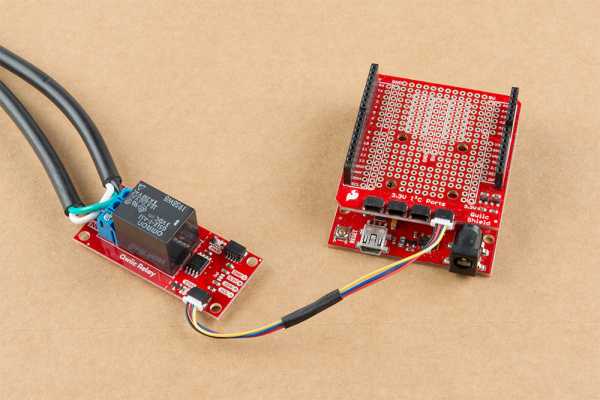
With the shield assembled, SparkFun's new Qwiic environment means that connecting the relay could not be easier. Just plug one end of the Qwiic cable into the Qwiic Relay, the other into the Qwiic Shield and you'll be ready to upload a sketch and start turning things on and off. It seems like it's too easy too use, but that's why we made it that way!
You'll also need to place the relay in line with the AC powered item you're attempting to control. You'll have to cut your live AC line (usually black or red) and connect one end of the cut wire to COM and the other to NC or NO, depending on what you want the resting state of your device to be. If your AC device is going to be on for most of the time, and you occasionally want to turn it off, you should connect one end to COM and the other to NC. Connect to NO if the device will be off for most of the time. Check out the picture below for a visual aid.
Looking for information about safety and insulation? Check out the notes about Safety and Insulation from our Beefcake Relay Control Kit.

