Programming the Intel® Edison: Beyond the Arduino IDE
 SFUptownMaker
Toolchain: Eclipse
There are two approaches to writing C++ code on the Edison: Using the Eclipse IDE that Intel provides or going barebones using GCC and a command line directly on the Edison.
Using the Eclipse Environment
Intel has provided a version of Eclipse for Windows, Linux, and MacOS.
Go ahead and download the appropriate file. You'll find that it's a compressed archive (either .7z or .bz2); there's no actual installation process. Just extract the file some place reasonable and run the devkit-launcher script in the extracted directory to launch Eclipse.
Super important note for Windows users: before you can launch Eclipse, you'll need to open that script and make the following change:
Find this line:
java -version 2>&1 | find "64-Bit" >nul:
and change it to:
java -version 2>&1 | C:\Windows\System32\find "64-Bit" >nul:
Once you've installed it and launched it, come back here and we'll walk through connecting the Edison to the IDE and loading an example program.
Starting with Eclipse
The first time you launch Eclipse, you'll see this window:
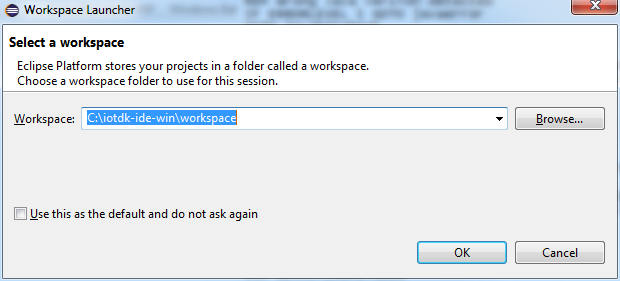
You can choose any folder you like; it doesn't really matter. I keep mine on Dropbox. I also clicked the "Use this as the default and do not ask again" checkbox; I like to keep my projects in one place and please don't hassle me about it. Note, however, that this doesn't mean you can't store individual projects elsewhere, just that Eclipse will assume this is where you want stuff stored and not ask.
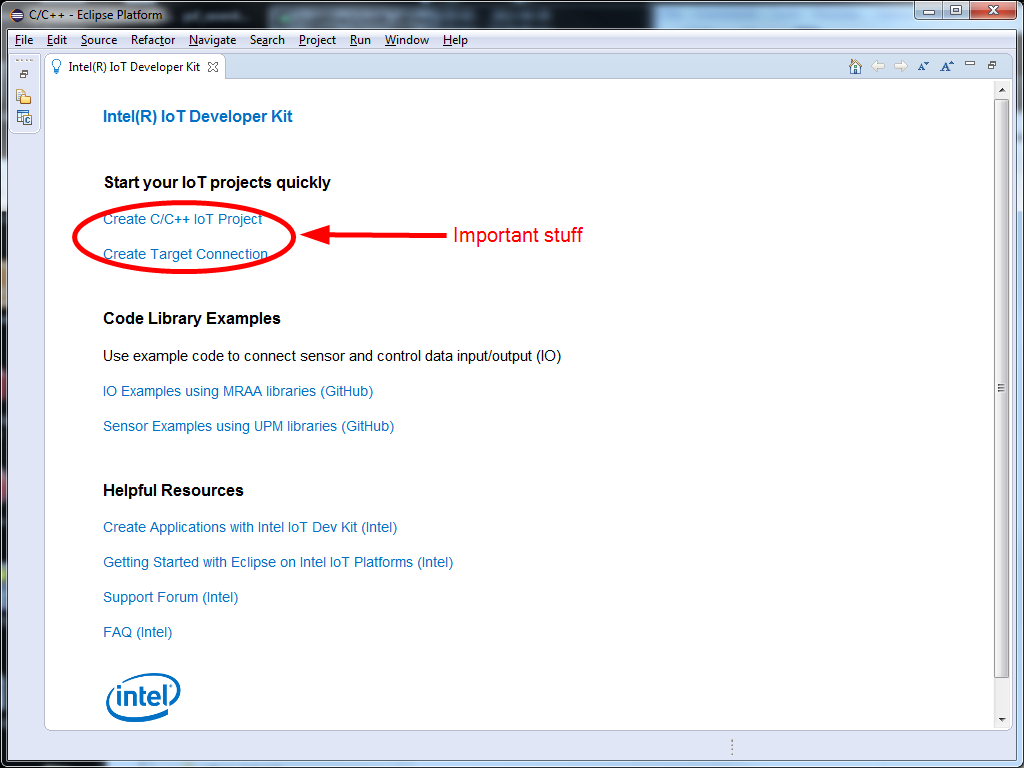
After you click okay, you'll see this startup screen. This only comes up the very first time you run Eclipse, as far as I can tell; I haven't been able to find it again at any rate.
The circled links are the important ones. First, we'll create our link to the Edison, and then start a new project. Click the "Create Target Connection" link, to bring up this dialog:
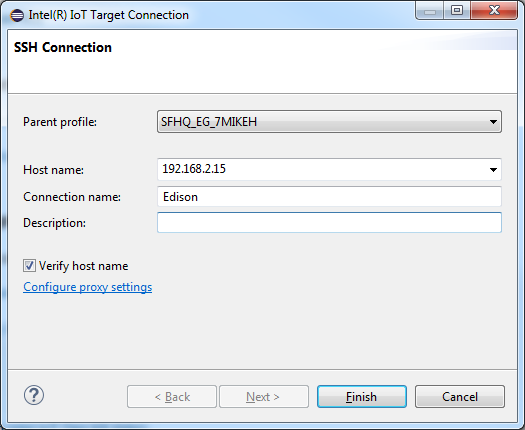
"Parent profile:" will vary for you, depending on the name of the computer you're on. Don't worry about it.
"Host name:" should be the IP address of your Edison. If you don't know what that is go to the Edison Getting Started Guide and follow the instructions there to get your Edison networked with your development computer. 192.168.2.15 is the default address for connections via the USB-OTG port.
"Connection name:" needs to be set to Edison. This is important.
Click finish, then click the "Create C/C++ IoT Project" link on the startup page.
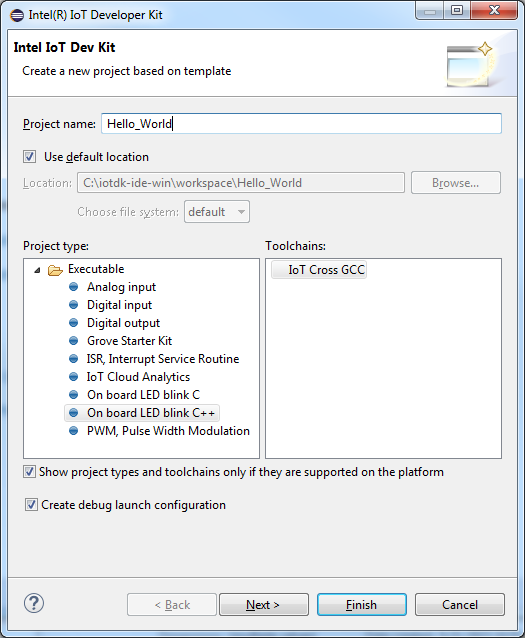
This window pops up; notice that the location is pre-filled with the workspace folder you selected earlier. "Project type" is (relatively) unimportant; it determines what sort of code will be present when the project launches. Let's start with "On board LED blink C++", and name the project "Hello_World". Click "Finish" to have the IDE copy over the files and set up the environment.